(Changed name to "Inferno Cape" in "Best P2P Melee Strength Setup" from "Infernao Cape") Tags: Visual edit apiedit |
m (cleanup) |
||
| (43 intermediate revisions by 31 users not shown) | |||
| Line 1: | Line 1: | ||
| + | {{External|rs}} |
||
:''For a full list of items and their stats worn in the body slot, see [[Body slot table|this table]].'' |
:''For a full list of items and their stats worn in the body slot, see [[Body slot table|this table]].'' |
||
| − | '''Melee armour''', used in the |
+ | '''Melee armour''', used in the {{Link|Attack|type=skill}}, {{Link|Strength|type=skill}} and {{Link|Defence|type=skill}} skills, is generally made out of some kind of metal. There is a "default" (regular) series of {{Link|armour}}, consisting of {{Link|Bronze equipment#Armour|Bronze}}, {{Link|Iron armour|Iron}}, {{Link|Steel equipment#Armour|Steel}}, {{Link|Black equipment#Armour|Black}}/{{Link|White armour|White}}, {{Link|Mithril armour|Mithril}}, {{Link|Adamant equipment#Armour|Adamant}}, {{Link|Rune equipment#Armour|Rune}}, and {{Link|Dragon equipment#Armour|Dragon}} (in ascending order of the quality of the armour). For each piece of armour, there is a counterpart made for each other type of metal (with the exception of Dragon armour which has some items yet to be released). All these can be made from the {{Link|Smithing|type=skill}} skill, with the exception of Black, White, and Dragon, which can only be purchased or received from a {{Link|Drops|monster drop}}. |
All armour items not made from those metal types can be considered "special" and generally cannot be made from the Smithing skill, but rather sold by an NPC or obtained as a monster drop. Some players may consider these more desirable, as they often provide higher bonuses than other forms of armour. |
All armour items not made from those metal types can be considered "special" and generally cannot be made from the Smithing skill, but rather sold by an NPC or obtained as a monster drop. Some players may consider these more desirable, as they often provide higher bonuses than other forms of armour. |
||
==Melee armour sets== |
==Melee armour sets== |
||
| − | A set generally comprises a |
+ | A set generally comprises a {{Link|Full helmet|full helm}}, {{Link|platebody}}, {{Link|platelegs}}/{{Link|Plateskirt|skirt}}, and a {{Link|kiteshield}} where applicable. It's very typical among the {{Link|metal}} armours. |
| − | To save |
+ | To save {{Link|Coins|money|img=Coins 1.png}}, low-tier armour pieces can be bought at the following places: |
| − | * |
+ | *{{Link|Helmet Shop}} in {{Link|Barbarian Village}} |
| − | * |
+ | *{{Link|Horvik's Smithy|Horvik's Armour Shop}} in {{Link|Varrock|East Varrock}} |
| − | * |
+ | *{{Link|Louie's Armoured Legs Bazaar}} or {{Link|Ranael's Super Skirt Store}} in {{Link|Al Kharid}} |
| − | * |
+ | *{{Link|Cassie's Shield Shop}} in {{Link|Falador}} |
{|class="wikitable sortable" |
{|class="wikitable sortable" |
||
!{{skill clickpic|Defence}} level |
!{{skill clickpic|Defence}} level |
||
| − | !Icon |
||
!Armour |
!Armour |
||
| − | ! |
+ | !Additional requirements |
|- |
|- |
||
|1 |
|1 |
||
| − | | |
+ | |{{Plink|Bronze armour|pic=Bronze full helm}} |
| − | |[[Bronze equipment#Armour|Bronze armour]] |
||
|None |
|None |
||
|- |
|- |
||
|1 |
|1 |
||
| − | | |
+ | |{{Plink|Iron armour|pic=Iron full helm}} |
| − | |[[Iron equipment#Armour|Iron armour]] |
||
|None |
|None |
||
|- |
|- |
||
|5 |
|5 |
||
| − | | |
+ | |{{Plink|Steel armour|pic=Steel full helm}} |
| − | |[[Steel equipment#Armour|Steel armour]] |
||
|None |
|None |
||
|- |
|- |
||
|10 |
|10 |
||
| − | | |
+ | |{{Plink|Black armour|pic=Black full helm}} |
| − | |[[Black equipment#Armour|Black armour]] |
||
|None |
|None |
||
|- |
|- |
||
|10 |
|10 |
||
| − | | |
+ | |{{Plink|White armour|pic=White full helm}} |
| − | |[[White equipment#Armour|White armour]] |
||
|[[Wanted!]] |
|[[Wanted!]] |
||
|- |
|- |
||
|20 |
|20 |
||
| − | | |
+ | |{{Plink|Mithril armour|pic=Mithril full helm}} |
| − | |[[Mithril equipment#Armour|Mithril armour]] |
||
|None |
|None |
||
|- |
|- |
||
|20 |
|20 |
||
| − | | |
+ | |{{Plink|Initiate armour|pic=Initiate sallet}} |
| ⚫ | |||
|10 {{Skill clickpic|Prayer}} and [[Recruitment Drive]] |
|10 {{Skill clickpic|Prayer}} and [[Recruitment Drive]] |
||
|- |
|- |
||
|30 |
|30 |
||
| − | | |
+ | |{{Plink|Adamant armour|pic=Adamant full helm}} |
| − | |[[Adamant equipment#Armour|Adamant armour]] |
||
|None |
|None |
||
|- |
|- |
||
|30 |
|30 |
||
| − | | |
+ | |{{Plink|Proselyte armour|pic=Proselyte sallet}} |
| − | |[[Proselyte armour]] |
||
|20 {{Skill clickpic|Prayer}} and [[Slug Menace]] |
|20 {{Skill clickpic|Prayer}} and [[Slug Menace]] |
||
|- |
|- |
||
|40 |
|40 |
||
| − | | |
+ | |{{Plink|Rune armour|pic=Rune full helm}} |
| − | |[[Rune equipment#Armour|Rune armour]] |
||
|[[Dragon Slayer]] (for platebody) |
|[[Dragon Slayer]] (for platebody) |
||
|- |
|- |
||
|40 |
|40 |
||
| − | | |
+ | |{{Plink|Rock-shell armour|pic=Rock-shell helm}} |
| − | |[[Rock-shell armour]] |
||
|[[The Fremennik Trials]] |
|[[The Fremennik Trials]] |
||
|- |
|- |
||
|42 |
|42 |
||
| − | | |
+ | |{{Plink|Void Knight equipment|pic=Void melee helm}} |
| − | |[[Void Knight Equipment]] |
||
|850 [[Pest Control]] points plus the following:<br />42 {{Skill clickpic|Attack}}, {{Skill clickpic|Strength}}, {{Skill clickpic|Defence}}, {{Skill clickpic|Hitpoints}}, {{Skill clickpic|Ranged}}, {{Skill clickpic|Magic}}, '''and''' 22 {{Skill clickpic|Prayer}} |
|850 [[Pest Control]] points plus the following:<br />42 {{Skill clickpic|Attack}}, {{Skill clickpic|Strength}}, {{Skill clickpic|Defence}}, {{Skill clickpic|Hitpoints}}, {{Skill clickpic|Ranged}}, {{Skill clickpic|Magic}}, '''and''' 22 {{Skill clickpic|Prayer}} |
||
|- |
|- |
||
|50 |
|50 |
||
| − | | |
+ | |{{Plink|Granite armour|pic=Granite helm}} |
| − | |[[Granite equipment#Armour|Granite armour]] |
||
|50 {{Skill clickpic|Strength}} |
|50 {{Skill clickpic|Strength}} |
||
|- |
|- |
||
|60 |
|60 |
||
| − | | |
+ | |{{Plink|Obsidian armour|pic=Obsidian helmet}} |
| ⚫ | |||
| − | |[[Obsidian armour]] |
||
| − | |[[File:Tokkul.png|Tokkul]] |
||
|- |
|- |
||
|60 |
|60 |
||
| − | | |
+ | |{{Plink|Dragon armour|pic=Dragon full helm}} |
| + | |[[Legends' Quest]] for [[Dragon sq shield|sq shield]], [[Dragon Slayer]] for [[Dragon platebody|platebody]] |
||
| − | |[[Dragon equipment#Armour|Dragon armour]] |
||
| − | |[[File:Coins.gif|Money]] [[Legend's quest]] (for the [[Dragon sq shield|sq shield]]) |
||
|- |
|- |
||
|65 |
|65 |
||
| − | | |
+ | |{{Plink|3rd age melee equipment|pic=3rd age full helmet}} |
| + | |Often prohibitively expensive ({{coins|{{GEPrice|3rd age full helmet}} + {{GEPrice|3rd age platebody}} + {{GEPrice|3rd age platelegs}} + {{GEPrice|3rd age kiteshield}}}}). |
||
| − | |[[Third-age warrior armour]] |
||
| − | |[[File:Coins.gif|Money]] |
||
|- |
|- |
||
|65 |
|65 |
||
| − | | |
+ | |{{Plink|Bandos armour|pic=Bandos chestplate}} |
| ⚫ | |||
| − | |[[Bandos armour]] |
||
| − | |[[File:Coins.gif|Money]] |
||
|- |
|- |
||
|70 |
|70 |
||
| − | | |
+ | |{{Plink|Barrows armour|pic=Verac's helm}} |
| ⚫ | |||
| − | |[[Barrows armour]] |
||
| ⚫ | |||
| ⚫ | |||
| + | |75 |
||
| + | |{{Plink|Justiciar armour|pic=Justiciar faceguard}} |
||
| + | |Often prohibitively expensive ({{coins|{{GEP|Justiciar faceguard}} + {{GEP|Justiciar chestguard}} + {{GEP|Justiciar legguards}}}}). |
||
|} |
|} |
||
| − | == |
+ | ==Other armour pieces== |
{| class="wikitable sortable" |
{| class="wikitable sortable" |
||
| − | !Defence |
+ | !{{skill clickpic|Defence}} level |
| + | !Item |
||
| − | !Icon |
||
| + | !Additional |
||
| − | !Type |
||
| − | !Other skills/<br />requirements |
||
|- |
|- |
||
|1 |
|1 |
||
| − | | |
+ | |{{plink|Warrior ring}} |
| − | |[[Warrior ring]] |
||
|650,000 [[Nightmare Zone]] points only to [[Warrior ring (i)|imbue]] |
|650,000 [[Nightmare Zone]] points only to [[Warrior ring (i)|imbue]] |
||
|- |
|- |
||
|1 |
|1 |
||
| − | | |
+ | |{{plink|Berserker ring}} |
| − | |[[Berserker ring]] |
||
|650,000 [[Nightmare Zone]] points only to [[Berserker ring (i)|imbue]] |
|650,000 [[Nightmare Zone]] points only to [[Berserker ring (i)|imbue]] |
||
|- |
|- |
||
| − | |41 <ref |
+ | |41 <ref>Although there are no requirements to wear the gloves, the lowest [[Defence]] level to complete [[Recipe for Disaster]] is 41.</ref> |
| + | |{{plink|Culinaromancer's gloves|pic=Barrows gloves}} |
||
| − | |[[File:Barrows gloves.png|left]] |
||
| − | |[[ |
+ | |[[Recipe for Disaster]] |
| − | |[[Recipe for Disaster]] <ref name="RFD"/> |
||
|- |
|- |
||
|1 |
|1 |
||
| − | | |
+ | |{{plink|Fire cape}} |
| + | |Completion of the [[TzHaar Fight Cave]] |
||
| − | |[[Fire cape]] |
||
| − | |Defeated [[TzTok-Jad]] |
||
|- |
|- |
||
|1 |
|1 |
||
| − | | |
+ | |{{plink|Infernal cape}} |
| + | |Completion of the [[Inferno]] |
||
| − | |[[Infernal cape]] |
||
| − | |Completing [[The Inferno]] |
||
|- |
|- |
||
|10 |
|10 |
||
| − | | |
+ | |{{plink|Slayer helmet}} |
| − | |[[Slayer helm]] |
||
|55 {{Skill clickpic|Crafting}} and 400 [[Slayer reward points]] |
|55 {{Skill clickpic|Crafting}} and 400 [[Slayer reward points]] |
||
|- |
|- |
||
|20 |
|20 |
||
| − | | |
+ | |{{plink|Yak-hide armour|pic=Yak-hide armour (top)}} |
| − | |[[Yak-hide armour]] |
||
|None |
|None |
||
|- |
|- |
||
|25 |
|25 |
||
| − | | |
+ | |{{plink|Fremennik shield (The Fremennik Isles)}} |
| − | |[[Fremennik round shield]] |
||
|None |
|None |
||
|- |
|- |
||
|30 |
|30 |
||
| − | | |
+ | |{{plink|Fremennik shield}} |
| − | |[[Fremennik shield]] |
||
|[[The Fremennik Trials]] |
|[[The Fremennik Trials]] |
||
|- |
|- |
||
|30 |
|30 |
||
| − | | |
+ | |{{plink|Fremennik helm}} |
| − | |[[Fremennik helm]] |
||
|[[The Fremennik Trials]] |
|[[The Fremennik Trials]] |
||
|- |
|- |
||
|40 |
|40 |
||
| − | | |
+ | |{{plink|Fighter torso}} |
| − | |[[Fighter Torso]] |
||
|[[Barbarian Assault]]: 375 [[Honour points]] in all four roles and killed the [[Penance Queen]] |
|[[Barbarian Assault]]: 375 [[Honour points]] in all four roles and killed the [[Penance Queen]] |
||
|- |
|- |
||
|45 |
|45 |
||
| − | | |
+ | |{{plink|Spirit shield}} |
| − | |[[Spirit shield]] |
||
|55 {{Skill clickpic|Prayer}} |
|55 {{Skill clickpic|Prayer}} |
||
|- |
|- |
||
|45 |
|45 |
||
| − | | |
+ | |{{plink|Warrior helm}} |
| − | |[[Warrior helm]] |
||
|[[The Fremennik Trials]] |
|[[The Fremennik Trials]] |
||
|- |
|- |
||
|45 |
|45 |
||
| − | | |
+ | |{{plink|Berserker helm}} |
| − | |[[Berserker helm]] |
||
|[[The Fremennik Trials]] |
|[[The Fremennik Trials]] |
||
|- |
|- |
||
|55 |
|55 |
||
| − | | |
+ | |{{plink|Helm of neitiznot}} |
| − | |[[Helm of neitiznot]] |
||
|[[The Fremennik Isles]] |
|[[The Fremennik Isles]] |
||
| ⚫ | |||
| − | |60 |
||
| ⚫ | |||
| − | |[[Toktz-ket-xil|Toktz-Ket-Xil]] |
||
| ⚫ | |||
|- |
|- |
||
|70 |
|70 |
||
| − | | |
+ | |{{plink|Crystal shield}} |
| − | |[[Crystal shield]] |
||
|50 {{Skill clickpic|Agility}} and [[Roving Elves]]; fully degrades after taking 2500 hits that deal damage |
|50 {{Skill clickpic|Agility}} and [[Roving Elves]]; fully degrades after taking 2500 hits that deal damage |
||
|- |
|- |
||
|70 |
|70 |
||
| − | | |
+ | |{{plink|Blessed spirit shield}} |
| − | |[[Blessed spirit shield]] |
||
|60 {{Skill clickpic|Prayer}} |
|60 {{Skill clickpic|Prayer}} |
||
|- |
|- |
||
|75 |
|75 |
||
| − | | |
+ | |{{plink|Elysian spirit shield}} |
| − | |[[Elysian spirit shield]] |
||
|75 {{Skill clickpic|Prayer}} |
|75 {{Skill clickpic|Prayer}} |
||
|- |
|- |
||
|75 |
|75 |
||
| ⚫ | |||
| − | |[[File:Serpentine_helm.png]] |
||
| ⚫ | |||
| |
| |
||
|- |
|- |
||
|75 |
|75 |
||
| − | | |
+ | |{{plink|Dragonfire shield}} |
| + | |[[Dragon Slayer]] must be started in order to equip |
||
| − | |[[Dragonfire shield]] |
||
| ⚫ | |||
|- |
|- |
||
|75 |
|75 |
||
| − | | |
+ | |{{plink|Primordial boots}} |
| − | |[[Primordial boots]] |
||
|75 {{Skill clickpic|Strength}} |
|75 {{Skill clickpic|Strength}} |
||
|} |
|} |
||
| + | {{Reflist}} |
||
| − | <references/> |
||
==Set items== |
==Set items== |
||
| Line 234: | Line 193: | ||
''[[Bronze med helm|Bronze]], [[Iron med helm|Iron]], [[Steel med helm|Steel]], [[Black med helm|Black]], [[White med helm|White]], [[Mithril med helm|Mithril]], [[Adamant med helm|Adamant]], [[Rune med helm|Rune]], [[Dragon med helm|Dragon]]'' |
''[[Bronze med helm|Bronze]], [[Iron med helm|Iron]], [[Steel med helm|Steel]], [[Black med helm|Black]], [[White med helm|White]], [[Mithril med helm|Mithril]], [[Adamant med helm|Adamant]], [[Rune med helm|Rune]], [[Dragon med helm|Dragon]]'' |
||
| − | + | {{Link|Medium helmet}}s offer little protection compared to {{Link|Full helmet|full helm}}s (shown below) from most {{Link|combat}} forms, but also do little to inhibit using any {{Link|combat style}}. This makes them a good choice for players who favour {{Link|Melee}}, but want the opportunity to use {{Link|Magic|type=skill}} and {{Link|Ranged|type=skill}}. But if you prefer Melee-fighting, the full helm is a better choice. |
|
===[[Full helmet]]s=== |
===[[Full helmet]]s=== |
||
| Line 240: | Line 199: | ||
''[[Bronze full helm|Bronze]], [[Iron full helm|Iron]], [[Steel full helm|Steel]], [[Black full helm|Black]], [[White full helm|White]], [[Mithril full helm|Mithril]], [[Adamant full helm|Adamant]], [[Rune full helm|Rune]], [[Dragon full helm|Dragon]]'' |
''[[Bronze full helm|Bronze]], [[Iron full helm|Iron]], [[Steel full helm|Steel]], [[Black full helm|Black]], [[White full helm|White]], [[Mithril full helm|Mithril]], [[Adamant full helm|Adamant]], [[Rune full helm|Rune]], [[Dragon full helm|Dragon]]'' |
||
| − | + | {{Link|Full helmet}}s encase the whole of the players head and provide better {{Link|Ranged|type=skill}} and {{Link|Melee}} {{Link|Defence|type=skill}} than other helmets. It does, however, impose larger negative modifiers to {{Link|Magic|type=skill}} and Ranged attacks, but many rangers prefer them for their Defence bonuses and accept the negative attack modifiers, which are significantly smaller than their magical attack penalty. |
|
===[[Chainbody|Chainbodies]]=== |
===[[Chainbody|Chainbodies]]=== |
||
| Line 246: | Line 205: | ||
''[[Bronze chainbody|Bronze]], [[Iron chainbody|Iron]], [[Steel chainbody|Steel]], [[Black chainbody|Black]], [[White chainbody|White]], [[Mithril chainbody|Mithril]], [[Adamant chainbody|Adamant]], [[Rune chainbody|Rune]], [[Dragon chainbody|Dragon]]'' |
''[[Bronze chainbody|Bronze]], [[Iron chainbody|Iron]], [[Steel chainbody|Steel]], [[Black chainbody|Black]], [[White chainbody|White]], [[Mithril chainbody|Mithril]], [[Adamant chainbody|Adamant]], [[Rune chainbody|Rune]], [[Dragon chainbody|Dragon]]'' |
||
| − | + | {{Link|Chainbody|Chainbodies}} are made up of small rings linked together. They are particularly useful for deflecting {{Link|Slash weapons|slash}}ing weapons and absorbing the impact of {{Link|Crush weapons|crush}} attacks. Chainmail is weak against {{Link|Stab weapons|stab}}bing weapons as small pointed blades can pierce the rings, as can {{Link|Arrows|arrow}}s, therefore it is less effective at defending against {{Link|Ranged|type=skill}} attacks. Chainmail is quite flexible and so does not penalise a ranger's {{Link|Attack|type=skill}} bonus, though its metal construction does impede a {{Link|Magic|mage|type=skill}}'s accuracy somewhat. However, they offer a lesser Magic Defence penalty than {{Link|Platebody|platebodies}}. |
|
===[[Platebody|Platebodies]]=== |
===[[Platebody|Platebodies]]=== |
||
| − | [[File: |
+ | [[File:Dragon platebody.png|right|A dragon platebody]] |
| − | ''[[Bronze platebody|Bronze]], [[Iron platebody|Iron]], [[Steel platebody|Steel]], [[Black platebody|Black]], [[White platebody|White]], [[Mithril platebody|Mithril]], [[Adamant platebody|Adamant]], [[Rune platebody|Rune]]'' |
+ | ''[[Bronze platebody|Bronze]], [[Iron platebody|Iron]], [[Steel platebody|Steel]], [[Black platebody|Black]], [[White platebody|White]], [[Mithril platebody|Mithril]], [[Adamant platebody|Adamant]], [[Rune platebody|Rune]], [[Dragon platebody|Dragon]]'' |
| − | + | {{Link|Platebody|Platebodies}} are much heavier and stronger than {{Link|Chainbody|chainbodies}}, providing the higher {{Link|Slash weapons|slash}}, {{Link|Stab weapons|stab}}, and {{Link|Ranged|type=skill}} {{Link|Defence|type=skill}} bonuses. Platebodies are weakest against {{Link|Crush weapons|crush}}ing and {{Link|Magic|type=skill}} attacks, as they conduct Magic and cannot absorb the impact of a crush attack as well as {{Link|dragonhide}} or chain armour. Rangers and mages are at a great disadvantage trying to aim their Ranged and distance magical attacks in this restrictive and heavy metal armour. The {{Link|Dragon Slayer}} {{Link|Quests|quest}} is required to wear the {{Link|Rune platebody|type=item}} as well as the {{Link|Dragon platebody|type=item}}. |
|
===[[Platelegs]] and [[plateskirt]]s=== |
===[[Platelegs]] and [[plateskirt]]s=== |
||
| Line 259: | Line 218: | ||
''[[Bronze platelegs|Bronze]], [[Iron platelegs|Iron]], [[Steel platelegs|Steel]], [[Black platelegs|Black]], [[White platelegs|White]], [[Mithril platelegs|Mithril]], [[Adamant platelegs|Adamant]], [[Rune platelegs|Rune]], [[Dragon platelegs|Dragon]]'' |
''[[Bronze platelegs|Bronze]], [[Iron platelegs|Iron]], [[Steel platelegs|Steel]], [[Black platelegs|Black]], [[White platelegs|White]], [[Mithril platelegs|Mithril]], [[Adamant platelegs|Adamant]], [[Rune platelegs|Rune]], [[Dragon platelegs|Dragon]]'' |
||
| − | + | {{Link|Platelegs}} and {{Link|plateskirt}}s are a vital part of a warrior's {{Link|armour}}, and provide the second best defensive bonuses after the {{Link|platebody}}. As with all {{Link|Dragon equipment}}, the {{Link|Dragon platelegs|type=item}}/{{Link|Dragon plateskirt|plateskirt|type=item}} '''cannot''' be made via the {{Link|Smithing|type=skill}} skill. |
|
===[[Square shield]]s=== |
===[[Square shield]]s=== |
||
| Line 265: | Line 224: | ||
''[[Bronze sq shield|Bronze]], [[Iron sq shield|Iron]], [[Steel sq shield|Steel]], [[Black sq shield|Black]], [[White sq shield|White]], [[Mithril sq shield|Mithril]], [[Adamant sq shield|Adamant]], [[Rune sq shield|Rune]], [[Dragon sq shield|Dragon]]'' |
''[[Bronze sq shield|Bronze]], [[Iron sq shield|Iron]], [[Steel sq shield|Steel]], [[Black sq shield|Black]], [[White sq shield|White]], [[Mithril sq shield|Mithril]], [[Adamant sq shield|Adamant]], [[Rune sq shield|Rune]], [[Dragon sq shield|Dragon]]'' |
||
| − | The |
+ | The {{Link|square shield}} has adequate {{Link|Melee}} and {{Link|Ranged|type=skill}} {{Link|Defence|type=skill}} bonuses, and does not penalise Ranged or Magic attacks as much as the {{Link|kiteshield}}. In Melee, a square shield is weakest against {{Link|Crush weapons|crush}} attacks, but stronger towards {{Link|Stab weapons|stab}}. Square shields are not often used, as most players prefer the kiteshield for its higher Defence bonuses. In similarity towards {{Link|medium helmet}}s, square shields provide less Ranged and Magic attack penalties and could be more preferred by those who aren't using Melee. |
===[[Kiteshield]]s=== |
===[[Kiteshield]]s=== |
||
| − | [[File: |
+ | [[File:Dragon kiteshield.png|right|A dragon kiteshield]] |
| − | ''[[Bronze kiteshield|Bronze]], [[Iron kiteshield|Iron]], [[Steel kiteshield|Steel]], [[Black kiteshield|Black]], [[White kiteshield|White]], [[Mithril kiteshield|Mithril]], [[Adamant kiteshield|Adamant]], [[Rune kiteshield|Rune]]'' |
+ | ''[[Bronze kiteshield|Bronze]], [[Iron kiteshield|Iron]], [[Steel kiteshield|Steel]], [[Black kiteshield|Black]], [[White kiteshield|White]], [[Mithril kiteshield|Mithril]], [[Adamant kiteshield|Adamant]], [[Rune kiteshield|Rune]], [[Dragon kiteshield|Dragon]]'' |
| − | + | {{Link|Kiteshield}}s offer better {{Link|Defence|type=skill}} than a {{Link|square shield}}, although like most heavier armour it is awkward to use in combination with {{Link|Magic|type=skill}} and {{Link|Ranged|type=skill}}. Kiteshields are marginally weaker against {{Link|Stab weapons|stab}}bing attacks. |
|
===[[Metal gloves]]=== |
===[[Metal gloves]]=== |
||
| Line 277: | Line 236: | ||
''[[Bronze gloves|Bronze]], [[Iron gloves|Iron]], [[Steel gloves|Steel]], [[Black gloves|Black]], [[White gloves|White]], [[Mithril gloves|Mithril]], [[Adamant gloves|Adamant]], [[Rune gloves|Rune]], [[Dragon gloves|Dragon]], [[Barrows gloves|Barrows]]'' |
''[[Bronze gloves|Bronze]], [[Iron gloves|Iron]], [[Steel gloves|Steel]], [[Black gloves|Black]], [[White gloves|White]], [[Mithril gloves|Mithril]], [[Adamant gloves|Adamant]], [[Rune gloves|Rune]], [[Dragon gloves|Dragon]], [[Barrows gloves|Barrows]]'' |
||
| − | The |
+ | The {{Link|Culinaromancer|type=chat}}'s {{Link|Culinaromancer's gloves|metal gloves}} can be bought from the {{Link|Culinaromancer's Chest|Culinaromancer's chest}} after completing varying numbers of {{Link|Recipe for Disaster}} subquests, the exception being {{Link|White gloves|type=item}}, which are purchased from {{Link|Sir Vyvin|type=chat}}. White gloves are also the only tradeable metal gloves. |
| − | Metal gloves provide good protection against all attack styles. |
+ | Metal gloves provide good protection against all attack styles. {{Link|Barrows gloves|type=item}} give the best {{Link|Attack|type=skill}} bonuses for all {{Link|Combat Options|Attack style}}s of any pair of gloves, and also the highest {{Link|Strength|type=skill}} bonus. These gloves also do '''not''' degrade. |
===[[Defender]]s=== |
===[[Defender]]s=== |
||
| − | ''[[Bronze defender|Bronze]], [[Iron defender|Iron]], [[Steel defender|Steel]], [[Black defender|Black]], [[Mithril defender|Mithril]], [[Adamant defender|Adamant]], [[Rune defender|Rune]], [[Dragon defender|Dragon]]'' |
+ | ''[[Bronze defender|Bronze]], [[Iron defender|Iron]], [[Steel defender|Steel]], [[Black defender|Black]], [[Mithril defender|Mithril]], [[Adamant defender|Adamant]], [[Rune defender|Rune]], [[Dragon defender|Dragon]], [[Avernic defender|Avernic]]'' |
[[File:Dragon defender detail.png|right|120px]] |
[[File:Dragon defender detail.png|right|120px]] |
||
| − | Metal |
+ | Metal {{Link|defender}}s are small {{Link|dagger}}-like items worn in the {{Link|Worn Equipment#Shield slot|Shield slot}}. Defenders make a trade off whereby they sacrifice much of a shields defensive capabilities to further boost offensive stats and are as such desirable for warriors who favour stronger and more accurate attacks over survivability. They cannot be made nor bought, only received as a drop from {{Link|Cyclops|cyclopes|img=Cyclops.png}} on the top floor of the {{Link|Warriors' Guild}}. Once the first - {{Link|Bronze defender|bronze|type=item}} - defender is received, it must be shown to {{Link|Kamfreena|type=chat}} outside the room before an {{Link|Iron defender|iron|type=item}} one may be received, which must then be shown before a {{Link|Steel defender|steel|type=item}} one may be received, etc. Entrance to the cyclops' room is temporary and the Guild's {{Link|Warrior guild token|tokens|img=Warrior guild token 1.png}} are required for access. The owned amount slowly decreases as one is in the room. |
==[[Bronze armour]]== |
==[[Bronze armour]]== |
||
[[File:Bronze full helm chathead.png|left]] |
[[File:Bronze full helm chathead.png|left]] |
||
| − | [[File:Bronze platebody detail.png|right|120px]] |
+ | [[File:Bronze platebody detail.png|right|120px]]{{Link|Bronze equipment#Armour|Bronze armour}} is the weakest of all {{Link|Melee}} armours, requiring no levels whatsoever and costing little. Bronze is a {{Link|Copper ore|copper|type=item}} and {{Link|tin}} alloy and as such may be {{Link|Smithing|smelted|type=skill}} using copper and tin ore. It can be made on an {{Link|anvil}} with requirements starting from level 1 {{Link|Smithing|type=skill}}.{{clear}} |
==[[Iron armour]]== |
==[[Iron armour]]== |
||
[[File:Iron full helm chathead.png|left]] |
[[File:Iron full helm chathead.png|left]] |
||
| − | [[File:Iron platebody detail.png|right|120px]] |
+ | [[File:Iron platebody detail.png|right|120px]]{{Link|Iron armour}} is slightly better than {{Link|Bronze equipment#Armour|bronze}}, and requires level 1 {{Link|Defence|type=skill}}. It is made from {{Link|iron bar|type=item}}s. {{clear}} |
==[[Steel armour]]== |
==[[Steel armour]]== |
||
[[File:Steel full helm chathead.png|left]] |
[[File:Steel full helm chathead.png|left]] |
||
[[File:Steel platebody detail.png|right|120px]] |
[[File:Steel platebody detail.png|right|120px]] |
||
| − | + | {{Link|Steel equipment#Armour|Steel armour}} is slightly better than the previous {{Link|metal}}, {{Link|iron}}. {{Link|Steel equipment|Steel armour and weapons}} require level 5 {{Link|Defence|type=skill}} and {{Link|Attack|type=skill}} respectively to equip and may also be {{Link|Smithing|smithed|type=skill}} from {{Link|steel bar|type=item}}s, which are the result of smelting {{Link|iron ore|type=item}} with {{Link|coal|type=item}}.{{clear}} |
|
==[[Black armour]]== |
==[[Black armour]]== |
||
[[File:Black full helm chathead.png|left]] |
[[File:Black full helm chathead.png|left]] |
||
[[File:Black platebody detail.png|right|120px]] |
[[File:Black platebody detail.png|right|120px]] |
||
| − | + | {{Link|Black equipment#Armour|Black armour}}, as worn by the {{Link|Kinshra}}, has an evil and dangerous look, but is not any better than {{Link|white armour}}. It is, in fact, worse, not offering any {{Link|Prayer#Prayer_bonus|Prayer bonus}}es. Black armour, like white, cannot be {{Link|Smithing|smithed|type=skill}}, only received as a drop or bought from several shops. A number of different versions exist, all received from {{Link|Treasure Trails}}. There is gold-trimmed black armour, white-trimmed black armour and five different sets of {{Link|Black heraldic armour|heraldic armour}}. It requires 10 {{Link|Defence|type=skill}} to wear, as does white armour. |
|
{{clear}} |
{{clear}} |
||
| Line 308: | Line 267: | ||
[[File:White full helm chathead.png|left]] |
[[File:White full helm chathead.png|left]] |
||
[[File:White platebody detail.png|right|120px]] |
[[File:White platebody detail.png|right|120px]] |
||
| − | + | {{Link|White armour}} does not offer great defensive bonuses, although better than {{Link|steel}}, but does offer decent {{Link|Prayer#Prayer_bonus|Prayer bonus}}es. Aside from the Prayer bonus, white armour is the same as {{Link|Black equipment#Armour|black armour}} requiring 10 {{Link|Defence|type=skill}}; however, it also requires the completion of {{Link|Wanted!|Wanted|img=Sir Amik Varze chathead.png}} to equip. White armour may be bought from {{Link|Sir Vyvin|type=chat}} on the second floor of {{Link|White Knights' Castle|Falador Castle}} with sufficient White Knight rank, which is received from killing {{Link|Black knights|Black Knights}}. White armour is worn by {{Link|White Knight|type=chat}}s of {{Link|Falador}}, and a number of varieties exist, them being initiate, proselyte, acolyte and partisan armour as worn by the {{Link|Temple Knights}}. |
|
{{clear}} |
{{clear}} |
||
| Line 314: | Line 273: | ||
[[File:Initiate sallet chathead.png|left]] |
[[File:Initiate sallet chathead.png|left]] |
||
[[File:Initiate hauberk detail.png|right|120px]] |
[[File:Initiate hauberk detail.png|right|120px]] |
||
| − | + | {{Link|Initiate armour}} is worn by Temple Knight recruits, which the player becomes after completion of {{Link|Recruitment Drive}}. It offers relatively low {{Link|Defence|type=skill}} bonuses but this is compensated by decent {{Link|Prayer#Prayer_bonus|Prayer bonus}}es. The set consists of a {{Link|Proselyte sallet|sallet|type=item}}, {{Link|Proselyte hauberk|hauberk|type=item}} and the choice of a {{Link|Proselyte cuisse|cuisse|type=item}} or {{Link|Proselyte tasset|tassets|type=item}}. The set may be bought from {{Link|Sir Tiffy Cashien|type=chat}} in {{Link|Falador Park}}, requiring no {{Link|Black Knight|img=Black Knight.png}} kills but requiring 20 {{Link|Defence|type=skill}} and 10 {{Link|Prayer|type=skill}} to wear. It appears to be yellow-trimmed white armour with the stats of {{Link|Mithril armour}} plus Prayer bonus. |
|
{{clear}} |
{{clear}} |
||
| Line 320: | Line 279: | ||
[[File:Proselyte sallet chathead.png|left]] |
[[File:Proselyte sallet chathead.png|left]] |
||
[[File:Proselyte hauberk detail.png|right|120px]] |
[[File:Proselyte hauberk detail.png|right|120px]] |
||
| − | + | {{Link|Proselyte armour}} is worn by Temple Knight proselytes who have advanced in rank and requires 30 {{Link|Defence|type=skill}} and 20 {{Link|Prayer|type=skill}}. Players may buy the armour off {{Link|Sir Tiffy Cashien|type=chat}} after completing {{Link|The Slug Menace}}. Basically being an upgrade of {{Link|initiate armour}}, it offers both higher Defence and {{Link|Prayer#Prayer_bonus|Prayer bonus}}es. It looks like gold/orange-trimmed white armour possessing {{Link|Adamant equipment#Armour|Adamant armour}} stats with Prayer. |
|
{{clear}} |
{{clear}} |
||
| Line 326: | Line 285: | ||
[[File:Mithril full helm chathead.png|left]] |
[[File:Mithril full helm chathead.png|left]] |
||
[[File:Mithril platebody detail.png|right|120px]] |
[[File:Mithril platebody detail.png|right|120px]] |
||
| − | + | {{Link|Mithril}} is a medium level {{Link|metal}}, requiring 20 {{Link|Defence|type=skill}} to equip all pieces of the armour. {{Link|Mithril bar|type=item}}s are smelted from {{Link|mithril ore|type=item}} and {{Link|coal|type=item}} in a 1:4 ratio. {{Link|Mithril armour}} offers decent bonuses for players who can just equip it. It is generally not used by higher levelled players. A set of mithril armour may be placed in one's skill hall in a {{Link|Player-owned house|POH}}, providing that the player has 68 {{Link|smithing|type=skill}}. |
|
{{clear}} |
{{clear}} |
||
| Line 332: | Line 291: | ||
[[File:Adamant full helm chathead.png|left]] |
[[File:Adamant full helm chathead.png|left]] |
||
[[File:Adamant platebody detail.png|right|120px]] |
[[File:Adamant platebody detail.png|right|120px]] |
||
| − | + | {{Link|Adamant equipment#Armour|Adamant armour}} is the second highest {{Link|Smithing|smithable|type=skill}} armour and green in colour. It offers decent bonuses and is quite cheap and as such often used by {{Link|Player killing|player killers}} who do not want to risk losing their own armour. Adamant is extracted from {{Link|adamantite ore|type=item}}. It requires level 30 {{Link|Defence|type=skill}} to wield. Like {{Link|Black equipment#Armour|black armour}}, {{Link|Treasure Trails}} offer variations to this armour, including gold-trimmed, white-trimmed and five sets of {{Link|Adamant heraldic armour|heraldic armour}}. |
|
{{clear}} |
{{clear}} |
||
| Line 338: | Line 297: | ||
[[File:Rune full helm chathead.png|left]] |
[[File:Rune full helm chathead.png|left]] |
||
[[File:Rune platebody detail.png|right|120px]] |
[[File:Rune platebody detail.png|right|120px]] |
||
| − | + | {{Link|Rune equipment#Armour|Rune armour}} is the best armour for {{Link|free-to-play}} that does not degrade and requires level 40 {{Link|Defence|type=skill}} to wear, although a smith wishing to start making runite equipment needs at least level 85 {{Link|Smithing|type=skill}}. Due to {{Link|runite ore|type=item}} being very precious, and only found in a few locations, a full set of rune armour is relatively expensive. It is often worn in {{Link|Player killing|PvP}} situations as it provides good bonuses and is easily replaced if lost. Equipping the {{Link|Rune platebody|type=item}} requires completion of the {{Link|Dragon Slayer}} {{Link|Quests|quest}}. Rune is cyan in colour. As with {{Link|Adamant equipment#Armour|adamant}} and {{Link|Black equipment#Armour|black armour}}, rune armour has {{Link|Treasure Trails|Treasure Trail}} variants: gold-trimmed, white-trimmed, {{Link|Gilded equipment#Armour|gilded}}, five sets of {{Link|Rune heraldic armour|heraldic armour}} and six different sets of {{Link|Rune god armour|god armour}}, with the colours of {{Link|Saradomin}}, {{Link|Guthix}}, {{Link|Zamorak}}, {{Link|Armadyl}}, {{Link|Zaros}} and {{Link|Bandos}}. |
|
| − | == |
+ | ==[[Granite armour]]== |
[[File:Granite body detail.png|right|120px]] |
[[File:Granite body detail.png|right|120px]] |
||
[[File:Granite helm chathead.png|left]] |
[[File:Granite helm chathead.png|left]] |
||
| − | ''[[Granite helm|Helmet]], [[Granite body| |
+ | ''[[Granite helm|Helmet]], [[Granite body|body]], [[Granite legs|legs]], [[Granite shield|shield]]'' |
| − | + | {{Link|Granite equipment|Granite armour}} is tough, resilient armour requiring not only a {{Link|Defence|type=skill}} level of 50 to wear, but also a {{Link|Strength|type=skill}} level of 50 due to its weight. The {{Link|Granite body|type=item}} and {{Link|Granite helm|helm|type=item}} have slightly better bonuses than their rune counterparts and all the pieces have very high ranged Defence. Granite armour is mainly obtained from monster drops, or trading with another player. The granite body is obtained by playing {{Link|Barbarian Assault}} and purchasing one from {{Link|Commander Connad|type=chat}}. Granite armour comes with the {{Link|granite maul|type=item}}. |
|
{{clear}} |
{{clear}} |
||
| − | == |
+ | ==[[Obsidian armour]]== |
[[File:Obsidian platebody detail.png|right|120px]] |
[[File:Obsidian platebody detail.png|right|120px]] |
||
[[File:Obsidian helmet chathead.png|left]] |
[[File:Obsidian helmet chathead.png|left]] |
||
| − | ''[[Obsidian helmet|Helmet]], [[Obsidian platebody| |
+ | ''[[Obsidian helmet|Helmet]], [[Obsidian platebody|body]], [[Obsidian platelegs|legs]], [[Toktz-ket-xil|shield]], [[Obsidian cape|cape]]'' |
| − | + | {{Link|Obsidian armour|img=Obsidian helmet chathead.png}} has moderate defensive capabilities but makes up for it with its high offensive stats with the entire set giving +12 in strength bonus. When the body, legs, and helmet are worn in conjunction with each other, all obsidian weaponry receives a +10% bonus in melee strength and melee accuracy and this bonus '''does''' stack with the 20% damage increase whilst wearing a {{Link|Berserker necklace|type=item}}. These armour pieces can all be purchased from {{Link|TzHaar-Hur-Tel's Equipment Store}} in {{Link|Mor Ul Rek}} with {{Link|Tokkul|type=item}}, or by fighting various {{Link|TzHaar-Ket|Tzhaar-ket|type=chat}}s around the city, although only the level-221 Kets drop the platebody, legs, and helmet. |
|
{{clear}} |
{{clear}} |
||
==[[Dragon armour]]== |
==[[Dragon armour]]== |
||
[[File:Dragon full helm chathead.png|left]] |
[[File:Dragon full helm chathead.png|left]] |
||
| − | [[File:Dragon |
+ | [[File:Dragon platebody detail.png|right|120px]] |
| − | + | {{Link|Dragon equipment#Armour|Dragon armour}} is one of the most sought-after armour sets and pieces of dragon equipment can cost millions of {{Link|coins|img=Coins 1.png}}. Dragon cannot be smithed by players and is only for members. The {{Link|Weapons|weapon}}ry may be received as a rare drop from a very limited amount of monsters or bought from several shops (often requiring quests to be completed), while the armour is limited to the former. For example, the elusive, fabled {{Link|Dragon full helm|type=item}} can be dropped by level-304 {{Link|Mithril dragon|img=Mithril dragon.png}}s. The origins of dragon armour are unknown, but it is widely believed the {{Link|Dragonkin}} created it and brought dragon {{Link|metal}} to {{Link|Gielinor}}. Dragon armour requires level 60 {{Link|Defence|type=skill}} to be worn and is very popular. |
|
{{clear}} |
{{clear}} |
||
==[[Fremennik armour]]== |
==[[Fremennik armour]]== |
||
''[[Yak-hide armour|Yak-hide]], [[Rockshell armour|Rockshell]], [[Fremennik helm|Helm]], [[Fremennik shield|Shield]], [[Warrior helm]], [[Berserker helm]], [[Helm of neitiznot]]'' |
''[[Yak-hide armour|Yak-hide]], [[Rockshell armour|Rockshell]], [[Fremennik helm|Helm]], [[Fremennik shield|Shield]], [[Warrior helm]], [[Berserker helm]], [[Helm of neitiznot]]'' |
||
| − | <br />'''''Rockshell:''' [[Rockshell helmet| |
+ | <br />'''''Rockshell:''' [[Rockshell helmet|helmet]], [[Rock-shell plate|plate]], [[Rock-shell legs|legs]], [[Rockshell gloves|gloves]], [[Rockshell boots|boots]]'' |
| − | <br />'''''Yak- |
+ | <br />'''''Yak-hide:''' [[Yak-hide armour (top)|top]], [[Yak-hide armour (legs)|legs]], [[Fremennik roundshield|roundshield]]'' |
===[[Fremennik helmets]]=== |
===[[Fremennik helmets]]=== |
||
| − | Out of the six |
+ | Out of the six {{Link|Fremennik helmets}}, three are suitable for warriors. All Fremennik helms require completion of {{Link|The Fremennik Trials|img=Brundt the Chieftain chathead.png}} to wear them, but the {{Link|Helm of neitiznot|type=item}} requires {{Link|The Fremennik Isles}}. |
====[[Fremennik helm]]==== |
====[[Fremennik helm]]==== |
||
[[File:Fremennik helm.png|right]] |
[[File:Fremennik helm.png|right]] |
||
| − | The |
+ | The {{Link|Fremennik helm|type=item}} is the most basic helm that the Fremennik have in store and is received as a drop from {{Link|Warrior (Rellekka)|Fremennik warrior|img=Warrior (Rellekka).png}}s and {{Link|Waterbirth Island|Waterbirth}} {{Link|Dagannoth}}s. Due to its low bonuses, it is generally not used by players. |
{{clear}} |
{{clear}} |
||
====[[Warrior helm]]==== |
====[[Warrior helm]]==== |
||
[[File:Warrior helm.png|right]] |
[[File:Warrior helm.png|right]] |
||
| − | The |
+ | The {{Link|Warrior helm|type=item}} is a more popular choice of helmet, as it gives decent {{Link|Defence|type=skill}} bonuses and a slash attack bonus. This helmet may be bought off {{Link|Skulgrimen|type=chat}} or received as a drop from {{Link|Dagannoth}}s. {{clear}} |
====[[Berserker helm]]==== |
====[[Berserker helm]]==== |
||
[[File:Berserker helm chathead.png|left]] |
[[File:Berserker helm chathead.png|left]] |
||
[[File:Berserker helm.png|right]] |
[[File:Berserker helm.png|right]] |
||
| − | Like the |
+ | Like the {{Link|Warrior helm|type=item}}, the {{Link|Berserker helm|type=item}} offers decent bonuses and a small strength bonus. This helmet can be bought as well as dropped by {{Link|Dagannoth}}s. Its stats are equal to the Warrior's helm. {{clear}} |
====[[Helm of Neitiznot]]==== |
====[[Helm of Neitiznot]]==== |
||
[[File:Helm of neitiznot.png|right]] |
[[File:Helm of neitiznot.png|right]] |
||
| − | The |
+ | The {{Link|Helm of neitiznot|Helm of Neitiznot|type=item}} is by far the most popular {{Link|Fremennik helm|type=item}}. Not only does it yield higher bonuses than the other helms, it also has an additional {{Link|Prayer#Prayer_bonus|Prayer bonus}} and strength bonus. It is received from {{Link|Mawnis Burowgar|type=chat}}, the burgher of {{Link|Neitiznot}}, after completion of {{Link|The Fremennik Isles}} and may be re-obtained from him if lost. |
===[[Yak-hide armour]]=== |
===[[Yak-hide armour]]=== |
||
[[File:Yak-hide armour equipped.png|60px|right|link=Yak-hide armour|A player wearing Yak-hides.]] |
[[File:Yak-hide armour equipped.png|60px|right|link=Yak-hide armour|A player wearing Yak-hides.]] |
||
| − | + | {{Link|Yak-hide armour}} and the {{Link|Fremennik shield (The Fremennik Isles)|Fremennik round shield|type=item}} are relatively weak, but valuable against {{Link|Ice troll|type=chat}}s, as the armour lowers the maximum hit of the {{Link|Ice troll male|males|img=Ice troll runt.png}}, and the shield lowers the maximum hit of the {{Link|Ice troll female|females|img=Ice troll female.png}}. They are made during {{Link|The Fremennik Isles}} from {{Link|yak-hide|type=item}} and split {{Link|Arctic pine logs|type=item}}. It has poor bonuses, meaning it is not used very often.{{clear}} |
|
===[[Rock-shell armour]]=== |
===[[Rock-shell armour]]=== |
||
[[File:Rock-shell helm chathead.png|left]] |
[[File:Rock-shell helm chathead.png|left]] |
||
| − | [[File:Rock-shell plate detail.png|right]] |
+ | [[File:Rock-shell plate detail.png|right|150px]] |
| − | + | {{Link|Rock-shell armour|img=Rock-shell helm chathead.png}} is very similar to {{Link|Rune equipment#Armour|Rune armour}}. It is made from hides and rocks dropped by {{Link|Dagannoth}}s and {{Link|Giant Rock Crab|Giant rock crab|img=Giant Rock Crab.png}}s, respectively. It's not very widely used due to the difficulty to obtain and the existence of better armour. {{clear}} |
|
===[[Void Knight equipment]]=== |
===[[Void Knight equipment]]=== |
||
[[File:Void melee helm equipped.png|right|70px|link=Void Knight equipment|A player wearing Void Knight robes.]] |
[[File:Void melee helm equipped.png|right|70px|link=Void Knight equipment|A player wearing Void Knight robes.]] |
||
| − | + | {{Link|Void melee helm|type=item}}, {{Link|Void knight top|type=item}}, {{Link|Void knight robe|type=item}} & {{Link|Void knight gloves|type=item}} |
|
| − | + | {{Link|Void knight robe|type=item}}s requires 42 {{Link|Attack|type=skill}}, {{Link|Strength|type=skill}}, {{Link|Defence|type=skill}}, {{Link|Ranged|type=skill}}, {{Link|Hitpoints|type=skill}} and {{Link|Magic|type=skill}}, and it also requires 22 {{Link|Prayer|type=skill}}. However, you need 850 {{Link|Pest Control}} points. The {{Link|Void melee helm|Melee helm|type=item}} grants the player a +10% bonus towards accuracy and damage, if the player is wearing the rest of the Void Knight equipment. |
|
| − | As some players find it more effective to wear other full sets of |
+ | As some players find it more effective to wear other full sets of {{Link|armour}}, such as {{Link|Bandos armour|Bandos}} or {{Link|Barrows equipment|Barrows armour}}, than a full set of Void Knight armour due to the Defence bonuses, this item is not frequently bought. However, those who do buy it can see a higher max hit and a higher average hit. Additionally, it {{Link|Combat style|classes}} as a {{Link|Combat_pure#Hybrid|hybrid}} set (besides the helmet), and as such gives equal Magic, Ranged and {{Link|Melee}} Defence, thus making it an alternative choice in {{Link|Minigames|minigame}}s where hybridding is common. |
| − | Note that the armour is only |
+ | Note that the armour is only Melee-based if you are wearing the {{Link|Void melee helm|Melee helm|type=item}}; if you are, your Melee damage is increased by 10%. |
| − | ==[[ |
+ | ==[[3rd age melee equipment|3rd age melee armour]]== |
[[File:3rd age full helmet.png|left]] |
[[File:3rd age full helmet.png|left]] |
||
[[File:3rd age platebody detail.png|right|120px]] |
[[File:3rd age platebody detail.png|right|120px]] |
||
| − | :''[[ |
+ | :''[[3rd age full helmet|Helmet]], [[3rd age platebody|platebody]], [[3rd age platelegs|platelegs]], [[3rd age kiteshield|kiteshield]]'' |
| − | + | {{Link|3rd age equipment|Armour from the 3rd age}} is incredibly rare. However, both {{Link|Justiciar armour}} and {{Link|Barrows equipment|Barrows armour}} have higher defensive bonuses and {{Link|Bandos armour}} is generally favoured for its {{Link|Strength#Strength bonus|strength bonus}}es despite the lower defensive bonuses. 3rd age armour can only be obtained through {{Link|Treasure Trails}}, or by buying from another player. |
|
==[[Bandos armour]]== |
==[[Bandos armour]]== |
||
[[File:Bandos chestplate.png|left]] |
[[File:Bandos chestplate.png|left]] |
||
[[File:Bandos tassets.png|right]] |
[[File:Bandos tassets.png|right]] |
||
| − | ''[[Bandos chestplate|Chestplate]], [[Bandos tassets| |
+ | ''[[Bandos chestplate|Chestplate]], [[Bandos tassets|tassets]], [[Bandos boots|boots]]'' |
| − | + | {{Link|Bandos armour}} is very strong armour, providing excellent defensive bonuses. Bandos armour is one of the best armours in the game. Bandos armour is dropped by {{Link|General Graardor|type=chat}} (who wears the armour himself) and his sergeants in Bandos's Stronghold in the {{Link|God Wars Dungeon}}, requiring level 70 {{Link|Strength|type=skill}} to enter, as well as having killed forty Bandosians in the dungeon. |
|
{{clear}} |
{{clear}} |
||
==[[Barrows armour]]== |
==[[Barrows armour]]== |
||
''[[Guthan's]], [[Dharok's]], [[Torag's]], [[Verac's]]'' |
''[[Guthan's]], [[Dharok's]], [[Torag's]], [[Verac's]]'' |
||
| − | <br />''Helmet, |
+ | <br />''Helmet, platebody/brassard, platelegs/plateskirt/chainskirt, (weapon: [[Dharok's greataxe|greataxe]]/[[Guthan's warspear|warspear]]/[[Torag's hammers|hammers]]/[[Verac's flail|flail]])'' |
| − | + | {{Link|Barrows equipment|Barrows armour}} is very strong and popular. It is obtained from the {{Link|Barrows}} {{Link|Minigames|minigame}}, or from trading with another player. If the player wears all the items from one of the brothers' armour sets (including the {{Link|Weapons|weapon}}), they have a chance of activating a set effect. Barrows armour needs to be repaired every 15 hours of {{Link|combat}} for a price. This can be done on an {{Link|armour stand}} (with discounts based on one's {{Link|Smithing|type=skill}} level) or by speaking to {{Link|Bob (smith)|Bob|type=chat}} in {{Link|Lumbridge}}. |
|
{{clear}} |
{{clear}} |
||
===[[Guthan's armour]]=== |
===[[Guthan's armour]]=== |
||
| − | [[File:Guthan the Infested.png|left]] |
||
[[File:Guthan's platebody.png|right]] |
[[File:Guthan's platebody.png|right]] |
||
| − | The |
+ | The {{Link|Guthan the Infested's equipment|armour set}} of {{Link|Guthan the Infested|img=Guthan the Infested.png}} has a very desirable bonus effect, as it has a chance of healing the wearer when they deal damage. The weapon of the set is a long warspear.{{clear}} |
===[[Dharok's armour]]=== |
===[[Dharok's armour]]=== |
||
| − | [[File:Dharok the Wretched.png|left]] |
||
[[File:Dharok's platebody.png|right]] |
[[File:Dharok's platebody.png|right]] |
||
| − | + | {{Link|Dharok the Wretched's equipment}} set effect has a useful, but dangerous set effect. The lower the wearer's health, the higher his/her maximum hit is.{{clear}} |
|
===[[Torag's armour]]=== |
===[[Torag's armour]]=== |
||
| − | [[File:Torag the Corrupted.png|left]] |
||
[[File:Torag's platebody.png|right]] |
[[File:Torag's platebody.png|right]] |
||
| − | + | {{Link|Torag the Corrupted's equipment}} set effect is the chance to drain run energy from the target with each hit. |
|
{{clear}} |
{{clear}} |
||
===[[Verac's armour]]=== |
===[[Verac's armour]]=== |
||
| − | [[File:Verac the Defiled.png|left]] |
||
[[File:Verac's brassard.png|right]] |
[[File:Verac's brassard.png|right]] |
||
| − | The set effect of |
+ | The set effect of {{Link|Verac the Defiled's equipment|the armour}} of {{Link|Verac the Defiled|img=Verac the Defiled.png}} is useful when fighting another player or the {{Link|Kalphite Queen|img=Kalphite Queen.png}}, as it hits through {{Link|Prayer|type=skill}} and armour. |
| + | {{clear}} |
||
| + | |||
| ⚫ | |||
| + | [[File:Justiciar chestguard detail.png|right|130px]] |
||
| + | :''[[Justiciar faceguard|Faceguard]], [[Justiciar chestguard|chestguard]], [[Justiciar legguards|legguards]]'' |
||
| + | |||
| + | {{Link|Justiciar armour}} possesses the best defensive bonuses in the game for melee and ranged. The armour requires level 75 in {{Link|Defence|type=skill}} to wear, and possesses a {{Link|Passive effect|set effect}} that reduces damage taken when the player wears the full set. Justiciar armour can only be obtained through completing the {{Link|Theatre of Blood}}, or by buying from another player. |
||
| + | |||
{{clear}} |
{{clear}} |
||
==[[Toktz-ket-xil]]== |
==[[Toktz-ket-xil]]== |
||
| ⚫ | |||
| − | + | Buy one from {{Link|TzHaar-Hur-Tel's Equipment Store}} in {{Link|Mor Ul Rek}}, trade with another player or obtain one as a rare monster drop from a {{Link|TzHaar-Ket|type=chat}}. This {{Link|Toktz-ket-xil|type=item}} is extremely popular amongst mid-level warriors who are unable to afford a better-suited shield for their level, and because it also possesses a strength bonus, it is often used by those who cannot currently gain access to the Warriors Guild but have the defence level requirement of 60 to use it. |
|
{{clear}} |
{{clear}} |
||
==[[Crystal shield]]== |
==[[Crystal shield]]== |
||
[[File:Crystal shield detail.png|right|120px]] |
[[File:Crystal shield detail.png|right|120px]] |
||
| − | The |
+ | The {{Link|Crystal shield|type=item}} is a high-level piece of {{Link|armour}} which, similar to barrows equipment, will degrade after use and must be recharged. Boasting a very high ranged defence bonus, It requires completion of {{Link|Roving Elves}}, 70 {{Link|Defence|type=skill}}, and 50 {{Link|Agility|type=skill}} to wield. |
{{clear}} |
{{clear}} |
||
==[[Dragonfire shield]]== |
==[[Dragonfire shield]]== |
||
[[File:Dragonfire shield detail.png|right|120px]] |
[[File:Dragonfire shield detail.png|right|120px]] |
||
| − | The |
+ | The {{Link|Dragonfire shield|type=item}} is a high-level piece of armour. It provides protection not only from {{Link|dragonfire}} but also the icy breath of the {{Link|Skeletal Wyvern|img=Skeletal Wyvern.png}}. It functions differently by absorbing the aforementioned, acquiring {{Link|Dragonfire shield#Dragonfire charges|charges}} and thereby increasing in defensive bonuses while protecting the player. It can then be discharged to release a viscous burning attack. |
{{clear}} |
{{clear}} |
||
| Line 469: | Line 433: | ||
''[[Spirit shield|Plain]], [[Blessed spirit shield|Blessed]], [[Arcane spirit shield|Arcane]], [[Elysian spirit shield|Elysian]], [[Spectral spirit shield|Spectral]]'' |
''[[Spirit shield|Plain]], [[Blessed spirit shield|Blessed]], [[Arcane spirit shield|Arcane]], [[Elysian spirit shield|Elysian]], [[Spectral spirit shield|Spectral]]'' |
||
| − | + | {{Link|Spirit shields}} are a range of shields available to members after the {{Link|Corporeal Beast|img=Corporeal Beast.png}} update. The shields are all derived from the {{Link|Spirit shield|"basic" one|type=item}}. Some {{Link|holy elixir|type=item}}, dropped by the Corporeal Beast, must be poured onto it to {{Link|Blessed spirit shield|bless it|type=item}}, increasing its stats and value. The spirit {{Link|sigil}}s are items which can be added to a {{Link|blessed spirit shield|type=item}} to modify its abilities even further. These sigils are {{Link|Arcane sigil|arcane|type=item}}, {{Link|Elysian sigil|elysian|type=item}} and {{Link|Spectral sigil|spectral|type=item}}. The {{Link|elysian spirit shield|type=item}} has a special effect that reduces the amount of damage taken |
|
| − | The basic spirit shield requires level 45 |
+ | The basic spirit shield requires level 45 {{Link|Defence|type=skill}} and level 55 {{Link|Prayer|type=skill}} to hold, the blessed one requires 70 Defence and level 60 Prayer, arcane and spectral spirit shield 75 Defence, 70 Prayer and 65 Magic, and elysian requires 75 Defence and 75 Prayer. |
| − | ==Best F2P |
+ | ==Best F2P melee armour setup== |
{{Main|Armour/Highest bonuses}} |
{{Main|Armour/Highest bonuses}} |
||
{{Equipment |
{{Equipment |
||
| Line 498: | Line 462: | ||
}} |
}} |
||
===Notes=== |
===Notes=== |
||
| − | *You will have to set up a 2-step verification for your account to obtain |
+ | *You will have to set up a 2-step verification for your account to obtain {{Link|fancy boots|type=item}} or {{Link|fighting boots|type=item}} from the {{Link|Stronghold of Security|img=Gate of War chathead.png}}; however, you can disable this after you obtain the boots. Remember if you lose your boots and disabled 2-step verification that you will need to re-enable the verification in order to get them back. |
| − | *An |
+ | *An {{Link|amulet of power|type=item}} is better to use for players who expect to be training on enemies with high {{Link|Defence|type=skill}}, otherwise {{Link|amulet of strength|type=item}} is better. |
| − | *All |
+ | *All {{Link|Free-to-play|F2P}} {{Link|rune god armour}}s have the same stats, and the only reason it is better than {{Link|Rune equipment#Armour|rune armour}} is because of its +1 {{Link|Prayer#Prayer_bonus|Prayer bonus}} on each armour piece creating a total of a +4 Prayer bonus. |
| − | * |
+ | *{{Link|Fancy boots|type=item}} and {{Link|fighting boots|type=item}} have the same stats. |
| − | *All |
+ | *All {{Link|Team cape|team capes|img=Team-1 cape.png}} and regular {{Link|capes}} have the same stats. |
*Currently, there are no rings in F2P that give any stat increases. |
*Currently, there are no rings in F2P that give any stat increases. |
||
| − | |||
{{Clear}} |
{{Clear}} |
||
| − | ==Best P2P |
+ | ==Best P2P melee strength setup== |
{{Main|Armour/Highest bonuses}} |
{{Main|Armour/Highest bonuses}} |
||
{{Equipment |
{{Equipment |
||
| − | | |
+ | |align = right |
| − | | |
+ | |caption = Best P2P Strength Armour |
| − | | |
+ | |helmimg = Serpentine helm.png |
| − | | |
+ | |helmlink = Serpentine helm |
| − | | |
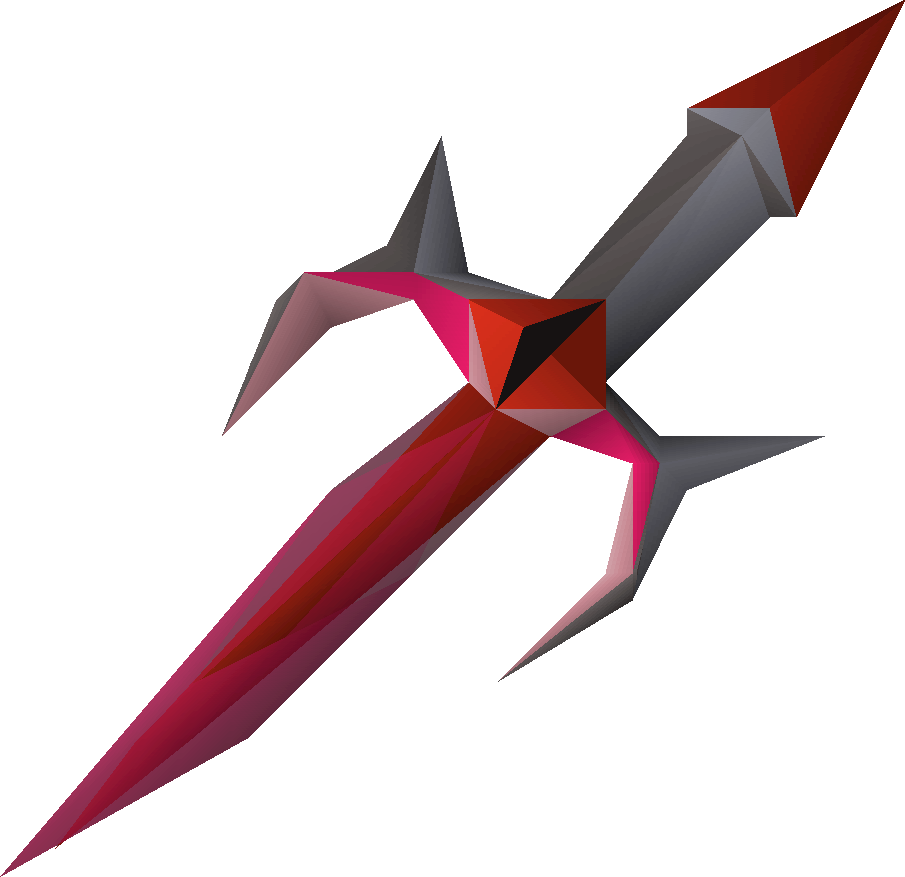
+ | |capeimg = Infernal cape.png |
| − | | |
+ | |capelink = Infernal cape |
| − | | |
+ | |neckimg = Amulet of torture.png |
| − | | |
+ | |necklink = Amulet of torture |
| − | | |
+ | |ammoimg = Holy blessing.png |
| − | | |
+ | |ammolink = Holy blessing |
| − | | |
+ | |weapimg = Abyssal tentacle.png |
| − | | |
+ | |weaplink = Abyssal tentacle |
| − | | |
+ | |bodyimg = Bandos chestplate.png |
| − | | |
+ | |bodylink = Bandos chestplate |
| − | | |
+ | |legsimg = Bandos tassets.png |
| − | | |
+ | |legslink = Bandos tassets |
| − | | |
+ | |shieldimg = Avernic defender.png |
| − | | |
+ | |shieldlink = Avernic defender |
| − | | |
+ | |glovesimg = Barrows gloves.png |
| − | | |
+ | |gloveslink = Barrows gloves |
| − | | |
+ | |bootsimg = Primordial boots.png |
| − | | |
+ | |bootslink = Primordial boots |
| − | | |
+ | |ringimg = Berserker ring (i).png |
| − | | |
+ | |ringlink = Berserker ring (i) |
}} |
}} |
||
===Notes=== |
===Notes=== |
||
| − | *The |
+ | *The {{Link|fighter torso|type=item}} gives the same {{Link|Strength#Strength bonus|Strength bonus}}. |
| − | *The |
+ | *The {{Link|amulet of torture|type=item}} has better offensive stats than the {{Link|amulet of fury|type=item}} yielding; +15 across all attack bonuses, however, has no defensive bonuses. Where the amulet of fury has +15 in all defensive stats, it has a +2 difference in Strength bonus. |
| − | *The |
+ | *The {{Link|slayer helmet|type=item}} or {{Link|black mask|type=item}} will give a higher Strength bonus if on task. |
| − | *The [[dragon defender]] is arguable with the [[Dragonfire Shield]] (DFS) as the DFS has more Strength bonus than the defender, but the defender has [[Attack bonuses]]. |
||
[[Category:Armour]] |
[[Category:Armour]] |
||
[[Category:Melee armour]] |
[[Category:Melee armour]] |
||
| − | [[Category:Defence]] |
||
Revision as of 10:11, 8 June 2019
- For a full list of items and their stats worn in the body slot, see this table.
Melee armour, used in the ![]() Attack,
Attack, ![]() Strength and
Strength and ![]() Defence skills, is generally made out of some kind of metal. There is a "default" (regular) series of
Defence skills, is generally made out of some kind of metal. There is a "default" (regular) series of ![]() armour, consisting of
armour, consisting of ![]() Bronze,
Bronze, ![]() Iron,
Iron, ![]() Steel,
Steel, ![]() Black/
Black/![]() White,
White, ![]() Mithril,
Mithril, ![]() Adamant,
Adamant, ![]() Rune, and
Rune, and ![]() Dragon (in ascending order of the quality of the armour). For each piece of armour, there is a counterpart made for each other type of metal (with the exception of Dragon armour which has some items yet to be released). All these can be made from the
Dragon (in ascending order of the quality of the armour). For each piece of armour, there is a counterpart made for each other type of metal (with the exception of Dragon armour which has some items yet to be released). All these can be made from the ![]() Smithing skill, with the exception of Black, White, and Dragon, which can only be purchased or received from a
Smithing skill, with the exception of Black, White, and Dragon, which can only be purchased or received from a ![]() monster drop.
monster drop.
All armour items not made from those metal types can be considered "special" and generally cannot be made from the Smithing skill, but rather sold by an NPC or obtained as a monster drop. Some players may consider these more desirable, as they often provide higher bonuses than other forms of armour.
Melee armour sets
A set generally comprises a ![]() full helm,
full helm, ![]() platebody,
platebody, ![]() platelegs/
platelegs/![]() skirt, and a
skirt, and a ![]() kiteshield where applicable. It's very typical among the
kiteshield where applicable. It's very typical among the ![]() metal armours.
metal armours.
To save ![]() money, low-tier armour pieces can be bought at the following places:
money, low-tier armour pieces can be bought at the following places:
 Helmet Shop in Barbarian Village
- Horvik's Armour Shop in East Varrock
- Louie's Armoured Legs Bazaar or Ranael's Super Skirt Store in Al Kharid
- Cassie's Shield Shop in Falador
| Armour | Additional requirements | |
|---|---|---|
| 1 | None | |
| 1 | None | |
| 5 | None | |
| 10 | None | |
| 10 | Wanted! | |
| 20 | None | |
| 20 | 10 | |
| 30 | None | |
| 30 | 20 | |
| 40 | Dragon Slayer (for platebody) | |
| 40 | The Fremennik Trials | |
| 42 | 850 Pest Control points plus the following: 42 | |
| 50 | 50 | |
| 60 | None | |
| 60 | Legends' Quest for sq shield, Dragon Slayer for platebody | |
| 65 | Often prohibitively expensive (159,322,992). | |
| 65 | ||
| 70 | Fully degrades after 15 hours in combat | |
| 75 | Often prohibitively expensive (65,826,355). |
Other armour pieces
| Item | Additional | |
|---|---|---|
| 1 | 650,000 Nightmare Zone points only to imbue | |
| 1 | 650,000 Nightmare Zone points only to imbue | |
| 41 [1] | Recipe for Disaster | |
| 1 | Completion of the TzHaar Fight Cave | |
| 1 | Completion of the Inferno | |
| 10 | 55 | |
| 20 | None | |
| 25 | None | |
| 30 | The Fremennik Trials | |
| 30 | The Fremennik Trials | |
| 40 | Barbarian Assault: 375 Honour points in all four roles and killed the Penance Queen | |
| 45 | 55 | |
| 45 | The Fremennik Trials | |
| 45 | The Fremennik Trials | |
| 55 | The Fremennik Isles | |
| 70 | 50 | |
| 70 | 60 | |
| 75 | 75 | |
| 75 | ||
| 75 | Dragon Slayer must be started in order to equip | |
| 75 | 75 |
Set items
Medium helmets
Bronze, Iron, Steel, Black, White, Mithril, Adamant, Rune, Dragon
![]() Medium helmets offer little protection compared to
Medium helmets offer little protection compared to ![]() full helms (shown below) from most
full helms (shown below) from most ![]() combat forms, but also do little to inhibit using any
combat forms, but also do little to inhibit using any ![]() combat style. This makes them a good choice for players who favour
combat style. This makes them a good choice for players who favour ![]() Melee, but want the opportunity to use
Melee, but want the opportunity to use ![]() Magic and
Magic and ![]() Ranged. But if you prefer Melee-fighting, the full helm is a better choice.
Ranged. But if you prefer Melee-fighting, the full helm is a better choice.
Full helmets
Bronze, Iron, Steel, Black, White, Mithril, Adamant, Rune, Dragon
![]() Full helmets encase the whole of the players head and provide better
Full helmets encase the whole of the players head and provide better ![]() Ranged and
Ranged and ![]() Melee
Melee ![]() Defence than other helmets. It does, however, impose larger negative modifiers to
Defence than other helmets. It does, however, impose larger negative modifiers to ![]() Magic and Ranged attacks, but many rangers prefer them for their Defence bonuses and accept the negative attack modifiers, which are significantly smaller than their magical attack penalty.
Magic and Ranged attacks, but many rangers prefer them for their Defence bonuses and accept the negative attack modifiers, which are significantly smaller than their magical attack penalty.
Chainbodies
Bronze, Iron, Steel, Black, White, Mithril, Adamant, Rune, Dragon
![]() Chainbodies are made up of small rings linked together. They are particularly useful for deflecting
Chainbodies are made up of small rings linked together. They are particularly useful for deflecting ![]() slashing weapons and absorbing the impact of
slashing weapons and absorbing the impact of ![]() crush attacks. Chainmail is weak against
crush attacks. Chainmail is weak against ![]() stabbing weapons as small pointed blades can pierce the rings, as can
stabbing weapons as small pointed blades can pierce the rings, as can ![]() arrows, therefore it is less effective at defending against
arrows, therefore it is less effective at defending against ![]() Ranged attacks. Chainmail is quite flexible and so does not penalise a ranger's
Ranged attacks. Chainmail is quite flexible and so does not penalise a ranger's ![]() Attack bonus, though its metal construction does impede a
Attack bonus, though its metal construction does impede a ![]() mage's accuracy somewhat. However, they offer a lesser Magic Defence penalty than
mage's accuracy somewhat. However, they offer a lesser Magic Defence penalty than ![]() platebodies.
platebodies.
Platebodies
Bronze, Iron, Steel, Black, White, Mithril, Adamant, Rune, Dragon
![]() Platebodies are much heavier and stronger than
Platebodies are much heavier and stronger than ![]() chainbodies, providing the higher
chainbodies, providing the higher ![]() slash,
slash, ![]() stab, and
stab, and ![]() Ranged
Ranged ![]() Defence bonuses. Platebodies are weakest against
Defence bonuses. Platebodies are weakest against ![]() crushing and
crushing and ![]() Magic attacks, as they conduct Magic and cannot absorb the impact of a crush attack as well as
Magic attacks, as they conduct Magic and cannot absorb the impact of a crush attack as well as ![]() dragonhide or chain armour. Rangers and mages are at a great disadvantage trying to aim their Ranged and distance magical attacks in this restrictive and heavy metal armour. The
dragonhide or chain armour. Rangers and mages are at a great disadvantage trying to aim their Ranged and distance magical attacks in this restrictive and heavy metal armour. The ![]() Dragon Slayer
Dragon Slayer ![]() quest is required to wear the
quest is required to wear the ![]() Rune platebody as well as the
Rune platebody as well as the ![]() Dragon platebody.
Dragon platebody.
Platelegs and plateskirts
Bronze, Iron, Steel, Black, White, Mithril, Adamant, Rune, Dragon
![]() Platelegs and
Platelegs and ![]() plateskirts are a vital part of a warrior's
plateskirts are a vital part of a warrior's ![]() armour, and provide the second best defensive bonuses after the
armour, and provide the second best defensive bonuses after the ![]() platebody. As with all
platebody. As with all ![]() Dragon equipment, the
Dragon equipment, the ![]() Dragon platelegs/
Dragon platelegs/![]() plateskirt cannot be made via the
plateskirt cannot be made via the ![]() Smithing skill.
Smithing skill.
Square shields
Bronze, Iron, Steel, Black, White, Mithril, Adamant, Rune, Dragon
The ![]() square shield has adequate
square shield has adequate ![]() Melee and
Melee and ![]() Ranged
Ranged ![]() Defence bonuses, and does not penalise Ranged or Magic attacks as much as the
Defence bonuses, and does not penalise Ranged or Magic attacks as much as the ![]() kiteshield. In Melee, a square shield is weakest against
kiteshield. In Melee, a square shield is weakest against ![]() crush attacks, but stronger towards
crush attacks, but stronger towards ![]() stab. Square shields are not often used, as most players prefer the kiteshield for its higher Defence bonuses. In similarity towards
stab. Square shields are not often used, as most players prefer the kiteshield for its higher Defence bonuses. In similarity towards ![]() medium helmets, square shields provide less Ranged and Magic attack penalties and could be more preferred by those who aren't using Melee.
medium helmets, square shields provide less Ranged and Magic attack penalties and could be more preferred by those who aren't using Melee.
Kiteshields
Bronze, Iron, Steel, Black, White, Mithril, Adamant, Rune, Dragon
![]() Kiteshields offer better
Kiteshields offer better ![]() Defence than a
Defence than a ![]() square shield, although like most heavier armour it is awkward to use in combination with
square shield, although like most heavier armour it is awkward to use in combination with ![]() Magic and
Magic and ![]() Ranged. Kiteshields are marginally weaker against
Ranged. Kiteshields are marginally weaker against ![]() stabbing attacks.
stabbing attacks.
Metal gloves
Bronze, Iron, Steel, Black, White, Mithril, Adamant, Rune, Dragon, Barrows
The ![]() Culinaromancer's
Culinaromancer's ![]() metal gloves can be bought from the
metal gloves can be bought from the ![]() Culinaromancer's chest after completing varying numbers of
Culinaromancer's chest after completing varying numbers of ![]() Recipe for Disaster subquests, the exception being
Recipe for Disaster subquests, the exception being ![]() White gloves, which are purchased from
White gloves, which are purchased from ![]() Sir Vyvin. White gloves are also the only tradeable metal gloves.
Sir Vyvin. White gloves are also the only tradeable metal gloves.
Metal gloves provide good protection against all attack styles. ![]() Barrows gloves give the best
Barrows gloves give the best ![]() Attack bonuses for all
Attack bonuses for all ![]() Attack styles of any pair of gloves, and also the highest
Attack styles of any pair of gloves, and also the highest ![]() Strength bonus. These gloves also do not degrade.
Strength bonus. These gloves also do not degrade.
Defenders
Bronze, Iron, Steel, Black, Mithril, Adamant, Rune, Dragon, Avernic
Metal ![]() defenders are small
defenders are small ![]() dagger-like items worn in the
dagger-like items worn in the ![]() Shield slot. Defenders make a trade off whereby they sacrifice much of a shields defensive capabilities to further boost offensive stats and are as such desirable for warriors who favour stronger and more accurate attacks over survivability. They cannot be made nor bought, only received as a drop from
Shield slot. Defenders make a trade off whereby they sacrifice much of a shields defensive capabilities to further boost offensive stats and are as such desirable for warriors who favour stronger and more accurate attacks over survivability. They cannot be made nor bought, only received as a drop from ![]() cyclopes on the top floor of the
cyclopes on the top floor of the ![]() Warriors' Guild. Once the first -
Warriors' Guild. Once the first - ![]() bronze - defender is received, it must be shown to
bronze - defender is received, it must be shown to ![]() Kamfreena outside the room before an
Kamfreena outside the room before an ![]() iron one may be received, which must then be shown before a
iron one may be received, which must then be shown before a ![]() steel one may be received, etc. Entrance to the cyclops' room is temporary and the Guild's
steel one may be received, etc. Entrance to the cyclops' room is temporary and the Guild's ![]() tokens are required for access. The owned amount slowly decreases as one is in the room.
tokens are required for access. The owned amount slowly decreases as one is in the room.
Bronze armour

![]() Bronze armour is the weakest of all
Bronze armour is the weakest of all ![]() Melee armours, requiring no levels whatsoever and costing little. Bronze is a
Melee armours, requiring no levels whatsoever and costing little. Bronze is a ![]() copper and
copper and ![]() tin alloy and as such may be
tin alloy and as such may be ![]() smelted using copper and tin ore. It can be made on an
smelted using copper and tin ore. It can be made on an ![]() anvil with requirements starting from level 1
anvil with requirements starting from level 1 ![]() Smithing.
Smithing.
Iron armour


![]() Iron armour is slightly better than
Iron armour is slightly better than ![]() bronze, and requires level 1
bronze, and requires level 1 ![]() Defence. It is made from
Defence. It is made from ![]() iron bars.
iron bars.
Steel armour

![]() Steel armour is slightly better than the previous
Steel armour is slightly better than the previous ![]() metal,
metal, ![]() iron.
iron. ![]() Steel armour and weapons require level 5
Steel armour and weapons require level 5 ![]() Defence and
Defence and ![]() Attack respectively to equip and may also be
Attack respectively to equip and may also be ![]() smithed from
smithed from ![]() steel bars, which are the result of smelting
steel bars, which are the result of smelting ![]() iron ore with
iron ore with ![]() coal.
coal.
Black armour


![]() Black armour, as worn by the
Black armour, as worn by the ![]() Kinshra, has an evil and dangerous look, but is not any better than
Kinshra, has an evil and dangerous look, but is not any better than ![]() white armour. It is, in fact, worse, not offering any
white armour. It is, in fact, worse, not offering any ![]() Prayer bonuses. Black armour, like white, cannot be
Prayer bonuses. Black armour, like white, cannot be ![]() smithed, only received as a drop or bought from several shops. A number of different versions exist, all received from
smithed, only received as a drop or bought from several shops. A number of different versions exist, all received from ![]() Treasure Trails. There is gold-trimmed black armour, white-trimmed black armour and five different sets of
Treasure Trails. There is gold-trimmed black armour, white-trimmed black armour and five different sets of ![]() heraldic armour. It requires 10
heraldic armour. It requires 10 ![]() Defence to wear, as does white armour.
Defence to wear, as does white armour.
White armour

![]() White armour does not offer great defensive bonuses, although better than
White armour does not offer great defensive bonuses, although better than ![]() steel, but does offer decent
steel, but does offer decent ![]() Prayer bonuses. Aside from the Prayer bonus, white armour is the same as
Prayer bonuses. Aside from the Prayer bonus, white armour is the same as ![]() black armour requiring 10
black armour requiring 10 ![]() Defence; however, it also requires the completion of
Defence; however, it also requires the completion of ![]() Wanted to equip. White armour may be bought from
Wanted to equip. White armour may be bought from ![]() Sir Vyvin on the second floor of
Sir Vyvin on the second floor of ![]() Falador Castle with sufficient White Knight rank, which is received from killing
Falador Castle with sufficient White Knight rank, which is received from killing ![]() Black Knights. White armour is worn by
Black Knights. White armour is worn by ![]() White Knights of
White Knights of ![]() Falador, and a number of varieties exist, them being initiate, proselyte, acolyte and partisan armour as worn by the
Falador, and a number of varieties exist, them being initiate, proselyte, acolyte and partisan armour as worn by the ![]() Temple Knights.
Temple Knights.
Initiate armour

![]() Initiate armour is worn by Temple Knight recruits, which the player becomes after completion of
Initiate armour is worn by Temple Knight recruits, which the player becomes after completion of ![]() Recruitment Drive. It offers relatively low
Recruitment Drive. It offers relatively low ![]() Defence bonuses but this is compensated by decent
Defence bonuses but this is compensated by decent ![]() Prayer bonuses. The set consists of a
Prayer bonuses. The set consists of a ![]() sallet,
sallet, ![]() hauberk and the choice of a
hauberk and the choice of a ![]() cuisse or
cuisse or ![]() tassets. The set may be bought from
tassets. The set may be bought from ![]() Sir Tiffy Cashien in
Sir Tiffy Cashien in ![]() Falador Park, requiring no
Falador Park, requiring no ![]() Black Knight kills but requiring 20
Black Knight kills but requiring 20 ![]() Defence and 10
Defence and 10 ![]() Prayer to wear. It appears to be yellow-trimmed white armour with the stats of
Prayer to wear. It appears to be yellow-trimmed white armour with the stats of ![]() Mithril armour plus Prayer bonus.
Mithril armour plus Prayer bonus.
Proselyte armour


![]() Proselyte armour is worn by Temple Knight proselytes who have advanced in rank and requires 30
Proselyte armour is worn by Temple Knight proselytes who have advanced in rank and requires 30 ![]() Defence and 20
Defence and 20 ![]() Prayer. Players may buy the armour off
Prayer. Players may buy the armour off ![]() Sir Tiffy Cashien after completing
Sir Tiffy Cashien after completing ![]() The Slug Menace. Basically being an upgrade of
The Slug Menace. Basically being an upgrade of ![]() initiate armour, it offers both higher Defence and
initiate armour, it offers both higher Defence and ![]() Prayer bonuses. It looks like gold/orange-trimmed white armour possessing
Prayer bonuses. It looks like gold/orange-trimmed white armour possessing ![]() Adamant armour stats with Prayer.
Adamant armour stats with Prayer.
Mithril armour

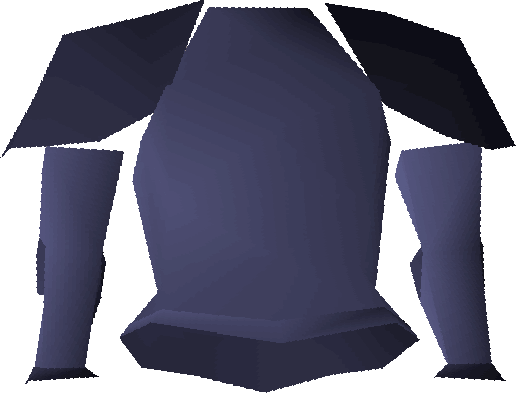
![]() Mithril is a medium level
Mithril is a medium level ![]() metal, requiring 20
metal, requiring 20 ![]() Defence to equip all pieces of the armour.
Defence to equip all pieces of the armour. ![]() Mithril bars are smelted from
Mithril bars are smelted from ![]() mithril ore and
mithril ore and ![]() coal in a 1:4 ratio.
coal in a 1:4 ratio. ![]() Mithril armour offers decent bonuses for players who can just equip it. It is generally not used by higher levelled players. A set of mithril armour may be placed in one's skill hall in a
Mithril armour offers decent bonuses for players who can just equip it. It is generally not used by higher levelled players. A set of mithril armour may be placed in one's skill hall in a ![]() POH, providing that the player has 68
POH, providing that the player has 68 ![]() smithing.
smithing.
Adamant armour

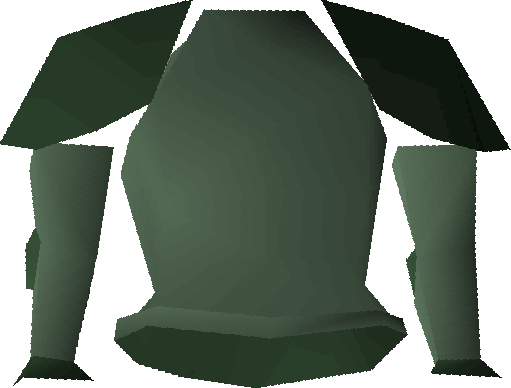
![]() Adamant armour is the second highest
Adamant armour is the second highest ![]() smithable armour and green in colour. It offers decent bonuses and is quite cheap and as such often used by
smithable armour and green in colour. It offers decent bonuses and is quite cheap and as such often used by ![]() player killers who do not want to risk losing their own armour. Adamant is extracted from
player killers who do not want to risk losing their own armour. Adamant is extracted from ![]() adamantite ore. It requires level 30
adamantite ore. It requires level 30 ![]() Defence to wield. Like
Defence to wield. Like ![]() black armour,
black armour, ![]() Treasure Trails offer variations to this armour, including gold-trimmed, white-trimmed and five sets of
Treasure Trails offer variations to this armour, including gold-trimmed, white-trimmed and five sets of ![]() heraldic armour.
heraldic armour.
Rune armour

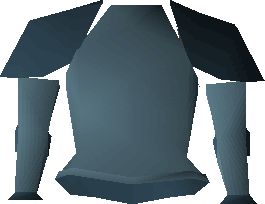
![]() Rune armour is the best armour for
Rune armour is the best armour for ![]() free-to-play that does not degrade and requires level 40
free-to-play that does not degrade and requires level 40 ![]() Defence to wear, although a smith wishing to start making runite equipment needs at least level 85
Defence to wear, although a smith wishing to start making runite equipment needs at least level 85 ![]() Smithing. Due to
Smithing. Due to ![]() runite ore being very precious, and only found in a few locations, a full set of rune armour is relatively expensive. It is often worn in
runite ore being very precious, and only found in a few locations, a full set of rune armour is relatively expensive. It is often worn in ![]() PvP situations as it provides good bonuses and is easily replaced if lost. Equipping the
PvP situations as it provides good bonuses and is easily replaced if lost. Equipping the ![]() Rune platebody requires completion of the
Rune platebody requires completion of the ![]() Dragon Slayer
Dragon Slayer ![]() quest. Rune is cyan in colour. As with
quest. Rune is cyan in colour. As with ![]() adamant and
adamant and ![]() black armour, rune armour has
black armour, rune armour has ![]() Treasure Trail variants: gold-trimmed, white-trimmed,
Treasure Trail variants: gold-trimmed, white-trimmed, ![]() gilded, five sets of
gilded, five sets of ![]() heraldic armour and six different sets of
heraldic armour and six different sets of ![]() god armour, with the colours of
god armour, with the colours of ![]() Saradomin,
Saradomin, ![]() Guthix,
Guthix, ![]() Zamorak,
Zamorak, ![]() Armadyl,
Armadyl, ![]() Zaros and
Zaros and ![]() Bandos.
Bandos.
Granite armour

![]() Granite armour is tough, resilient armour requiring not only a
Granite armour is tough, resilient armour requiring not only a ![]() Defence level of 50 to wear, but also a
Defence level of 50 to wear, but also a ![]() Strength level of 50 due to its weight. The
Strength level of 50 due to its weight. The ![]() Granite body and
Granite body and ![]() helm have slightly better bonuses than their rune counterparts and all the pieces have very high ranged Defence. Granite armour is mainly obtained from monster drops, or trading with another player. The granite body is obtained by playing
helm have slightly better bonuses than their rune counterparts and all the pieces have very high ranged Defence. Granite armour is mainly obtained from monster drops, or trading with another player. The granite body is obtained by playing ![]() Barbarian Assault and purchasing one from
Barbarian Assault and purchasing one from ![]() Commander Connad. Granite armour comes with the
Commander Connad. Granite armour comes with the ![]() granite maul.
granite maul.
Obsidian armour
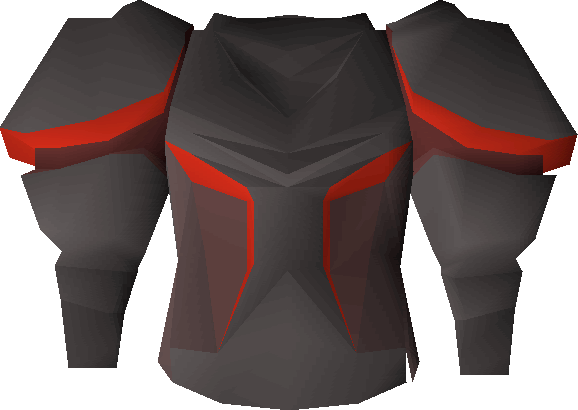

Helmet, body, legs, shield, cape
![]() Obsidian armour has moderate defensive capabilities but makes up for it with its high offensive stats with the entire set giving +12 in strength bonus. When the body, legs, and helmet are worn in conjunction with each other, all obsidian weaponry receives a +10% bonus in melee strength and melee accuracy and this bonus does stack with the 20% damage increase whilst wearing a
Obsidian armour has moderate defensive capabilities but makes up for it with its high offensive stats with the entire set giving +12 in strength bonus. When the body, legs, and helmet are worn in conjunction with each other, all obsidian weaponry receives a +10% bonus in melee strength and melee accuracy and this bonus does stack with the 20% damage increase whilst wearing a ![]() Berserker necklace. These armour pieces can all be purchased from
Berserker necklace. These armour pieces can all be purchased from ![]() TzHaar-Hur-Tel's Equipment Store in
TzHaar-Hur-Tel's Equipment Store in ![]() Mor Ul Rek with
Mor Ul Rek with ![]() Tokkul, or by fighting various
Tokkul, or by fighting various ![]() Tzhaar-kets around the city, although only the level-221 Kets drop the platebody, legs, and helmet.
Tzhaar-kets around the city, although only the level-221 Kets drop the platebody, legs, and helmet.
Dragon armour

![]() Dragon armour is one of the most sought-after armour sets and pieces of dragon equipment can cost millions of
Dragon armour is one of the most sought-after armour sets and pieces of dragon equipment can cost millions of ![]() coins. Dragon cannot be smithed by players and is only for members. The
coins. Dragon cannot be smithed by players and is only for members. The ![]() weaponry may be received as a rare drop from a very limited amount of monsters or bought from several shops (often requiring quests to be completed), while the armour is limited to the former. For example, the elusive, fabled
weaponry may be received as a rare drop from a very limited amount of monsters or bought from several shops (often requiring quests to be completed), while the armour is limited to the former. For example, the elusive, fabled ![]() Dragon full helm can be dropped by level-304
Dragon full helm can be dropped by level-304 ![]() Mithril dragons. The origins of dragon armour are unknown, but it is widely believed the
Mithril dragons. The origins of dragon armour are unknown, but it is widely believed the ![]() Dragonkin created it and brought dragon
Dragonkin created it and brought dragon ![]() metal to
metal to ![]() Gielinor. Dragon armour requires level 60
Gielinor. Dragon armour requires level 60 ![]() Defence to be worn and is very popular.
Defence to be worn and is very popular.
Fremennik armour
Yak-hide, Rockshell, Helm, Shield, Warrior helm, Berserker helm, Helm of neitiznot
Rockshell: helmet, plate, legs, gloves, boots
Yak-hide: top, legs, roundshield
Fremennik helmets
Out of the six ![]() Fremennik helmets, three are suitable for warriors. All Fremennik helms require completion of
Fremennik helmets, three are suitable for warriors. All Fremennik helms require completion of ![]() The Fremennik Trials to wear them, but the
The Fremennik Trials to wear them, but the ![]() Helm of neitiznot requires
Helm of neitiznot requires ![]() The Fremennik Isles.
The Fremennik Isles.
Fremennik helm
The ![]() Fremennik helm is the most basic helm that the Fremennik have in store and is received as a drop from
Fremennik helm is the most basic helm that the Fremennik have in store and is received as a drop from ![]() Fremennik warriors and
Fremennik warriors and ![]() Waterbirth
Waterbirth ![]() Dagannoths. Due to its low bonuses, it is generally not used by players.
Dagannoths. Due to its low bonuses, it is generally not used by players.
Warrior helm
The ![]() Warrior helm is a more popular choice of helmet, as it gives decent
Warrior helm is a more popular choice of helmet, as it gives decent ![]() Defence bonuses and a slash attack bonus. This helmet may be bought off
Defence bonuses and a slash attack bonus. This helmet may be bought off ![]() Skulgrimen or received as a drop from
Skulgrimen or received as a drop from ![]() Dagannoths.
Dagannoths.
Berserker helm

Like the ![]() Warrior helm, the
Warrior helm, the ![]() Berserker helm offers decent bonuses and a small strength bonus. This helmet can be bought as well as dropped by
Berserker helm offers decent bonuses and a small strength bonus. This helmet can be bought as well as dropped by ![]() Dagannoths. Its stats are equal to the Warrior's helm.
Dagannoths. Its stats are equal to the Warrior's helm.
Helm of Neitiznot
The ![]() Helm of Neitiznot is by far the most popular
Helm of Neitiznot is by far the most popular ![]() Fremennik helm. Not only does it yield higher bonuses than the other helms, it also has an additional
Fremennik helm. Not only does it yield higher bonuses than the other helms, it also has an additional ![]() Prayer bonus and strength bonus. It is received from
Prayer bonus and strength bonus. It is received from ![]() Mawnis Burowgar, the burgher of
Mawnis Burowgar, the burgher of ![]() Neitiznot, after completion of
Neitiznot, after completion of ![]() The Fremennik Isles and may be re-obtained from him if lost.
The Fremennik Isles and may be re-obtained from him if lost.
Yak-hide armour

![]() Yak-hide armour and the
Yak-hide armour and the ![]() Fremennik round shield are relatively weak, but valuable against
Fremennik round shield are relatively weak, but valuable against ![]() Ice trolls, as the armour lowers the maximum hit of the
Ice trolls, as the armour lowers the maximum hit of the ![]() males, and the shield lowers the maximum hit of the
males, and the shield lowers the maximum hit of the ![]() females. They are made during
females. They are made during ![]() The Fremennik Isles from
The Fremennik Isles from ![]() yak-hide and split
yak-hide and split ![]() Arctic pine logs. It has poor bonuses, meaning it is not used very often.
Arctic pine logs. It has poor bonuses, meaning it is not used very often.
Rock-shell armour

![]() Rock-shell armour is very similar to
Rock-shell armour is very similar to ![]() Rune armour. It is made from hides and rocks dropped by
Rune armour. It is made from hides and rocks dropped by ![]() Dagannoths and
Dagannoths and ![]() Giant rock crabs, respectively. It's not very widely used due to the difficulty to obtain and the existence of better armour.
Giant rock crabs, respectively. It's not very widely used due to the difficulty to obtain and the existence of better armour.
Void Knight equipment

![]() Void melee helm,
Void melee helm, ![]() Void knight top,
Void knight top, ![]() Void knight robe &
Void knight robe & ![]() Void knight gloves
Void knight gloves
![]() Void knight robes requires 42
Void knight robes requires 42 ![]() Attack,
Attack, ![]() Strength,
Strength, ![]() Defence,
Defence, ![]() Ranged,
Ranged, ![]() Hitpoints and
Hitpoints and ![]() Magic, and it also requires 22
Magic, and it also requires 22 ![]() Prayer. However, you need 850
Prayer. However, you need 850 ![]() Pest Control points. The
Pest Control points. The ![]() Melee helm grants the player a +10% bonus towards accuracy and damage, if the player is wearing the rest of the Void Knight equipment.
Melee helm grants the player a +10% bonus towards accuracy and damage, if the player is wearing the rest of the Void Knight equipment.
As some players find it more effective to wear other full sets of ![]() armour, such as
armour, such as ![]() Bandos or
Bandos or ![]() Barrows armour, than a full set of Void Knight armour due to the Defence bonuses, this item is not frequently bought. However, those who do buy it can see a higher max hit and a higher average hit. Additionally, it
Barrows armour, than a full set of Void Knight armour due to the Defence bonuses, this item is not frequently bought. However, those who do buy it can see a higher max hit and a higher average hit. Additionally, it ![]() classes as a
classes as a ![]() hybrid set (besides the helmet), and as such gives equal Magic, Ranged and
hybrid set (besides the helmet), and as such gives equal Magic, Ranged and ![]() Melee Defence, thus making it an alternative choice in
Melee Defence, thus making it an alternative choice in ![]() minigames where hybridding is common.
minigames where hybridding is common.
Note that the armour is only Melee-based if you are wearing the ![]() Melee helm; if you are, your Melee damage is increased by 10%.
Melee helm; if you are, your Melee damage is increased by 10%.
3rd age melee armour
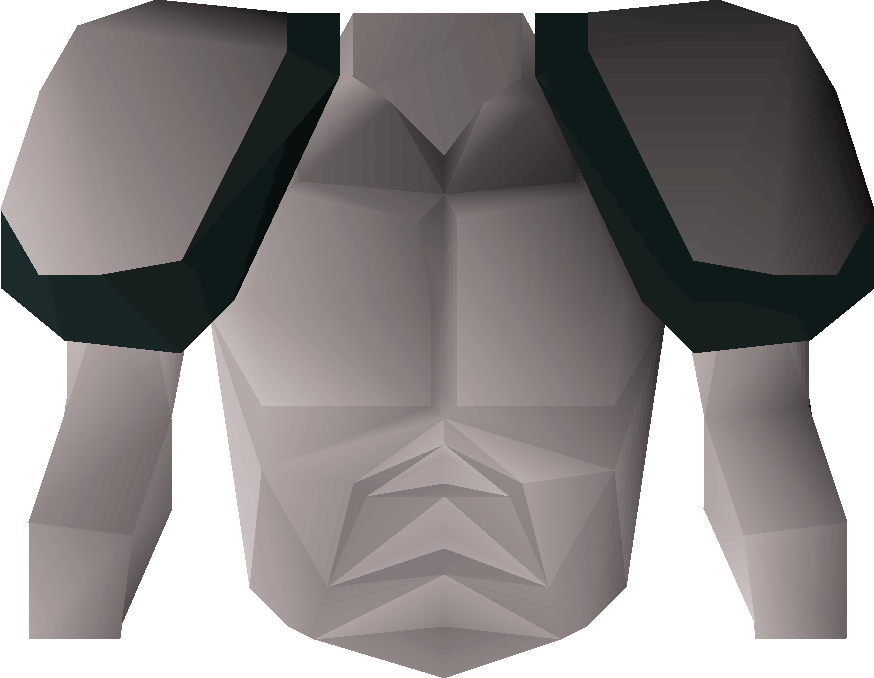
![]() Armour from the 3rd age is incredibly rare. However, both
Armour from the 3rd age is incredibly rare. However, both ![]() Justiciar armour and
Justiciar armour and ![]() Barrows armour have higher defensive bonuses and
Barrows armour have higher defensive bonuses and ![]() Bandos armour is generally favoured for its
Bandos armour is generally favoured for its ![]() strength bonuses despite the lower defensive bonuses. 3rd age armour can only be obtained through
strength bonuses despite the lower defensive bonuses. 3rd age armour can only be obtained through ![]() Treasure Trails, or by buying from another player.
Treasure Trails, or by buying from another player.
Bandos armour
![]() Bandos armour is very strong armour, providing excellent defensive bonuses. Bandos armour is one of the best armours in the game. Bandos armour is dropped by
Bandos armour is very strong armour, providing excellent defensive bonuses. Bandos armour is one of the best armours in the game. Bandos armour is dropped by ![]() General Graardor (who wears the armour himself) and his sergeants in Bandos's Stronghold in the
General Graardor (who wears the armour himself) and his sergeants in Bandos's Stronghold in the ![]() God Wars Dungeon, requiring level 70
God Wars Dungeon, requiring level 70 ![]() Strength to enter, as well as having killed forty Bandosians in the dungeon.
Strength to enter, as well as having killed forty Bandosians in the dungeon.
Barrows armour
Guthan's, Dharok's, Torag's, Verac's
Helmet, platebody/brassard, platelegs/plateskirt/chainskirt, (weapon: greataxe/warspear/hammers/flail)
![]() Barrows armour is very strong and popular. It is obtained from the
Barrows armour is very strong and popular. It is obtained from the ![]() Barrows
Barrows ![]() minigame, or from trading with another player. If the player wears all the items from one of the brothers' armour sets (including the
minigame, or from trading with another player. If the player wears all the items from one of the brothers' armour sets (including the ![]() weapon), they have a chance of activating a set effect. Barrows armour needs to be repaired every 15 hours of
weapon), they have a chance of activating a set effect. Barrows armour needs to be repaired every 15 hours of ![]() combat for a price. This can be done on an
combat for a price. This can be done on an ![]() armour stand (with discounts based on one's
armour stand (with discounts based on one's ![]() Smithing level) or by speaking to
Smithing level) or by speaking to ![]() Bob in
Bob in ![]() Lumbridge.
Lumbridge.
Guthan's armour
The ![]() armour set of
armour set of ![]() Guthan the Infested has a very desirable bonus effect, as it has a chance of healing the wearer when they deal damage. The weapon of the set is a long warspear.
Guthan the Infested has a very desirable bonus effect, as it has a chance of healing the wearer when they deal damage. The weapon of the set is a long warspear.
Dharok's armour
![]() Dharok the Wretched's equipment set effect has a useful, but dangerous set effect. The lower the wearer's health, the higher his/her maximum hit is.
Dharok the Wretched's equipment set effect has a useful, but dangerous set effect. The lower the wearer's health, the higher his/her maximum hit is.
Torag's armour
![]() Torag the Corrupted's equipment set effect is the chance to drain run energy from the target with each hit.
Torag the Corrupted's equipment set effect is the chance to drain run energy from the target with each hit.
Verac's armour
The set effect of ![]() the armour of
the armour of ![]() Verac the Defiled is useful when fighting another player or the
Verac the Defiled is useful when fighting another player or the ![]() Kalphite Queen, as it hits through
Kalphite Queen, as it hits through ![]() Prayer and armour.
Prayer and armour.
Justiciar armour
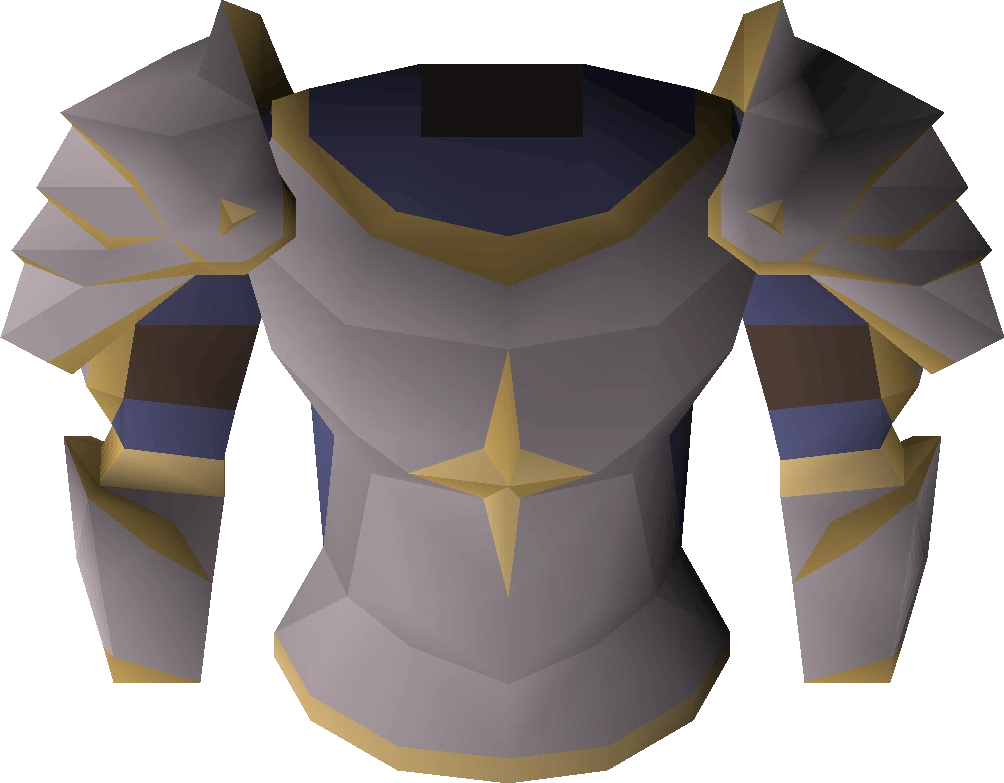
![]() Justiciar armour possesses the best defensive bonuses in the game for melee and ranged. The armour requires level 75 in
Justiciar armour possesses the best defensive bonuses in the game for melee and ranged. The armour requires level 75 in ![]() Defence to wear, and possesses a
Defence to wear, and possesses a ![]() set effect that reduces damage taken when the player wears the full set. Justiciar armour can only be obtained through completing the
set effect that reduces damage taken when the player wears the full set. Justiciar armour can only be obtained through completing the ![]() Theatre of Blood, or by buying from another player.
Theatre of Blood, or by buying from another player.
Toktz-ket-xil

Buy one from ![]() TzHaar-Hur-Tel's Equipment Store in
TzHaar-Hur-Tel's Equipment Store in ![]() Mor Ul Rek, trade with another player or obtain one as a rare monster drop from a
Mor Ul Rek, trade with another player or obtain one as a rare monster drop from a ![]() TzHaar-Ket. This
TzHaar-Ket. This ![]() Toktz-ket-xil is extremely popular amongst mid-level warriors who are unable to afford a better-suited shield for their level, and because it also possesses a strength bonus, it is often used by those who cannot currently gain access to the Warriors Guild but have the defence level requirement of 60 to use it.
Toktz-ket-xil is extremely popular amongst mid-level warriors who are unable to afford a better-suited shield for their level, and because it also possesses a strength bonus, it is often used by those who cannot currently gain access to the Warriors Guild but have the defence level requirement of 60 to use it.
Crystal shield
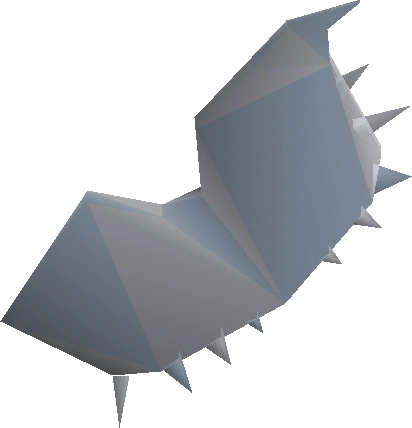
The ![]() Crystal shield is a high-level piece of
Crystal shield is a high-level piece of ![]() armour which, similar to barrows equipment, will degrade after use and must be recharged. Boasting a very high ranged defence bonus, It requires completion of
armour which, similar to barrows equipment, will degrade after use and must be recharged. Boasting a very high ranged defence bonus, It requires completion of ![]() Roving Elves, 70
Roving Elves, 70 ![]() Defence, and 50
Defence, and 50 ![]() Agility to wield.
Agility to wield.
Dragonfire shield
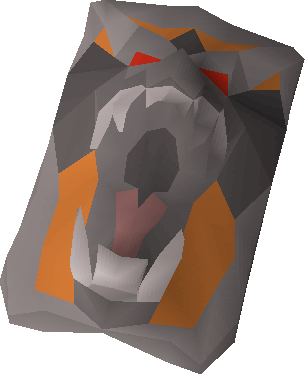
The ![]() Dragonfire shield is a high-level piece of armour. It provides protection not only from
Dragonfire shield is a high-level piece of armour. It provides protection not only from ![]() dragonfire but also the icy breath of the
dragonfire but also the icy breath of the ![]() Skeletal Wyvern. It functions differently by absorbing the aforementioned, acquiring
Skeletal Wyvern. It functions differently by absorbing the aforementioned, acquiring ![]() charges and thereby increasing in defensive bonuses while protecting the player. It can then be discharged to release a viscous burning attack.
charges and thereby increasing in defensive bonuses while protecting the player. It can then be discharged to release a viscous burning attack.
Spirit shields

Plain, Blessed, Arcane, Elysian, Spectral
![]() Spirit shields are a range of shields available to members after the
Spirit shields are a range of shields available to members after the ![]() Corporeal Beast update. The shields are all derived from the
Corporeal Beast update. The shields are all derived from the ![]() "basic" one. Some
"basic" one. Some ![]() holy elixir, dropped by the Corporeal Beast, must be poured onto it to
holy elixir, dropped by the Corporeal Beast, must be poured onto it to ![]() bless it, increasing its stats and value. The spirit
bless it, increasing its stats and value. The spirit ![]() sigils are items which can be added to a
sigils are items which can be added to a ![]() blessed spirit shield to modify its abilities even further. These sigils are
blessed spirit shield to modify its abilities even further. These sigils are ![]() arcane,
arcane, ![]() elysian and
elysian and ![]() spectral. The
spectral. The ![]() elysian spirit shield has a special effect that reduces the amount of damage taken
elysian spirit shield has a special effect that reduces the amount of damage taken
The basic spirit shield requires level 45 ![]() Defence and level 55
Defence and level 55 ![]() Prayer to hold, the blessed one requires 70 Defence and level 60 Prayer, arcane and spectral spirit shield 75 Defence, 70 Prayer and 65 Magic, and elysian requires 75 Defence and 75 Prayer.
Prayer to hold, the blessed one requires 70 Defence and level 60 Prayer, arcane and spectral spirit shield 75 Defence, 70 Prayer and 65 Magic, and elysian requires 75 Defence and 75 Prayer.
Best F2P melee armour setup
|
|
||||||
|
|
|
| ||||
|
|
|
| ||||
|
|
||||||
|
|
|
| ||||
| Best F2P Melee Armour | ||||||
|---|---|---|---|---|---|---|
Notes
- You will have to set up a 2-step verification for your account to obtain fancy boots or fighting boots from the Stronghold of Security; however, you can disable this after you obtain the boots. Remember if you lose your boots and disabled 2-step verification that you will need to re-enable the verification in order to get them back.
- An amulet of power is better to use for players who expect to be training on enemies with high Defence, otherwise amulet of strength is better.
- All F2P rune god armours have the same stats, and the only reason it is better than rune armour is because of its +1 Prayer bonus on each armour piece creating a total of a +4 Prayer bonus.
- Fancy boots and fighting boots have the same stats.
- All team capes and regular capes have the same stats.
- Currently, there are no rings in F2P that give any stat increases.
Best P2P melee strength setup
|
|
||||||
|
|
|
| ||||
|
|
|
| ||||
|
|
||||||
|
|
|
| ||||
| Best P2P Strength Armour | ||||||
|---|---|---|---|---|---|---|
Notes
- The fighter torso gives the same Strength bonus.
- The amulet of torture has better offensive stats than the amulet of fury yielding; +15 across all attack bonuses, however, has no defensive bonuses. Where the amulet of fury has +15 in all defensive stats, it has a +2 difference in Strength bonus.
- The slayer helmet or black mask will give a higher Strength bonus if on task.