(Undid revision 7425120 by Flarker8000 (talk)) |
m (Reverting vandalism) |
||
| Line 1: | Line 1: | ||
| + | {{External|rs}} |
||
| − | + | [[File:Balloon transport system.png|thumb|250px|A hot air balloon.]] |
|
The '''Balloon Transport System''' or '''Hot Air Balloon''' is one of several [[transportation]] modes in ''[[RuneScape]]''. During the [[Enlightened Journey]] [[quest]], it can be used for travel between two locations. After the quest is complete, four more locations are available to be unlocked by completing respective journeys to those locations. The track "[[Floating Free]]" plays during the journey. |
The '''Balloon Transport System''' or '''Hot Air Balloon''' is one of several [[transportation]] modes in ''[[RuneScape]]''. During the [[Enlightened Journey]] [[quest]], it can be used for travel between two locations. After the quest is complete, four more locations are available to be unlocked by completing respective journeys to those locations. The track "[[Floating Free]]" plays during the journey. |
||
| Line 179: | Line 180: | ||
{{Enlightened Journey}} |
{{Enlightened Journey}} |
||
| − | |||
[[Category:Transportation]] |
[[Category:Transportation]] |
||
Revision as of 20:15, 26 October 2018

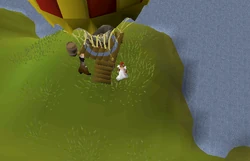
A hot air balloon.
The Balloon Transport System or Hot Air Balloon is one of several transportation modes in RuneScape. During the Enlightened Journey quest, it can be used for travel between two locations. After the quest is complete, four more locations are available to be unlocked by completing respective journeys to those locations. The track "Floating Free" plays during the journey.
Requirements
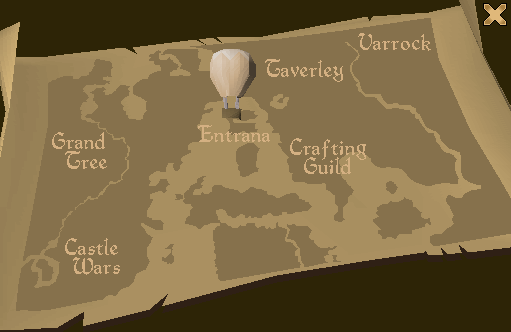
There are currently six locations that can be flown to, each needing a specific type of log and Firemaking level to attempt the flight. The player may not carry over 40 kilograms of weight when using the balloon. This weight limit does not include the log used to make the journey.
After completing the Enlightened Journey quest, a player can travel between Entrana and Taverley. To unlock the four new routes, a player must first start from Entrana with the required new logs, and navigate successfully through three screens to a new destination. Crashing the balloon will result in the loss of the remaining logs, and the need to start again in Entrana with a new set of logs. Once a destination is unlocked, players may travel there from any other unlocked location, using fewer logs, and without navigating the three screens.
| Destination | Initial Trip | Firemaking Level | Subsequent Trips | NPC |
|---|---|---|---|---|
| Entrana | Build balloon (during Quest) | 20 | 1 Normal log | Auguste |
| Taverley | 10 Normal logs (during Quest) | 20 | 1 Normal log | Assistant Stan |
| Crafting Guild | 10 Oak logs | 30 | 1 Oak log | Assistant Brock |
| Varrock - south of Lumber Yard | 10 Willow logs | 40 | 1 Willow log | Assistant Serf |
| Castle Wars | 10 Yew logs | 50 | 1 Yew log | Assistant Marrow |
| Grand Tree | 3 Magic logs | 60 | 1 Magic log | Assistant Le Smith |
Note: For each of the 4 new routes that is unlocked, a player receives 2,000 Firemaking experience. Going back to Entrana to unlock the other destinations requires 1 normal log. Each Firemaking level requirement can be boosted.
Ballooning
See the quest Ballooning section for a review of flying a balloon.
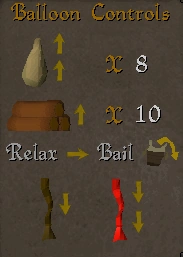
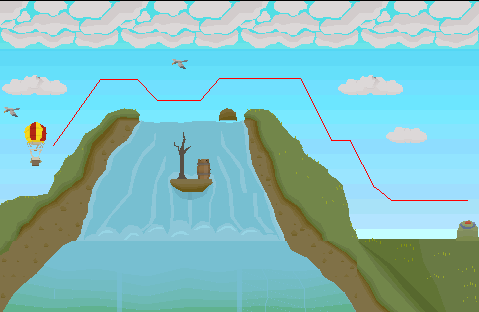
- Each control always moves one "space" forward (horizontally to the right), and either up, down, or without change in altitude.
- Drop sandbag: moves up two spaces (UP 2).
- Burn log: moves up one space (UP 1).
- Relax: moves straight forward with no change in altitude (RIGHT).
- Pull normal rope: moves down one space (DOWN 1).
- Pull red rope: moves down two spaces (DOWN 2).
- Bail: bails out the player from the balloon flight. (Note: "Crashes" east of Falador and west of Draynor Manor.)
Destinations
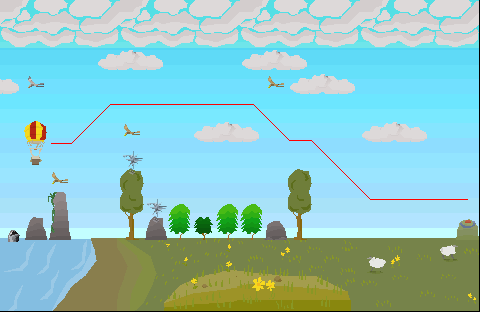
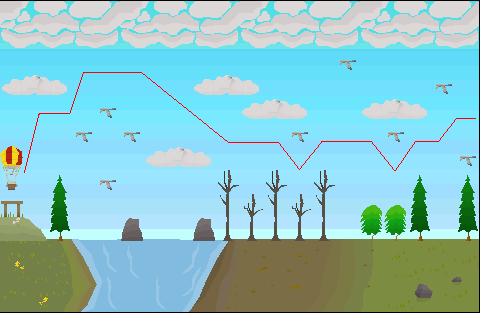
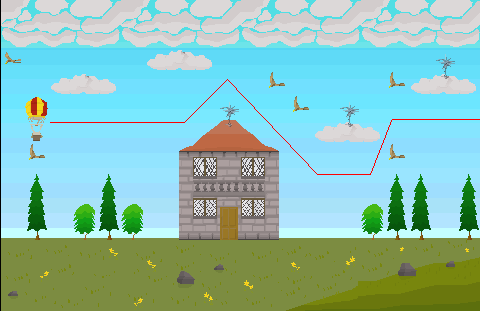
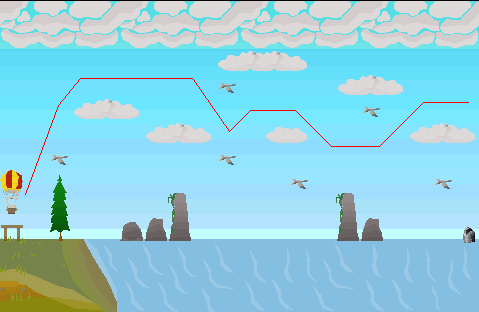
There are six locations the balloons can fly to: Entrana, Taverley, Crafting Guild, Varrock, Castle Wars, and the Grand Tree. Entrana and Taverley are available after completing the Enlightened Journey quest.
Entrana is also the main entry point to unlock routes to new locations. A player must start at the Entrana site carrying the appropriate logs.
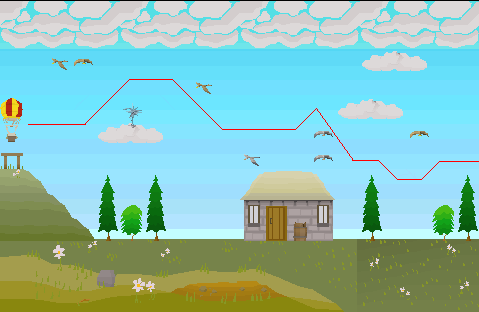
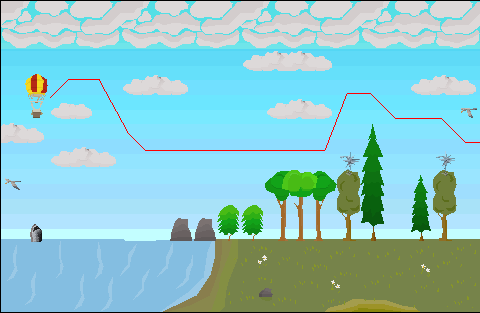
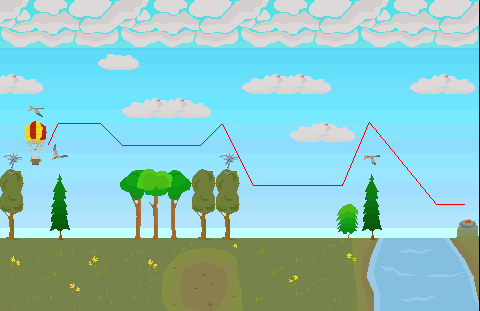
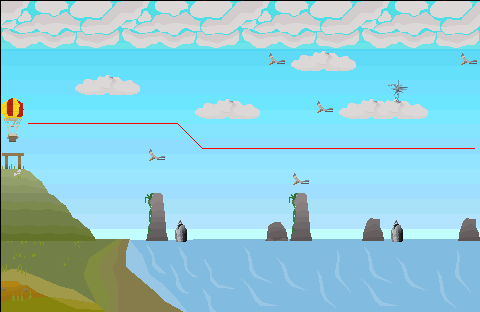
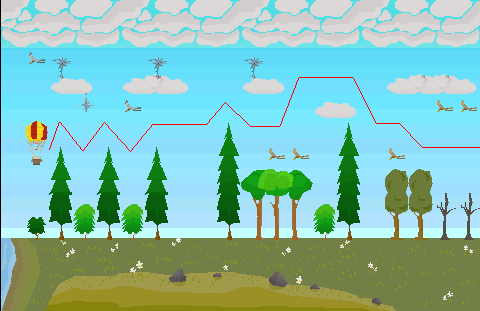
For the first trip, a player needs to navigate through three screens avoiding birds, clouds, buildings, trees, and other hazards. Once the player completes the journey, the subsequent trips do not require navigation, and the trip requires only one log of the appropriate type.
If you log out during one of these screens, you will have to get new logs and start over.
")
")
")
")
")
")
Future destinations
- There are several rocks that look exactly like the balloon landing sites before completing Enlightened Journey.
- In the Rellekka Hunter area, there is a snow or ice covered stone landing pad rock in the north-east.
Walkthrough
The following sections show one of several possible methods to get to the final destination.
Entrana
- Entrana is the starting point for the Enlightened Journey quest, where a player begins the construction of the balloon transport system.
- The Entrana balloon is located north-west of the dock, and just north of the Herblore shop.
- As a starting point, there are no screen routes available for Entrana.
- Unlocked upon the completion of Enlightened Journey, subsequent trips to Entrana require one normal log.
- Requires Firemaking level 20.
- Entrana contains the law altar (for making law runes via Runecrafting), spawn points for seaweed, and a sandpit (for collecting buckets of sand), making it a popular location for glass crafting.
- Note: weapons and armour are not allowed on Entrana, including axes.
Taverley
- Taverley was made available during the quest, and the screen routes are available at the Flying to Taverley section.
- The Taverley balloon is located south of the Herblore shop, north-west from Falador, and is on the island with the Lady of the Lake.
- Initial requirement is 10 normal logs, subsequent trips to Taverley require one normal log.
- Requires Firemaking level 20.
Crafting Guild
- Initial requirement is 10 oak logs, subsequent trips to Crafting Guild require one oak log.
- The Crafting Guild balloon is located just north of the Crafting Guild, and south-west of Falador.
- Requires Firemaking level 30.
| Screen 1 | Screen 2 | Screen 3 |
|---|---|---|
 |
 |
 |
|
|
|
Varrock
- Initial requirement is 10 willow logs, subsequent trips to Varrock require 1 willow log
- Requires Firemaking level 40.
- The Varrock balloon is located east of Varrock Palace, just south of the Lumber Yard, and north-west of the Earth Altar.
| Screen 1 | Screen 2 | Screen 3 |
|---|---|---|
 |
 |
 |
|
|
|
Castle Wars
- Initial requirement is 10 yew logs, subsequent trips to Castle Wars require one yew log.
- Requires Firemaking level 50.
- The Castle Wars balloon is located just north-east of Castle Wars, and west of Yanille.
| Screen 1 | Screen 2 | Screen 3 |
|---|---|---|
 |
 |
 |
|
|
|
Grand Tree
- The Grand Tree is where most of the gnomes live. It is located in the north-east section of the Tree Gnome Stronghold.
- The balloon landing site is just south-east of the main entrance. This site is close to all the shops and food services of the Grand Tree, two banks, both a tree and fruit tree farming patch, and the Gnome Stronghold Agility Course.
- It has close access to a Spirit tree and Gnome glider.
- Initial requirement is three magic logs, subsequent trips to the Grand Tree require one magic log.
- Requires Firemaking level 60.
- Note: The third screen of this path is very graphically intensive and may cause your game client to freeze/disconnect, forcing you to go back to Entrana and start over. It is still possible to complete the path though. Turn your graphic settings to "Minimum" and be patient on the final screen, as the game will likely freeze momentarily after every couple of moves. It is recommended to bring extra sets of logs with you to save time.
| Screen 1 | Screen 2 | Screen 3 |
|---|---|---|
 |
 |
 |
|
|
|
Uses of the balloon transport system
There is a maximum weight requirement (40 kg) that acts as a slight disadvantage of the balloon transport system. The main uses of the balloon transport system are in combination with the use of a Ring of dueling teleport to Castle Wars for banking. Typical trips start at Castle Wars bank, which has an entry to the balloon transport system close by. A trip can also start at Grand Tree if a player teleports there by using a spirit tree (the balloon is just north-east).
Each balloon transport system destination has a crate which may be used to store up to 100 logs of each kind listed below. The logs may be brought noted to the crate for faster deposits. All the crates share the same inventory of logs.
Examples of round trips to balloon transport system destinations, and possible activities are presented in the table below:
| Destination | Cost | Activity |
|---|---|---|
| Entrana | 1 log | Law Runecrafting at Law altar, hops patch, buy vials, sandpit (Note: No weapons or armour allowed, including axes.) |
| Taverley | 1 log | Access to a tree patch, the crystal key chest, and a POH portal. Buy vials |
| Crafting Guild | 1 Oak log | Mining ores at Crafting Guild & Rimmington Mine (Tip: Using the Magic spell Superheat item GREATLY decreases the weight for return trips), berry patch at Rimmington, also POH portal. Close to Port Sarim. |
| Varrock | 1 Willow log | Earth Runecrafting at Earth altar, access alternate entrance for chaos Runecrafting at Chaos altar, Sawmill, Woodcutting (yew logs). |
| Castle Wars | 1 Yew log | Closest to a bank, often used as entry point into the balloon network in conjunction with a Ring of dueling. |
| Grand Tree | 1 Magic log | Tree patch, fruit tree patch, Spirit Tree teleport, Gnome Gliders, Gnome Stronghold Agility Course, Monkey Madness II quest |
As one example, a player can equip Boots of lightness, a Spotted cape, an Earth tiara, and rune essence at Castle Wars, leaving one inventory space free:
- Craft earth runes at the Earth altar, which is also right next to the balloon. You could also use the Chaos altar just a little farther away, but its maze means a lot more running.
- Step back out of the earth altar, and cut oak logs near the Sawmill. Turn them into oak planks, but leave one space free. Planks weigh less than logs, so even a full load is doable with minor weight-reducing items, such as the Boots of lightness or Graceful clothing.
- Fly to Castle Wars and bank.
Repeat as needed for a much faster way to get both oak planks for Construction, and that always-tiring Runecrafting experience, using less time and running energy than other plank or Runecrafting options. Alternatively, players may stock up on willow logs in advance, and use a Ring of dueling rather than a yew log to return to Castle Wars.
Another use for the transport system is that it is a requirement for Monkey Madness II, as it requires you to use the Grand Tree route to start the quest.
See also
| NPCs | |||||
| Items |
| ||||
| Rewards | |||||
| Music | |||||
| Related |
Quick Guide • Balloon transport system • Transcript | ||||