BladededHero4 (talk | contribs) (Updating price) |
m (cleanup) |
||
| (6 intermediate revisions by 6 users not shown) | |||
| Line 1: | Line 1: | ||
| + | {{External|rs}} |
||
| − | #REDIRECT [[Spade]] |
||
| + | {{Otheruses|the [[strongest]] class of monsters}} |
||
| + | [[File:Boss.png|left]] |
||
| + | A '''boss''' is a powerful, usually unique [[monster]] that is fought to accomplish an objective, be it the advancement or completion of a [[quest]] or [[minigame]], or as part of a team [[Monster killing|player-versus-monster]] event. Many quests feature boss fights at their climaxes; such bosses are often the main antagonists of the quests or quest series, or are somehow related to the main antagonist(s). Some monsters that are commonly referred to as bosses are very powerful monsters that reside in [[Multi-combat area|multi-combat areas]]; these monsters are commonly fought by teams of players in search of highly valuable [[drops]]. Many bosses have extremely high [[Combat level|combat levels]], and most of the [[strongest monsters]] in the game are bosses. |
||
| + | |||
| + | [[Dwarf multicannons]] often cannot be set up in the areas of many bosses. Others may have different restrictions; for example, [[Prayer]] cannot be used during the fights with the final bosses of [[Recipe for Disaster]]. |
||
| + | |||
| + | Most bosses (e.g. bosses like the [[Corporeal Beast]]) also reside in a multi-way area; very few reside in [[single-way]] areas or instances. Bosses that are killed in multi-way areas will also generate a message telling the player what drop(s) they have obtained, regardless if there are other players around or not. For example, if players are at [[General Graardor]] and kill him (and drops [[Bandos tassets]]), a message will appear in the game box saying "Player name received item: Bandos tassets". If a boss is killed in a single-way area, this message will not appear, even if the boss resides in a multi-way area and is killed in a single-way zone. |
||
| + | |||
| + | ==Common PvM bosses== |
||
| + | The monsters included in this section wouldn't better fit in any other categories, and are located in some spot in the game-world that are accessible/reachable to anyone, without any restrictions. However, despite their accessibility, many players prefer to have certain [[Achievement diary|diaries]] done before killing these with dedication, since the rewards from those [[Diaries]] can be game-changing in the long-run: those rewards could range from making it significantly easier to access the Boss to making the manner in which you earn the drops, from these bosses, significantly more convenient. |
||
| + | [[File:Giant Mole.png|thumb|279x279px|The around its ra]] |
||
| + | *The '''[[Giant Mole]]''' is, true to its name, an enormous mole, level 230, that lives in [[Falador Mole Lair|its lair]] under [[Falador Park]]. A [[light source]] is required to fight it. During [[combat]], the Giant Mole attacks with [[Melee]] and burrows around its rather large lair. Its chief drops, [[mole skin]] and [[mole claws]], may be given to [[Wyson the gardener]] in exchange for [[Bird's nest|bird's nests]]. |
||
| + | *The '''[[Kalphite Queen]]''' is the ruler of the [[kalphites]]; she can be found at the bottom of the [[Kalphite Lair]] in the [[Kharidian Desert]]. Unlike many other bosses, she has two forms, both of which are level 333, and she uses [[protection prayers]] to block different attack styles. Her attacks are extremely accurate and very deadly for players who are unprepared for them. She drops the [[dragon chainbody]] and [[Dragon 2h sword|Dragon 2h sword]]; she also drops [[Kq head|her head]], which can be mounted in a [[player-owned house]]. |
||
| + | *Three level 303 '''[[Dagannoth Kings]]''' lair deep under [[Waterbirth Island]]. Each uses a different combat style: '''[[Dagannoth Supreme]]''' attacks with [[Ranged]], '''[[Dagannoth Rex]]''' attacks with [[Melee]], and '''[[Dagannoth Prime]]''' attacks with [[Magic]]. Altogether, the Kings drop several unique items, such as [[Seercull]], [[Dragon axe|Dragon axes]], [[Berserker ring|Berserker rings]] and [[Mud battlestaff|Mud battlestaves]]. They also drop a variety of [[Fremennik]]-related arms and armour, such as [[Archer helm|Archer helms]] and [[Skeletal armour]]. |
||
| + | |||
| + | == God Wars Dungeon generals == |
||
| + | <choose> |
||
| + | <option>[[File:Commander Zilyana.png|thumb|200px|[[Commander Zilyana]], holy champion of [[Saradomin]]]]</option> |
||
| + | <option>[[File:K'ril Tsutsaroth.png|thumb|250px|[[K'ril Tsutsaroth]], foul champion of [[Zamorak]]]]</option> |
||
| + | <option>[[File:General Graardor.png|thumb|200px|[[General Graardor]], powerful champion of [[Bandos]]]]</option> |
||
| + | <option>[[File:Kree'arra.png|thumb|300px|[[Kree'arra]], majestic champion of [[Armadyl]]]]</option> |
||
| + | </choose> |
||
| + | For each warring deity in the [[God Wars Dungeon]], there is a very powerful leader commonly referred to as a 'general'. Each general also has three bodyguards, one of which uses each style of combat: [[Melee]], [[Magic]] and [[Ranged]]. In addition to the 60 [[Strength]] or 60 [[Agility]] required to enter the God Wars Dungeon, each general's encampment has further requirements to enter. |
||
| + | |||
| + | *'''[[Commander Zilyana]]''' is the level 596 [[Icyene]] general of [[Saradomin]], attacking rapidly and accurately with both Melee and Magic. Her bodyguards are [[Starlight]], [[Growler]] and [[Bree]]. She drops the [[Saradomin hilt]], and she and her bodyguards drop the [[Saradomin sword]] and [[Armadyl crossbow]]. 70 [[Agility]] is required to enter the [[Saradomin Encampment]]. Two [[Rope|ropes]] are needed to access her chamber if entering her encampment for the first time. |
||
| + | *'''[[K'ril Tsutsaroth]]''' is the level 650 [[Greater demon|demonic]] general of [[Zamorak]]. He is extremely [[poisonous]] and can hit through [[protection prayers]] with his powerful Melee and Magic attacks. His bodyguards are the [[demons]] [[Tstanon Karlak]], [[Zakl'n Gritch]] and [[Balfrug Kreeyath]]. He drops the [[Zamorak hilt]], and he and his bodyguards also drop the [[Zamorakian spear]] and [[Staff of the dead]]. Entering the [[Zamorak's Fortress|Zamorakian encampment]] requires 70 [[Hitpoints]] (boostable) |
||
| + | *'''[[General Graardor]]''' is one of the last known living [[ourgs]], although he may very well be the only ourg in existence. He is the level 624 general of [[Bandos]] and is the most popular God Wars Dungeon general to kill, despite his devastating Melee and Ranged attacks. His bodyguards are [[Sergeant Strongstack]], [[Sergeant Grimspike]] and [[Sergeant Steelwill]]. Along with the [[Bandos hilt]], General Graardor and his bodyguards drop pieces of [[Bandos armour]]. 70 [[Strength]] and a [[hammer]] ([[Dragon warhammer]] also works) are required to enter the [[Bandos Stronghold|Bandos encampment]]. |
||
| + | *'''[[Kree'arra]]''' the [[Aviansie]] is the level 580 general of [[Armadyl]]. Being a guardian and leader of the [[Aviantese]], he cannot be attacked with [[Melee weapons]], though he uses all three styles himself. His bodyguards are [[Flight Kilisa]], [[Flockleader Geerin]] and [[Wingman Skree]]. Kree'arra himself drops the highly valuable [[Armadyl hilt]], and he and his bodyguards drops pieces of [[Armadyl armour]]. Entering [[Armadyl's Eyrie|Armadyl's encampment]] requires 70 [[Ranged]] and a [[mithril grapple]]. |
||
| + | [[File:Great Olm.png|thumb|The [[Great Olm]], the final boss in the Chambers of Xeric and the third strongest monster in the game.|293x293px]] |
||
| + | == Raids' bosses == |
||
| + | *'''[[Chambers of Xeric]]''' is where the raids activity takes place featuring multiple bosses with many mechanics. This uses a score system which improves the chance of receiving unique loot, such as [[dragon claws]] and [[twisted bow]]. A raid can contain any of the five sub-bosses ([[Vasa Nistirio]], [[Tekton]], [[Vespula]], [[Vanguard]], and the [[Muttadile]]), but the final boss will always be [[Great Olm]]. |
||
| + | |||
| + | [[File:Verzik Vitur (final form).png|thumb|Verzik Vitur, the final boss in the Theatre of Blood and strongest monster in the game.|222x222px]] |
||
| + | *'''[[Theatre of Blood]]''' is where the raids activity takes place featuring multiple bosses with many mechanics. This uses a performance system, where the better the player performs, the more likely they are to obtain a drop, such as [[justiciar armour]] and [[scythe of vitur]]. These raids always contain five sub-bosses in the following order ([[The Maiden of Sugadinti]], [[Pestilent Bloat]], [[Nylocas Vasilias]], [[Sotetseg]], [[Xarpus]]), with the final boss being [[Verzik Vitur]]. |
||
| + | |||
| + | ==Wilderness bosses & demi-bosses== |
||
| + | ===Bosses=== |
||
| + | All of the [[Wilderness bosses]] (''not'' demi-bosses) can drop the [[Dragon pickaxe]]. |
||
| + | {| class="wikitable sortable" |
||
| + | ! Name |
||
| + | ! Image |
||
| + | ! Level |
||
| + | ! Hitpoints |
||
| + | ! Attack style |
||
| + | ! Location |
||
| + | ! Notes |
||
| + | |- |
||
| + | |[[Chaos Elemental]] |
||
| + | | [[File:Chaos Elemental.png|centre|150px]] |
||
| + | | 305 |
||
| + | | 250 |
||
| + | | [[Magic]], [[Ranged]], [[Melee]] |
||
| + | | West of the [[Rogues' Castle]] |
||
| + | | It can hit up to 28 in all three [[combat styles]]. |
||
| + | Unique drop: [[File:Pet chaos elemental.png]] [[Pet chaos elemental]] |
||
| + | |- |
||
| + | |[[King Black Dragon]] |
||
| + | | [[File:King Black Dragon.png|centre|163x163px]] |
||
| + | | 276 |
||
| + | | 255 |
||
| + | | [[Melee]], [[Dragonfire]] (long-ranged) |
||
| + | | [[King Black Dragon Lair|His lair]], located deep in the [[Wilderness]] |
||
| + | | A particularly strong [[black dragon]] that is capable of various [[dragonfire]] attacks that can [[poison]], [[Stun (status)|stun]] and freeze. |
||
| + | Unique drops: [[File:Prince black dragon.png]] [[Prince black dragon]] [[File:Kbd heads.png]] [[Kbd heads]] |
||
| + | |- |
||
| + | |[[Callisto]] |
||
| + | | [[File:Callisto.png|centre|150px]] |
||
| + | | 470 |
||
| + | | 255 |
||
| + | | [[Melee]], [[Magic]] |
||
| + | | South of [[Demonic Ruins]] |
||
| + | | It can hit through [[Prayer]] and knock players backwards. |
||
| + | Unique drop: [[File:Tyrannical ring.png]] [[Tyrannical ring]] |
||
| + | |- |
||
| + | |[[Vet'ion]] |
||
| + | | [[File:Vet'ion.png|centre|154x154px]] |
||
| + | | 454 |
||
| + | | 255 |
||
| + | | [[Melee]], [[Magic]] |
||
| + | | North of the [[Bone Yard]] |
||
| + | | It has a lightning bolt attack that can't be blocked by [[Prayer]], and when it reaches half health, it will summon two level 120 [[Skeleton Hellhound (Vet'ion)|Skeleton Hellhounds]] to aid it. When they are present, [[Vet'ion]] cannot be damaged. He also has two forms, the normal and reborn form where he will return to his normal form if left too long. |
||
| + | Unique drop: [[File:Ring of the gods.png]] [[Ring of the gods]] |
||
| + | |- |
||
| + | |[[Venenatis]] |
||
| + | | [[File:Venenatis.png|centre|162x162px]] |
||
| + | | 464 |
||
| + | | 255 |
||
| + | | [[Melee]], [[Magic]] |
||
| + | | East of the [[Bone Yard]] |
||
| + | | During the fight, it will summon level 15 spiders to aid it. It is able to drain [[Prayer]] and perform a deadly special attack that can hit up to 50. |
||
| + | Unique drop: [[File:Treasonous ring.png]] [[Treasonous ring]] |
||
| + | |} |
||
| + | |||
| + | ===Demi-bosses=== |
||
| + | {| class="wikitable sortable" |
||
| + | ! Name |
||
| + | ! Image |
||
| + | ! Level |
||
| + | ! Hitpoints |
||
| + | ! Attack style |
||
| + | ! Location |
||
| + | ! Notes |
||
| + | |- |
||
| + | |[[Scorpia]] |
||
| + | | [[File:Scorpia.png|centre|176x176px]] |
||
| + | | 225 |
||
| + | | 200 |
||
| + | | [[Melee]] |
||
| + | | Cavern beneath [[Scorpion Pit]] |
||
| + | | Has a powerful [[poison]] that can damage up to 20. |
||
| + | Unique drops: [[File:Malediction shard 3.png]] [[Malediction shard 3]] [[File:Odium shard 3.png]] [[Odium shard 3]] |
||
| + | |- |
||
| + | |[[Chaos Fanatic]] |
||
| + | | [[File:Chaos Fanatic.png|centre|190x190px]] |
||
| + | | 202 |
||
| + | | 225 |
||
| + | | [[Melee]], [[Magic]] |
||
| + | | West of the [[Lava Maze]] |
||
| + | | Has a [[special attack]] that must be avoided in order to avoid damage. |
||
| + | Unique drops: [[File:Pet chaos elemental.png]] [[Pet chaos elemental]] [[File:Malediction_shard_1.png]] [[Malediction shard 1]] [[File:Odium_shard_1.png]] [[Odium shard 1]] |
||
| + | |- |
||
| + | |[[Crazy archaeologist]] |
||
| + | | [[File:Crazy archaeologist.png|centre|204x204px]] |
||
| + | | 204 |
||
| + | | 225 |
||
| + | | [[Melee]], [[Ranged]] |
||
| + | | [[Ruins (west)|Ruins]] south of [[The Forgotten Cemetery]] |
||
| + | | Has a multi-area [[special attack]] that must be avoided by running away. |
||
| + | Unique drops: [[File:Malediction_shard_2.png]] [[Malediction shard 2]] [[File:Odium_shard_2.png]] [[Odium shard 2]] [[File:Fedora.png]] [[Fedora]] |
||
| + | |} |
||
| + | |||
| + | ==Sporadic bosses== |
||
| + | Sporadic bosses are those that can't be fought whenever the player wishes to, instead, they require a special item of some sort to gain access to them, which is obtained by killing other more common monsters. |
||
| + | |||
| + | {| class="wikitable sortable" |
||
| + | ! Name |
||
| + | ! Image |
||
| + | ! Level |
||
| + | ! Hitpoints |
||
| + | ! Attack style |
||
| + | ! Location |
||
| + | ! Notes |
||
| + | |- |
||
| + | |[[Skotizo]] |
||
| + | | [[File:Skotizo.png|centre|183x183px]] |
||
| + | | 321 |
||
| + | | 450 |
||
| + | | [[Melee]], [[Magic]] |
||
| + | | Centre of the [[Catacombs of Kourend]] |
||
| + | | Activates altars found in the north, south, east and west central areas of the room, which increases its [[Defence]] and must be taken down. Also, it can summon three [[Reanimated demon spawn|spawns]] and/or a [[dark ankou]] to aid it in battle. |
||
| + | Notable drops: [[File:Uncut onyx.png]] [[Uncut onyx]] [[File:Skotos.png]] [[Skotos]] [[File:Dark claw.png|31x31px]] [[Dark claw]] |
||
| + | |- |
||
| + | |[[Obor]] |
||
| + | |[[File:Obor.png|thumb|212x212px]] |
||
| + | |106 |
||
| + | |120 |
||
| + | |[[Melee]], [[Ranged]] |
||
| + | |Western wall of the [[Hill Giant]] area, by the southern part of the [[Edgeville Dungeon]] |
||
| + | |Pretty simple and straight-forward mechanics, weak to Magic, could be frozen with a spell for an even easier Mage kill. Unique drop: [[File:Hill giant club detail.png|25x25px]] [[Hill giant club]] |
||
| + | |- |
||
| + | |[[Bryophyta]] |
||
| + | |[[File:Bryophyta.png|thumb|207x207px]] |
||
| + | |128 |
||
| + | |115 |
||
| + | |[[Melee]], [[Magic]] |
||
| + | |Near the north-western end of the [[Varrock Sewers]] |
||
| + | |Can summon three growthlings that must be defeated to be able to hit Bryophyta again. She can also poison the player with a starting damage of 8. Unique drop: [[File:Bryophyta's essence detail.png|27x27px]] [[Bryophyta's essence]] |
||
| + | |}[[File:Howling Snow Storm.gif|thumb|[[Wintertodt]], currently the only "skilling boss" in ''Old School RuneScape''.|246x246px]] |
||
| + | == Skilling bosses == |
||
| + | The '''[[Wintertodt]]''' is the only [[skilling]] boss in ''Old School RuneScape''. Players must light the braziers and burn logs or make them into kindling, using the roots found near the braziers. This is the only place where the [[tome of fire]] can be awarded and has a very rare chance of receiving a [[dragon axe]], an alternate for [[Ironmen]] who can't successfully kill the [[Dagannoth Kings]]. |
||
| + | |||
| + | == Other bosses == |
||
| + | [[File:Corporeal Beast.png|thumb|[[Corporeal Beast]], currently the fourth [[strongest monster]] in ''Old School RuneScape''.|259x259px]] |
||
| + | *The '''[[Corporeal Beast]]''' was the [[highest-level monster]] in ''[[Old School RuneScape]]'' with a [[combat]] of 785. It is not labeled under the Wilderness category because PvP attacks are disallowed in his cave, whereas PvP attacks could happen while fighting the other bosses labeled as "actual Wilderness Bosses", even though the [[Corporeal Beast|Corporeal Beast's]]''' '''cave is indeed located ''"within"'' the [[Wilderness]]. It can be extremely dangerous to fight as a solo player, therefore, players often team up to kill it. It is the only monster that drops [[sigil|Sigils]] for [[spirit shields]]. |
||
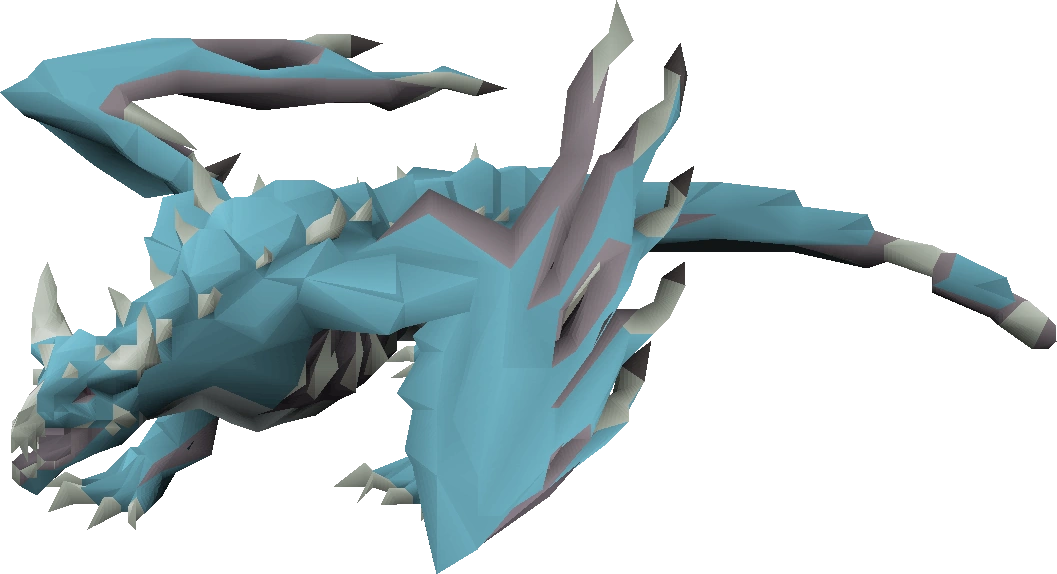
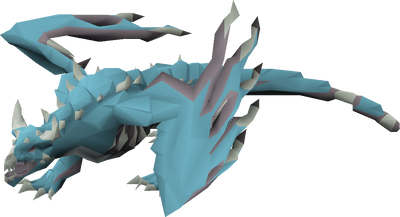
| + | *'''[[Vorkath]]''' is a very powerful [[blue dragon]] who was first encountered during [[Dragon Slayer II]] as a penultimate boss. After completion of said quest, he becomes stronger and available for solo battle, possessing a [[combat level]] of 732. He is the only monster to drop the [[skeletal visage]]. |
||
| + | *[[Zulrah|'''Zulrah''']] is a powerful, solo-only boss, where one cannot attack with [[Melee]] and must use [[Ranged]] or [[Magic]]. Partial completion of [[Regicide]] is required to access this boss; however, completing the [[quest]] is recommended to unlock faster travelling routes. With a combat of 725, he is currently the sixth highest-level monster in the game. He is the only monster to drop the [[tanzanite fang]], [[magic fang]] and [[serpentine visage]]. |
||
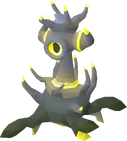
| + | *The [[Deranged Archaeologist|'''Deranged Archaeologist''']], actually a ''demi-boss'', is mostly inspired by the Wilderness "[[Crazy archeologist|Crazy archaeologist]]". This one, though, is located in the [[Tar Swamp]] of [[Fossil Island|Fossil Island.]] He can attack with both melee and ranged combat styles. His combat level is 276 but has no unique drops on his drop table. When you enter his "lair", you'll get hit with some big damage, something above 40. His [[special attack]] is a "devastating" multi-area attack that can deal a stack of multiple damage hitsplats if the player doesn't avoid it quick enough by running away. |
||
| + | |||
| + | ==Slayer bosses== |
||
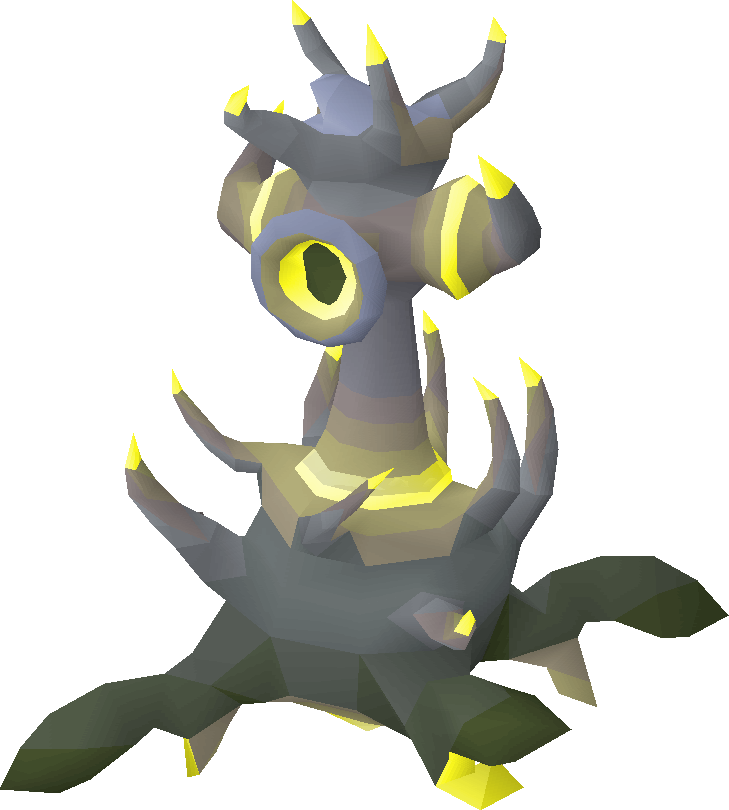
| + | [[File:Dusk.png|left|thumb|140px]] |
||
| + | [[File:Dawn.png|thumb|200px]] |
||
| + | The '''[[Grotesque Guardians]]''' are a boss version of [[Gargoyles]] found on the [[Slayer Tower]]'s rooftop, whose entrance is found on the {{FloorNumber|3}}. In order to access the roof, players must obtain a [[brittle key]] from gargoyles while assigned them for a [[Slayer task]]. The Grotesque Guardians require 75 [[Slayer]] and can only be killed while the player is assigned gargoyles or the Guardians themselves. The pair consists of [[Dusk]] and [[Dawn]]. |
||
| + | |||
| + | {{clear}} |
||
| + | [[File:Abyssal Sire.png|left|thumb|141x141px]] |
||
| + | The '''[[Abyssal Sire]]''' is the boss version of the [[Abyssal demon]]. It requires level 85 Slayer to kill. Located within the [[Abyssal Nexus]] (accessible via [[fairy ring]] {{Fairycode|DIP}} or the [[Abyss]]), it can only be attacked if you have them as a Slayer assignment. This monster drops the [[unsired]], which can be used at the [[Font of Consumption]] giving players a chance of receiving the [[Abyssal dagger]] and the three pieces of the [[Abyssal bludgeon]] ([[bludgeon axon]], [[Bludgeon claw|claw]] and [[Bludgeon spine|spine]]) as well as its boss pet, the [[Abyssal orphan]]. It shares the [[Abyssal whip]] drop with its non-boss variant. |
||
| + | |||
| + | {{clear}} |
||
| + | [[File:Cave kraken.png|left|thumb|96x96px]] |
||
| + | The '''[[Kraken]]''' is a stronger and larger version of the [[Cave kraken]]. It requires level 87 Slayer to kill. Located at the [[Kraken Cove]], it can only be attacked if you have it (or Cave Kraken) as a [[Slayer assignment]]. Along with these monsters and their non-boss variant, they are the only monsters that drop the [[Kraken tentacle]]. Other notable drops include the [[Trident of the seas]] and a [[pet kraken]]. |
||
| + | |||
| + | {{clear}} |
||
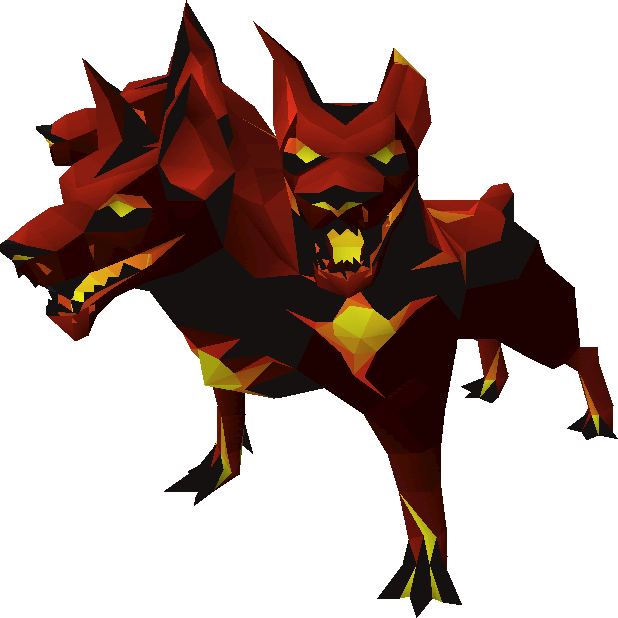
| + | [[File:Cerberus.png|left|thumb|141x141px]] |
||
| + | '''[[Cerberus]]''' is the boss version of the [[Hellhound]]. It requires a minimum of 91 Slayer to kill. Located at [[Cerberus' Lair]], it can only be attacked if you have them as a Slayer assignment. Notable drops include the [[Primordial crystal|primordial]], [[Pegasian crystal|pegasian]], [[Eternal crystal|eternal]] crystals and a [[hellpuppy]]. It shares the [[Smouldering stone]] drop with its weaker cousins, although at a far better rate. |
||
| + | |||
| + | {{clear}} |
||
| + | [[File:Thermonuclear smoke devil.png|left|thumb|141x141px]] |
||
| + | The '''[[Thermonuclear smoke devil]]''' is the boss version of the [[Smoke devil]]. These require a minimum of 93 Slayer to kill. Located at the [[Smoke Devil Dungeon]], they can only be attacked if you have them as a Slayer assignment. This monster is the only monster to drop the [[Smoke battlestaff]]. Their non-boss variants, however, also drop the [[Occult necklace]]. |
||
| + | |||
| + | ==Boss-slayer== |
||
| + | Not to be confused with the actual Slayer bosses themselves. Players who have unlocked the ''Like a boss'' ability via spending 200 [[Slayer reward points]] can have [[Nieve]]/[[Steve]], [[Duradel]], or [[Krystilia]] assign them boss monsters in addition to the [[Slayer assignment|tasks]] they already assign. The [[Slayer master]] will randomly assign a boss if they can meet those requirements; for example, they can assign the [[Dagannoth Kings]] to the player (since there are no special requirements), but will not assign them [[Commander Zilyana]] if they do not have 70 [[Agility]]. |
||
| + | |||
| + | Once a boss has been assigned, they will ask the player to select the amount that they want to kill for their assignment. The player can select anywhere from 3-35 times to kill that boss or those bosses. Make sure that you want to kill that much of the boss, as once you hit enter, this decision cannot be reversed. |
||
| + | |||
| + | Note that the [[Slayer helmet]] [[Slayer helmet (i)|(i)]] '''does''' work during boss Slayer tasks. To progress towards a boss task, the player '''must''' either land the final blow or deal the most damage to the boss, just as in regular Slayer. Bosses will also give [[Slayer]] [[experience]] upon death, and upon finishing a boss task, the player will get an additional 5,000 Slayer experience. |
||
| + | |||
| + | The following bosses can be assigned: |
||
| + | |||
| + | {| width="100%" |
||
| + | |{{*}} [[Abyssal Sire]] |
||
| + | |{{*}} [[Dagannoth Kings]] |
||
| + | |{{*}} [[K'ril Tsutsaroth]] |
||
| + | |- |
||
| + | |{{*}} [[Barrows]] ([[Barrows brothers|Brothers]] only, not [[Barrows chest|chests]]) |
||
| + | |{{*}} [[General Graardor]] |
||
| + | |{{*}} [[Scorpia]] |
||
| + | |- |
||
| + | |{{*}} [[Callisto]] |
||
| + | |{{*}} [[Giant Mole]] |
||
| + | |{{*}} [[Thermonuclear smoke devil]] |
||
| + | |- |
||
| + | |{{*}} [[Cerberus]] |
||
| + | |[[Grotesque Guardians|{{*}} Grotesque Guardians]] |
||
| + | |{{*}} [[Venenatis]] |
||
| + | |- |
||
| + | |{{*}} [[Chaos Elemental]] |
||
| + | |{{*}} [[Kalphite Queen]] |
||
| + | |{{*}} [[Vet'ion]] |
||
| + | |- |
||
| + | |{{*}} [[Chaos Fanatic]] |
||
| + | |{{*}} [[King Black Dragon]] |
||
| + | |{{*}} [[Vorkath]] |
||
| + | |- |
||
| + | |{{*}} [[Commander Zilyana]] |
||
| + | |{{*}} [[Kraken]] |
||
| + | |{{*}} [[Zulrah]] |
||
| + | |- |
||
| + | |{{*}} [[Crazy archaeologist]] |
||
| + | |{{*}} [[Kree'arra]] |
||
| + | | |
||
| + | |} |
||
| + | [[Boss category]] for odds of getting a specific boss from a specific slayer master. |
||
| + | |||
| + | ==Minigame bosses== |
||
| + | <choose> |
||
| + | <option>[[File:TzKal-Zuk.png|thumb|200px|right|The fearsome and mighty [[TzKal-Zuk]], an ancient adversary to the [[TzHaar]].]]</option> |
||
| + | <option>[[File:Penance Queen.png|thumb|200px|left|The [[Penance Queen]], nemesis of the [[Barbarian Assault|Barbarians]]]]</option> |
||
| + | </choose> |
||
| + | These bosses are fought as parts of [[minigames]]. |
||
| + | *The '''[[Penance Queen]]''' is the level 209 boss of the [[Barbarian Assault]] minigame; she is fought during the tenth and final wave. She uses rapid Melee and Ranged attacks and can only be damaged with [[Omega egg|omega eggs]] fired from the egg launcher. Defeating her earns players 80 [[honour points]] in their chosen roles, and five points in the other roles. |
||
| + | *The six '''[[Barrows brothers]]''' can be thought of as bosses, as each is quite powerful and together they are fought during the [[Barrows]] minigame. The brothers and their [[combat styles]] and levels are '''[[Ahrim the Blighted]]''' ([[Magic]], 98), '''[[Dharok the Wretched]]''' ([[Melee]], 115), '''[[Guthan the Infested]]''' ([[Melee]], 115), '''[[Karil the Tainted]]''' ([[Ranged]], 98), '''[[Torag the Corrupted]]''' ([[Melee]], 115) and '''[[Verac the Defiled]]''' ([[Melee]], 115). Each is an undead spirit and wears a certain set of [[equipment]] that gives a certain set effect; this equipment, known as [[Barrows equipment]], can be obtained from the activity, and is highly popular as the sets are among the most powerful combat equipment in the game. |
||
| + | *'''[[TzTok-Jad]]''' is the final boss of the [[TzHaar Fight Cave]] minigame. It is level 702 and is extremely dangerous as all of its attacks, which hit from every side of the [[combat triangle]], can each deal up to 98 damage. Additionally, TzTok-Jad summons [[Yt-HurKot]] to rapidly heal it once it reaches half health. The reward for defeating TzTok-Jad is 8,032 [[tokkul]] and the [[fire cape]]. |
||
| + | *'''[[TzKal-Zuk]]''' is the final boss of the [[Inferno]] minigame. It is level 1400 and possesses a max hit of 251, meaning getting hit by one of its attacks is almost certain death. Its attacks can be avoided by hiding behind the shield that appears during the fight. However, [[Jal-Xil]] and [[Jal-Zek]] will appear periodically throughout the fight and attempt to destroy the shield. Additionally, it will summon a [[JalTok-Jad]] and [[Jal-MejJak|Jal-MejJaks]] at different periods of the fight. The reward for defeating Tzkal-Zuk is 16,064 [[tokkul]] and the [[infernal cape]]. |
||
| + | |||
| + | ==Quest bosses== |
||
| + | [[File:Culinaromancer.png|thumb|right|The [[Culinaromancer]], the evil culinary sorcerer, and main antagonist of [[Recipe for Disaster]].|260x260px]] |
||
| + | A large number of [[quests]] involve and/or conclude with a battle against a powerful [[monster]], which often is or is related to the quest's main antagonist. Except where otherwise noted, these bosses can only be fought in the [[Nightmare Zone]] once their respective quest has been completed. |
||
| + | |||
| + | A '''sub-boss''' is a powerful or semi-powerful monster fought as a prelude to the actual boss fight. |
||
| + | *The '''[[Abomination]]''' is fought during [[A Taste of Hope]]. |
||
| + | *'''[[Agrith Naar]]''', a [[demon]] summoned to [[Gielinor]] by a group of [[Zamorak]]ians, is fought at the end of [[Shadow of the Storm]]. |
||
| + | *The '''[[Arzinian Avatar]]''' is the boss of [[Between a Rock...]]. |
||
| + | *'''[[Arrg]]''' is the strongest [[mountain troll]] in the game, and is the boss monster of [[Troll Romance]]. |
||
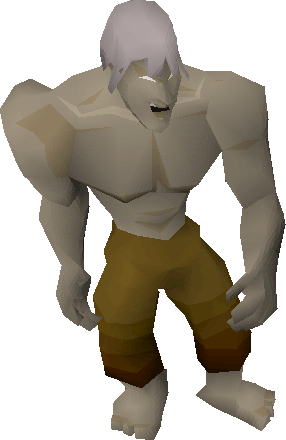
| + | *'''[[Barrelchest]]''', a hulking artificial construct controlled by [[Mi-Gor]], is the boss of [[The Great Brain Robbery]]. |
||
| + | *A '''[[Black demon]]''' controlled by [[Glough]] is the final challenge in [[The Grand Tree]]. |
||
| + | *The '''[[Black Knight Titan]]''' is the scourge of the [[Fisher Realm]] and is fought during [[Holy Grail]]. |
||
| + | *'''[[Bouncer]]''' is a powerful [[hellhound]], the pet of [[General Khazard]], and is fought during [[Fight Arena]]. |
||
| + | **Its '''[[Bouncer (ghost)|ghost]]''' is fought during the [[Shadow Sword (miniquest)|Shadow Sword miniquest]]. |
||
| + | *'''[[Chronozon]]''' is a demon who is the boss of [[Family Crest]]. |
||
| + | *A '''[[Corrupt Lizardman]]''' is a [[lizardman]] fought during the [[Tale of the Righteous]]. |
||
| + | *'''[[Count Draynor]]''' is a notorious [[vampyre]] who is the boss of [[Vampire Slayer]]. He is one of the few [[free-to-play]] bosses. |
||
| + | *The '''[[Culinaromancer]]''' is a powerful sorcerer who draws his power from [[food]]. He is the main antagonist of the [[Recipe for Disaster]] quest series, and is the final boss of its conclusion, [[Defeating the Culinaromancer]]. |
||
| + | [[File:Glod.png|thumb|[[Glod]], a giant who resides at the top of the [[beanstalk]] in [[Grim Tales]].]] |
||
| + | *'''[[Dad]]''' is a [[mountain troll]] who is fought during [[Troll Stronghold]]. |
||
| + | *The '''[[Dagannoth Mother]]''' is the boss of [[Horror from the Deep]]. |
||
| + | *'''[[Delrith]]''' is an ancient demon who was summoned to destroy [[Varrock]]; he is the boss of [[Demon Slayer]]. He is one of the few [[free-to-play]] bosses. |
||
| + | *The '''[[Dramen Tree Spirit]]''' guards the [[dramen tree]] within [[Entrana Dungeon]], and is the boss of [[Lost City]]. Because of the restrictions on [[Entrana]], no [[weapons]] or [[armour]] may be used to fight the tree spirit. |
||
| + | *'''[[Draugen]]''' is a spirit fought as part of [[The Fremennik Trials]]. |
||
| + | *'''[[Elvarg]]''' is a [[green dragon]] who has decimated the island of [[Crandor]], where she roosts. She is the final boss of [[Dragon Slayer]], and is one of the few [[free-to-play]] bosses. |
||
| + | *An '''[[Evil Spirit]]''' is the boss monster of [[Rum Deal]]. |
||
| + | *'''[[Gadderanks]]''' is a human supporter of the vampyric regime in [[Morytania]]. He is fought during [[In Aid of the Myreque]]. |
||
| + | *'''[[Galvek]]''' is an extremely powerful [[Dragon (race)|dragon]] who serves as the final boss of [[Dragon Slayer II]]. |
||
| + | [[File:Vorkath.png|thumb|400px|right|[[Vorkath]], a very powerful [[blue dragon]] and penultimate boss encountered during and post-[[Dragon Slayer II]].]] |
||
| + | *'''[[General Khazard]]''' can be optionally fought during [[Fight Arena]]. |
||
| + | *The '''[[Giant Roc]]''' is a large avian fought atop [[Trollheim]] during [[My Arm's Big Adventure]]. He has the uncommon ability to knock players around the area with his massive wings. |
||
| + | *A '''[[giant scarab]]''' is fought at the end of [[Contact!]]. |
||
| + | *The '''[[Giant Sea Snake]]''' is the boss of [[Royal Trouble]]. |
||
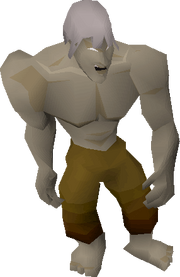
| + | *'''[[Glod]]''' is an enormous [[giant]] who resides in the cloud world above the magic beanstalk that players plant during [[Grim Tales]]; he is the quest's boss. He can disable [[prayers]] and force players towards or away from him. |
||
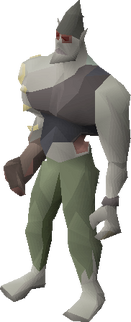
| + | *'''[[Glough]]''' is a [[gnome]] who causes trouble in the quest, [[Monkey Madness II]]. He turns into a giant with three phases and must be defeated by the player. |
||
| + | [[File:Glough (monster).png|thumb|322x322px|right|[[Glough]], an antagonist of the [[gnome quest series]] in his mutant form in [[Monkey Madness II]].]] |
||
| + | *The '''[[Ice Troll King]]''', leader of the [[ice trolls]], is the boss of [[The Fremennik Isles]]. |
||
| + | *The '''[[Jungle demon]]''' is a powerful demon who serves as the final boss of [[Monkey Madness I]]. |
||
| + | *A '''[[Khazard Ogre]]''' is one of the bosses of [[Fight Arena]]. |
||
| + | *'''[[Koschei the Deathless]]''' is a [[Fremennik]] warrior who cannot be truly killed. He must be defeated in battle three times in a row as part of [[The Fremennik Trials]]. |
||
| + | *'''[[Me]]''', who takes the form of players who fight him or her, is fought at the end of [[Lunar Diplomacy]]. |
||
| + | *'''[[Melzar the Mad]]''' is the keeper of [[Melzar's Maze]]. He is a sub-boss of [[Dragon Slayer]]. |
||
| + | *A powerful '''[[Moss giant (Roving Elves)|Moss giant]]''' must be fought, without [[weapons]], [[armour]], or [[Prayer]], to obtain the [[consecration seed]] in [[Roving Elves]]. |
||
| + | *'''[[Nezikchened]]''' is a [[black demon]] who is fought three times during [[Legends' Quest]], including at the quest's climax. |
||
| + | *'''[[Ranis Drakan]]''' is fought during [[A Taste of Hope]]. |
||
| + | *The '''[[Sand Snake]]''', is the boss of [[The Depths of Despair]]. |
||
| + | *The '''[[Sea Troll Queen]]''', ruler of the [[Sea trolls]], is the final boss of [[Swan Song]]. |
||
| + | *'''[[Sigmund]]''' is a supporter of [[H.A.M.]] who is fought in two quests: [[Death to the Dorgeshuun]] and [[Another Slice of H.A.M.]]. |
||
| + | *'''[[Sir Leye]]''' is a [[Temple Knight]] who cannot be defeated by any man alive. Thusly, he must be fought as a woman during [[Recruitment Drive]]. |
||
| + | *'''[[Sir Mordred]]''' is the leader of the [[Renegade Knight|Renegade Knights]] and is fought during [[Merlin's Crystal]]. |
||
| + | *'''[[Slagilith]]''' is an animated golem of rock who is fought during [[One Small Favour]]. It can be fought after the quest is complete. |
||
| + | *'''[[Slash Bash]]''' is a strong [[zogre]] who is the boss of [[Zogre Flesh Eaters]]. |
||
| + | *'''[[Tarn Razorlor]]''' is a necromancer and is the boss of the [[miniquest]], [[The Lair of Tarn Razorlor]]. |
||
| + | *'''[[Tolna]]''' is a young boy who succumbed to the evils of what later became known as the [[Dungeon of Tolna]]. He is the boss of [[A Soul's Bane]], taking the form of a three-headed monster. |
||
| + | *'''[[Treus Dayth]]''', now a [[ghost]], was a follower of [[Drakan]] who was sealed within the [[Abandoned Mine]]. He is the boss of [[Haunted Mine]]. |
||
| + | *'''[[Ulfric]]''' is an undead [[Fremennik]] who is the boss of [[Olaf's Quest]]. |
||
| + | |||
| + | ===Quests with multiple bosses=== |
||
| + | Some [[quests]] have several boss [[monsters]] that must be defeated, usually one after the other. |
||
| + | *[[Spirits of the Elid]] has three bosses: The '''[[black golem]]''', '''[[grey golem]]''' and '''[[white golem]]'''. |
||
| + | *[[Desert Treasure]] has four [[Zamorakian]] warriors as bosses: '''[[Dessous]]''', '''[[Kamil]]''', '''[[Fareed]]''' and '''[[Damis]]'''. |
||
| + | *The [[Recipe for Disaster]] quest series culminates in the final subquest, [[Recipe for Disaster#Culinaromancer|Defeating the Culinaromancer]]. Six bosses must be defeated: '''[[Agrith Na-Na]]''', '''[[Flambeed]]''', '''[[Karamel]]''', '''[[Dessourt]]''', '''[[Gelatinnoth Mother]]''' and the '''[[Culinaromancer]]''' himself. Each of these bosses except for the Culinaromancer is a play on another boss of one of the quests required to finish Recipe for Disaster. |
||
| + | *During [[Dream Mentor]], four boss monsters are fought, in order: '''[[The Inadequacy]]''', '''[[The Everlasting]]''', '''[[The Untouchable]]''' and '''[[The Illusive]]'''. |
||
| + | *[[Monkey Madness II]] has four bosses: '''[[Kruk]]''', '''[[Kob]]''', '''[[Keef]]''', and '''[[Glough]]'''. |
||
| + | *[[Dragon Slayer II]] has three bosses: '''[[Robert the Strong]]''', '''[[Vorkath]]''', and '''[[Galvek]]'''. |
||
| + | |||
| + | ==Nightmare Zone== |
||
| + | {{main|Nightmare Zone}} |
||
| + | The [[Nightmare Zone]] is a [[minigame]] that allows players to fight bosses from [[quests]] they have completed. Players can fight [[Nightmare Zone#Bosses|up to 42 unique boss monsters]] from previous quests. |
||
| + | |||
| + | ==See also== |
||
| + | *[[Wilderness boss]] |
||
| + | *[[Strongest monster]] |
||
| + | *[[Monster]] |
||
| + | *[[PvM]] |
||
| + | [[Category:Bosses]] |
||
Latest revision as of 10:10, 8 June 2019
A boss is a powerful, usually unique monster that is fought to accomplish an objective, be it the advancement or completion of a quest or minigame, or as part of a team player-versus-monster event. Many quests feature boss fights at their climaxes; such bosses are often the main antagonists of the quests or quest series, or are somehow related to the main antagonist(s). Some monsters that are commonly referred to as bosses are very powerful monsters that reside in multi-combat areas; these monsters are commonly fought by teams of players in search of highly valuable drops. Many bosses have extremely high combat levels, and most of the strongest monsters in the game are bosses.
Dwarf multicannons often cannot be set up in the areas of many bosses. Others may have different restrictions; for example, Prayer cannot be used during the fights with the final bosses of Recipe for Disaster.
Most bosses (e.g. bosses like the Corporeal Beast) also reside in a multi-way area; very few reside in single-way areas or instances. Bosses that are killed in multi-way areas will also generate a message telling the player what drop(s) they have obtained, regardless if there are other players around or not. For example, if players are at General Graardor and kill him (and drops Bandos tassets), a message will appear in the game box saying "Player name received item: Bandos tassets". If a boss is killed in a single-way area, this message will not appear, even if the boss resides in a multi-way area and is killed in a single-way zone.
Common PvM bosses
The monsters included in this section wouldn't better fit in any other categories, and are located in some spot in the game-world that are accessible/reachable to anyone, without any restrictions. However, despite their accessibility, many players prefer to have certain diaries done before killing these with dedication, since the rewards from those Diaries can be game-changing in the long-run: those rewards could range from making it significantly easier to access the Boss to making the manner in which you earn the drops, from these bosses, significantly more convenient.
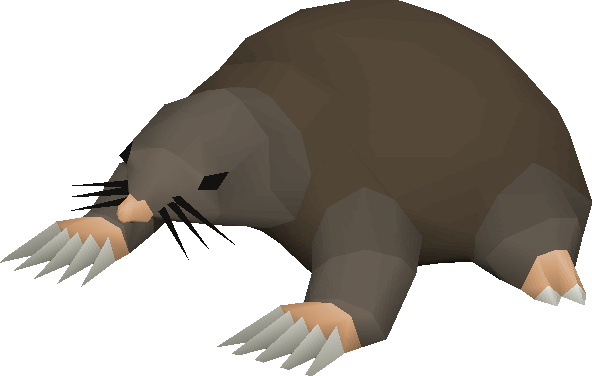
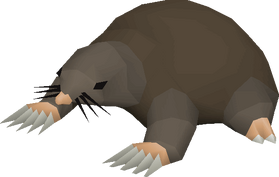
The around its ra
- The Giant Mole is, true to its name, an enormous mole, level 230, that lives in its lair under Falador Park. A light source is required to fight it. During combat, the Giant Mole attacks with Melee and burrows around its rather large lair. Its chief drops, mole skin and mole claws, may be given to Wyson the gardener in exchange for bird's nests.
- The Kalphite Queen is the ruler of the kalphites; she can be found at the bottom of the Kalphite Lair in the Kharidian Desert. Unlike many other bosses, she has two forms, both of which are level 333, and she uses protection prayers to block different attack styles. Her attacks are extremely accurate and very deadly for players who are unprepared for them. She drops the dragon chainbody and Dragon 2h sword; she also drops her head, which can be mounted in a player-owned house.
- Three level 303 Dagannoth Kings lair deep under Waterbirth Island. Each uses a different combat style: Dagannoth Supreme attacks with Ranged, Dagannoth Rex attacks with Melee, and Dagannoth Prime attacks with Magic. Altogether, the Kings drop several unique items, such as Seercull, Dragon axes, Berserker rings and Mud battlestaves. They also drop a variety of Fremennik-related arms and armour, such as Archer helms and Skeletal armour.
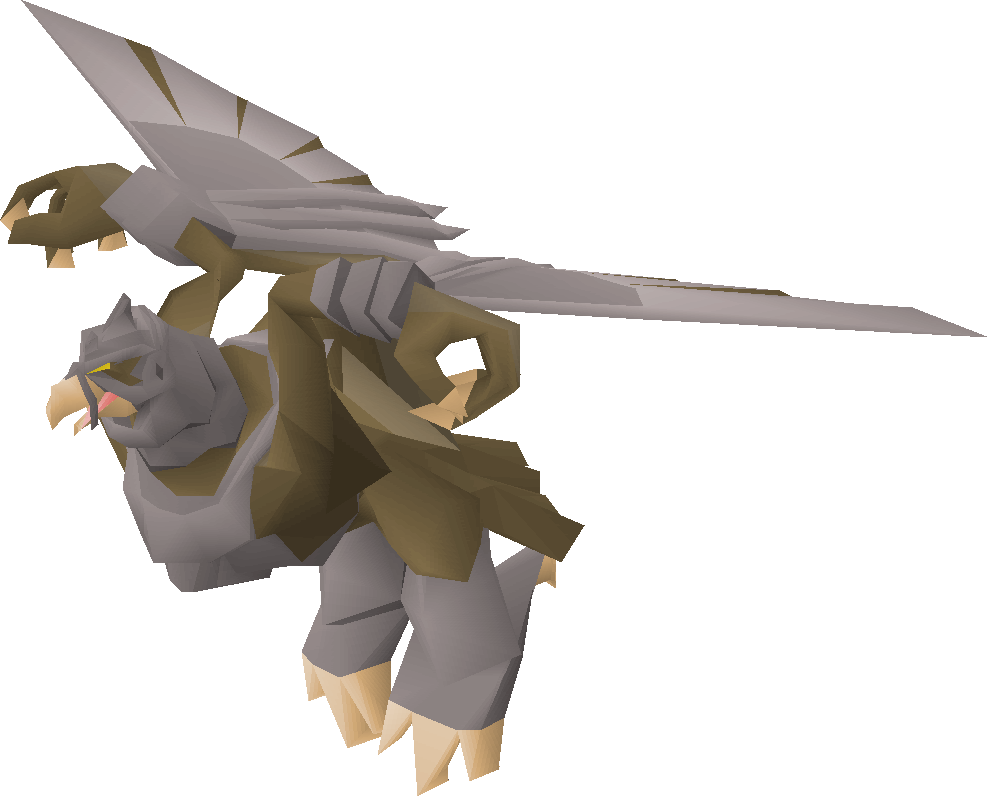
God Wars Dungeon generals
For each warring deity in the God Wars Dungeon, there is a very powerful leader commonly referred to as a 'general'. Each general also has three bodyguards, one of which uses each style of combat: Melee, Magic and Ranged. In addition to the 60 Strength or 60 Agility required to enter the God Wars Dungeon, each general's encampment has further requirements to enter.
- Commander Zilyana is the level 596 Icyene general of Saradomin, attacking rapidly and accurately with both Melee and Magic. Her bodyguards are Starlight, Growler and Bree. She drops the Saradomin hilt, and she and her bodyguards drop the Saradomin sword and Armadyl crossbow. 70 Agility is required to enter the Saradomin Encampment. Two ropes are needed to access her chamber if entering her encampment for the first time.
- K'ril Tsutsaroth is the level 650 demonic general of Zamorak. He is extremely poisonous and can hit through protection prayers with his powerful Melee and Magic attacks. His bodyguards are the demons Tstanon Karlak, Zakl'n Gritch and Balfrug Kreeyath. He drops the Zamorak hilt, and he and his bodyguards also drop the Zamorakian spear and Staff of the dead. Entering the Zamorakian encampment requires 70 Hitpoints (boostable)
- General Graardor is one of the last known living ourgs, although he may very well be the only ourg in existence. He is the level 624 general of Bandos and is the most popular God Wars Dungeon general to kill, despite his devastating Melee and Ranged attacks. His bodyguards are Sergeant Strongstack, Sergeant Grimspike and Sergeant Steelwill. Along with the Bandos hilt, General Graardor and his bodyguards drop pieces of Bandos armour. 70 Strength and a hammer (Dragon warhammer also works) are required to enter the Bandos encampment.
- Kree'arra the Aviansie is the level 580 general of Armadyl. Being a guardian and leader of the Aviantese, he cannot be attacked with Melee weapons, though he uses all three styles himself. His bodyguards are Flight Kilisa, Flockleader Geerin and Wingman Skree. Kree'arra himself drops the highly valuable Armadyl hilt, and he and his bodyguards drops pieces of Armadyl armour. Entering Armadyl's encampment requires 70 Ranged and a mithril grapple.
The Great Olm, the final boss in the Chambers of Xeric and the third strongest monster in the game.
Raids' bosses
- Chambers of Xeric is where the raids activity takes place featuring multiple bosses with many mechanics. This uses a score system which improves the chance of receiving unique loot, such as dragon claws and twisted bow. A raid can contain any of the five sub-bosses (Vasa Nistirio, Tekton, Vespula, Vanguard, and the Muttadile), but the final boss will always be Great Olm.

.png)
Verzik Vitur, the final boss in the Theatre of Blood and strongest monster in the game.
- Theatre of Blood is where the raids activity takes place featuring multiple bosses with many mechanics. This uses a performance system, where the better the player performs, the more likely they are to obtain a drop, such as justiciar armour and scythe of vitur. These raids always contain five sub-bosses in the following order (The Maiden of Sugadinti, Pestilent Bloat, Nylocas Vasilias, Sotetseg, Xarpus), with the final boss being Verzik Vitur.
Wilderness bosses & demi-bosses
Bosses
All of the Wilderness bosses (not demi-bosses) can drop the Dragon pickaxe.
| Name | Image | Level | Hitpoints | Attack style | Location | Notes |
|---|---|---|---|---|---|---|
| Chaos Elemental | 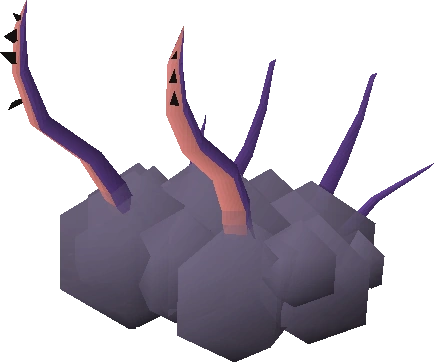 |
305 | 250 | Magic, Ranged, Melee | West of the Rogues' Castle | It can hit up to 28 in all three combat styles.
Unique drop: |
| King Black Dragon | 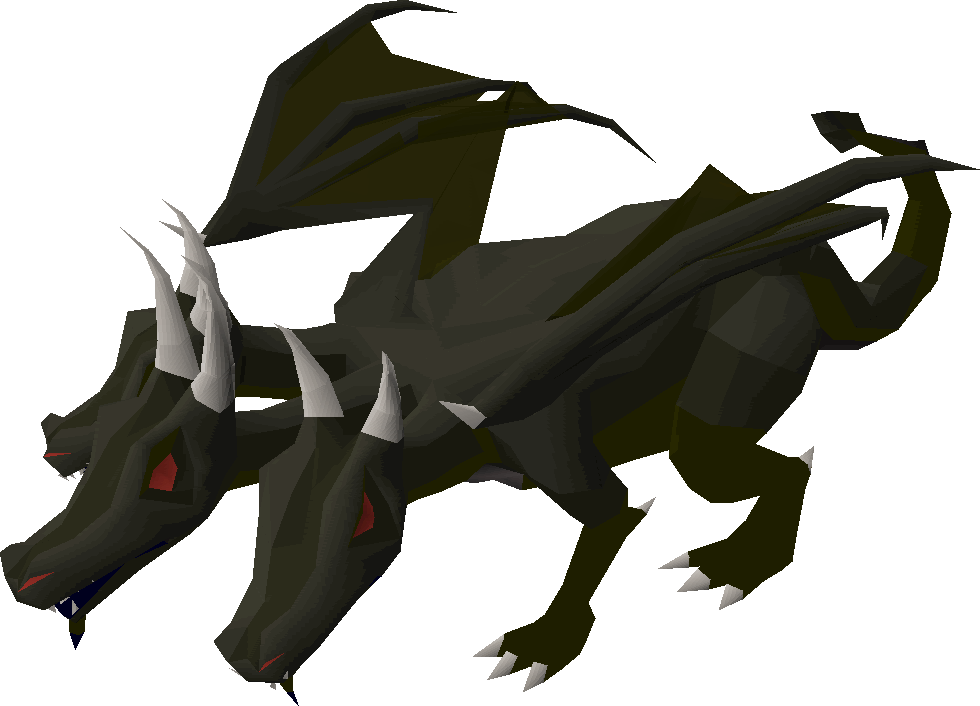 |
276 | 255 | Melee, Dragonfire (long-ranged) | His lair, located deep in the Wilderness | A particularly strong black dragon that is capable of various dragonfire attacks that can poison, stun and freeze.
Unique drops: |
| Callisto | 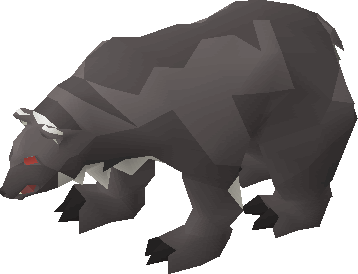 |
470 | 255 | Melee, Magic | South of Demonic Ruins | It can hit through Prayer and knock players backwards.
Unique drop: |
| Vet'ion |  |
454 | 255 | Melee, Magic | North of the Bone Yard | It has a lightning bolt attack that can't be blocked by Prayer, and when it reaches half health, it will summon two level 120 Skeleton Hellhounds to aid it. When they are present, Vet'ion cannot be damaged. He also has two forms, the normal and reborn form where he will return to his normal form if left too long.
Unique drop: |
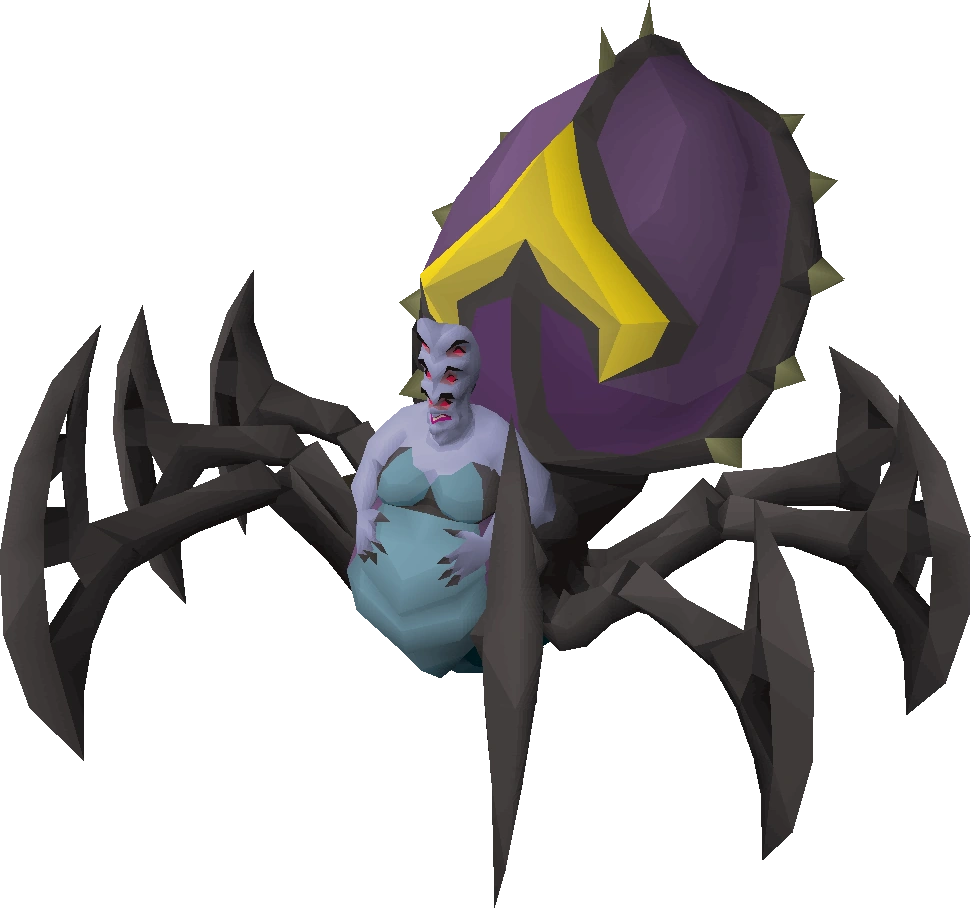
| Venenatis | 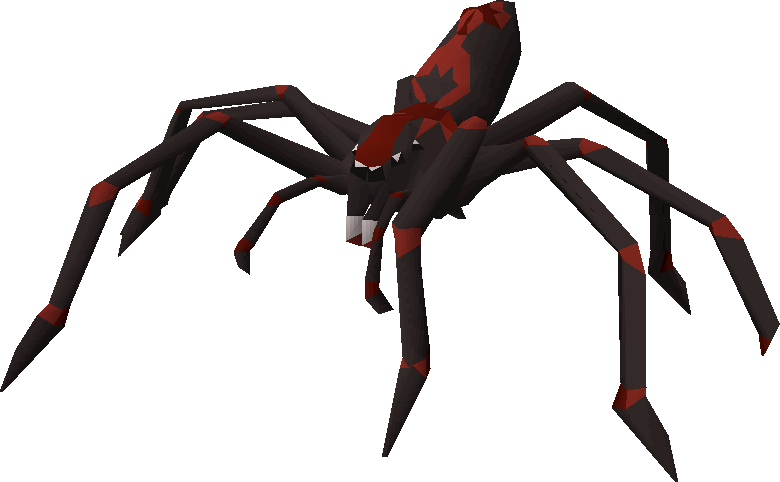 |
464 | 255 | Melee, Magic | East of the Bone Yard | During the fight, it will summon level 15 spiders to aid it. It is able to drain Prayer and perform a deadly special attack that can hit up to 50.
Unique drop: |
Demi-bosses
| Name | Image | Level | Hitpoints | Attack style | Location | Notes |
|---|---|---|---|---|---|---|
| Scorpia | 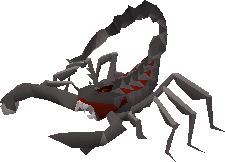 |
225 | 200 | Melee | Cavern beneath Scorpion Pit | Has a powerful poison that can damage up to 20.
Unique drops: |
| Chaos Fanatic |  |
202 | 225 | Melee, Magic | West of the Lava Maze | Has a special attack that must be avoided in order to avoid damage.
Unique drops: |
| Crazy archaeologist | 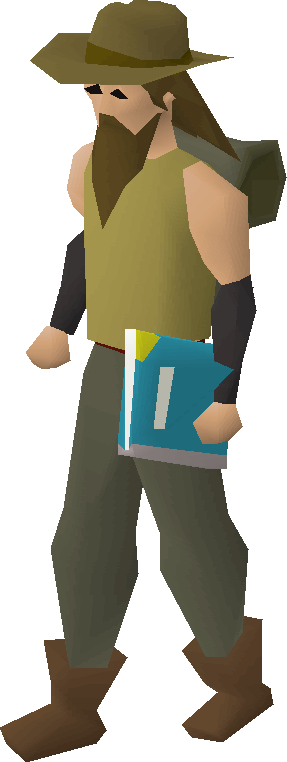 |
204 | 225 | Melee, Ranged | Ruins south of The Forgotten Cemetery | Has a multi-area special attack that must be avoided by running away.
Unique drops: |
Sporadic bosses
Sporadic bosses are those that can't be fought whenever the player wishes to, instead, they require a special item of some sort to gain access to them, which is obtained by killing other more common monsters.
| Name | Image | Level | Hitpoints | Attack style | Location | Notes |
|---|---|---|---|---|---|---|
| Skotizo | 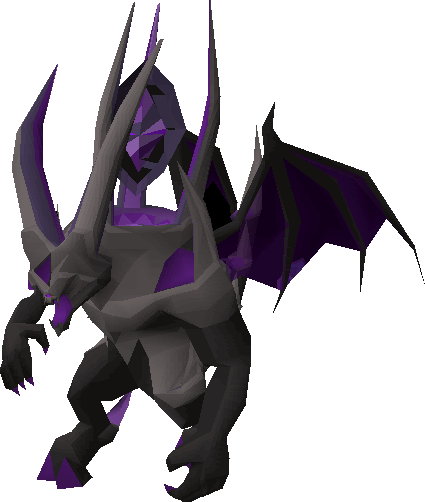 |
321 | 450 | Melee, Magic | Centre of the Catacombs of Kourend | Activates altars found in the north, south, east and west central areas of the room, which increases its Defence and must be taken down. Also, it can summon three spawns and/or a dark ankou to aid it in battle.
Notable drops: |
| Obor |   |
106 | 120 | Melee, Ranged | Western wall of the Hill Giant area, by the southern part of the Edgeville Dungeon | Pretty simple and straight-forward mechanics, weak to Magic, could be frozen with a spell for an even easier Mage kill. Unique drop: |
| Bryophyta | 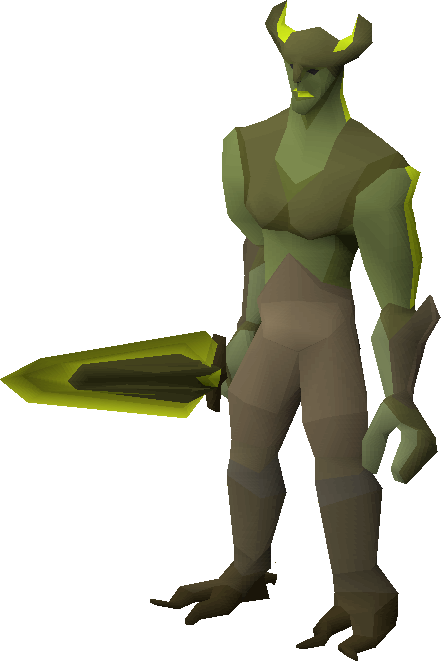  |
128 | 115 | Melee, Magic | Near the north-western end of the Varrock Sewers | Can summon three growthlings that must be defeated to be able to hit Bryophyta again. She can also poison the player with a starting damage of 8. Unique drop: |
Wintertodt, currently the only "skilling boss" in Old School RuneScape.
Skilling bosses
The Wintertodt is the only skilling boss in Old School RuneScape. Players must light the braziers and burn logs or make them into kindling, using the roots found near the braziers. This is the only place where the tome of fire can be awarded and has a very rare chance of receiving a dragon axe, an alternate for Ironmen who can't successfully kill the Dagannoth Kings.
Other bosses
Corporeal Beast, currently the fourth strongest monster in Old School RuneScape.
- The Corporeal Beast was the highest-level monster in Old School RuneScape with a combat of 785. It is not labeled under the Wilderness category because PvP attacks are disallowed in his cave, whereas PvP attacks could happen while fighting the other bosses labeled as "actual Wilderness Bosses", even though the Corporeal Beast's cave is indeed located "within" the Wilderness. It can be extremely dangerous to fight as a solo player, therefore, players often team up to kill it. It is the only monster that drops Sigils for spirit shields.
- Vorkath is a very powerful blue dragon who was first encountered during Dragon Slayer II as a penultimate boss. After completion of said quest, he becomes stronger and available for solo battle, possessing a combat level of 732. He is the only monster to drop the skeletal visage.
- Zulrah is a powerful, solo-only boss, where one cannot attack with Melee and must use Ranged or Magic. Partial completion of Regicide is required to access this boss; however, completing the quest is recommended to unlock faster travelling routes. With a combat of 725, he is currently the sixth highest-level monster in the game. He is the only monster to drop the tanzanite fang, magic fang and serpentine visage.
- The Deranged Archaeologist, actually a demi-boss, is mostly inspired by the Wilderness "Crazy archaeologist". This one, though, is located in the Tar Swamp of Fossil Island. He can attack with both melee and ranged combat styles. His combat level is 276 but has no unique drops on his drop table. When you enter his "lair", you'll get hit with some big damage, something above 40. His special attack is a "devastating" multi-area attack that can deal a stack of multiple damage hitsplats if the player doesn't avoid it quick enough by running away.
Slayer bosses
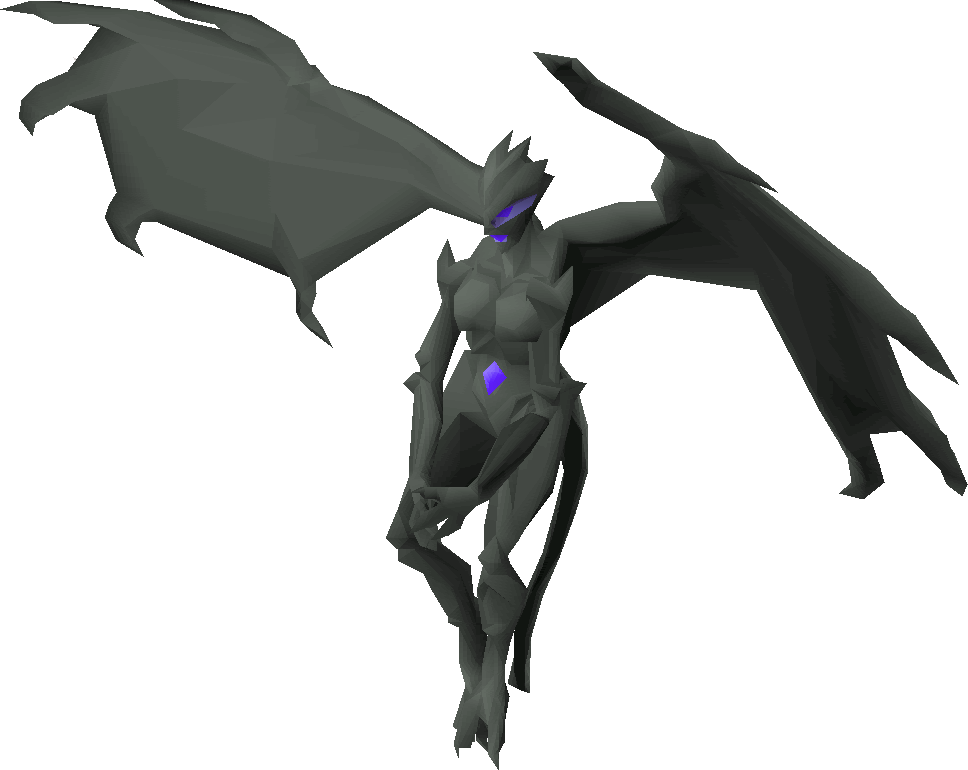
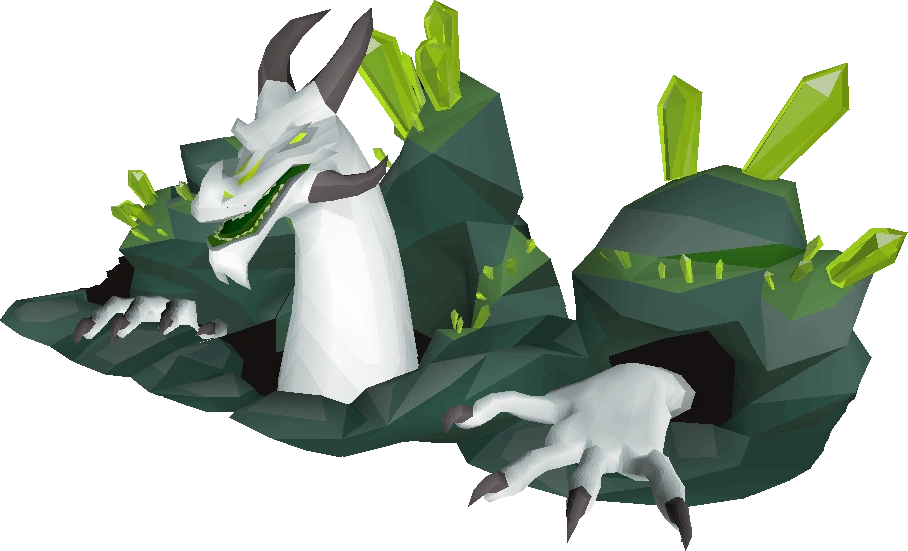
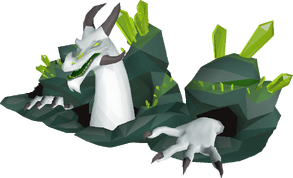
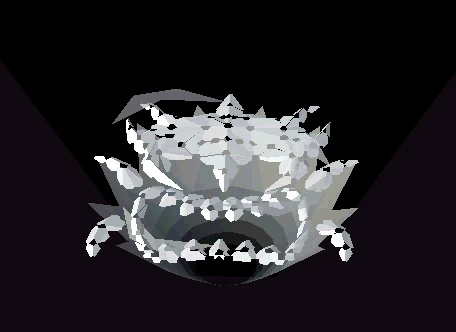
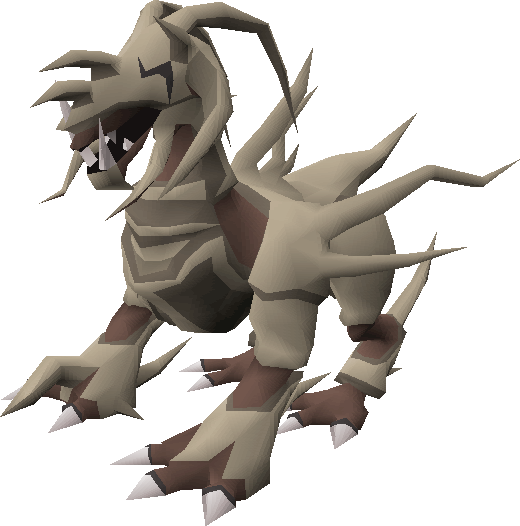
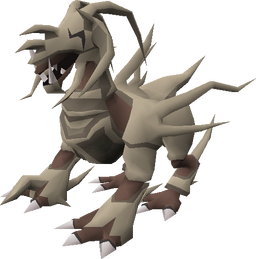
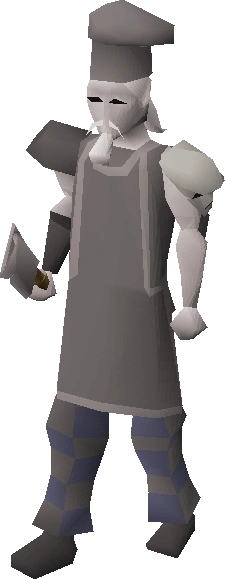
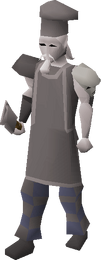
The Grotesque Guardians are a boss version of Gargoyles found on the Slayer Tower's rooftop, whose entrance is found on the 2nd floor[?]. In order to access the roof, players must obtain a brittle key from gargoyles while assigned them for a Slayer task. The Grotesque Guardians require 75 Slayer and can only be killed while the player is assigned gargoyles or the Guardians themselves. The pair consists of Dusk and Dawn.
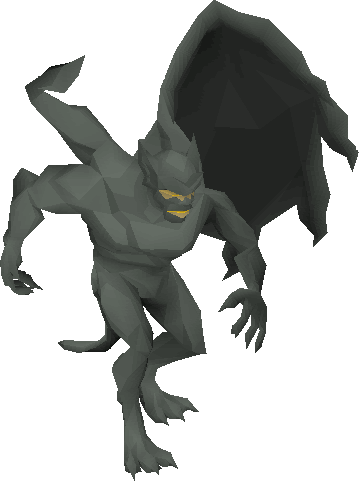
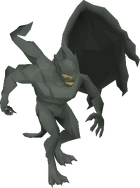
The Abyssal Sire is the boss version of the Abyssal demon. It requires level 85 Slayer to kill. Located within the Abyssal Nexus (accessible via fairy ring DIP or the Abyss), it can only be attacked if you have them as a Slayer assignment. This monster drops the unsired, which can be used at the Font of Consumption giving players a chance of receiving the Abyssal dagger and the three pieces of the Abyssal bludgeon (bludgeon axon, claw and spine) as well as its boss pet, the Abyssal orphan. It shares the Abyssal whip drop with its non-boss variant.

The Kraken is a stronger and larger version of the Cave kraken. It requires level 87 Slayer to kill. Located at the Kraken Cove, it can only be attacked if you have it (or Cave Kraken) as a Slayer assignment. Along with these monsters and their non-boss variant, they are the only monsters that drop the Kraken tentacle. Other notable drops include the Trident of the seas and a pet kraken.
Cerberus is the boss version of the Hellhound. It requires a minimum of 91 Slayer to kill. Located at Cerberus' Lair, it can only be attacked if you have them as a Slayer assignment. Notable drops include the primordial, pegasian, eternal crystals and a hellpuppy. It shares the Smouldering stone drop with its weaker cousins, although at a far better rate.
The Thermonuclear smoke devil is the boss version of the Smoke devil. These require a minimum of 93 Slayer to kill. Located at the Smoke Devil Dungeon, they can only be attacked if you have them as a Slayer assignment. This monster is the only monster to drop the Smoke battlestaff. Their non-boss variants, however, also drop the Occult necklace.
Boss-slayer
Not to be confused with the actual Slayer bosses themselves. Players who have unlocked the Like a boss ability via spending 200 Slayer reward points can have Nieve/Steve, Duradel, or Krystilia assign them boss monsters in addition to the tasks they already assign. The Slayer master will randomly assign a boss if they can meet those requirements; for example, they can assign the Dagannoth Kings to the player (since there are no special requirements), but will not assign them Commander Zilyana if they do not have 70 Agility.
Once a boss has been assigned, they will ask the player to select the amount that they want to kill for their assignment. The player can select anywhere from 3-35 times to kill that boss or those bosses. Make sure that you want to kill that much of the boss, as once you hit enter, this decision cannot be reversed.
Note that the Slayer helmet (i) does work during boss Slayer tasks. To progress towards a boss task, the player must either land the final blow or deal the most damage to the boss, just as in regular Slayer. Bosses will also give Slayer experience upon death, and upon finishing a boss task, the player will get an additional 5,000 Slayer experience.
The following bosses can be assigned:
| • Abyssal Sire | • Dagannoth Kings | • K'ril Tsutsaroth |
| • Barrows (Brothers only, not chests) | • General Graardor | • Scorpia |
| • Callisto | • Giant Mole | • Thermonuclear smoke devil |
| • Cerberus | • Grotesque Guardians | • Venenatis |
| • Chaos Elemental | • Kalphite Queen | • Vet'ion |
| • Chaos Fanatic | • King Black Dragon | • Vorkath |
| • Commander Zilyana | • Kraken | • Zulrah |
| • Crazy archaeologist | • Kree'arra |
Boss category for odds of getting a specific boss from a specific slayer master.
Minigame bosses

The Penance Queen, nemesis of the Barbarians
These bosses are fought as parts of minigames.
- The Penance Queen is the level 209 boss of the Barbarian Assault minigame; she is fought during the tenth and final wave. She uses rapid Melee and Ranged attacks and can only be damaged with omega eggs fired from the egg launcher. Defeating her earns players 80 honour points in their chosen roles, and five points in the other roles.
- The six Barrows brothers can be thought of as bosses, as each is quite powerful and together they are fought during the Barrows minigame. The brothers and their combat styles and levels are Ahrim the Blighted (Magic, 98), Dharok the Wretched (Melee, 115), Guthan the Infested (Melee, 115), Karil the Tainted (Ranged, 98), Torag the Corrupted (Melee, 115) and Verac the Defiled (Melee, 115). Each is an undead spirit and wears a certain set of equipment that gives a certain set effect; this equipment, known as Barrows equipment, can be obtained from the activity, and is highly popular as the sets are among the most powerful combat equipment in the game.
- TzTok-Jad is the final boss of the TzHaar Fight Cave minigame. It is level 702 and is extremely dangerous as all of its attacks, which hit from every side of the combat triangle, can each deal up to 98 damage. Additionally, TzTok-Jad summons Yt-HurKot to rapidly heal it once it reaches half health. The reward for defeating TzTok-Jad is 8,032 tokkul and the fire cape.
- TzKal-Zuk is the final boss of the Inferno minigame. It is level 1400 and possesses a max hit of 251, meaning getting hit by one of its attacks is almost certain death. Its attacks can be avoided by hiding behind the shield that appears during the fight. However, Jal-Xil and Jal-Zek will appear periodically throughout the fight and attempt to destroy the shield. Additionally, it will summon a JalTok-Jad and Jal-MejJaks at different periods of the fight. The reward for defeating Tzkal-Zuk is 16,064 tokkul and the infernal cape.
Quest bosses
The Culinaromancer, the evil culinary sorcerer, and main antagonist of Recipe for Disaster.
A large number of quests involve and/or conclude with a battle against a powerful monster, which often is or is related to the quest's main antagonist. Except where otherwise noted, these bosses can only be fought in the Nightmare Zone once their respective quest has been completed.
A sub-boss is a powerful or semi-powerful monster fought as a prelude to the actual boss fight.
- The Abomination is fought during A Taste of Hope.
- Agrith Naar, a demon summoned to Gielinor by a group of Zamorakians, is fought at the end of Shadow of the Storm.
- The Arzinian Avatar is the boss of Between a Rock....
- Arrg is the strongest mountain troll in the game, and is the boss monster of Troll Romance.
- Barrelchest, a hulking artificial construct controlled by Mi-Gor, is the boss of The Great Brain Robbery.
- A Black demon controlled by Glough is the final challenge in The Grand Tree.
- The Black Knight Titan is the scourge of the Fisher Realm and is fought during Holy Grail.
- Bouncer is a powerful hellhound, the pet of General Khazard, and is fought during Fight Arena.
- Its ghost is fought during the Shadow Sword miniquest.
- Chronozon is a demon who is the boss of Family Crest.
- A Corrupt Lizardman is a lizardman fought during the Tale of the Righteous.
- Count Draynor is a notorious vampyre who is the boss of Vampire Slayer. He is one of the few free-to-play bosses.
- The Culinaromancer is a powerful sorcerer who draws his power from food. He is the main antagonist of the Recipe for Disaster quest series, and is the final boss of its conclusion, Defeating the Culinaromancer.
Glod, a giant who resides at the top of the beanstalk in Grim Tales.
- Dad is a mountain troll who is fought during Troll Stronghold.
- The Dagannoth Mother is the boss of Horror from the Deep.
- Delrith is an ancient demon who was summoned to destroy Varrock; he is the boss of Demon Slayer. He is one of the few free-to-play bosses.
- The Dramen Tree Spirit guards the dramen tree within Entrana Dungeon, and is the boss of Lost City. Because of the restrictions on Entrana, no weapons or armour may be used to fight the tree spirit.
- Draugen is a spirit fought as part of The Fremennik Trials.
- Elvarg is a green dragon who has decimated the island of Crandor, where she roosts. She is the final boss of Dragon Slayer, and is one of the few free-to-play bosses.
- An Evil Spirit is the boss monster of Rum Deal.
- Gadderanks is a human supporter of the vampyric regime in Morytania. He is fought during In Aid of the Myreque.
- Galvek is an extremely powerful dragon who serves as the final boss of Dragon Slayer II.
Vorkath, a very powerful blue dragon and penultimate boss encountered during and post-Dragon Slayer II.
- General Khazard can be optionally fought during Fight Arena.
- The Giant Roc is a large avian fought atop Trollheim during My Arm's Big Adventure. He has the uncommon ability to knock players around the area with his massive wings.
- A giant scarab is fought at the end of Contact!.
- The Giant Sea Snake is the boss of Royal Trouble.
- Glod is an enormous giant who resides in the cloud world above the magic beanstalk that players plant during Grim Tales; he is the quest's boss. He can disable prayers and force players towards or away from him.
- Glough is a gnome who causes trouble in the quest, Monkey Madness II. He turns into a giant with three phases and must be defeated by the player.

.png)
Glough, an antagonist of the gnome quest series in his mutant form in Monkey Madness II.
- The Ice Troll King, leader of the ice trolls, is the boss of The Fremennik Isles.
- The Jungle demon is a powerful demon who serves as the final boss of Monkey Madness I.
- A Khazard Ogre is one of the bosses of Fight Arena.
- Koschei the Deathless is a Fremennik warrior who cannot be truly killed. He must be defeated in battle three times in a row as part of The Fremennik Trials.
- Me, who takes the form of players who fight him or her, is fought at the end of Lunar Diplomacy.
- Melzar the Mad is the keeper of Melzar's Maze. He is a sub-boss of Dragon Slayer.
- A powerful Moss giant must be fought, without weapons, armour, or Prayer, to obtain the consecration seed in Roving Elves.
- Nezikchened is a black demon who is fought three times during Legends' Quest, including at the quest's climax.
- Ranis Drakan is fought during A Taste of Hope.
- The Sand Snake, is the boss of The Depths of Despair.
- The Sea Troll Queen, ruler of the Sea trolls, is the final boss of Swan Song.
- Sigmund is a supporter of H.A.M. who is fought in two quests: Death to the Dorgeshuun and Another Slice of H.A.M..
- Sir Leye is a Temple Knight who cannot be defeated by any man alive. Thusly, he must be fought as a woman during Recruitment Drive.
- Sir Mordred is the leader of the Renegade Knights and is fought during Merlin's Crystal.
- Slagilith is an animated golem of rock who is fought during One Small Favour. It can be fought after the quest is complete.
- Slash Bash is a strong zogre who is the boss of Zogre Flesh Eaters.
- Tarn Razorlor is a necromancer and is the boss of the miniquest, The Lair of Tarn Razorlor.
- Tolna is a young boy who succumbed to the evils of what later became known as the Dungeon of Tolna. He is the boss of A Soul's Bane, taking the form of a three-headed monster.
- Treus Dayth, now a ghost, was a follower of Drakan who was sealed within the Abandoned Mine. He is the boss of Haunted Mine.
- Ulfric is an undead Fremennik who is the boss of Olaf's Quest.
Quests with multiple bosses
Some quests have several boss monsters that must be defeated, usually one after the other.
- Spirits of the Elid has three bosses: The black golem, grey golem and white golem.
- Desert Treasure has four Zamorakian warriors as bosses: Dessous, Kamil, Fareed and Damis.
- The Recipe for Disaster quest series culminates in the final subquest, Defeating the Culinaromancer. Six bosses must be defeated: Agrith Na-Na, Flambeed, Karamel, Dessourt, Gelatinnoth Mother and the Culinaromancer himself. Each of these bosses except for the Culinaromancer is a play on another boss of one of the quests required to finish Recipe for Disaster.
- During Dream Mentor, four boss monsters are fought, in order: The Inadequacy, The Everlasting, The Untouchable and The Illusive.
- Monkey Madness II has four bosses: Kruk, Kob, Keef, and Glough.
- Dragon Slayer II has three bosses: Robert the Strong, Vorkath, and Galvek.
Nightmare Zone
The Nightmare Zone is a minigame that allows players to fight bosses from quests they have completed. Players can fight up to 42 unique boss monsters from previous quests.