Spineweilder (talk | contribs) |
Spineweilder (talk | contribs) |
||
| Line 227: | Line 227: | ||
{{clear}} |
{{clear}} |
||
===Ice Demon=== |
===Ice Demon=== |
||
| − | [[File: |
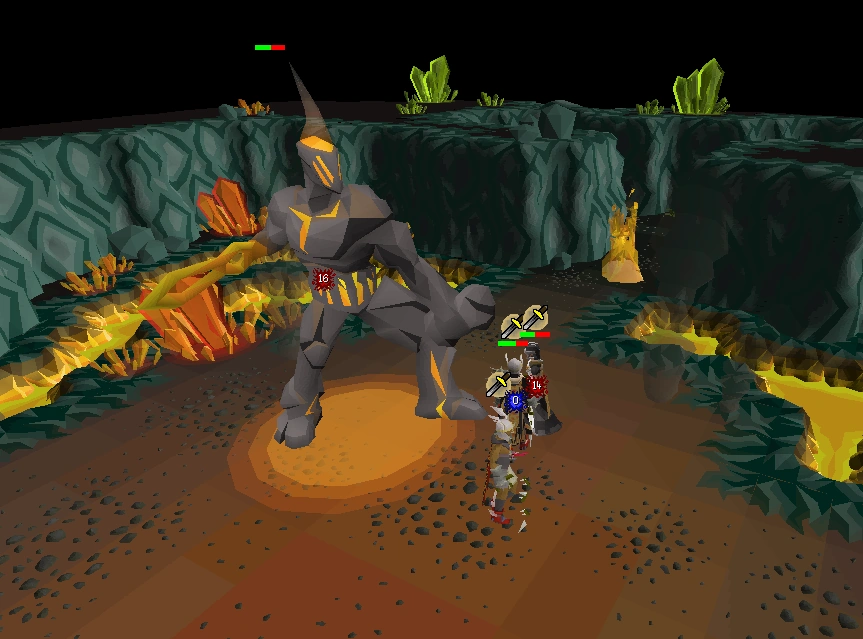
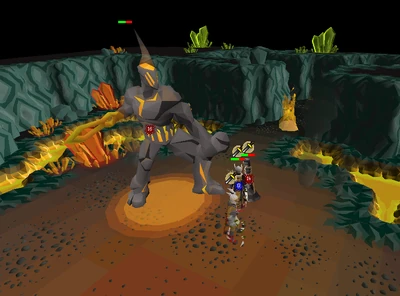
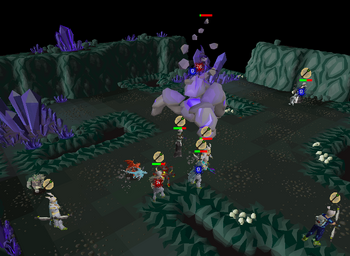
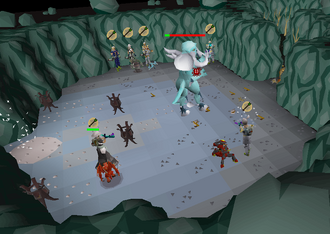
+ | [[File:Chambers of Xeric - Ice demon.png|thumb|330px|A group of players face the ice demon.]] |
An ice demon is blocking the way further into the cavern. It cannot be attacked immediately, due to the cold protecting it. It must be warmed up to force it out of its spot. There are four braziers surrounding the demon, and up to four unattackable [[icefiend]]s (one for each player) that will try to extinguish any flames set by the team. The icefiends do not move from their spot, so they can only focus on the brazier in front of it. |
An ice demon is blocking the way further into the cavern. It cannot be attacked immediately, due to the cold protecting it. It must be warmed up to force it out of its spot. There are four braziers surrounding the demon, and up to four unattackable [[icefiend]]s (one for each player) that will try to extinguish any flames set by the team. The icefiends do not move from their spot, so they can only focus on the brazier in front of it. |
||
Revision as of 20:23, 30 April 2018
The Chambers of Xeric is Old School RuneScape's first Raid.
Players can attempt the chambers by themselves, though up to 100 players can be in a raid. There are a few basic tips that should be known before starting:
- Scaling Difficulty - The difficulty of the chambers are based on the team's overall combat. So the higher the combat level of the team is, the stronger the enemies will be
- Random Generator - Raids are randomly generated, so every raid is different (apart from the Great olm).
- Note: If there are at least five bosses in the same raid, duplicate puzzle rooms can be encountered.
Points
Points gained from the raid are based on player contribution and actions. They can get points from the following:
- Attacking monsters, though there are several exceptions:
- Penultimate phase of the Great olm; anytime it regains control of its hands, no points are given for any damage dealt to them.
- Damaging a recovered abyssal portal.
- When players battle mini-bosses, a "decay" point multiplier is put into effect. For example, players initially have a normal multiplier rate when disabling Vasa Nistirio's crystals, but as the fight progresses, the "decay" will set in and prevent players from obtaining as much points as they normally would.
- Completing puzzle rooms
- Making shortcuts in large ruin chambers (requiring Woodcutting, Mining and Strength if the obstacle is a rotten sapling, rock or boulder respectively).
The points determine the team's potential rewards at the end of the raid, when the Great olm is killed. The more points obtained, the higher the chance of obtaining unique loot. The more players in a raid attempt, the higher the points multiplier will be to compensate for increased difficulty. If members of the team leave, the points multiplier will decrease, but the difficulty will remain the same, to prevent players from exploiting additional points in smaller groups.
Note: If a team's average combat level is lower than 100, the total available points will be dramatically decreased as the raid "scales down."
If a player dies in the chambers, a percentage of points will be removed from the player, which will lower the team's overall chance of getting unique rewards. In order to access the unique reward table, the team must obtain a minimum of 7,125 points.
Equipment/Inventory Setup
By using elite void equipment, one can attain higher accuracy rates in tandem with both overload+ and prayers, as most Raid bosses typically have high defence. It also reduces the amount of switches required when fighting bosses that require multiple combat styles, allowing for more supplies to be put in its place.
|
|
||||||
|
|
|
| ||||
|
|
|
| ||||
|
|
||||||
|
|
|
| ||||
| Void | ||||||
|---|---|---|---|---|---|---|
Skills:
- 90+

- 90+
- 55+
- 78+
Other items:
- All three void helms for accuracy and damage bonuses
- Dragon pickaxe
- Dragon warhammer or Bandos godsword
- Abyssal tentacle
- Zamorakian hasta (only if battling Vasa Nistirio)
- Crush weapon (for Tekton)
- Trident of the swamp
- Arcane spirit shield or Malediction ward
- Boot switches (optional)
- Amulet switches
- Toxic blowpipe
- Heavy ballista (skeletons/shamans)
- Salve amulet(ei) (for skeletons)
- Super combat potion
- Ranging potion
- 2-3 Stamina potions
- Sanfew serum
- 1-3 Super restores
- Remaining inventory spots for high-leveled food or saradomin brews
Bosses
There are several bosses that can be encountered in a raid. A minimum of one boss can be expected in a raid (that being the Great olm). Multiple bosses can be encountered, especially in larger groups.
List of bosses:
- Tekton
- Vespula
- Vasa Nistirio
- Vanguard
- Muttadiles
- Lizardman shamans
- Skeletal mystics
- Great olm (always the last boss)
Tekton
Tekton has high Defence but only uses Melee attacks. His attacks can deal heavy damage, though there is one disadvantage for him; his attacks have a small delay before they hit, meaning that a player can run corners to avoid getting hit by most of his standard attacks. However, his attacks can cleave clockwise. Tekton always starts with an orange aura around him, which has lower Defence than his red aura.
It is best to use the Dragon Warhammer special attack on Tekton and then attack him with weapons high in crush stats such as an Elder Maul.
After several attacks, or if his attacks are interrupted, he will return to the anvil. Players under him will take rapid stomp damage. He can still be attacked as he makes his way to the anvil.
When Tekton goes back to the anvil, he will repair himself, recovering a percentage of his hitpoints. While he is at the anvil, he will send two sparks flying for each player in the chamber, which have a 3x3 AoE and will deal moderate damage to anyone hit by them. They can be avoided by simply running two spaces away from your current spot when the sparks are flying. After five sets of sparks, he will resume combat, this time in an "enraged" stance (red aura). Tekton will automatically return to the anvil if his attacks are interrupted (e.g no targets within his range when he attempts to attack).
For solo players, using the corner method is recommended to fight Tekton (if using this method, make sure that Tekton does not put himself in a position where one corner is cut off). Experienced players can save plenty of run energy and/or stamina potions with a hit and run method. This method does require much more patience, as mistiming your runs will result in Tekton returning to the anvil.
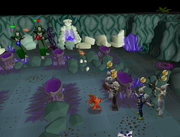
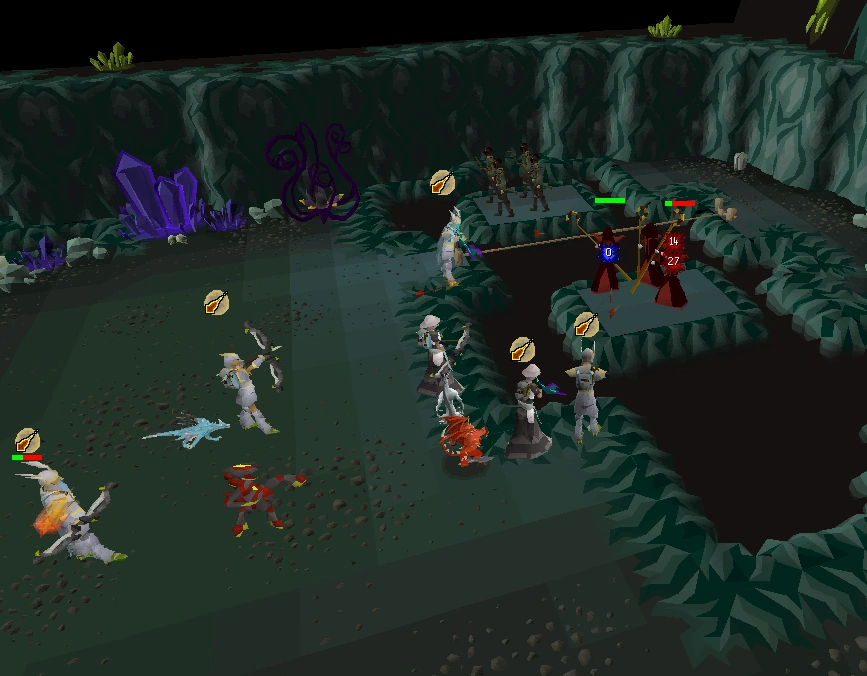
Vespula

A group of players in Vespula's chamber.
In the chamber will be Vespula herself, four lux grubs and an abyssal portal. There are three layouts for Vespula's chamber; a left/right corner and straight line.
Once someone enters the chamber, septic tendrils will appear and damage players who pass them. Vespula herself is extremely poisonous (poison starting at 20 damage), so a form of poison protection is required when fighting her.
Vespula will sting the lux grubs from time to time, causing their health to degrade over time. If fully degraded, it will turn into a Vespine soldier, fully healing both Vespula and the portal. Therefore, it is important to prevent the lux grubs from transforming into Vespine soldiers. In the other end of the chamber are several Medivaemia blossom plants which can be picked. The blossoms are then given to the grubs to restore their health.
In a group, one member should focus on collecting the blossoms and giving it to the grubs to prevent them from turning into soldiers. The rest of the team should focus on damaging Vespula.
When Vespula reaches 20% of her hitpoints, she will stop flying and drop to the floor. Attacks should be directed at the abyssal portal, as Vespula cannot be harmed while on the ground. Players can have roughly 2-4 attacks on the portal before Vespula starts flying again. If the portal is attacked while Vespula is flying, she will become enraged and start stinging anyone in melee range for massive damage. If under her while she is flying, she only applies rapid stomp damage which has a max hit of 8.
For solo players, use your crossbow (or twisted bow if you have one) and attack the portal once, before moving out of melee range to avoid her stinger. It is highly recommended to bring a prayer enhance potion so Redemption can be used effectively to heal yourself from the low damage of her stomp attack. Perfectly executing this method will result in killing Vespula easily without having any lux grubs hatching.
Given the high demand for attention when fighting Vespula, most teams often prefer a raid that does not have her, as a single mistake can often lead to the portal being fully restored, prolonging the fight.
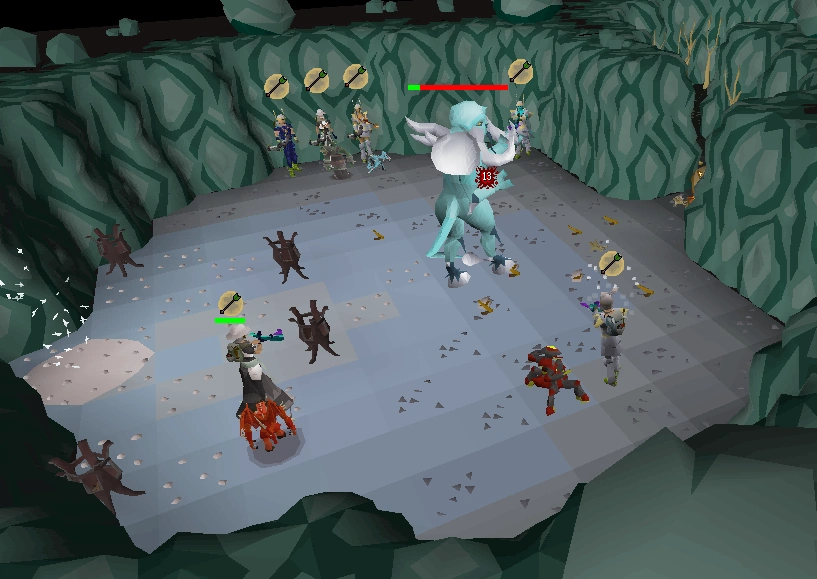
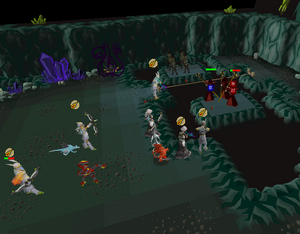
Vasa Nistirio

A group of players in battle with Vasa Nistirio.
Before starting the fight, it is important that one player with low health awaken him. While this will cause flames to appear at the entrance, Vasa immediately performs his special attack upon starting the fight.
Vasa's special attack can be deadly for those unprepared. He teleports half of the team next to him, while the other half are placed randomly across the room. He will then launch multiple projectiles near him, dealing damage (player's current hitpoints at that time - 5). By keeping your health low, it will save food and reduce the amount of damage he can deal. In a group, players teleported away from him can reduce the damage of this attack 50% by running next to him and activating Protect from Magic. Unfortunately for solo players, they will always be teleported next to him and will have to tank the incoming damage.
Vasa heals himself by going one of the four crystals in the corners of his chamber. The one that he heads to will always light up, so head there and attack the crystal. The crystals usually give the most points in the encounter. They are weak to stab attacks, so the Zamorakian hasta is an effective weapon against them. When the crystal darkens, Vasa will return to the center of the room. If the player disabled the crystal in time, he'll immediately head to another crystal. If not, he will return to the center and perform his teleport attack. Sometimes the crystal will disable itself as soon as Vasa interacts with it, resulting in an inevitable teleport attack.
As his standard attack, he expels boulders from himself and land at the player's position. This can be avoided by running away (they have a 3x3 AoE); Protect from Missiles will reduce the damage from this attack. He also has a stomp attack for players under him.
Vanguard
The Vanguard are three separate entities, so individually, they have less health compared to other bosses. The Vanguard are the only raid boss that does not have a barrier mechanic.
For this fight, it is recommended to bring medium-damage weaponry, such as the Zamorakian hasta. Weapons like godswords are not advised here as they may cause too much damage to a Vanguard and significantly prolong the fight.
Each Vanguard uses one form of attack. The magic Vanguard has no tentacles flailing out. The ranged Vanguard is carrying a bunch of rocks with its tentacles. The melee Vanguard flaunts its tentacles. Both the magic and ranged Vanguard have AoE attacks, while the melee Vanguard attacks three times for each attack.
Damage maintenance is key to fighting the Vanguard. They have a unique healing property where all three will fully heal themselves if there is a massive difference (33%). The Vanguard are also aware of their own health, so players cannot simply pile one Vanguard, as doing so will prompt them to scuttle into their shells and fully heal themselves. Slowly damage each Vanguard, ensuring that the damage between them is equal to prevent them from healing. While they are out of their shells, their health bar is shown to help players with damage maintenance.
After being out of their shells for a while, the Vanguard retreat back into them and shuffle around in either a clockwise or counterclockwise formation. Stomp damage is only applied when they're shuffling.
Muttadiles

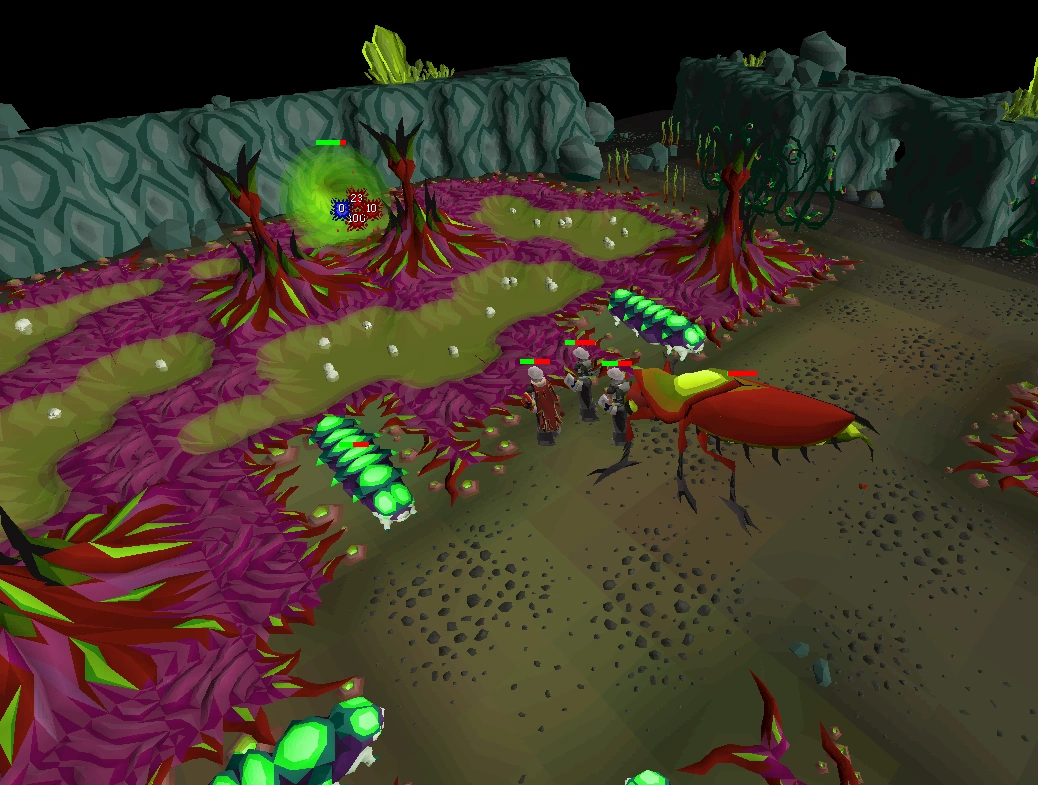
Upon starting, several noxious tendrils will appear to deal damage to players who try to leave the chamber. There are also two Muttadiles; a small one walking around the chamber, and a second, larger Muttadile lurking in the water. A meat tree is also nearby.
The small Muttadile only attacks with both Melee and Ranged, while the larger one uses all three and has a special shockwave attack that can deal massive damage; however, this attack is only used against players in melee range. During the fight with the small Muttadile, the larger one will occasionally attack players in the chamber with magic.
When the Muttadile reaches around 40-50% of its health, it will go to the meat tree and cannibalize it to restore health. A common way of speeding up kills is to successfully bind the Muttadile in place and continue attacking it until it stops going for the tree. If binds are not available (which is the case when soloing), depending on the layout, it is possible to trap the muttadile behind the crystal blocking the passageway, as they will not go around it. Muttadiles will eat from the tree up to three times (each time consisting of two bites), after which they will not eat from it anymore.
Once the small Muttadile dies, the larger one will surface and attack. Use ranged against both Muttadiles and avoid being within melee distance of them, while using Protect from Ranged. Note that the Muttadiles will always attempt to melee the player, and can occasionally lose aggression towards their target if they're able to attack them.
Depending on the layout of the room, it is possible to safespot the Muttadiles from afar - this requires a weapon with a range of 10, as they will be able to retaliate back otherwise.
Great olm
The Great olm is the last boss in the raid.
For small teams (at least 7 or lower), the Great olm only has three phases. This section assumes that the team has seven or less players.
Before starting, ensure that you have all of your equipment and supplies, as you cannot leave the Great olm's chamber unless you die. Inexperienced players should suicide several brews and revitalisations (20-22 of the best Xeric's aid and 6-8 revitalisation available) as backup supplies.
Olm will start either on the west or east side of the chamber. It will also start with one of three powers; fire, acid or crystal, which determines the special attacks it uses. To force the Great olm into the next phase, both hands must be disabled. His left hand is weak to melee attacks, while his right hand is weak to magic. Attacking his head on any non-final phase will deal no damage, as any dealt will be regenerated back.
During the first two phases, if the left hand takes too much damage, Olm will clench it temporarily. This prevents it from performing special attacks (lightning, crystal and teleport), but it cannot be harmed. Olm will loosen its grip after a set amount of time has passed, or if the right arm is disabled. If the left hand is disabled first, it will simply prevent Olm from performing any special attacks for that phase; this is unfeasible as it will clench very often when soloing.
"Blind spots" exist against Olm. This is only useful for soloing, as it requires unnecessary coordination in groups. By running in specific spots, Olm moves its head accordingly in order to "see" the player. In addition to preventing Olm from attacking, it also skips an attack in the process - for example, if the player uses a blind spot when Olm has already attacked twice after its lightning attack, it skips the teleport attack for an auto-attack. Using the blind spots while attacking Olm requires practice, especially with the left hand.
In groups of three or more, the middle player is designated as the "head" runner, moving left and right to shift Olm's attention on both sides. Runners do not need to use as much supplies, and as a result, drop supplies to any players that may need them.
When forced into the next phase, Olm will retreat back underground and shake the cavern. Crystals will fall from above, dealing moderate damage covering a 3x3 radius, with shadows indicating where they will fall. After enough time has passed, it will appear on the other side and start using a new power alongside its old powers.
In the penultimate phase, both arms must be disabled simultaneously to force Olm into the next phase (its head glows with a green aura to indicate this). Weaken one hand; when that hand is on low health, focus on the other hand and disable it. In most cases, this means weakening the right hand and disabling the left hand. Once a hand is disabled, Olm loses control of it. A bar will appear over that gap; if filled before the other hand is disabled, Olm will regain control of its disabled hand with full health.
In the last phase, Olm will attempt a final stand. The head can now be attacked, as its autoheal property is removed. Olm will use all mechanics from the previous phases (barring the swap attack), and now gets the ability to sap health. When it does this, Olm sends out two "shields"; when on top of them, it protects the player(s) from its sapping attack. Players should move continually during this phase, but not in an erratic way, as crystals continually fall from above until Olm is killed. Ensure that your health is high, as players can die very quickly if they're trapped in a fire wall with crystals falling on them.
Once killed, the crystal surrounding the chest shatters and players can claim their rewards from there before returning to the surface.
Puzzles/Obstacles
Crab Puzzle


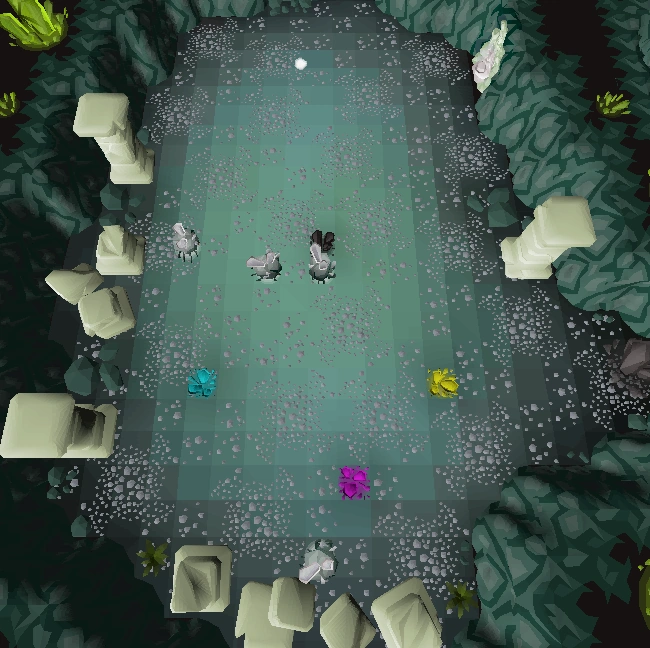
Typical layout of a Crab Puzzle room.
In this chamber are several Jewelled Crabs which cannot be killed by conventional combat. The main purpose of these crabs is to reflect orbs that the carved sculpture nearby emits. Getting hit by the orb will deal heavy damage onto the player that blocked its path. The crabs also deal reasonably high damage, so use Protect from Melee while luring them into place.
The goal is to turn the coloured crystals in the chamber white. The crystals on the crabs can be attacked to change colour; red for melee, blue for magic, and ranged for green. The white orb emitted from the carving must be reflected off the crabs in the room to hit the crystals. Note that a colored orb cannot change color again - if a green orb hits a red crab, it will disappear.
In a solo raid, the crabs can be temporarily bound in place with a standard hammer. The dragon warhammer can also bind the crabs, but it must be wielded first. Note that the crab's crystals will turn red temporarily when hit by it.
All layouts require the use of three crabs. The more players in a raid, the more crabs will be present in the room. In this case, only selected players should enter and clear the room while the remaining stay outside until it is cleared.
| Crystal | Orb Colour | Style |
|---|---|---|
| Black | White | None |
| Yellow | Blue | Mage |
| Cyan (Blue) | Red | Melee |
| Magenta (Purple) | Green | Range |
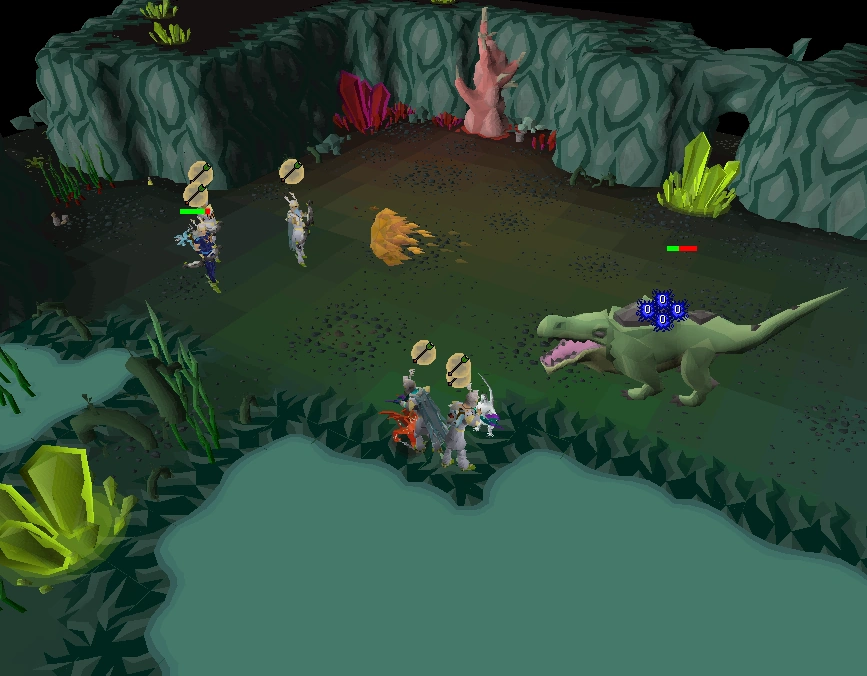
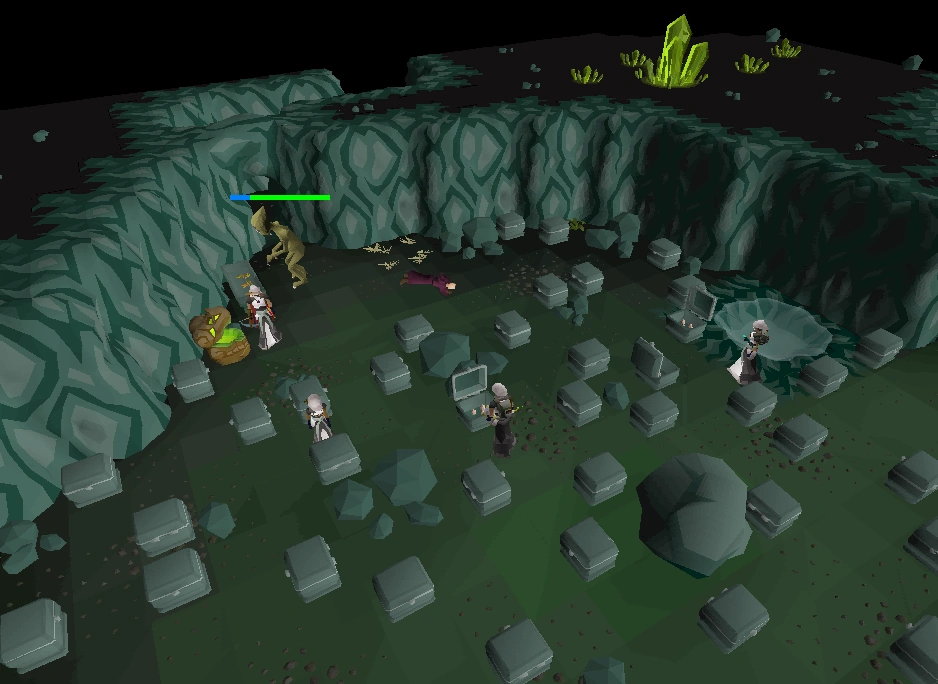
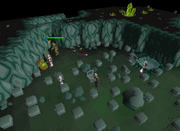
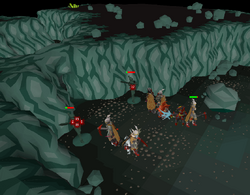
Ice Demon
A group of players face the ice demon.
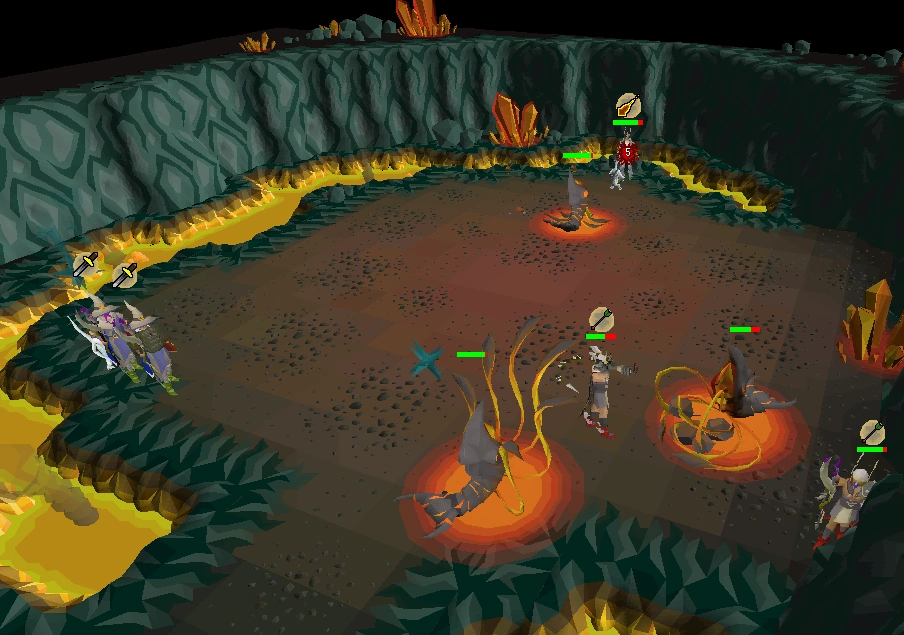
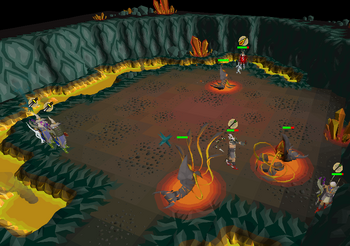
An ice demon is blocking the way further into the cavern. It cannot be attacked immediately, due to the cold protecting it. It must be warmed up to force it out of its spot. There are four braziers surrounding the demon, and up to four unattackable icefiends (one for each player) that will try to extinguish any flames set by the team. The icefiends do not move from their spot, so they can only focus on the brazier in front of it.
There is an infinite tinderbox and bronze axe spawn in the room, to save players time from killing scavengers for it.
Multiple saplings are nearby which can be cut for kindlings. It is advised to stockpile enough kindling before lighting the braziers. If possible, light the braziers that are not being attended to by the icefiends.
In a solo encounter, the player can either obtain 64, 54 or 48 kindling to light four, three and two braziers respectively. The more braziers lit, the faster the demon thaws.
Once thawed, the icefiends die and the demon moves out of its spot, becoming attackable. It uses AoE attacks; a small snowball and Ice Burst. If Protect from Magic is used, it will only focus on Ice Burst, while if Protect from Missiles is used, it will simply throw snowballs instead. Both attacks have a 3x3 AoE, but the Ice Burst attack can occasionally bind. It is recommended to keep Protect from Missiles active, to prevent the demon from using Ice Burst in addition to reducing the demon's snowball attack by roughly 50%.
Lizardman Shamans
A small room filled with two to four lizardman shamans (dependent on party size) are in the room, with several spawns blocking the way. They share the same mechanics as the shamans outside. The strength of the shamans is also dependent on the party size. These shamans do not require 100% favour with the Shayzien House in order to kill.
There are several layouts for the shaman room. When nearing a room with lizardmen shamans, one or two sets of spirit tendrils will appear, to avoid players from safespotting them away from the chamber. The chamber itself does have safespots against the shamans, though it will usually require a shaman to aggro a player in order to do so.
In a solo raid, the player will need to face two shamans. The shamans drop seeds upon being killed.
Dark Altar Room


Players fight against several Skeletal Mystics.
In this room, there is a varying amount of Skeletal Mystics left behind to perform sacrifices for the dark altar. The mages attack with magic from distance, and melee if players get close to them. The mages take the player's overhead prayers into account. However, if the mage cannot melee the player, they will focus on magic instead. In some areas of the chamber, it is possible to trick the mages into attempting to use melee, allowing for a relatively easy kill with the occasional magic attack from them as long as Protect from Magic is active.
Protect from Magic reduces the skeletons' accuracy and damage by roughly 50%.
Kill all the mages before proceeding. The strength of the mages is dependent on the party size.
In a solo raid, the player will encounter three mystics. The mystics drop seeds upon being killed.
Creature Keeper

Players search for cavern grubs within the chests.
A corrupted scavenger blocks the path and must be fed cavern grubs until it becomes full and tired. Cavern grubs can be found by opening many of the chests located in the room. The scavenger's hunger level can be tracked with the bar above its head.
Most of these chests will contain cocoons. Thieving is required to open the chests, though experience is only gained when grubs are collected. One of these chests always contains a one-time loot of five Psykk bat (6)s. A few chests may contain poison which is released when opened, dealing 1-3 damage. This does not inflict poison on the player (nor will poison immunity prevent it). Remember which chests contain poison, as the poison chests will automatically lock itself like the grub ones.
If run energy is a concern, find a cluster of four chests that are placed in a way that the player walks around a 2x2 square to save run energy. Each layout has at least one of these clusters. If that is not possible (due to one of those four chests being poisoned), simply walk around the room and pickpocket chests as you go.
Stockpile cavern grubs near the trough. When enough grubs are collected, start feeding the scavenger. In a solo raid, roughly 30 grubs will be needed to make the scavenger sleepy.
Players can search the creature keeper to obtain his journal.
Tightrope

The tightrope must be crossed to obtain the keystone.
A group of deathly rangers and mages stand on a platform in between a tightrope. They must be attacked with either ranged or magic in order to damage them. Both groups frequently hit through prayer, but protection prayers reduce the damage. A lodestone must be grabbed from the other side to complete the room. The tightrope requires Agility in order to use.
While they are tolerant to players, any player that attempts to cross the tightrope will get their attention. All enemies should be killed - this results in more points, and saves potential crossers from being one-ticked, since the damage they deal stacks on the player when they reach the other side. Any enemies left when the lodestone is used on the barrier will automatically die.
The mages should be killed first, as while they are just as accurate as the rangers, their max hit is significantly lower. When dealing with rangers in a group, one player should aggro the selected target before hiding behind an obstacle. This prevents the ranger from attacking as much. The bait should pop out once in a while to ensure that the ranger does not aggro an attacker.
Protect from Magic/Missiles does not provide full protection - it simply reduces the deathly opponents' damage by 50%.
In a solo raid, players will encounter two deathly mages and two deathly rangers.
Guardians


Two Guardian statues are guarding a passageway deeper into the chambers. The statues must be destroyed, as they will shove players away from the passageway if they try to get pass them. They can only be harmed through pickaxes; all other sources of damage will not count.

Players attacking the guardian statues.
The guardians attack with a cleaving melee attack and can occasionally stomp the ground, dealing moderate to heavy damage in a 3x3 area. Due to the guardians' stomping attack, it is highly recommended to flinch them to reduce the amount of damage taken. When flinching, run two tiles south of the guardian immediately after attacking, so that the stomp attack can be completely evaded if it manages to retaliate back.
The strength of the guardians is dependent on the party size. Guardians drop seeds, but significantly less than mystics and lizardmen shamans.
The special attack of the Saradomin godsword, Guthan's set and blood spells will heal accordingly despite not dealing any damage on them.
Resources
The Chambers of Xeric have various resources which appear based on the team's skill levels.
Scavenger runts and scavenger beasts can be found around the dungeon. One scavenger room is always guaranteed somewhere in the raid. It is common to encounter one scavenger room on each floor, though in uncommon and rare circumstances players may encounter two or even no scavenger rooms on the floor. They are killed for material drops which are used in the resource rooms, such as butterfly nets and cave worms.
The scavengers encountered are random, in addition to the room type they appear in - some rooms may be a small bend or curve, others a spacious area (which will always contain a boulder, mining rock or sapling which can be cleared away for points). The amount of scavengers in the room, along with their strength (to a very mild degree) is determined by the amount of players in the raid.
If the player dies in the Chambers, they will drop all raid-only items upon death; for example, if the player died with 10 Xeric's aid (+), those potions are dropped immediately upon dying. Other items that can be found, such as a hammer, will not be dropped upon death.
Players who die in the chamber will respawn in the area (they will not be thrown out). While exploring the first floor, the respawn point is the starting room of the Chambers. Once the second and third floors have been visited at least once by someone in the team, the respawn point changes to the last room in the previous floor.
Food
All these cooking resources require the same level for hunting or fishing them.
To catch bats, a butterfly net is required.
To catch fish, a fishing rod is required, with cave worms as bait. In fishing rooms, there are three fishing spots. One of these three spots contains a cave snake, which will damage the player (or take their fish). If a snake appears in the fishing spot, stop fishing and click elsewhere to avoid taking damage. While the spots are static, the spots containing plain fish and the cave snake change occasionally.
Fishing
| Food | Levels | XP | Heals | |
|---|---|---|---|---|
| Pysk fish (0) | 1 |
|||
| Suphi fish (1) | 15 |
8 | ||
| Leckish fish (2) | 30 |
11 | ||
| Brawk fish (3) | 45 |
29 Fish
19 Cook |
14 | |
| Mycil fish (4) | 60 |
32 |
17 | |
| Roqed fish (5) | 75 |
35 |
20 | |
| Kyren fish (6) | 90 |
38 |
23 | |
Hunter
In resource rooms without fishing spots, there will be two to three bats flying around in the chamber, which can be caught and cooked for food.
| Food | Levels | XP | Heals | |
|---|---|---|---|---|
| Guanic bat (0) | 1 |
5 (catch) 10 (cook) | 5 | |
| Prael bat (1) | 15 |
9 (catch) 13 (cook) | 8 | |
| Giral bat (2) | 30 |
11 | ||
| Phluxia bat (3) | 45 |
14 | ||
| Kryket bat (4) | 60 |
17 | ||
| Murng bat (5) | 75 |
20 | ||
| Psykk bat (6) | 90 |
23 | ||
Farming
Seeds can be obtained from several monsters, such as skeletal mystics, Lizardmen shamans and Guardian statues. They can also be found by raking weeds in the top and lower floors (the last area in those floors and the first area in the lower floor)
There are two farming plots in each resource room for players to grow herbs. Due to the magic of the chambers, herbs grow faster and are fully grown in 30 seconds.
| Seed | Level | Planting XP | Harvest XP | |
|---|---|---|---|---|
| Golpar seed | 27 |
4 | 10 | |
| Buchu seed | 39 |
6 | 15 | |
| Noxifer seed | 55 |
12 | 30 | |
Herblore
Potions can be occasionally dropped by the bosses, though this should not be relied on to obtain them. Scavenger runts and beasts drop herblore secondaries.
There are three types of potions a player can make:
- Golpar (combat potions)
- Buchu (recovery potions)
- Noxifer (overload-type potions)
To create potions in the chambers, a gourd must be collected from the nearby gourd tree, then filled with water from the nearby water spout. Gourds can be picked en masse with the "Pick-lots" option. Gourds automatically break upon drinking the last dose of the potion.
Note: Overload tier is capped based on your Herblore level and potions being used. For example, you cannot make Overload+ without having 90 Herblore and Elder+, Twisted+ and Kodai+ potions. If you have those potions but only have 75 Herblore, the combat+ potions will downgrade one tier to create a normal Overload.
Weak potions
| Potion | Level | Herb | Second ingredient | XP | Effect | |
|---|---|---|---|---|---|---|
| Elder (-) | 47 |
Increases Attack, Strength, and Defence levels. | ||||
| Twisted (-) | 47 |
Increases your Ranged level. | ||||
| Kodai (-) | 47 |
Increases your Magic level. | ||||
| Revitalisation (-) | 52 |
Restores your stats and Prayer. | ||||
| Prayer enhance (-) | 52 |
Regenerates prayer points over time. | ||||
| Xeric's aid (-) | 52 |
Works as Saradomin brew. | ||||
| Overload (-) | 60 |
Boosts all the player's combat stats by 4 + 10%, while damaging them for 50 hitpoints. This boost is repeated every 15 seconds for 5 minutes until the effects wear off, and the player is then healed 50 hitpoints. | ||||
Standard potions
Standard potions have the effects of their super variants outside (e.g the Overload is exactly the same as the one in Nightmare Zone).
| Potion | Level | Herb | Second ingredient | XP | Effect | |
|---|---|---|---|---|---|---|
| Elder potion | 59 |
Increases Attack, Strength, and Defence levels. | ||||
| Twisted potion | 59 |
Increases your Ranged level. | ||||
| Kodai potion | 59 |
Increases your Magic level. | ||||
| Revitalisation potion | 65 |
Restores your stats and Prayer. | ||||
| Prayer enhance | 65 |
Regenerates prayer points over time. | ||||
| Xeric's aid | 65 |
Works as Saradomin brew. | ||||
| Overload | 75 |
50 | Boosts all the player's combat stats by 5 + 13%, while damaging them for 50 hitpoints. This boost is repeated every 15 seconds for 5 minutes until the effects wear off, and the player is then healed 50 hitpoints. | |||
Strong potions
| Potion | Level | Herb | Second ingredient | XP | Effect | |
|---|---|---|---|---|---|---|
| Elder (+) | 70 |
13 | Increases Attack, Strength, and Defence levels. | |||
| Twisted (+) | 70 |
13 | Increases your Ranged level. | |||
| Kodai (+) | 70 |
13 | Increases your Magic level. | |||
| Revitalisation (+) | 78 |
26.5 | Restores your stats and Prayer. | |||
| Prayer enhance (+) | 78 |
26.5 | Regenerates prayer points over time. | |||
| Xeric's aid (+) | 78 |
26.5 | Works as Saradomin brew. | |||
| Overload (+) | 90 |
Boosts all the player's combat stats by 6 + 16%, while damaging them for 50 hitpoints. This boost is repeated every 15 seconds for 5 minutes until the effects wear off, and the player is then healed 50 hitpoints. | ||||
Storage units
Storage units are built from mallignum root planks, obtained as drops from scavengers. A hammer is required in building storage units, with the dragon warhammer being a suitable substitute.
Once a storage unit is built, anyone can use it. Storage units have a shared and personal set. The shared set allows players to store items such as hammers and potions. The personal set is much like the shared set, but it can also hold the player's belongings, such as weapons. The player can also put in raid-unique items in there if desired. In addition to this, once a storage unit is built anywhere in the Chambers, they will appear in all potential hotspots where they may be found.
Storage units can be found at the end of each level, in addition to appearing in resource rooms, the corrupted scavenger and ice demon chambers.
While higher-leveled storage units can be built immediately, they require the other storage units to be built. So in order to build a large storage unit instantly, you need 6 planks (4 for the first two storage units, then 2 for the remaining upgrade)
Players who leave the Chambers with their personal items still stored in the storage units can retreive them from the private storage unit next to the bank chest on the Mountain. The private storage unit must be emptied before players can re-enter the Chambers of Xeric.
| Storage units | Planks required | Experience | Capacity | Capacity (personal) | ||
|---|---|---|---|---|---|---|
| Small storage unit | 30 | 2 | 150 | 250 | 30 | |
| Medium storage unit | 60 | 4 | 150 | 500 | 60 | |
| Large storage unit | 90 | 6 | 150 | 1,000 | 90 | |