Mage Hybrid (talk | contribs) No edit summary |
(→Final Boss: added info about phases) Tag: Visual edit |
||
| Line 234: | Line 234: | ||
== Final Boss == |
== Final Boss == |
||
| + | It is recommended to bring a stamina potion, to negate the wind attack run-draining effect he gains in the second phase. |
||
| − | You kill Galvek. Strategies and Galvek's styles coming later. |
||
| + | |||
| + | The boss has 4 phases, depending on his position: |
||
| + | # At the top of the boat |
||
| + | # Flying west of the boat |
||
| + | # Flying east of the boat |
||
| + | # In the middle of the boat |
||
| + | During the 1st or 4th phase, you can use melee on him, so something like a [[Dragon Warhammer]] is very effective on him. During all phases, he will sometimes shoot a slow moving fireball, that if not avoided, will one shot you. Make sure to keep moving if you see the animation. |
||
| + | |||
| + | '''1st phase''' |
||
| + | |||
| + | Galvek will sometimes throw fire traps around the ship that will instantly kill you if you walk into them. Their position will always be the same, so a safe place to be is exactly in front of him. You can stay roughly between melee range and the broken part of the ship. Whenever he does the insta kill fireball, move north-south to avoid it. |
||
| + | |||
| + | '''2nd phase''' |
||
| + | |||
| + | Galvek will move from the top of the ship and start flying in place to the west of it. He will gain two new attacks: a ranged attack, that looks like a small, red orb and a wind attack, which slightly drains your stats and a lot of run energy. Don't forget to keep moving to avoid the fireball. |
||
| + | |||
| + | '''3rd phase''' |
||
| + | |||
| + | Galvek will move to the other side of the ship and he will gain yet another attack, this time a moving water wall. The wall has a one tile gap in it, which you must go through in order to not get one shot by the wall. |
||
| + | |||
| + | '''4th phase''' |
||
| + | |||
| + | Galvek will land on the ship and will gain a rock throwing attack, but will stop doing the stat-draining wind attack. This is where the stamina potion comes useful: sip the stamina and run around him, while hitting him. This way, you avoid both the rock and the fireball. |
||
== Rewards == |
== Rewards == |
||
Revision as of 16:51, 4 January 2018
Dragon Slayer II is a quest released on 4 January 2018. It was announced during RuneFest 2017, and is a sequel to the original Dragon Slayer quest.
Details
| Start point | |
| Official difficulty | Grandmaster |
| Description | None |
| Length | Very Long (estimation 2-4 hours) |
| Requirements |
No boosts allowed: |
| Items required |
|
| Enemies to defeat |
Every single dragon in ascending order leading up to Galvek
|
Starting Off
Items Required: Pickaxe (Suggested: Amulet of glory, Digsite pendant, Weapons and Armour
To start the quest, first speak to Alec Kincade outside the Myths' Guild. He will let you join the guild if you can discover an ancient secret, and tells you to meet up with Dallas Jones at Karamja Wines, Spirits, and Beers.
Speak to Dallas Jones, who will realize you are the Hero of Crandor after learning that you slayed Elvarg. He tells you to meet her in her old lair. Once inside, use a pickaxe on a covered up wall at the north-eastern corner. Should a player forget their pickaxe, just outside her lair, there is a rock with a bronze pickaxe embedded in it. When the wall crumbles, go in.
Inspect the machinery to the east for some old notes, then attempt to inspect the mural. A spawn will burst out from the nearby pot and attack you; kill it. Once it is killed, reinspect the mural again, which Dallas states that it means the House by the Hill on Fossil Island. Head there.
Puzzle
The quickest way to reach the House on the Hill is with an enchanted Digsite pendant; refer on the page on how to access this form. Once inside, head downstairs, where Dallas states that you need to finish this puzzle. He gives you some puzzle scraps, which you can give to him to hold. You need to find the other 24 scraps, which are found near or around the House on the Hill; don't go past the bridges, as there's nothing there.
- There are five scraps on the chest at the same floor as you.
- There are three more scraps on the chest at the top floor.
- There are seven scraps in a hook briar south of the house.
- There are five a mushtree just east of the house, near the strange stone.
- There are four in the fungi next to the staircase outside.
Moving On
Items Required: hammer, amulet of catspeak, saw, 8 oak planks, 10 swamp paste, 12 nails of any kind
Once all map parts are given, it's time to solve the puzzle. You need to map out the area using the pieces you obtained. Some pieces are stuck, so those can't be moved. The remaining can be turned and moved around as desired. You'll know when you've completed it when your character mentions it. Dallas tells you to look for Jardric, who is found at the Fossil Island Camp next to the General Store, while he stays behind to take a copy of the completed map.
Jardic tells you that he can use a boat, but requires 8 Oak planks, 10 Swamp paste, 12 nails of any kind (NOTE: YOU MAY BEND NAILS, BRING EXTRAS), a saw, and a hammer. Once you have these materials, you can build the boat, which is just north-west of the Mushroom Forest.
The easiest way to get there is with the enhanced Digsite pendant, as the mushtree taking you to the forest is extremely close to the shore. Build the boat.
At Lithkren
Make your way towards Lithkren. Head slightly north and up the stairs of the only accessible building. Travel south down the trap door, down the stairs to the north, and follow the path. Meet Dallas at the bottom. He tells you that he found these doors but can't open them. Search the nearby burnt skeleton for an old diary, then speak to Dallas again. You suggest that Bob the cat may help, which Dallas finds absurd but trusts you.
Finding Bob
Find Bob, who can be located in a large array of places. Using your catspeak amulet (e) from A Tail of Two Cats will prove very useful here.
A few of the common locations to find Bob are:
- Taverley home portal
- Taverley clothes line
- Varrock west bank anvils
- Falador east bank
Make sure you have your amulet of catspeak to understand him!
Speak to Bob with your kitten/cat. You tell Bob about his memories as Robert the Strong, which he can't remember. So the group suggests to talk to the Sphinx again, so meet him at Sophanem. The Sphinx tells you that she has given you the ability to speak with cats without having the amulet of catspeak on, as you've proven yourself to be a friend of the felines. Tell the Sphinx of your problems; unfortunately, she can't help you. However, you then remember of the Oneiromancer, and you tell Bob to meet you there. Make sure you bring your Seal of passage if you haven't completed the Fremmenik Elite Diaries yet!
Helping Bob
Items needed: Tinderbox, goutweed, astral rune, hammer, pestle and mortar, fighting equipment (good range defensive armor, food)
The Oneiromancer gives you a dream vial, telling you that you need to make it the same way as you helped Cyrisus in Dream Mentor. Once you make the potion, light the brazier to the building at the far west and use the dream potion on it. Make sure you put your cat away for this next part.
Entering Bob's dream, Not Bob tells you that the guardian needs to be defeated to bring back Bob's memories. You must fight Robert the Strong. He is level 194 and uses Ranged. Prayer can be used during this fight, however he is able to hit through prayer; it's highly recommended to bring some food as he can deal some damage. additionally he wont be able to be damaged by ranged attacks. (NOTE: Crush attacks seem to work the best). Make sure to maximise your range defence and crush attack. Two handed crush weapons should not be used as this will guarantee a very fast death.
When Robert says "Let's see if you can hide from this!", run to a pillar and hide behind it. This will protect you from a strong arrow which will deal heavy damage and will disable your current prayer(s) if you let it hit you. It is best to eat any food to heal at this point while running to allow you to continuously hit without pause during the fight. Robert will then bring you back to him for being a coward. Repeat until he dies. Bob will then remember everything now that the guardian is killed.
If you die fighting Robert, a chest near the brazier will allow you to reclaim items for a fee of 100k. Don't die again anywhere though, or the contents will be lost!
Finding the Map
Bob tells you that he hid several key pieces around the world after the incident.
Karamja Key Piece
Items needed: Food, energy restoration (stamina potions and Saradomin brews recommended)
Location of the maze entrance.
Inside the maze.
Bob tells you that he hid the Karamja key on the south coast of Karamja; the Kharazi Jungle. Head towards the south-eastern area of the shore, where there's staircases leading underground. This takes you to a maze.
You have to navigate the maze, with traps consisting of spike and man traps. The spikes can be disabled through thieving, and man traps leaped over with Agility. To make matters worse, there's also multiple Stone guardian wandering the area in a multi-combat environment. Each Stone guardian only uses one combat style (indicated by the color on them), so pray accordingly. West, South, east all the way, north, west, south. The traps will do more damage than tanking a wrong pray guardian so mouse over corners before running to save food.
Red: Melee
Green: Ranged
Blue: Magic
Once you reach the center, grab the key piece. The plinth also activates to for a two-way transport between the entrance and center.
Morytania Key Piece
Bob tells you that he had a trusted friend hold onto this key. Go to Varrock, and speak to Reldo regarding this. He'll tell you of the book, and that he doesn't remember where it was, but knows that it had a red cover. Search the bookcases until you find it, then he'll read it. Apparently, the family of the person you're looking for seems to have moved over to Morytania, so go to Port Phasmatys.
Make sure you have your ghostspeak amulet equipped. Speak to the villagers, and they'll lead you to a ghost woman just west of the bank. Speak to her about the key; she buried it in the swamp because she didn't feel comfortable around it. You'll remark about a device that may find it, so head to Draynor Manor and speak to Ava. She can make you the device if you make her a locator orb, from two pieces of molten glass and a cut dragonstone with a glassblowing pipe. Make it, then give it to her.
It's time to search for the key. The orb acts much like similar items, damaging the player when used in return for telling you where it is. Make sure you have food to last the trip. Be wary of ghasts, as they may rot your food. Once you find the exact location, dig it up.
Rellekka Key Piece
Bob tells you that he hid another key in an abandoned fort of Rellekka. Talk to Brundt the Chieftain about this fort, and he tells you that a dragon has slain many of his warriors who went there. He'll give you permission to fight the dragon, and that Torfinn will take you there. Kill Vorkath. Go into lair. find hidden lever* in southwest of map and pull to unlock door. Be sure to have an extra inventory space for the Ancient Key, also in the chest, that you will need later.
During the fight pray mage, It would be beneficial to set up quick prayers as he frequently disables prayer, bring an antivenom+ or serpentine helm as he applies venom to the player. During the phase where he spits acid move continuously every tick to avoid damage. In another phase he summons a small decending meteor/ fireball avoid the 3x3 area around this as the attack hits 60+
*Lever is in southwest corner between the crates.
Kourend Key Piece
Bring a Lightsource
Head to Amelia in Shayzien house. She is in a hut south-west from the bank, west of the clothes store. While you are nearby, grab a tinderbox and a lightsource. She will tell you to go to the Shayzien crypts. They are in the south western part of the Shayzien graveyard (dungeon icon).
Shayzien Crypt part:
| PERSON | WEAPON | LOCATION |
|---|---|---|
| Avias | Crossbow | Zarthium |
| Camorra | Axe | Saranthium |
| Robert | Bow | Arkney |
| Tristan | Sword | Karville |
Note: If you get it wrong, you'll get another clue/puzzle from the tomb.
Forging the Pieces
Items required: All 4 pieces, ancient key, Fire wave spells, HAMMER, Dragonfire protection, Recommended: Barbarian outpost teleport, stamina, food
Travel to the ancient caverns. Once on the floor with the green dragons, follow the east wall until you reach stairs leading to the Mithril Dragons. Once up the stairs, travel west to a door on the north side of the wall and go inside. Use fire spells on the three structures. Go back out and travel east and down the stairs. run to the south west corner where the barbarians are and go up the stairs. Continue to the end and forge the four pieces together.
Once you have the combined key, go back to the dragon door* and place the key into it.
*The dragon door is located on Lithkren using the boat on the west coast of Mushroom Meadows on Fossil Island.
Final Preparations
Items required: Ardougne teleport, Varrock teleport, Falador teleport, Transportation to Rellekka,
A cutscene will play once you enter the dragon doors and continue down. Once the cutscene is over travel to King Roald in Varrock castle. You then have to talk to Sir Amik Varze in Falador, King Lathas in Ardougne, and Brundt in Rellekka.
Once you have talked to everyone, travel back to Varrock castle and go through the north door of King Roald's room. Talk to Bob after you leave the room.
Final part on the boats
There's four checkpoints during this final part of the quest. Once you completed any of the four seperate parts you won't have to do it again. When you teleport or die you can reach these checkpoints again by speaking to the sailor on the Relleka docks. You can also reclaim your items there if you died for a 100k fee. The checkpoints are:
- After the four minutes on the barbarian boat
- After all agility obstacles and the cutscene when you first reach the big boat with the two green and two blue dragons
- After the cutscene when you killed the green and blue dragons and the black dragon spawns
- After you killed the rune dragon and you have to start killing the final boss.
CAUTION: Galvek will shoot fireballs at you while you're fighting the other dragons.
Final Boss
It is recommended to bring a stamina potion, to negate the wind attack run-draining effect he gains in the second phase.
The boss has 4 phases, depending on his position:
- At the top of the boat
- Flying west of the boat
- Flying east of the boat
- In the middle of the boat
During the 1st or 4th phase, you can use melee on him, so something like a Dragon Warhammer is very effective on him. During all phases, he will sometimes shoot a slow moving fireball, that if not avoided, will one shot you. Make sure to keep moving if you see the animation.
1st phase
Galvek will sometimes throw fire traps around the ship that will instantly kill you if you walk into them. Their position will always be the same, so a safe place to be is exactly in front of him. You can stay roughly between melee range and the broken part of the ship. Whenever he does the insta kill fireball, move north-south to avoid it.
2nd phase
Galvek will move from the top of the ship and start flying in place to the west of it. He will gain two new attacks: a ranged attack, that looks like a small, red orb and a wind attack, which slightly drains your stats and a lot of run energy. Don't forget to keep moving to avoid the fireball.
3rd phase
Galvek will move to the other side of the ship and he will gain yet another attack, this time a moving water wall. The wall has a one tile gap in it, which you must go through in order to not get one shot by the wall.
4th phase
Galvek will land on the ship and will gain a rock throwing attack, but will stop doing the stat-draining wind attack. This is where the stamina potion comes useful: sip the stamina and run around him, while hitting him. This way, you avoid both the rock and the fireball.
Rewards
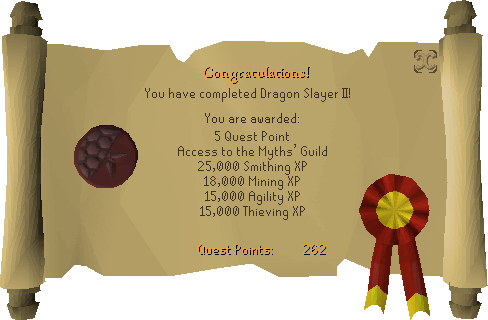
- 5
 Quest points
 - 25,000 Smithing experience
- 18,000 Mining experience
- 15,000 Agility experience
- 15,000 Thieving experience
- Access to the Myths' Guild.