mNo edit summary |
m (cleanup) |
||
| (22 intermediate revisions by 18 users not shown) | |||
| Line 1: | Line 1: | ||
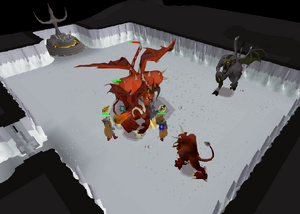
| + | [[File:Fighting K'ril Tsutsaroth.png|thumb|300px|A pair of players fighting K'ril Tsutsaroth and his bodyguards.]] |
||
[[K'ril Tsutsaroth]] is a powerful boss capable of hitting up to 60 with his [[Melee]] attacks, 30 with his [[Magic]] attacks, and 49 with a [[Prayer]]-draining [[special attack]] that he occasionally uses against players who use [[Protect from Melee]]. K'ril's attacks are also capable of poisoning the player starting at 16 damage. |
[[K'ril Tsutsaroth]] is a powerful boss capable of hitting up to 60 with his [[Melee]] attacks, 30 with his [[Magic]] attacks, and 49 with a [[Prayer]]-draining [[special attack]] that he occasionally uses against players who use [[Protect from Melee]]. K'ril's attacks are also capable of poisoning the player starting at 16 damage. |
||
| Line 6: | Line 7: | ||
The 40 [[Zamorak]] followers [[kill count]] is quite easy to achieve although it will take longer than [[Bandos]]. There are several tips to get a quick killcount: |
The 40 [[Zamorak]] followers [[kill count]] is quite easy to achieve although it will take longer than [[Bandos]]. There are several tips to get a quick killcount: |
||
| − | *Main room: The place north and east of the |
+ | *Main room: The place north and east of the rope has Zamorakian followers fighting both Bandosians in the north and Saradominists in the east. There are two [[imp]]s which can be quickly killed, and other followers such as [[Bloodveld]]s, [[Gorak]]s, [[Werewolf|Werewolves]] and [[Icefiend]]s battling [[Spiritual warrior]]s and [[Spiritual mage]]s. |
| + | *Zamorak's Fortress: There are four imp spawns which can be quickly killed for kill count. |
||
| − | *North of the rope is where [[Bandos]] and Zamorakian followers fight each other. [[Hobgoblin]]s, [[ogre]]s and [[goblin]]s fight the [[hellhound]]s; [[Feral Vampyre]]s and werewolves and the hobgoblins are quite durable for their [[Combat level]], and this should be taken note of when killing Zamorak followers. |
||
| − | *In [[Zamorak's Fortress]], there are four imp spawns that can be killed for a fairly fast rate. Spiritual mages can also be killed while waiting for the imps to respawn, requiring 83 [[Slayer]]. While the mages can provide [[dragon boots]] to turn the trip profitable if something goes wrong, since inventory space is needed, it is best to kill werewolves and spiritual warriors (68 Slayer) instead. |
||
| − | == |
+ | ==Strategy== |
| + | K'ril attacks with both melee and magic. His magic attack is significantly weaker compared to his melee attacks, but should not be underestimated as it can hit up to 30. His melee attacks can hit up to 47, and will also inflict poison starting at 16 damage. If his target is using [[Protect from Melee]], he will perform a prayer smash attack, yelling ''"YARRRRRRR!"'', dealing up to 49 damage and will also reduce the target's current prayer points by 50%. |
||
| − | * If on a [[slayer task]], consider bringing along [[Arclight]] and a [[Dragon halberd|Dragon]]/[[Crystal halberd]]. On a task against [[demons]], Arclight performs better than a [[tentacle whip]], and you will be hitting very frequently (and often hard) with the slayer helm and arclight. It is also far easier and cheaper to maintain. The dragon/crystal halberd can make short work of [[K'ril]] if both hits manage to damage him hard enough. If inventory space is a concern, you can use Arclight's [[special attack]] instead to drain K'ril's stats. |
||
| − | ** If not on a slayer task, bring a [[Serpentine helm]] instead, since it will prevent K'ril from [[poisoning]] you. |
||
| − | * Bring an [[unholy blessing]] to save inventory space. Although it is rather expensive, you will not need to bring another Zamorak affiliated item to swap just for god protection while getting killcount. |
||
| − | * Always keep spare [[Ecumenical key]]s on hand! Incase you die, you can bring the key along to get back to your grave quickly without having to get [[killcount]]. You can also use it to go straight into the boss room; however, this is not recommended as [[Zamorakian]] killcount is rather easy to obtain, and if it is your last one, could be an issue if you die in the boss room. |
||
| − | * When [[tanking]], keep health above 70, as it is possible to get combo'ed out if K'ril performs his [[prayer]] smash attack and a minion manages to land a max hit on you. |
||
| − | ** If you need to eat while tanking, go under K'ril; that way, he will not get free swings at you while you are recovering health. |
||
| − | ** In addition, attack twice with your primary weapon, then go under him. If you do this right, you will delay K'ril's attacks, which will reduce the amount of damage he can deal to you. |
||
| − | * Once K'ril dies, attack [[Zakl'n Gritch]] ([[Ranged]] minion) first, as you will most likely be praying Magic, nullifying [[Balfrug Kreeyath]]'s ([[Magic]] minion) attacks. Zakl'n can hit harder then [[Tstanon Karlak]] ([[Melee]] minion). [[Guthan's]] can be used to heal off them while K'ril is respawning, and prayer flicking is advised so that you can protect yourself from the minions' attacks while killing them. The minions also drop food in sets of three [[tuna potato]]es and two [[shark]]s, which can help prolong trips. |
||
| − | ** Experienced players can prayer flick instead to prevent the minions from outright damaging you. |
||
| + | K'ril can be dealt with the same way as with [[General Graardor]] as both fights are fairly the same. |
||
| − | ==Setup== |
||
| − | <tabber> |
||
| − | |-| Magic Defence Tank = |
||
| − | When using this setup, you will be using [[Protect from Melee]] to block his powerful [[Melee]] attacks. You should choose gear to maximise your magical [[Defence]]. A [[Magic]] level of around 80+ is enough to block the majority of his magical attacks. Be aware that [[K'ril]] will occasionally use his powerful [[special attack]] that can deal heavy damage and will drop your current prayer points by half. You should keep Prayer points low to prevent losing too many Prayer points when he does activate his special attack. |
||
| + | [[Sanfew serum]]s are recommended as they serve as both antipoison and super restores. All players should carry one or two of these potions in the event that they must tank a kill. |
||
| − | It is recommended to stand on the north-east corner, as the mage and range minions cannot see you from that side.<ref>An update on the 17<sup>th</sup> December 2013 caused all minions to be on those who are attacking the boss; therefore, it significantly reduces the amount of kills per trip.</ref> |
||
| + | ==Equipment== |
||
| − | * 80+ {{Skill clickpic|Magic}}<br> |
||
| − | * 70+ {{Skill clickpic|Hitpoints}}<br> |
||
| − | * 70+ {{Skill clickpic|Attack}}<br> |
||
| − | * 70+ {{Skill clickpic|Strength}}<br> |
||
| − | * 70+ {{Skill clickpic|Defence}}<br> |
||
| − | * 70+ {{Skill clickpic|Prayer}}<br> |
||
| + | ===Tank=== |
||
| − | {| class="wikitable" |
||
| + | <tabber> |
||
| − | !Slot |
||
| + | Magic Defence Tank = The tanking player focuses on magic defence while using [[Protect from Melee]] to defend themselves against K'ril's powerful melee attacks. This will leave them vulnerable to his prayer smash attack however, so they should keep their health high to avoid being combo'ed out by the resulting damage from this attack and from minions. Players may maximise magical defence by changing their legs to ranged legs, but this will make them more vulnerable to [[Zakl'n Gritch]]'s attacks. |
||
| − | !Item |
||
| − | |- |
||
| − | |'''Weapon''' |
||
| − | |[[Arclight]] (task only) > [[Zamorakian hasta]] > [[Abyssal tentacle]] > [[Abyssal whip]] |
||
| − | |- |
||
| − | |'''Head''' |
||
| − | |[[Serpentine helm]] > [[Slayer helmet]] ([[Black mask]]) (only if on task) > [[Guthan's helm]] > [[Verac's helmet]] |
||
| − | |- |
||
| − | |'''Neck''' |
||
| − | |[[Amulet of fury]] > [[Amulet of glory]] |
||
| − | |- |
||
| − | |'''Torso''' |
||
| − | |[[Armadyl chestplate]] > [[Karil's leathertop]] > [[Zamorak body]] |
||
| − | |- |
||
| − | |'''Legs''' |
||
| − | |[[Armadyl chainskirt]] > [[Karil's leatherskirt]] > [[Zamorak chaps]] |
||
| − | |- |
||
| − | |'''Boots''' |
||
| − | |[[Dragon boots]] ([[Strength]] bonus) / [[Infinity boots]] ([[Magic]] [[Defence]]) > [[Bandos boots]] |
||
| − | |- |
||
| − | |'''Cape''' |
||
| − | |[[Fire cape]] > [[Skillcape]] (trimmed) > [[Zamorak cape]] > [[Skillcape]] |
||
| − | |- |
||
| − | |'''Special attack weapon''' |
||
| − | |[[Saradomin godsword]] > [[Crystal halberd]] > [[Dragon halberd]] > [[Dragon dagger]] |
||
| − | |- |
||
| − | |'''Shield''' |
||
| − | |[[Spectral spirit shield]] > [[Dragonfire shield]] > [[Crystal shield]] > [[Dragon defender]] |
||
| − | |- |
||
| − | |'''Gloves''' |
||
| − | |[[Barrows gloves]] > [[Dragon gloves]] > [[Combat bracelet]] |
||
| − | |- |
||
| − | |'''Ring''' |
||
| − | |[[Berserker ring (i)]] / [[Warrior ring (i)]] > [[Berserker ring]] / [[Warrior ring]] > [[Seers' ring (i)]] / [[Seers ring]] ([[Magic]] [[Defence]]) > [[Ring of wealth]] > [[Ring of life]] |
||
| − | |} |
||
| + | {{Recommended equipment |
||
| − | <references/> |
||
| + | |style = melee |
||
| + | |helm1 = {{plink|Slayer helmet (i)}} (task only) |
||
| + | |helm2 = {{plink|Serpentine helm}} |
||
| + | |helm3 = {{plink|Helm of neitiznot}} |
||
| + | |neck1 = {{plink|Amulet of torture}} |
||
| + | |neck2 = {{plink|Amulet of fury}} |
||
| + | |neck3 = {{plink|Amulet of glory}} |
||
| + | |cape1 = {{plink|Infernal cape}} |
||
| + | |cape2 = {{plink|Fire cape}} |
||
| + | |cape3 = {{plink|Max cape}} or {{plink|Hitpoints cape}} |
||
| + | |cape4 = {{plink|Ardougne cloak 4}} |
||
| + | |cape5 = {{plink|Ardougne cloak 3}} |
||
| + | |body1 = {{plink|Karil's leathertop}} |
||
| + | |body2 = {{plink|Armadyl chestplate}} |
||
| + | |body3 = {{plink|Blessed d'hide|pic=Saradomin d'hide|txt=Blessed d'hide}} |
||
| + | |body4 = {{plink|Black d'hide body}} |
||
| + | |legs1 = {{plink|Karil's leatherskirt}} |
||
| + | |legs2 = {{plink|Armadyl chainskirt}} |
||
| + | |legs3 = {{plink|Blessed chaps|pic=Saradomin chaps|txt=Blessed chaps}} |
||
| + | |legs4 = {{plink|Black d'hide chaps}} |
||
| + | |weapon1 = {{plink|Arclight}} (task only) |
||
| + | |weapon2 = {{plink|Scythe of vitur}} |
||
| + | |weapon3 = {{plink|Ghrazi rapier}} |
||
| + | |weapon4 = {{plink|Abyssal tentacle}} |
||
| + | |weapon5 = {{plink|Abyssal whip}} |
||
| + | |shield1 = {{plink|Elysian spirit shield}} |
||
| + | |shield2 = {{plink|Dragonfire shield}} |
||
| + | |shield3 = {{plink|Avernic defender}} |
||
| + | |shield4 = {{plink|Dragon defender}} |
||
| + | |gloves1 = {{plink|Barrows gloves}} |
||
| + | |gloves2 = {{plink|Rune gloves}} |
||
| + | |gloves3 = {{plink|Regen bracelet}} |
||
| + | |gloves4 = {{plink|Combat bracelet}} |
||
| + | |gloves5 = {{plink|Bracelet of slaughter}} (optional for extending task) |
||
| + | |boots1 = {{plink|Primordial boots}} |
||
| + | |boots2 = {{plink|Dragon boots}} |
||
| + | |boots3 = {{plink|Rune boots}} |
||
| + | |ring1 = {{plink|Ring of suffering (ri)|Ring of suffering (i)}} |
||
| + | |ring2 = {{plink|Berserker ring (i)}} |
||
| + | |ring3 = {{plink|Ring of the gods (i)}} |
||
| + | |ring4 = {{plink|Seers ring (i)}} |
||
| + | |special1 = {{plink|Dragon warhammer}} |
||
| + | |special2 = {{plink|Bandos godsword}} |
||
| + | |special3 = {{plink|Crystal halberd}} |
||
| + | }} |
||
| + | |-| |
||
| − | |-| Melee Defence Tank = |
||
| + | Melee Defence Tank = By focusing on melee defence, players can use [[Protect from Magic]] to protect themselves from K'ril's magical attacks and his prayer smash. However, his melee attacks are significantly more accurate compared to his magic attack and have a higher max hit. K'ril's melee attack is slash-based, so high Slash defence is recommended. |
||
| − | With this setup, you will pray [[Protect from Magic]] and wear [[armour]] to maximise your [[Melee Defence]]. This is '''not recommended''' for players under 90 [[Defence]] because [[K'ril]] will be too accurate and deal too much damage. This method has the benefit of avoiding K'ril's dangerous [[special attack]]. |
||
| + | {{Recommended equipment |
||
| − | * 90+ {{Skill clickpic|Defence}}<br> |
||
| + | |style = melee |
||
| − | * 70+ {{Skill clickpic|Hitpoints}}<br> |
||
| + | |helm1 = {{plink|Justiciar faceguard}} |
||
| − | * 70+ {{Skill clickpic|Attack}}<br> |
||
| + | |helm2 = {{plink|Slayer helmet (i)}} (task only) |
||
| − | * 70+ {{Skill clickpic|Strength}}<br> |
||
| + | |helm2 = {{plink|Serpentine helm}} |
||
| − | * 70+ {{Skill clickpic|Prayer}}<br> |
||
| + | |neck1 = {{plink|Amulet of torture}} |
||
| + | |neck2 = {{plink|Amulet of fury}} |
||
| + | |neck3 = {{plink|Amulet of glory}} |
||
| + | |cape1 = {{plink|Infernal cape}} |
||
| + | |cape2 = {{plink|Fire cape}} |
||
| + | |cape3 = {{plink|Max cape}} or {{plink|Hitpoints cape}} |
||
| + | |cape4 = {{plink|Ardougne cloak 4}} |
||
| + | |cape5 = {{plink|Ardougne cloak 3}} |
||
| + | |body1 = {{plink|Justiciar chestguard}} |
||
| + | |body2 = {{plink|Torag's platebody}} |
||
| + | |body3 = {{plink|Verac's brassard}} |
||
| + | |legs1 = {{plink|Justiciar legguards}} |
||
| + | |legs2 = {{plink|Torag's platelegs}} |
||
| + | |legs3 = {{plink|Verac's plateskirt}} |
||
| + | |weapon1 = {{plink|Arclight}} (task only) |
||
| + | |weapon2 = {{plink|Scythe of vitur}} |
||
| + | |weapon3 = {{plink|Ghrazi rapier}} |
||
| + | |weapon4 = {{plink|Abyssal tentacle}} |
||
| + | |weapon5 = {{plink|Abyssal whip}} |
||
| + | |shield1 = {{plink|Elysian spirit shield}} |
||
| + | |shield2 = {{plink|Dragonfire shield}} |
||
| + | |shield3 = {{plink|Avernic defender}} |
||
| + | |shield4 = {{plink|Dragon defender}} |
||
| + | |gloves1 = {{plink|Barrows gloves}} |
||
| + | |gloves2 = {{plink|Rune gloves}} |
||
| + | |gloves3 = {{plink|Regen bracelet}} |
||
| + | |gloves4 = {{plink|Combat bracelet}} |
||
| + | |gloves5 = {{plink|Bracelet of slaughter}} (optional for extending task) |
||
| + | |boots1 = {{plink|Primordial boots}} |
||
| + | |boots2 = {{plink|Dragon boots}} |
||
| + | |boots3 = {{plink|Rune boots}} |
||
| + | |ring1 = {{plink|Ring of suffering (ri)|Ring of suffering (i)}} |
||
| + | |ring2 = {{plink|Berserker ring (i)}} |
||
| + | |ring3 = {{plink|Ring of the gods (i)}} |
||
| + | |special1 = {{plink|Dragon warhammer}} |
||
| + | |special2 = {{plink|Bandos godsword}} |
||
| + | |special3 = {{plink|Crystal halberd}} |
||
| + | }} |
||
| + | </tabber> |
||
| − | {| class="wikitable" |
||
| − | !Slot |
||
| − | !Item |
||
| − | |- |
||
| − | |'''Weapon''' |
||
| − | |[[Godsword]] > [[Abyssal whip]] > [[Zamorakian spear]] |
||
| − | |- |
||
| − | |'''Head''' |
||
| − | |[[Serpentine helm]] > [[Black mask]] (only if on task) > [[Verac's helmet]] > [[Torag's helm]] > [[Helm of neitiznot]] |
||
| − | |- |
||
| − | |'''Neck''' |
||
| − | |[[Amulet of fury]] > [[Amulet of glory]] |
||
| − | |- |
||
| − | |'''Torso''' |
||
| − | |[[Torag's platebody]] > [[Bandos chestplate]] |
||
| − | |- |
||
| − | |'''Legs''' |
||
| − | |[[Verac's plateskirt]] > [[Torag's platelegs]] > [[Bandos tassets]] |
||
| − | |- |
||
| − | |'''Boots''' |
||
| − | |[[Guardian boots]] > [[Dragon boots]] > [[Bandos boots]] > [[Rune boots]] |
||
| − | |- |
||
| − | |'''Cape''' |
||
| − | |[[Fire cape]] > [[Skillcape]] (trimmed) > [[Zamorak cape]] > [[Skillcape]] |
||
| − | |- |
||
| − | |'''Special attack weapon''' |
||
| − | |[[Darklight]] (if using Abyssal whip) / [[Bandos godsword]] / [[Armadyl godsword]] / [[Saradomin godsword]] |
||
| − | |- |
||
| − | |'''Shield''' |
||
| − | |[[Dragonfire shield]] > [[Crystal shield]] > [[Dragon defender]] > [[Rune defender]] |
||
| − | |- |
||
| − | |'''Gloves''' |
||
| − | |[[Barrows gloves]] > [[Dragon gloves]] > [[Regen bracelet]] > [[Combat bracelet]] |
||
| − | |- |
||
| − | |'''Ring''' |
||
| − | |[[Berserker ring (i)]] > [[Berserker ring]] > [[Ring of wealth]] > [[Ring of life]] |
||
| − | |} |
||
| − | + | ===Attacker=== |
|
| + | <tabber> |
||
| − | This setup focuses solely on damage per second, and it is recommended for [[Melee]] users who are not going to [[tank]]. |
||
| + | Melee Attacker = |
||
| + | {{Recommended equipment |
||
| − | * 70+ {{Skill clickpic|Hitpoints}}<br> |
||
| + | |style = melee |
||
| − | * 70+ {{Skill clickpic|Attack}}<br> |
||
| + | |helm1 = {{plink|Slayer helmet (i)}} (task only) |
||
| − | * 70+ {{Skill clickpic|Strength}}<br> |
||
| + | |helm2 = {{plink|Serpentine helm}} |
||
| − | * 70+ {{Skill clickpic|Defence}}<br> |
||
| + | |helm3 = {{plink|Helm of neitiznot}} |
||
| − | * 70+ {{Skill clickpic|Prayer}}<br> |
||
| + | |neck1 = {{plink|Amulet of torture}} |
||
| + | |neck2 = {{plink|Amulet of fury}} |
||
| + | |neck3 = {{plink|Amulet of glory}} |
||
| + | |cape1 = {{plink|Infernal cape}} |
||
| + | |cape2 = {{plink|Fire cape}} |
||
| + | |cape3 = {{plink|Max cape}} or {{plink|Hitpoints cape}} |
||
| + | |cape4 = {{plink|Ardougne cloak 4}} |
||
| + | |cape5 = {{plink|Ardougne cloak 3}} |
||
| + | |body1 = {{plink|Bandos chestplate}} |
||
| + | |body2 = {{plink|Karil's leathertop}} |
||
| + | |body3 = {{plink|Blessed d'hide|pic=Saradomin d'hide|txt=Blessed d'hide}} |
||
| + | |legs1 = {{plink|Bandos tassets}} |
||
| + | |legs2 = {{plink|Verac's plateskirt}} |
||
| + | |weapon1 = {{plink|Arclight}} (task only) |
||
| + | |weapon2 = {{plink|Scythe of vitur}} |
||
| + | |weapon3 = {{plink|Ghrazi rapier}} |
||
| + | |weapon4 = {{plink|Abyssal tentacle}} |
||
| + | |weapon5 = {{plink|Abyssal whip}} |
||
| + | |shield1 = {{plink|Elysian spirit shield}} |
||
| + | |shield2 = {{plink|Dragonfire shield}} |
||
| + | |shield3 = {{plink|Avernic defender}} |
||
| + | |shield4 = {{plink|Dragon defender}} |
||
| + | |gloves1 = {{plink|Barrows gloves}} |
||
| + | |gloves2 = {{plink|Rune gloves}} |
||
| + | |gloves3 = {{plink|Regen bracelet}} |
||
| + | |gloves4 = {{plink|Combat bracelet}} |
||
| + | |gloves5 = {{plink|Bracelet of slaughter}} (optional for extending task) |
||
| + | |boots1 = {{plink|Primordial boots}} |
||
| + | |boots2 = {{plink|Dragon boots}} |
||
| + | |boots3 = {{plink|Rune boots}} |
||
| + | |ring1 = {{plink|Ring of suffering (ri)|Ring of suffering (i)}} |
||
| + | |ring2 = {{plink|Berserker ring (i)}} |
||
| + | |ring3 = {{plink|Ring of the gods (i)}} |
||
| + | |ring4 = {{plink|Seers ring (i)}} |
||
| + | |special1 = {{plink|Dragon warhammer}} |
||
| + | |special2 = {{plink|Bandos godsword}} |
||
| + | |special3 = {{plink|Crystal halberd}} |
||
| + | }} |
||
| + | |-| |
||
| − | {| class="wikitable" |
||
| + | Ranged Attacker = Players can use the [[Twisted bow]] against K'ril as he possesses a Magic level of 200, meaning that it will hit relatively often and hard against him. A toxic blowpipe with dragon darts may also be used if one cannot afford a twisted bow. |
||
| − | !Slot |
||
| − | !Item |
||
| − | |- |
||
| − | |'''Weapon''' |
||
| − | |[[Arclight]] > [[Godsword]] > [[Abyssal whip]] > [[Zamorakian spear]] |
||
| − | |- |
||
| − | |'''Head''' |
||
| − | |[[Serpentine helm]] > [[Black mask]] (only if on task) > [[Helm of neitiznot]] |
||
| − | |- |
||
| − | |'''Neck''' |
||
| − | |[[Amulet of fury]] > [[Amulet of glory]] |
||
| − | |- |
||
| − | |'''Torso''' |
||
| − | |[[Bandos chestplate]] > [[Fighter torso]] > [[Verac's brassard]] / [[Torag's platebody]] |
||
| − | |- |
||
| − | |'''Legs''' |
||
| − | |[[Bandos tassets]] > [[Verac's plateskirt]] > [[Torag's platelegs]] |
||
| − | |- |
||
| − | |'''Boots''' |
||
| − | |[[Dragon boots]] > [[Bandos boots]] > [[Rune boots]] |
||
| − | |- |
||
| − | |'''Cape''' |
||
| − | |[[Fire cape]] > [[Skillcape]] (trimmed) > [[Zamorak cape]] > [[Skillcape]] |
||
| − | |- |
||
| − | |'''Special attack weapon''' |
||
| − | |[[Darklight]] (if using Abyssal whip) / [[Bandos godsword]] / [[Armadyl godsword]] / [[Saradomin godsword]] > [[Dragon halberd]] |
||
| − | |- |
||
| − | |'''Shield''' |
||
| − | |[[Dragon defender]] > [[Rune defender]] |
||
| − | |- |
||
| − | |'''Gloves''' |
||
| − | |[[Barrows gloves]] > [[Dragon gloves]] > [[Regen bracelet]] > [[Combat bracelet]] |
||
| − | |- |
||
| − | |'''Ring''' |
||
| − | |[[Berserker ring (i)]] > [[Berserker ring]] > [[Ring of wealth]] > [[Ring of life]] |
||
| − | |} |
||
| + | {{Recommended equipment |
||
| − | |-| Ranged Setup = |
||
| + | |style = melee |
||
| − | A [[Ranged]] player can tank nearly as well as a [[Melee]] player at [[K'ril Tsutsaroth]] due to the high [[Magic Defence]] of [[Ranged armour]]. The player must use [[Protect from Melee]] to prevent K'ril's powerful Melee attacks from ripping through the weak [[Melee Defence]] of Ranged armour. The player will gain moderate Ranged and Magic Defence, preventing [[Zakl'n Gritch]] and [[Balfrug Kreeyath]] from damaging you as often. |
||
| + | |helm1 = {{plink|Slayer helmet (i)}} (task only) |
||
| + | |helm2 = {{plink|Armadyl helmet}} |
||
| + | |helm3 = {{plink|Void ranger helm}} |
||
| + | |neck1 = {{plink|Necklace of anguish}} |
||
| + | |neck2 = {{plink|Amulet of fury}} |
||
| + | |neck3 = {{plink|Amulet of glory}} |
||
| + | |cape1 = {{plink|Assembler max cape}}/{{plink|Ava's assembler}} |
||
| + | |cape2 = {{plink|Accumulator max cape}}/{{plink|Ava's accumulator}}/{{plink|Ranging cape}} |
||
| + | |body1 = {{plink|Armadyl chestplate}} |
||
| + | |body2 = {{plink|Karil's leathertop}} |
||
| + | |body3 = {{plink|Elite void top}} |
||
| + | |body4 = {{plink|Blessed body|pic=Zamorak d'hide|txt=Blessed d'hide body}} |
||
| + | |legs1 = {{plink|Armadyl chainskirt}} |
||
| + | |legs2 = {{plink|Karil's leatherskirt}} |
||
| + | |legs3 = {{plink|Elite void robe}} |
||
| + | |legs4 = {{plink|Blessed chaps|pic=Zamorak chaps|txt=Blessed d'hide chaps}} |
||
| + | |weapon1 = {{plink|Twisted bow}} |
||
| + | |weapon2 = {{plink|Toxic blowpipe}} |
||
| + | |ammo1 = {{plink|Dragon arrow}} (with twisted bow) |
||
| + | |gloves1 = {{plink|Barrows gloves}} |
||
| + | |gloves2 = {{plink|Rune gloves}} |
||
| + | |gloves3 = {{plink|Regen bracelet}} |
||
| + | |gloves4 = {{plink|Combat bracelet}} |
||
| + | |gloves5 = {{plink|Bracelet of slaughter}} (optional for extending task) |
||
| + | |boots1 = {{plink|Pegasian boots}} |
||
| + | |boots2 = {{plink|Ranger boots}} |
||
| + | |boots3 = {{plink|Blessed boots|pic=Zamorak d'hide boots|txt=Blessed d'hide boots}} |
||
| + | |ring1 = {{plink|Archers ring (i)}} |
||
| + | |ring2 = {{plink|Archers ring}} |
||
| + | }} |
||
| − | Players may also use ranger [[Void Knight equipment]] instead to take advantage of the 10% accuracy and damage bonus from the set. |
||
| − | |||
| − | * 70+ {{Skill clickpic|Hitpoints}}<br> |
||
| − | * 70+ {{Skill clickpic|Ranged}}<br> |
||
| − | * 70+ {{Skill clickpic|Defence}}<br> |
||
| − | * 44+ {{Skill clickpic|Prayer}} ([[Eagle Eye]])<br> |
||
| − | |||
| − | {| class="wikitable" |
||
| − | !Slot |
||
| − | !Item |
||
| − | |- |
||
| − | |'''Weapon''' |
||
| − | |[[Armadyl crossbow]] > [[Rune crossbow]] |
||
| − | |- |
||
| − | |'''Head''' |
||
| − | |[[Serpentine helm]] > [[Black mask (i)]] (only if on task) > [[Armadyl helm]] > [[Zamorak coif]] |
||
| − | |- |
||
| − | |'''Neck''' |
||
| − | |[[Amulet of fury]] > [[Amulet of glory]] |
||
| − | |- |
||
| − | |'''Torso''' |
||
| − | |[[Armadyl chestplate]] > [[Karil's leathertop]] > [[Zamorak body]] > [[Black d'hide body]] |
||
| − | |- |
||
| − | |'''Legs''' |
||
| − | |[[Armadyl chainskirt]] > [[Karil's leatherskirt]] > [[Zamorak chaps]] > [[Black d'hide chaps]] |
||
| − | |- |
||
| − | |'''Boots''' |
||
| − | |[[Ranger boots]] / [[Infinity boots]] / [[Silly jester boots]] > [[Snakeskin boots]] > [[Dragon boots]] |
||
| − | |- |
||
| − | |'''Cape''' |
||
| − | |[[Ava's accumulator]] > [[Ava's attractor]] |
||
| − | |- |
||
| − | |'''Ammunition''' |
||
| − | |[[Ruby bolts (e)]] / [[Diamond bolts (e)]] > [[Runite bolts]] > [[Broad bolts]] > [[Adamant bolts]] |
||
| − | |- |
||
| − | |'''Shield''' |
||
| − | |[[Dragonfire shield]] > [[Crystal shield]] > [[Zamorak's unholy book]] > [[Saradomin's holy book]] (+8 [[Magic Defence]]) |
||
| − | |- |
||
| − | |'''Gloves''' |
||
| − | |[[Barrows gloves]] > [[Dragon gloves]] > [[Regen bracelet]] > [[Combat bracelet]] |
||
| − | |- |
||
| − | |'''Ring''' |
||
| − | |[[Archers' ring (i)]] > [[Archers' ring]] > [[Ring of wealth]] > [[Ring of life]] |
||
| − | |} |
||
</tabber> |
</tabber> |
||
| − | |||
| − | ==Inventory== |
||
| − | ===Solo=== |
||
| − | * One-click teleport (such as [[Ectophial]] or [[teleport tab]]s/[[Teleport scrolls|scrolls]]) |
||
| − | * 1 [[Super antipoison]] or better |
||
| − | * 1 [[Saradomin brew]] |
||
| − | * 1 [[Super restore]] |
||
| − | * 3-4 [[Prayer potion]]s |
||
| − | * 1 [[Super set]] or [[Super combat potion]] |
||
| − | * (optional) [[Sanfew serum]] effectively condenses a [[prayer potion]] and [[super antipoison]] into a single inventory slot, allowing an additional slot for food. |
||
| − | * Rest [[Shark]]s |
||
| − | * (Ring Of Suffering(i) is a great ring slot for solo) |
||
| − | |||
| − | ===Team=== |
||
| − | * One-click teleport (such as [[Ectophial]] or [[teleport tab]]s/[[Teleport scrolls|scrolls]]) |
||
| − | * 2-3 [[Super antipoison]]s (not needed if you are wearing the [[Serpentine helm]]) |
||
| − | * 12-16 [[Saradomin brew]]s or [[Sharks]] |
||
| − | * 6-8 [[Super restore]]s |
||
| − | * 2-3 [[Super set]]s or [[Super combat potion]]s |
||
[[Category:Strategies]] |
[[Category:Strategies]] |
||
[[Category:God Wars Dungeon]] |
[[Category:God Wars Dungeon]] |
||
Latest revision as of 10:07, 8 June 2019

A pair of players fighting K'ril Tsutsaroth and his bodyguards.
K'ril Tsutsaroth is a powerful boss capable of hitting up to 60 with his Melee attacks, 30 with his Magic attacks, and 49 with a Prayer-draining special attack that he occasionally uses against players who use Protect from Melee. K'ril's attacks are also capable of poisoning the player starting at 16 damage.
His bodyguards attack from all three sides of the Combat triangle: Balfrug Kreeyath uses accurate Magic attacks, Zakl'n Gritch uses accurate Ranged attacks, and Tstanon Karlak uses inaccurate Melee attacks.
Killcount
The 40 Zamorak followers kill count is quite easy to achieve although it will take longer than Bandos. There are several tips to get a quick killcount:
- Main room: The place north and east of the rope has Zamorakian followers fighting both Bandosians in the north and Saradominists in the east. There are two imps which can be quickly killed, and other followers such as Bloodvelds, Goraks, Werewolves and Icefiends battling Spiritual warriors and Spiritual mages.
- Zamorak's Fortress: There are four imp spawns which can be quickly killed for kill count.
Strategy
K'ril attacks with both melee and magic. His magic attack is significantly weaker compared to his melee attacks, but should not be underestimated as it can hit up to 30. His melee attacks can hit up to 47, and will also inflict poison starting at 16 damage. If his target is using Protect from Melee, he will perform a prayer smash attack, yelling "YARRRRRRR!", dealing up to 49 damage and will also reduce the target's current prayer points by 50%.
K'ril can be dealt with the same way as with General Graardor as both fights are fairly the same.
Sanfew serums are recommended as they serve as both antipoison and super restores. All players should carry one or two of these potions in the event that they must tank a kill.
Equipment
Tank
The tanking player focuses on magic defence while using Protect from Melee to defend themselves against K'ril's powerful melee attacks. This will leave them vulnerable to his prayer smash attack however, so they should keep their health high to avoid being combo'ed out by the resulting damage from this attack and from minions. Players may maximise magical defence by changing their legs to ranged legs, but this will make them more vulnerable to Zakl'n Gritch's attacks.
| Slot | Item (most effective → least effective) | ||||
|---|---|---|---|---|---|
| N/A | N/A | ||||
| N/A | N/A | ||||
| N/A | |||||
| N/A | |||||
| N/A | |||||
| N/A | N/A | ||||
| N/A | |||||
| N/A | N/A | ||||
By focusing on melee defence, players can use Protect from Magic to protect themselves from K'ril's magical attacks and his prayer smash. However, his melee attacks are significantly more accurate compared to his magic attack and have a higher max hit. K'ril's melee attack is slash-based, so high Slash defence is recommended.
| Slot | Item (most effective → least effective) | ||||
|---|---|---|---|---|---|
| N/A | N/A | N/A | |||
| N/A | N/A | ||||
| N/A | N/A | ||||
| N/A | N/A | ||||
| N/A | |||||
| N/A | N/A | ||||
| N/A | N/A | ||||
| N/A | N/A | ||||
Attacker
| Slot | Item (most effective → least effective) | ||||
|---|---|---|---|---|---|
| N/A | N/A | ||||
| N/A | N/A | ||||
| N/A | N/A | ||||
| N/A | N/A | N/A | |||
| N/A | |||||
| N/A | N/A | ||||
| N/A | |||||
| N/A | N/A | ||||
Players can use the Twisted bow against K'ril as he possesses a Magic level of 200, meaning that it will hit relatively often and hard against him. A toxic blowpipe with dragon darts may also be used if one cannot afford a twisted bow.
| Slot | Item (most effective → least effective) | ||||
|---|---|---|---|---|---|
| N/A | N/A | ||||
| N/A | N/A | ||||
| N/A | N/A | N/A | |||
| N/A | |||||
| N/A | |||||
| N/A | N/A | N/A | |||
| N/A | N/A | N/A | N/A | ||
| N/A | N/A | ||||
| N/A | N/A | N/A | |||