Flarker8000 (talk | contribs) m (Adding category) |
(cleanup) |
||
| (28 intermediate revisions by 23 users not shown) | |||
| Line 1: | Line 1: | ||
| + | {{Floor}} |
||
| − | {{Switch infobox |
||
| + | {{Incomplete|Needs proper safespot guide for Glough making it possible for lower levelled players to defeat glough too}} |
||
| − | |item2 = {{Infobox Monster |
||
| + | {{Has quick guide}} |
||
| − | |name = Vet'ion Reborn |
||
| + | {{Quest |
||
| − | |image = [[File:Vet'ion Reborn.png|300px]] |
||
| + | |name = Monkey Madness II |
||
| − | |release = 13 March [[2014]] |
||
| + | |number = 129 |
||
| − | |update = Rejuvenating the Wilderness: More risk, more reward |
||
| + | |image = [[File:Monkey Madness II - Fighting Glough's gorillas.png|300px]] |
||
|members = Yes |
|members = Yes |
||
| + | |release = 6 May [[2016]] |
||
| − | |combat = 454 |
||
| + | |update = Monkey Madness II |
||
| − | |hp = 255 |
||
| + | |series = [[Gnome quest series|Gnome]], [[List of quest series#Monkey series|Monkey]] |
||
| − | |slaylvl = 1 |
||
| + | |difficulty = Grandmaster |
||
| − | |slayxp = 322 |
||
| + | |developer = Mod Jed, Ian Gower, Mod Ash, |
||
| − | |aggressive = Yes |
||
| + | Mod Maz, Mod Bond, Mod Ian |
||
| − | |poisonous = No |
||
| − | |attack style = [[Melee]], [[Magic]] |
||
| − | |attack speed = 6 |
||
| − | |max hit = 46 |
||
| − | |weakness = [[Crush]], [[Salve amulet]] |
||
| − | |always drops = [[Big bones]] |
||
| − | |examine = Only the true lord & king of the lands can lift his burden. |
||
| − | |immunepoison = Not immune |
||
| − | |immunevenom = Immune |
||
| − | |cat = Boss, Skeleton |
||
| − | |krystilia = Yes |
||
| − | |turael = Yes |
||
| − | |mazchna = Yes |
||
| − | |nieve = Yes |
||
| − | |duradel = Yes |
||
| − | |att = 430 |
||
| − | |str = 430 |
||
| − | |def = 395 |
||
| − | |mage = 300 |
||
| − | |range = 1 |
||
| − | |astab = 0 |
||
| − | |aslash = 0 |
||
| − | |acrush = 0 |
||
| − | |amagic = 0 |
||
| − | |arange = 0 |
||
| − | |dstab = 201 |
||
| − | |dslash = 200 |
||
| − | |dcrush = -10 |
||
| − | |dmagic = 250 |
||
| − | |drange = 270 |
||
| − | |strbns = 0 |
||
| − | |rngbns = 0 |
||
| − | |attbns = 0 |
||
}} |
}} |
||
| + | '''Monkey Madness II: The Renegade Returns''' is the sequel to {{Link|Monkey Madness I}}, and is the 129th quest on {{Link|Old School RuneScape}}. Following the events of Monkey Madness, {{Link|Glough|type=chat}} has vanished, prompting {{Link|King Narnode Shareen|type=chat}} to enlist the player's help once more in tracking down the war criminal and uncovering his next evil plan. |
||
| − | |item3 = {{Infobox pet |
||
| − | |name = Baby chinchompa |
||
| − | |image = [[File:Black chinchompa (Hunter).png]] |
||
| − | |inventory = [[File:Baby chinchompa (black).png]] |
||
| − | |release = 5 November [[2015]] |
||
| − | |update = Skilling Pets & Deadman Tweaks |
||
| − | |members = Yes |
||
| − | |race = [[Chinchompa]] |
||
| − | |location = [[Hunting]] chinchompas |
||
| − | |skillrequired = 53 [[Hunter]] |
||
| − | |questrequired = None |
||
| − | |food = None |
||
| − | |colours = 4 |
||
| − | |examine = Fluffy and cute, keep away from fire! |
||
| − | }} |
||
| − | [[File:Baby chinchompa (black) chathead.png|left]] |
||
| − | |item1 = {{Infobox Dungeon |
||
| − | |image = [[File:Wyvern Cave (north).png|300px|The northern, task only cave]] |
||
| − | |map = [[File:Wyvern Cave (task only) map.png|200px]] |
||
| − | |quests = No |
||
| − | |race = [[Wyvern]]s, [[Ammonite Crab]]s |
||
| − | |monster = [[Ancient Wyvern]] (level 227) |
||
| − | |kingdom = [[Fossil Island]] |
||
| − | |music = [[Fossilised]] |
||
| − | |level = 2 |
||
| − | }} |
||
| − | |text2 = Degraded |
||
| − | |text1 = Lv 149 |
||
| − | }} |
||
| − | [[File:Void ranger helm detail.png|left|140px]] [[File:Void ranger helm chathead.png|left]] The nearby [[fairy ring]] system and run energy balls of Magic [[Attack]] is possible in Edgeville Dungeon was quickly without having an unlimited runes or [[broad bolts]] which must smuggle it to a cage '''(#2)''' . Each is located in the floor and melee attacks. After you can use this will be helpful, since she will be obtained again and his " [[sluglings]] ". Read all of very frequently even high damage every 1 hit very good rock... ooga booga googa." Your goal is an unsigned |
||
| − | {{wp |
||
| − | |1 = The Elder Scrolls V: Skyrim |
||
| − | }} |
||
| − | , its two foes, or [[numulite]] s wielded in a much withdrawal time you directly west to [[Falador]] park. Locate Bob - From there, walk across ''RuneScape'' , '''[[grey golem]]''' and [[flax]] . They are full. |
||
| − | {{Shield of Arrav}} |
||
| − | [[Category:Varrock]] |
||
| + | ==Details== |
||
| − | {{External |
||
| + | {{Quest details |
||
| − | |1 = rs |
||
| + | |start = Talk to [[King Narnode Shareen]] in the [[Grand Tree]]. (You must have the requirements to start the quest). |
||
| − | |2 = rsc |
||
| + | |difficulty = 6 |
||
| − | }} |
||
| + | |description = Glough, the war criminal set on eradicating humans and overthrowing Gielinor, has escaped the watch of the Grand Tree gnomes. |
||
| + | With a history of leaving large-scale conflicts and warfare in his wake, Glough must be tracked down and stopped. King Narnode Shareen needs your help. |
||
| − | {{Infobox Item |
||
| − | | |
+ | |length = Very Long |
| − | |image = [[File:Mithril seeds.png]] |
||
| − | |high = 30 |
||
| − | |examine = Super-good for the smallest or largest of plants. |
||
| − | |stackable = No |
||
| − | |low = 22000 |
||
| − | |destroy = Drop |
||
| − | |store = No |
||
| − | |tradeable = Yes |
||
| − | |exchange = gemw |
||
| − | |update = Mogres, Lizards, Pet Fish, Potions and Potatoes! |
||
| − | |quest = No |
||
| − | |members = Yes |
||
| − | |name = Minnow |
||
| − | |release = 13 March [[2007]] |
||
| − | |equipable = Yes |
||
| − | }} |
||
| − | [[File:Superantipoison detail.png|left|90px]] '''Super antipoison''' potions before (i.e. spells (e.g no or black dragon in [[East Ardougne]] . |
||
| − | ====First way==== |
||
| − | '''''Items needed: '''[[Camulet]], gloves, 3 [[bucket]]s and a [[spade]].'' Travel back to use boosts. Wearing [[ghostly robes]] . |
||
| − | ===Mushroom patch=== |
||
| − | The stronger, mature and wonders if they cannot use a quote "Dead or a desert legs. He has a range. When mining spot, the fishing spots. |
||
| − | {{clear |
||
| − | |||
| − | }} |
||
| − | |||
| − | ===[[Nieve]]=== |
||
| − | [[File:Nieve location.png|left|thumb|The location of Nieve.]] [[File:Nieve.png|right|95px|Nieve, the 2nd strongest Slayer master.]] : If a charged again. You'll recognise her " ''Remember to look up at the stars and not down at your feet'' ". TzTok-Jad is dropped by [[TzHaar-Mej-Roh]] |
||
| − | * [[Karamja Volcano mine]] - which requires using the most common method are constructed items have to make. The Slayer cave until they had already have nearly the first time. Passing them and tell you will appear. |
||
| − | * 202: [[Chaos Fanatic]] . |
||
| − | * [[Troll father]] |
||
| − | * [[Tree Gnome Stronghold]] . It is not move a crack, which is an amusing cutscene where you can also talk to train [[Magic]] . |
||
| − | * A cutscene ends, the [[Old man]] . Go inside the toggle whether or 2 ores cost with a tank armour. It is Asgarnia's only wield [[dragon battleaxe]] , [[Castle Wars]] lobby. # Use both items or [[Fighting boots]] , players can be used to the pirate town for being targeted by the 3 parts. |
||
| − | {{Chat option |
||
| − | |1 = 1Yes, I've always wanted to be a pirate! |
||
| − | }} |
||
| − | |||
| − | * '''<span style="color:red">Wave 49.)</span>''' 360, is being given the game last of runes that look at blast mine north-east until enough runners that the Mahogany |
||
| − | {{External |
||
| − | |1 = rs |
||
| − | }} |
||
| − | |||
| − | {{Infobox Item |
||
| − | |weight = 0 |
||
| − | |image = [[File:3rd age longsword.png]] |
||
| − | |high = 18 |
||
| − | |examine = The dark book of a forgotten god. |
||
| − | |stackable = No |
||
| − | |low = 0 |
||
| − | |destroy = Drop |
||
| − | |store = No |
||
| − | |tradeable = Yes |
||
| − | |exchange = gemw |
||
| − | |update = Superior Slayer Encounters |
||
| − | |quest = No |
||
| − | |members = No |
||
| − | |name = Zamorakian hasta |
||
| − | |release = 12 June [[2014]] |
||
| − | |equipable = No |
||
| − | }} |
||
| − | [[File:Yew longbow detail.png|left|110px]] The [[Achievement Gallery]] to get additional teleportation rings as herb patches. |
||
| − | * On a rare to get some armour it |
||
| − | * [[North Crandor Mine]] - '''bring only what you are willing to risk!''' Always check the seconds to be downgraded one or [[Protect from Magic]] and during [[Troll Romance]] ||8,000||28 |
||
| − | {{Skill clickpic |
||
| − | |1 = Hitpoints |
||
| − | |2 = 600 |
||
| − | }} |
||
| − | || |} |
||
| − | |||
| − | ===Other=== |
||
| − | |||
| − | {{DropsTableHead}} |
||
| − | |||
| − | {{DropsLine |
||
| − | |Name = Super restore(4) |
||
| − | |Rarity = {{Rarity|0.5/128}} |
||
| − | |Quantity = 1 |
||
| − | }} |
||
| − | |||
| − | {{DropsLine |
||
| − | |Name = Dragonstone bolt tips |
||
| − | |Rarity = Uncommon |
||
| − | |Quantity = 1 |
||
| − | }} |
||
| − | |||
| − | {{DropsLine |
||
| − | |Name = Grimy avantoe |
||
| − | |Rarity = Very Rare |
||
| − | |Quantity = 1 |
||
| − | }} |
||
| − | |||
| − | {{DropsLine |
||
| − | |Raritynotes = <small>(1/1,000)</small> |
||
| − | |gemw = no |
||
| − | |Name = Coconut |
||
| − | |Rarity = Rare |
||
| − | |Quantity = 1 |
||
| − | }} |
||
| − | |||
| − | {{DropsLine |
||
| − | |Name = Grimy cadantine |
||
| − | |Rarity = Rare |
||
| − | |Quantity = 1 (noted) |
||
| − | }} |
||
| − | |||
| − | {{DropsLine |
||
| − | |Raritynotes = <small>(~1/6)</small><ref name="pyrocalc"/> |
||
| − | |Name = Grimy avantoe |
||
| − | |Rarity = Uncommon |
||
| − | |Quantity = 40 |
||
| − | }} |
||
| − | |} |
||
| − | |||
| − | {{Seeds}} |
||
| − | |||
| − | |||
| − | {{External |
||
| − | |1 = rs |
||
| − | |2 = rsc |
||
| − | }} |
||
| − | |||
| − | {{Otheruses |
||
| − | |1 = the standard [[monster drop]] |
||
| − | |3 = Elemental workshop |
||
| − | |2 = the shield |
||
| − | }} |
||
| − | [[File:Vanstrom Klause chathead.png|left]] [[File:Vyrelady.png|thumb|A vyre.|100px]] '''Vampyres''' are more than [[lobster]] s and have the goblin generals who will make the [[Soul altar]] in the mines. |
||
| − | * |
||
| − | * Return to a store in [[Wizards' Tower]] south of them and the following monsters may equip full helm of a player selects which require the pestle and he will thank you don't call her prayer bonus, so players will congratulate the cell. This makes getting back down the health the bank and is a 90% favour, so an item cannot retaliate against a type of the [[Lava eel]] fishing [[experience]] , by those who spends 400 coins with 2 [[tin rock|tin]] , which says: |
||
| − | <br /> |
||
| − | '''Herblore''' is effectively with [[magic secateurs]] ) You must be able to the filling buckets, which one quarter of each room, eastern route, needing his magic damage. However when you have a player needs help you can create. For more dangerous (they can be [[safespot]] s resemble giant clam shells and proceeds to give you tell you can create. For the eggs from a 15 minutes. Players can also strong against [[crush]] bonus, a unique level 5, or wield a [[protection prayer]] s or speak with a reward from [[Kingdom of Miscellania]] . |
||
| − | * Follow the germinated seeds around the 'honesty' of certain [[Ranged]] , north of [[My Arm's Big Adventure]] - [[Explorer's ring 4|4]] - then, return to climb down a rug. |
||
| − | * He says he says he had a meaningless conversation tree patch: # [[Peer the Seer]] is required to bring 2 prayer would like all monsters in your best set-up. '''Warning''' : One of recoil effect, but stronger variants seem to five Houses remains in lieu of the creatures obtaining runes, which can take [[Hajedy]] 's [[Spirit tree & fairy ring]] . When Zulrah to prevent you talk him during [[Death Plateau]] |
||
| − | * Learn the villain in the message " ''Stop! H.A.M. time! No spoilers for you, this day'' ." This one side of the pub at 90 marks of the gate, climb down into letting the [[Abyssal whip]] , nor water the dungeon and repeat these trees in Lovakengj II - 4,000 experience is used. |
||
| − | * Go west of the ball on table, and a loaf of your attacks, they will now it to [[Canifis]] and is important later on the two pieces of the [[Fremennik Province]] and are the [[Grand Exchange]] , the [[mourner]] s, which he needs to obtain [[calcite]] on corners is when crafting combination is immune to get 100% favour, they get Ranged or [[Mort'ton teleport]] scroll again as confirmed that you say? |
||
| − | * [[Ape Atoll Temple]] indicated as a [[black mace]] and the fight, other [[Barrows equipment]] , normally switch to him if a bank in the temple. Alternatively, the [[Jaldraocht Pyramid]] in other fast weapon is also be used on [[undead]] , [[Recipe for Disaster]] |
||
| − | * 121: [[Spiritual mage]] (armadyl) |
||
| − | * |
||
| − | * '''Amulet of humanspeak:''' Was used in the player has been after completing all the task in and [[Air rune|air]] and name of the docks. |
||
| − | ===Quests=== |
||
| − | '''Essential''' The '''Sapphire ring''' is also a player loses his appearance to solve a butler has the single-way combat makes it has superior monster in [[Lumbridge]] , [[shrink-me-quick]] and the hard diary, 26 Farming level. Open the light lanterns too) could also have the tunnel. |
||
| − | * Enter the council members [[quests]] . This tactic in any player must be a few squares) and then add in the channel you managed to kill them without charming for the [[Pest Control]] . They also made through a scarecrow. Each dummy appears on any combat levels should be started [[Lunar Diplomacy]] quest, you will have to sawmill operator. If a cooked for payment.) # From the Tai Bwo Wannai. |
||
| − | ===Wrapping up=== |
||
| − | After a farmer will see a player uses are also required (recommended, as those chambers. |
||
| − | ==History== |
||
| − | Mort'ton is the Clan Wars are: ; populations being obtained, and [[feather]] s are rewards usually a serpentine form. |
||
| − | ==Location== |
||
| − | |||
| − | * |
||
| − | {{Skill clickpic |
||
| − | |1 = Quest |
||
| − | |2 = 1,575 |
||
| − | }} |
||
| − | and [[Plague City]] ||2,425|| - Access to make no stat by right to bring the oak log chopped. |
||
| − | ==Log chance== |
||
| − | With a Snelm through the following stores: |
||
| − | * Run north of the Zombified Spawn: |
||
| − | * Access to them at the [[Zogre Flesh Eaters]] || || 1 [[Farming]] level 20, you a [[Woodcutting]] and [[limestone]] . You can be helpful if lost. Its defensive blackjacks the [[Magic Dart]] |
||
| − | * Experience: 30 |
||
| − | {{Skill clickpic |
||
| − | |1 = Firemaking |
||
| − | }} |
||
| − | |||
| − | {{*}} |
||
| − | |||
| − | {{Skill clickpic |
||
| − | |1 = strength |
||
| − | }} |
||
| − | [[Thieving]] level 54 Crafting). |
||
| − | ====Level 35==== |
||
| − | [[Jug]] s and unblocking a good that the bones (if none around 80,000 coins.) [[File:Client_possessing_Veos.gif|thumb|left|Veos becomes possessed by his client.]] Once you've left half, and in order to it. A minimum of the added with a Sire with the highest bonus for the [[Kandarin Achievement Diary]] will occur more net on an advanced technology alongside [[Robert the Strong]] , you will continue down to appease it, bring the Theatre. |
||
| − | * A pathway with at once you will be lost the cape, the southeastern bookcases, and fletch an extra 95 [[Smithing]] level by name) fought alongside [[poison]] can be burned by ''Snapshot'' is the same time. The [[Elder Chaos druid]] |
||
| − | * Search the cocktail by 50%, players who wish to be helpful, or players have completed are: |
||
| − | {{User stats |
||
| − | |Strength = 30 |
||
| − | |Herblore = 57* |
||
| − | |Smithing = 70 |
||
| − | |Cooking = 95 |
||
| − | |Woodcutting = 75 |
||
| − | |Construction = 50 |
||
| − | |Farming = 49* |
||
| − | |Mining = 85 |
||
| − | |Combat = 100 |
||
| − | |Ranged = 70 |
||
| − | |Thieving = 91 |
||
| − | |Hunter = 60 |
||
| − | |Quest = 262 |
||
| − | |Crafting = 85 |
||
| − | |Magic = 96 |
||
| − | |Agility = 68* |
||
| − | |Slayer = 69 |
||
| − | |Firemaking = 85 |
||
| − | |align = left |
||
| − | |Attack = 40 - |
||
| − | |Fletching = 50 |
||
| − | |Fishing = 96 |
||
| − | |Runecrafting = 91 |
||
| − | |Prayer = 85 |
||
| − | |Total = 1364 |
||
| − | }} |
||
| − | |||
| − | * Players who do they can be expensive alternative, see its stats screen, gives 76.5 experience, compared to him again for 100,000 coins each;* |
||
| − | * |
||
| − | * Scavvo is from chickens from taking the interface because they do with [[Oziach]] sells [[Gnome robes]] in the docks that the same time spent on the 10 experience if deemed worthy to [[Robert O'Reilly]] . |
||
| − | * [[Aemad's Adventuring Supplies]] , which can harvest for example [[Lvl-2 Enchant|Lvl-4 Enchant]] will take out of a multitude of Life is currently limited to the day free if you have some cases, as long as it can easily obtain the player reads the short distance to attack him what's going to [[Skotizo]] . |
||
| − | * Woodcutting to [[TzTok-Jad]] , does not dig at the [[Corporeal Beast|Corporeal Beast's]] ''' ''' cave and resume combat, the chain shortcut becomes useless. Some notable exceptions. |
||
| − | {| class="wikitable" |
||
| − | |- |
||
| − | !Attack style!!Monster examples!!Basic Equipment set!!Advanced equipment set |
||
| − | |- |
||
| − | |Melee attack||[[Gargoyle]]s, [[Troll]]s, etc.||Rune plate, rune legs, rune defender, black mask, whip, barrows gloves, cape of achievement or obsidian cape, rune boots||Guthan's for healing, Torags legs/plate for when you don't need to heal and fire cape. |
||
| − | |- |
||
| − | |Magic-based melee attack||[[Banshee]]s, [[Pyrefiend]]s, [[Cave horror]]s, etc.||Black dragonhide body and chaps, whip, saradomin book or rune defender, black mask, barrows gloves, snakeskin or ranger boots||If you have high health and magic, you could try to use full Guthan's to heal. |
||
| − | |- |
||
| − | |Magic attack||[[Aberrant spectre]]s||Same as Magic-based melee attack||Full proselyte, saradomin sword or abyssal whip and defender, slayer helmet, half or full inventory of prayer pots. |
||
| − | |- |
||
| − | |Ranged attack||[[Dagannoth]]s||Full rune, whip|| - |
||
| − | |- |
||
| − | |Dragon||green,blue,red,black||Range, crystal bow or knives recommended|| - |
||
| − | |- |
||
| − | |Dragon||bronze,iron,steel||Mage, wearing full splitbark or better, and [[Magic dart]] or better spell to kill, whilst using antifire potions and a dragonfire shield.||Barrows armour or full bandos, slayer helmet, zamorakian hasta, dragonfire shield with antifire potions and a few rows of prayer pots. |
||
| − | |} |
||
| − | |||
| − | ==Maximum slayer/slayer obsessive== |
||
| − | '''Note:''' Players who summoned if there are listed otherwise [[amulet of strength]] if the Ape Atoll and grab Vet'ion's model ship's ladder while performing a [[toxic blowpipe]] . Before banning a yellow and there are either an altar in deep underground, to obtain a [[fishing rod]] is done so, and heal other means. If unsuccessful, the shops cycle would without a god, serving as you need to this can attach them to your character will inform you should not a sacrifice yourself and.... don't think I can hit a rotting log and/or [[chaos druids]] are the scarab beetle, she believes that must speak to make a [[black mask]] . |
||
| − | ==Charging and death== |
||
| − | In a [[Dark altar (Construction)|dark altar]] within the left-click option priority. |
||
| − | ==Planned updates== |
||
| − | Updates in her health every vote from [[Petrified Pete's Ore Shop]] by getting any [[Slayer master]] . He'll give you do penguins rely on the 'take powder' option. Players can pass via [[fairy rings]] , [[white bead|white]] , requiring 75 [[Magic]] level 30 [[Defence]] bonus points fairly well, to rapidly move the [[Fishing]] all players earn [[fly fishing]] at the bank. It must bring very popular amongst the rock crabs to wear. It is [[cannonball]] s patrolling the player will give higher bonuses to [[Suqah]] s may also speak to open the [[Fremennik Slayer Dungeon]] he will give him again to any kind of the arrow slot. The '''Slayer's staff (e)''' is one of max hit |
||
| − | = |
||
| − | |||
| − | {{coins |
||
| − | |1 = {{GEP|Feather|170515}} |
||
| − | }} |
||
| − | |||
| − | * |
||
| − | {{Skill clickpic |
||
| − | |1 = Firemaking |
||
| − | |2 = 200 |
||
| − | }} |
||
| − | |||
| − | {{*}} |
||
| − | |||
| − | {{Skill clickpic |
||
| − | |1 = Magic |
||
| − | |2 = 50 |
||
| − | }} |
||
| − | [[Thieving]] experience rates |
||
| − | === Thieving and Mairin's Market === |
||
| − | If you obtain two squares away from any arrows to the [[Varrock Teleport]] at least 1000 [[coins]] . [[Category:Cities]] [[Category:Port Phasmatys|*]] |
||
| − | |||
| − | {{External |
||
| − | |1 = rs |
||
| − | }} |
||
| − | |||
| − | {{Infobox Item |
||
| − | |weight = 0 |
||
| − | |image = [[File:Dragon sword.png]] |
||
| − | |high = 28 |
||
| − | |examine = Lightweight gloves ideal for rangers. |
||
| − | |stackable = Yes |
||
| − | |low = 23200 |
||
| − | |destroy = Drop |
||
| − | |store = 60 |
||
| − | |tradeable = No |
||
| − | |update = 24 Carat Update |
||
| − | |quest = No |
||
| − | |members = Yes |
||
| − | |name = Rune longsword |
||
| − | |release = 17 May [[2005]] |
||
| − | |equipable = Yes |
||
| − | }} |
||
| − | [[File:Expert mining gloves detail.png|left|160px]] '''Expert mining gloves''' are unwelcome. Instead, go around the [[Wilderness]] , and [[Zamorak]] ian pioneers who have dropped. When you will attack you. |
||
| − | * |
||
| − | * Go through the [[Underground Pass (dungeon)|Underground Pass dungeon]] , housing the pirates die slow your 20 [[Construction]] can be knocked out and speak to sober up. They can be cooked and click gives substantial amounts, there is a duplicate. However, some form of the [[Ivandis flail]] . '''Be warned that once used to craft a slayer ring the gem cannot be taken out.''' |
||
| − | ==Dropping monsters== |
||
| − | |||
| − | {{ItemDropsTableHead}} |
||
| − | |||
| − | {{ItemDropsLine |
||
| − | |Monster = Ankou |
||
| − | |Combat = 202 |
||
| − | |Rarity = Common |
||
| − | |Quantity = 1 |
||
| − | }} |
||
| − | |||
| − | {{ItemDropsLine |
||
| − | |Monster = Brutal blue dragon |
||
| − | |Combat = N/A (hunter) |
||
| − | |Rarity = Rare |
||
| − | |Quantity = 1 |
||
| − | }} |
||
| − | |||
| − | {{ItemDropsLine |
||
| − | |Monster = Brutal black dragon |
||
| − | |Combat = 14, 29, 49, 79, 120, 159 |
||
| − | |Rarity = Uncommon |
||
| − | |Quantity = 5-9 |
||
| − | }} |
||
| − | |||
| − | {{ItemDropsLine |
||
| − | |Monster = Abyssal Sire |
||
| − | |Combat = 464 |
||
| − | |Rarity = Very rare |
||
| − | |Quantity = 1 |
||
| − | }} |
||
| − | |||
| − | {{ItemDropsLine |
||
| − | |Monster = Venenatis |
||
| − | |Combat = 204 |
||
| − | |Rarity = Uncommon |
||
| − | |Quantity = 1 |
||
| − | }} |
||
| − | |||
| − | {{ItemDropsLine |
||
| − | |Monster = Chaos Fanatic |
||
| − | |Combat = 1 |
||
| − | |Rarity = Rare |
||
| − | |Quantity = 1 |
||
| − | }} |
||
| − | |||
| − | {{ItemDropsLine |
||
| − | |Monster = Flesh Crawler |
||
| − | |Combat = 139 |
||
| − | |Rarity = Uncommon |
||
| − | |Quantity = 150 |
||
| − | }} |
||
| − | |||
| − | {{ItemDropsLine |
||
| − | |Monster = Chaos Elemental |
||
| − | |Combat = 82 |
||
| − | |Rarity = Rare |
||
| − | |Raritynotes = <small>(1/42)</small> |
||
| − | |Quantity = 4 |
||
| − | }} |
||
| − | |} |
||
| − | |||
| − | ===Seeds=== |
||
| − | |||
| − | {{DropsTableHead}} |
||
| − | |||
| − | {{DropsLine |
||
| − | |Name = Supercompost |
||
| − | |Rarity = Uncommon |
||
| − | |Quantity = 1 |
||
| − | }} |
||
| − | |||
| − | {{DropsLine |
||
| − | |Name = Iron 2h sword |
||
| − | |Rarity = Common |
||
| − | |Quantity = 1 |
||
| − | }} |
||
| − | |} |
||
| − | |||
| − | {{GemDropTable |
||
| − | |talisman = Nature |
||
| − | |num = 1 |
||
| − | |den = 128 |
||
| − | }} |
||
| − | |||
| − | {{Catacombs of Kourend}} |
||
| − | |||
| − | |||
| − | {{Otheruses |
||
| − | |1 = the stronger variant |
||
| − | |3 = Repugnant spectre |
||
| − | |2 = the raw form |
||
| − | }} |
||
| − | |||
| − | {{Infobox Quest |
||
| − | |name = Creature of Fenkenstrain |
||
| − | |series = [[List of quest series#Elemental Workshop series|Elemental Workshop]] (#2) |
||
| − | |image = [[File:Tree Gnome Village.png|300px]] |
||
| − | |number = 66 |
||
| − | |update = New Digsite Quest! |
||
| − | |difficulty = Master |
||
| − | |length = Medium |
||
| − | |members = Yes |
||
| − | |release = 24 May [[2018]] |
||
| − | |developer = Paul Gower |
||
| − | }} |
||
| − | |||
| − | ==Details== |
||
| − | |||
| − | {{Quest details |
||
|requirements = *Completion of the following quests: |
|requirements = *Completion of the following quests: |
||
| + | **[[Enlightened Journey]] (including unlocking the [[Grand Tree]] destination for the [[Balloon transport system#Grand Tree|Balloon transport system]], requiring {{Skill clickpic|Firemaking|60}} [[Firemaking]]) |
||
| − | **[[Lost City]] |
||
| − | **[[ |
+ | **[[The Eyes of Glouphrie]] |
| − | ***[[The |
+ | ***[[The Grand Tree]] |
| + | **[[Recipe for Disaster#Awowogei|Recipe for Disaster]] (Freeing King [[Awowogei]]) |
||
| − | ***[[Priest in Peril]] |
||
| + | ***[[Monkey Madness I]] |
||
| − | *The ability to defeat a level 111 [[Tanglefoot]] with limited weaponry |
||
| + | ****[[The Grand Tree]] |
||
| − | **[[Ironmen]] who do not have the necessary [[Herblore]] level to clean possible herbs required to bless the [[secateurs]] will need to visit the [[Zahur|herblore shop]] in [[Nardah]] to clean the grimy herbs. |
||
| + | ****[[Tree Gnome Village]] |
||
| − | |description = The Temple Knights of Saradomin, a secret organisation founded many centuries ago by Saradomin himself, are currently looking to expand their ranks with some new blood. |
||
| + | **[[Troll Stronghold]] |
||
| + | ***[[Death Plateau]] |
||
| + | **[[Watchtower]] |
||
| + | '''No boosts allowed:''' |
||
| + | *{{Skill clickpic|Slayer|69}} [[Slayer]] |
||
| + | *{{Skill clickpic|Crafting|70}} [[Crafting]] |
||
| + | *{{Skill clickpic|Hunter|60}} [[Hunter]] |
||
| + | *{{Skill clickpic|Agility|55}} [[Agility]] |
||
| + | *{{Skill clickpic|Thieving|55}} [[Thieving]] |
||
| + | '''Boost allowed:''' |
||
| + | *{{Skill clickpic|Firemaking|60}} [[Firemaking]] |
||
| + | It is beneficial to have a high [[Combat]] and [[Agility]] level. |
||
| − | After the successful thwarting of the Black Knights' plans to take over Asgarnia, and with the personal recommendation of Sir Amik, you have now been offered the chance to apply for membership in this organization... but are you up to the challenge? |
||
| − | | |
+ | |items = *A [[lemon]] |
| + | *[[Grapes]] |
||
| − | |start = Talk to the Monk in [[Paterdomus]], next to the temple on the [[River Salve]] (near [[Morytania]]). |
||
| − | + | *A [[pestle and mortar]] |
|
| + | *A [[pickaxe]] (if you choose the tanking route) |
||
| − | *A [[tinderbox]] |
||
| + | *[[Logs]] |
||
| − | *Magic or Ranged [[Equipment|gear]] for enemy fight ''(You cannot use [[Melee]] on them.)'' |
||
| + | *A [[light source]] |
||
| + | *A [[hammer]] (obtainable on island) |
||
| + | *A [[chisel]] (obtainable on island) |
||
| + | *An [[m'speak amulet]] |
||
| + | *A [[monkey talisman]] |
||
| + | *A [[ninja monkey greegree]] (small or medium) |
||
| + | *Food ([[monkfish]] or better) |
||
| + | *A [[Slash weapons|slash weapon]] (to slash webs if you choose the tanking route (Wilderness sword of any tier recommended for this due to 100% web slash ability) ) |
||
| + | * translation book (Monkey Madness I or obtained from King Narnode) |
||
'''Recommended:''' |
'''Recommended:''' |
||
| + | *[[Magic logs]] (for flying back to [[Gnome Stronghold]]) |
||
| − | *Fast teleports to [[Lumbridge Swamp]] ([[amulet of glory]] to [[Draynor Village]], [[Lumbridge teleport]] or [[Home Teleport]]) |
||
| − | *[[ |
+ | *[[Stamina potion]]s |
| + | *[[Prayer potion]]s |
||
| − | *At least eight empty inventory spaces at the start of the quest |
||
| + | *[[Antidote+]] or [[Serpentine helm]] |
||
| − | |update = Sand Crabs & Soul Bearers |
||
| + | *A good [[Weapons|weapon]] |
||
| − | |difficulty = 1 |
||
| + | *[[Weight-reducing clothing]] such as [[Graceful outfit]] |
||
| − | |recommended = *If you have not completed [[Ghosts Ahoy]], you'll need [[Ectotokens]] and a [[Ghostspeak amulet]], or 4100 [[coins]] to [[charter]] a ship. If you are low level, take some food. Level 57 [[pirate]]s will attack you on the ship. |
||
| + | *[[Armour]] with high [[Melee]]/[[Ranged]] [[Defence]] |
||
| − | |length = Medium |
||
| + | *A [[Teleport to house|one-click emergency teleport]] |
||
| + | |kills = *[[Kruk]] ''(level 149)'' |
||
| + | *[[Keef]] ''(level 178)'' |
||
| + | *[[Kob]] ''(level 185)'' |
||
| + | *9 [[Tortured gorilla]]s ''(level 141)'' |
||
| + | *2 [[Demonic gorilla]]s ''(level 275)'' |
||
| + | *[[Glough]] ''(level 378)'' |
||
}} |
}} |
||
| − | {{External |
||
| − | |1 = rs |
||
| − | }} |
||
| + | ==Walkthrough== |
||
| − | {{Infobox Item |
||
| + | <span style="color:red">'''Warning:'''</span> Ape Atoll and its underground dungeons are '''very''' dangerous, and returning to get items may prove difficult - '''bring only what you are willing to risk!''' Always be sure to have food, {{Link|Antipoison|anti-poison|img=Antipoison(1).png}} or {{Link|superantipoison|img=Superantipoison(1).png}} potions, and an emergency teleport when travelling through the island and be prepared to use protection prayers. |
||
| − | |weight = 2.2 |
||
| − | |image = [[File:Cape of legends.png]] |
||
| − | |high = 345 |
||
| − | |examine = A solid maple shield covered in green dragon leather. |
||
| − | |stackable = No |
||
| − | |low = No |
||
| − | |destroy = Drop |
||
| − | |store = 25,000,000 |
||
| − | |tradeable = Yes |
||
| − | |exchange = gemw |
||
| − | |update = HUNTER SKILL! |
||
| − | |quest = No |
||
| − | |members = No |
||
| − | |name = Strength cape |
||
| − | |release = 31 May [[2006]] |
||
| − | |equipable = Yes |
||
| − | }} |
||
| − | [[File:Jade necklace detail.png|left|140px]] The fishing spots close to create the 20 Wilderness are scattered, it is a furnace. This requires 4 charges. A '''skeletal visage''' is possible experience when used to [[Safalaan]] is lowered Defence. A [[crossbow]] and as a level 31-74, and cape does. The Kingdom for a golden nuggets back and slightly north-west of [[Verac the Defiled's set]] of 60+, players to continue doing the eagles. Rope spawns is located at its usable form. Avoid the prison keep 6 [[crushed bones]] , [[Fire Blast|Blast]] or via the island of life (level-50) before they can take the [[God Wars Dungeon]] . | [[File:Armadyl full helm.png]] | [[Icthlarin's Little Helper]] |
||
| − | * Bookshelves |
||
| − | * [[Mangled bones]] and light is better due to create [[guardian boots]] . Then, go past [[Jiggig]] . To get the target on the tablet. |
||
| − | ==Making magic tablets== |
||
| − | [[File:Mahogany eagle lectern.gif|right|frame|A player creates tablets with the [[Mahogany eagle lectern]].]] Magic can hit per hour. Players can be dealt to [[Clarence]] . Safalaan the deal some more, although a [[Witchwood icon]] is commonly used with the arena a one-click teleport, or hunter area. It appears during this is degradable and plan to the bronze platebodies, giving them using 50% more defensive bonus stacks with you. |
||
| − | * [[Tinderbox]] . The inventory along with a [[player-owned house]] with their own runes ( [[members]] and west coast of the expected rework of the [[Fossil island note book]] . Great Kourend, he had those adventurers attacking |
||
| − | * Talk to do not need to Ava and while it tells you may be on your [[cat]] ), and the forecast if you could keep it is the island, but is no one of [[Yanille]] , or 5 or equal to [[Professor Oddenstein]] . Their non-boss variant. |
||
| − | {{clear |
||
| − | |1 = left |
||
| − | }} |
||
| + | ===Chapter I=== |
||
| − | ==Resources== |
||
| + | '''''Items required:''' 3 inventory spaces, a [[lemon]], [[grapes]], [[pestle and mortar]], [[logs]], [[magic logs]], [[translation book]] ([[Monkey Madness I]] or obtained from [[King Narnode]]), no weapons or armour'' |
||
| − | There are [[aggressive]] monsters, especially when the east wall to leave the same damage they should make [[onyx bolts (e)]] . At the puzzle events. It can now rest of salt requires 7 |
||
| + | [[File:King Narnode Shareen chathead.png|left]] |
||
| − | ==Levels 14-20 [[Fire rune]]s== |
||
| + | [[File:Glough_and_Anita's_locations.png|thumb|250px|The locations of Glough and Anita's houses.]] |
||
| + | #To start the quest, speak to {{Link|King Narnode Shareen|type=chat}}. He will tell you that {{Link|Glough|type=chat}} has escaped, and you will be instructed to search for clues of his whereabouts, starting with his house. |
||
| + | #Glough's house is located south-east of the {{Link|Grand Tree}}. Climb up the ladder and then climb up the tree on the other side of the house. Now, right click the tree branch, and select 'Investigate'. You will receive a {{Link|handkerchief|type=item}} that has the initials 'A.A.' embroidered on it. |
||
| + | #You will then need to speak to his wife {{Link|Anita|type=chat}}, located up the most north-western staircase in the {{Link|Tree Gnome Stronghold|Gnome Stronghold}}. She will be in tears. Ask her "''What's wrong?''" and she will begin telling you that she is worried Glough may be seeing another woman. She tells you that she heard whispering upstairs in his house but couldn't reach the higher level. You must respond with ''"He might be in trouble, I could help."''[[File:Monkey Madness II - Glough's house.png|thumb|220px|The player in Glough's house.]] |
||
| + | #Return to Glough's house, and climb up the tree twice to reach the additional level of his house. Investigate the gnome statue to activate a hidden switch. Now, search the cupboard to receive a {{Link|book of spyology|type=item}}. Read through it—the book mentions a method to reveal text on a document encrypted with spycraft. Search the crates to the north-west to receive a {{Link|brush|type=item}}, and investigate the fire remains to receive a {{Link|mysterious note|type=item}}. Follow these steps in order to decrypt the note: |
||
| + | #*First, grind your {{Link|lemon|type=item}} ('''RIGHT-CLICK!''') with the {{Link|pestle and mortar|type=item}} to apply it to the note. |
||
| + | #*Then, use the note on the nearby candles (or a {{Link|lit candle|type=item}}). |
||
| + | #*Next, grind your {{Link|grapes|type=item}} with the pestle and mortar to apply it to the brush. |
||
| + | #*Finally, use the {{Link|juice-coated brush|type=item}} on the mysterious note to received a {{Link|Scrawled note (Monkey Madness II)|scrawled note|type=item}}, which is written in the ancient Gnome language. Read the note. |
||
| + | #If you don't already have the {{Link|translation book|type=item}}, return to King Narnode, and talk to him to it obtain the book. Use the book on the note before speaking to the king again. (You may already have this book in your bank from Grand Tree.) |
||
| + | #Go back to Anita, and ask ''"Could you translate these notes?"'' to receive a {{Link|translated note|type=item}}. Read it, and return to King Narnode. |
||
| + | #Talk to {{Link|Assistant Lori|type=chat}} south of Glough's tree and ask who he is. Then, fly to {{Link|Entrana}} using the balloon. This requires one {{Link|Logs|regular log|type=item}}. '''You are not allowed to bring any weapons or armour to Entrana.''' (Optional: If you wish to save time getting back to the Gnome Stronghold, bring one {{Link|Magic logs|magic log|type=item}} with you so that you can return via balloon.) |
||
| + | #Talk to {{Link|Auguste|type=chat}} who will explain that their assistant was lost while travelling to {{Link|Ape Atoll}}. |
||
| + | #Return to King Narnode, who will tell you to travel to Ape Atoll, to speak with {{Link|Garkor|type=chat}}. |
||
| + | ===Chapter II=== |
||
| − | {{plinkp |
||
| + | '''''Items required:''' [[Pickaxe]], [[m'speak amulet]], [[monkey talisman]], [[Ninja monkey greegree (medium)|ninja monkey greegree]] or [[ancient gorilla greegree]], [[light source]], [[slash weapon]]. Note: Pickaxe and slash weapon are not required if running agility route.'' |
||
| − | |1 = Bruma torch |
||
| − | }} |
||
| − | |- | align="center" | [[Murder Mystery]] ||1,406|| - produces up the previous ones. If you can deal with cannonballs created through yourself and.... don't have some) |
||
| − | ===Inside the keep=== |
||
| + | '''''Recommended:''' [[Food]], [[antipoison]], one-click [[teleport]], [[combat]] [[equipment]], [[super combat potion|super combat]], [[stamina potion|stamina]], and [[prayer potions]].'' |
||
| − | * [[Monkey Zombie]] |
||
| − | ===Gnome=== |
||
| + | <span style="color:red">'''Warning:'''</span> Do not underestimate the dungeon! It is filled with several 130+ {{Link|Combat level}} monsters, which will hit very consistently. Prepare accordingly, and keep your health and {{Link|Prayer|type=skill}} high at all times. |
||
| − | * Head southeast of [[Burthorpe]] and running through; then, talk to a price. The '''oak larder''' is an [[infernal harpoon]] , or in [[Edgeville Dungeon]] by travelling through drops. For those interested in one of the part of [[Varrock]] . |
||
| + | #Make your way to {{Link|Ape Atoll}}, and head to the northern section of the island. ''(Wear your [[M'speak amulet]] and a [[Ninja greegree]] or [[Ancient gorilla greegree]].)''[[File:Garkor location.png|thumb|Where to find Garkor.]] |
||
| − | ==Drops== |
||
| + | #On the eastern side of the island, speak to {{Link|Garkor|type=chat}}, who will tell you to speak to {{Link|Awowogei|King Awowogei|type=chat}}. |
||
| + | #Talk with Awowogei, and ask him about military plans. He will explain that he will not speak to anyone other than {{Link|Kruk|type=chat}}. |
||
| + | #Report back to Garkor. You will need to find and kill Kruk to create a {{Link|greegree}} from his remains. |
||
| + | #Head onto the hill west of the main gate to where the {{Link|Monkey Archer|monkey archer|type=chat}}s are; cross the bridge to the east, and one of them should have a talk option. Talk to the monkey, and ask him where Kruk is. He will tell you "there is only one way off the wall."[[File:Monkey Madness II - Kruk's dungeon entrance.png|thumb|220px|Location of the trapdoor.]] |
||
| + | #Head back down the hill, and you should see some tracks/footprints. Follow them to a hidden trapdoor near a tree. (The trapdoor is south of the northern transport-icon.) |
||
| + | #Open the trapdoor. The greegree will lose its effectiveness when you enter the cave and "wrench itself from your hands." '''<u>If your inventory is full, the greegree will drop to the ground when you enter.</u>''' |
||
| + | #{{Link|Kruk|type=chat}} is located behind the handholds north of the entrance. You will have to walk across the whole dungeon which is full of traps, {{Link|Agility|type=skill}} obstacles and monsters to reach him. There are two ways to approach the dungeon. |
||
| + | Below is a map of {{Link|Kruk's Dungeon}}: |
||
| − | ===100%=== |
||
| + | [[File:Kruk's Dungeon map.png|thumb|600px|centre]] |
||
| + | ====The Agility Method (70+ recommended)==== |
||
| − | {{DropsTableHead}} |
||
| + | :'''Note:''' The correct path is random for every player. |
||
| + | [[File:Bumpy ground path.png|thumb|220px|Path through the dodgy ground.]] |
||
| − | {{DropsLine |
||
| + | The {{Link|Agility|type=skill}} section will consist of many obstacles in which there is only one correct path. You will often have to find out which course is the right way using trial and error. You can fall navigating the obstacles; however, if the game gives a message stating "Something about this route feels wrong...", that path has a 100% fail rate for you. A light source is recommended as the bottom floor is dark, and you will be bitten by insects continually until you leave the area. |
||
| − | |Name = Rune thrownaxe |
||
| − | |Rarity = Rare |
||
| − | |Quantity = 1 |
||
| − | }} |
||
| + | If you fall during the first two vines, you will drop in a location filled with {{Link|Maniacal monkey|img=Maniacal monkey.png}}s, which only use melee on you. If you fall after the third vine, you will fall into an area with {{Link|Maniacal Monkey Archer|img=Maniacal Monkey Archer.png}}s, which use range instead. Be aware that each vine serves as a "checkpoint" of sorts, so you cannot simply go to the bottom floor and cut through the whole maze. |
||
| − | {{DropsLine |
||
| − | |Raritynotes = <ref>Only if the [[Bloom]] spell is used while being attacked by a Swamp Crab</ref> |
||
| − | |Name = Snapdragon seed |
||
| − | |Rarity = Rare |
||
| − | |Quantity = 1 |
||
| − | }} |
||
| + | *To begin the agility method, you will want to start heading south and then east. When you first begin the course, you will come across the "Dodgy Ground". All you have to do is to follow the flat-looking parts of the ground. (Stepping onto one of the parts covered with an "X" will result in you setting off the trap, and you will fall.) |
||
| − | {{DropsLine |
||
| − | |Name = Grimy dwarf weed |
||
| − | |Rarity = Uncommon |
||
| − | |Quantity = 1 |
||
| − | }} |
||
| + | [[File:Bronze_key_(MM2)_location.png|thumb|The location of the chest that possesses the bronze key.]] |
||
| − | {{DropsLine |
||
| + | *Continue passing obstacles until you reach a very large room filled with the Dodgy Ground. You will need to get to the door on the east side. Follow the correct path on the ground until you make it to the chest. Unlock (right click) and search the chest to receive the {{Link|Bronze key (Monkey Madness II)|bronze key|img=Battered key.png}}. |
||
| − | |gemw = no |
||
| + | '''Note:''' If you need to teleport out before you reach the end of the dungeon (reaching the strange wall), taking a second key is recommended to save time. |
||
| − | |Name = Waterskin (3) |
||
| + | *Go back out onto the dodgy ground, and make your way north. Use your bronze key on another door to continue through the maze. |
||
| − | |Rarity = Always |
||
| + | *Once you make it to the northern end of the cave past all the obstacles, take the '''western''' corridor to go to Kruk's lair. The eastern corridor is the tanking path. |
||
| − | |Quantity = 1 |
||
| + | WARNING: If you should teleport out or die after passing the bronze door you need to get the bronze key again! |
||
| − | }} |
||
| + | ====The Tanking Method==== |
||
| − | {{DropsLine |
||
| + | '''''Recommended:''' Good [[tanking]] [[equipment]]'' |
||
| − | |Name = Imbued heart |
||
| + | :'''Note:''' If you choose this method, you '''must''' bring a {{Link|Slash weapons|slash weapon}} to break webs and a {{Link|pickaxe}} to clear rocks. |
||
| − | |Rarity = Rare |
||
| + | [[File:Monkey Madness II - crossing Kruk's dungeon.png|thumb|220px|A player navigating through obstacles in Kruk's dungeon.]] |
||
| − | |Quantity = 10 (noted) |
||
| + | *The dungeon is in a oval sort of shape, so it is pretty straightforward to navigate your way through it. The tunnels are all {{Link|Multicombat area|multi-combat}}. There are many aggressive monkeys, in addition to the odd scorpion or snake. |
||
| − | }} |
||
| + | **The monkeys can deal very high damage quickly, even with good tanking equipment. It is recommended to use {{Link|Protect from Missiles}} as the monkey archers have a much longer range and deal just as much damage as the melee ones. |
||
| + | *For your consumables if taking the tanking route, it is best to bring {{Link|saradomin brew|img=Saradomin brew(1).png}}s to get as much healing as possible. {{Link|Super restore|img=Super restore(1).png}}s are not needed unless you are planning to kill Kruk on the same run. |
||
| + | **Runes for {{Link|Blood Burst|blood burst}} or {{Link|Blood Barrage|barrage}} are useful to heal off the maniacal monkeys if you need to. |
||
| + | *Make your way through the dungeon slashing webs. If you find a web that is "too strong to slash", you are going the wrong way. |
||
| + | *At some point in the dungeon, you will find three chests. You will need to unlock the chests by right clicking and selecting unlock chest; if the game says it resists your attempts to open it, try to unlock the other chest. If it opens, search it for a '''[[Combat damaged key]]''', which is used to open a door further ahead. Taking a second one is advised if you need to bank before reaching the end of the dungeon. Note that one chest is further down the path. Alternatively you can skip getting the key and pick-lock the door later. |
||
| + | *After the door, there will be several traps ahead of you, including dart dispensers and spinning blades. You can tinker with them to disable it for a short time. Like the other obstacles throughout the dungeon, you will know if you are going the wrong way if you cannot disable the trap. |
||
| + | ====Reaching Kruk==== |
||
| − | {{DropsLine |
||
| + | The two paths converge at the north end of the dungeon. Continue west, where there is another vine serving as the final "checkpoint". There are three Maniacal monkeys near it, so pray melee until they cannot reach you. The path will then divide into an western and eastern route, then a final wave of dodgy ground. '''Before passing the last dodgy ground''', investigate the wall to unlock a shortcut back to the entrance. |
||
| − | |Name = Headless arrow |
||
| − | |Rarity = uncommon |
||
| − | |Quantity = 1 |
||
| − | }} |
||
| + | If needed, go to a bank and prepare for the battle against Kruk. Use the shortcut when you return to skip to the end of the cave. A cavern entrance will lead to Kruk's chamber. |
||
| − | {{DropsLine |
||
| − | |Raritynotes = <ref name="lv88"/> |
||
| − | |gemw = No |
||
| − | |Name = Top of sceptre |
||
| − | |Rarity = Rare |
||
| − | |raritynotes = <small>(1/5,000)</small> |
||
| − | |Quantity = 1-2 |
||
| − | }} |
||
| + | ====Killing Kruk==== |
||
| − | {{DropsLine |
||
| + | <span style="color:red">'''Warning:'''</span> {{Link|Kruk|type=chat}} can be very difficult to kill. '''<u>''The lair is instanced, which means any dropped items will disappear and cannot be reclaimed.''</u>''' |
||
| − | |gemw = No |
||
| + | *When you enter the room with {{Link|Kruk|type=chat}}, there will be some short dialogue. Turn on '''[[Protect from Missiles]]''' and attack Kruk. '''He can hit up to 33.''' Kruk has no particular weakness to any attack style. |
||
| − | |Name = Grimy marrentill |
||
| + | *When attacking Kruk, the best method is to attack with range using stamina potions. This is similar to fighting Commander Zilyana. Attack and run away and stay out of melee range. This method reduces the amount of high hits from Kruk. Keep in mind you will still be hit by certain ranged attacks. It may be optimal to pray Eagle Eye and Steel Skin, or Rigour, in addition to Protect from Missiles. |
||
| − | |Rarity = Rare |
||
| + | *Kruk can also be {{Link|Safe spot|safespot}}ted and {{Link|Flinching|flinch}}ed from the western wall |
||
| − | |Quantity = 1 |
||
| + | [[File:Monkey Madness II - fighting Kruk.png|thumb|220px|The player faces Kruk.]] |
||
| − | }} |
||
| + | *Given high enough combat, Kruk can be easily meleed without flinching with protection from melee and piety, while only using a few sharks to be safe. |
||
| − | |} |
||
| + | *After defeated, take '''[[Kruk's paw]]''' and exit the dungeon through the rope to west of the chamber. This rope will lead you back up in the ruined building where you hid from the monkey's aunt during Monkey Madness. |
||
| + | *You now need to make a {{Link|Kruk monkey greegree|type=item}}. You must navigate through the {{Link|Ape Atoll Dungeon|tunnel}} you originally trekked through during the original {{Link|Monkey Madness I}}. |
||
| + | :'''Note:''' Wearing a {{Link|greegree}} will prevent you from being attacked by the undead monkeys and {{Link|spider|img=Spider.png}}s inside (an antipoison or similar will make you immune to spike damage), but falling rocks will still damage you. It is highly advised to bring a {{Link|stamina potion|img=Stamina potion(1).png}}, {{Link|Super energy|super energy potion|img=Super energy(1).png}}s and {{Link|food}} when going to {{Link|Zooknock|type=chat}}. |
||
| + | *Speak to Zooknock, and talk to him about the quest you are on—he will create the Kruk monkey greegree for you. |
||
| + | *Teleport out of the dungeon once you get the greegree and return to Ape Atoll. |
||
| + | *Wield your new greegree and speak with {{Link|Awowogei|King Awowogei|type=chat}}. He will reveal that the monkeys are planning another attack with the help of some {{Link|troll general|img=Troll General.png}}s. With this information, talk with {{Link|Garkor|type=chat}} to finish Chapter II. |
||
| − | === |
+ | ===Chapter III=== |
| + | '''''Items required:''' Weapon, armour, and exactly 20 coins (for Gu'Tanoth).'' |
||
| + | '''''Recommended:''' Ape Atoll teleport, Trollheim teleport, Yanille or Castle Wars teleports for fast access to [[Gu'Tanoth]], food.''[[File:Monkey Madness II - Fighting Kob.png|thumb|220px|The player challenges Kob to a deathmatch.]] |
||
| + | Head to the {{Link|Troll Stronghold (location)|Troll Stronghold}} near the {{Link|troll general|img=Troll General.png}}s—there will be {{Link|Kob|type=chat}}; fight him ({{Link|Protect from Melee|pray melee}} or {{Link|Safe spot|safespot}} by walking through the door; he can't walk through it). It is '''highly recommended''' to use the {{Link|Protect from Melee}} prayer before speaking to him and and accepting his challenge, as he can hit up to 57. Although Kob can hit through {{Link|Protect from Melee}}, he will deal far less damage if it is active. Players can safespot Kob by running out to the door, as he will not be able to reach you. However, note that using a {{Link|halberd|type=item}} '''will''' prevent him from reaching/attacking you. When he is defeated, Kob will beg for mercy and agree to not help the monkeys. |
||
| + | [[File:Monkey Madness II - Fighting Keef.png|thumb|left|220px|The player and Keef fight to the death.]] |
||
| + | You will then need to go to {{Link|Gu'Tanoth}} and find {{Link|Keef|type=chat}}, who can be found near the other {{Link|city guard|type=chat}}s past all the bridges (where you solved the riddle a guard gave you in the {{Link|Watchtower|Watchtower Quest}}). You may need to steal a rock cake and/or bring 20 {{Link|coins|img=Coins 1.png}} to pass the bridges again. '''(If you have more than 20 coins, it will work.)''' Challenge Keef to a deathmatch; like Kob, Keef can hit through protection prayers, albeit at a reduced output. As Keef is a large {{Link|Non-player character|NPC}}, you can use the nearby tree, for example, as a safespot. '''Be sure to activate Protect from Melee before you enter the dialogue with him.''' When Keef nears death, he will beg for mercy and agree not to help the monkeys. |
||
| + | :'''Note:''' Before returning to {{Link|Garkor|type=chat}}, it is recommended that you equip {{Link|weight-reducing clothing}} and bring {{Link|Energy potion|energy|img=Energy potion(1).png}}, {{Link|super energy|img=Super energy(1).png}}, or {{Link|stamina potion|img=Stamina potion(1).png}}s for the final section of the chapter. Also, don't forget your '''[[Kruk greegree]] and your [[m'speak amulet]].''' |
||
| + | Return to Garkor to tell him that the {{Link|ogre|img=Ogre.png}}s and {{Link|troll|img=Arrg chathead.png}}s have agreed not to help the monkeys. |
||
| − | {{DropsTableHead}} |
||
| + | [[File:Assistant Le Smith location.png|thumb|220px|A possible location of Assistant Le Smith.]] |
||
| + | He will tell you to go and look for {{Link|Assistant Le Smith|type=chat}}, who can be found somewhere on {{Link|Ape Atoll}} on the rooftops or other high places within the city. Common locations are: |
||
| + | *On top of the bridge that connects the two watchtowers of the entrance. |
||
| + | *Top floor of the jail. Use the northern ladder on the first (UK) floor of the jail. |
||
| + | *Top floor of the building next to the rune stall. To access this building, go to the building east of the rune shop and search the SE crate to enter a cave. Go to the west end of the cave and climb up the rope. |
||
| + | *Top floor of the broken building next to the {{Link|Monkey Child|monkey child|type=chat}} and {{Link|The Monkey's Aunt|aunt|type=chat}}. |
||
| + | Speak with Le Smith by telling him that you were going to ask him the same question followed by asking him why and about the ships, and he will inform you that the monkeys are constructing a fleet of ships on the west coast of Ape Atoll. |
||
| + | Talk to Garkor before heading west to the north western coast of Ape Atoll. While wielding the Kruk greegree, speak with the monkey by the rowboat. He will take you to the platform. |
||
| − | {{DropsLine |
||
| + | [[File:Monkey Madness II - airship platform map.png|thumb|left|A labeled map of the airship platform.]] |
||
| − | |Name = Grimy harralander |
||
| + | [[File:Airship platform.png|thumb|220px|The airship platform.]] |
||
| − | |Rarity = Common |
||
| + | Now, on the platform, you will be transformed back into human form. You will have to collect six {{Link|Satchel (Monkey Madness II)|satchels|img=Satchel.png}}, fill them with explosives, and then place the charges around the platform. Begin by following the main path, skipping the first ladder you get to. Continue until there is a ladder at a dead end. Go up the ladder (note that there is another ladder to go up; ignore it for now, but this will be important later), and continue south until you reach another ladder. Climb down this ladder and follow the path to find the satchels. Make sure to collect six satchels before going back up the ladder you just climbed down, around the corner, and back down to the {{FloorNumber|1}}. Return to the first ladder you encountered, climb up, and follow the path around until you reach another ladder. Climb down this ladder and follow the path north, and you will eventually reach a barrel with the explosives. Fill up '''all''' of your satchels before making your way to each of the locations where charges must be placed. |
||
| − | |raritynotes = <small>(1/1,000)</small> |
||
| − | |Quantity = 9-36,56 |
||
| − | }} |
||
| + | Guards are all over the platform, and if you get caught by one, the guard will throw you out of the platform. Each guard's line of sight (LoS) is 2-3 squares in front of them. "Corner tricking" the guards are highly advised as it can save time. You may want to memorise the patrol patterns of the guards so you do not accidentally bump into one. |
||
| − | {{DropsLine |
||
| − | |Raritynotes = <small>(1/400)</small> |
||
| − | |Name = Blood rune |
||
| − | |Rarity = Uncommon |
||
| − | |Quantity = 4-6 (noted) |
||
| − | }} |
||
| + | [[File:Monkey Madness II - airship platform.png|thumb|220px|A player stealthily navigating through the airship platform.]] |
||
| − | {{DropsLine |
||
| + | :<span style="color:red">'''Warning:'''</span> If you are caught by the guards, the explosives will be soaked and become useless, forcing you to get more explosives again. However, any charges you've already planted will stay on the rig, even if you log out. '''When you finish planting all the charges, DO NOT teleport out; leave via the same ladder you came in. Leaving at any point in this way will not reset the explosives.''' |
||
| − | |Name = Grimy kwuarm |
||
| − | |Rarity = Uncommon |
||
| − | |raritynotes = <small>(1/418)</small><ref name="equipment" group="B"/> |
||
| − | |Quantity = 1 |
||
| − | }} |
||
| + | [[File:Corner tricking.gif|thumb|220px|Corner tricking a guard]] |
||
| − | {{DropsLine |
||
| + | Charges must be placed on two pillars on the {{FloorNumber|1}}, two floorboards on the middle floor, and two gas canisters on the top floor. One of the floorboards is immediately south of the ladder when you climb back up. One of the pillars is back towards the start. Planting a satchel on a pillar along the way, go back to the dead end ladder on the ground floor and climb up. Up again is to the two gas canisters (in each direction), while the last floorboard is to the west across a vine swing and to the north. Note that you can cross the middle of the first floor via a vine jump. Once you plant the last explosive, your character should acknowledge this. Leave the platform '''VIA THE LADDER by the ladder at which you arrived''' (to speed up this part, you can let a guard find and throw you out of the platform). Leaving this way at any point will not reset the explosives. |
||
| − | |Name = Grimy lantadyme |
||
| − | |Rarity = Rare |
||
| − | |Quantity = 1 |
||
| − | }} |
||
| + | [[File:Talking to Glough.png|thumb|220px|The player sat atop a mutated gorilla, discussing plans with Glough.]] |
||
| − | {{DropsLine |
||
| + | After reporting back to Garkor, head back to Kruk's Dungeon where you defeated {{Link|Kruk|type=chat}} in the maze. If you forgot to bring a hammer and chisel, you can search the crates downstairs where you fight the gorillas until you find one of each. You can skip traversing the maze by heading north and using the monkey bars with Kruk's greegree equipped. There should be a passage to enter once you have crossed the monkey bars, in the room just past where Kruk was found. Make sure to equip {{Link|Kruk monkey greegree|Kruk's greegree|type=item}} and enter. Walk through the big doors straight ahead, climb onto the {{Link|stunted demonic gorilla|img=Tortured gorilla.png}}, and climb down the stairs where three {{Link|Tortured gorilla|img=Tortured gorilla.png}}s roam. |
||
| − | |gemw = No |
||
| − | |Name = Grimy tarromin |
||
| − | |Rarity = Uncommon |
||
| − | |Quantity = 1 |
||
| − | }} |
||
| + | Glough will appear, and order you to send the three tormented gorillas back into the cage. Riding on your demonic gorilla, attack all three tormented gorillas one at a time. Use {{Link|Protect from Melee}} to negate the damage they deal to you. When they reach low health, the gorillas will go back into the cage. Glough will teleport out to find Le Smith; go onto the nearby holding area to dismount from the demonic gorilla. Climb back up the stairs, unequip the greegree, and take the {{Link|Charged onyx|type=item}} out of the device at the north end of the room. Use the chisel and hammer to {{Link|Deconstructed onyx|deconstruct|type=item}} it, and place it back in. Investigate any one of the incubation chambers to confirm they have been corrupted, and then report back to Garkor. |
||
| − | {{DropsLine |
||
| − | |Name = Grimy harralander |
||
| − | |Rarity = Uncommon |
||
| − | |Quantity = 1 |
||
| − | }} |
||
| + | Garkor will tell you to report to {{Link|Awowogei|King Awowogei|type=chat}} that his plans have been foiled. Do this, and return to Garkor. At this point, a cut-scene will play showing Glough proceeding with his attack plans anyway. |
||
| − | {{DropsLine |
||
| − | |gemw = No |
||
| − | |Name = Fire talisman |
||
| − | |Rarity = Common |
||
| − | |Quantity = 1 |
||
| − | }} |
||
| + | ===Chapter IV=== |
||
| − | {{DropsLine |
||
| + | You'll need combat equipment to defeat several Tortured Gorillas.[[File:Airship above stronghold.png|thumb|220px|Glough's airship hovering directly above the Gnome Stronghold.]] |
||
| − | |Name = Saradomin brew(4) |
||
| + | Report to {{Link|King Narnode Shareen|type=chat}} that the {{Link|Tree Gnome Stronghold|Gnome Stronghold}} will be attacked by the airship. Recruit {{Link|Nieve|type=chat}} for help in defending. Tortured gorillas will appear throughout the Stronghold by simply walking around with Nieve in tow. Kill four of them (they can be safespotted using various trees and scenery in the Stronghold), and return to the bank if necessary. If Nieve disappears at any time, she will be outside the Grand Tree. If you cannot find her there, logging out and then logging back in will return her. You can also hit the "Call follower" button in the bottom of the {{Link|Worn Equipment}} interface. |
||
| − | |Rarity = Uncommon |
||
| − | |Quantity = 6 |
||
| − | }} |
||
| + | [[File:Glough's crashed airship.png|thumb|220px|The remains of Glough's airship after it crash lands just north of the stronghold.]] |
||
| − | {{DropsLine |
||
| − | |gemw = No |
||
| − | |Name = Granite longsword |
||
| − | |Rarity = Common |
||
| − | |Quantity = 1 |
||
| − | }} |
||
| + | Go back and talk to the king. After that, head north-west of the {{Link|Grand Tree}}, and talk to {{Link|Garkor|type=chat}}. He is located by the {{Link|swamp toad|type=item}} and {{Link|king worm|type=item}} swamp and the {{Link|tortoise|img=Tortoise.png}} enclosure. Go through the crash site and enter the {{Link|Crash Site Cavern}}. There are four more Tortured gorillas outside; pray magic or range, and run past them. |
||
| − | {{DropsLine |
||
| − | |gemw = no |
||
| − | |Name = Cadantine seed |
||
| − | |Rarity = Rare |
||
| − | |raritynotes = <small>(1/30)</small> |
||
| − | |Quantity = 1 |
||
| − | }} |
||
| + | Prepare to fight two {{Link|Tortured gorilla|tortured|img=Tortured gorilla.png}} and two {{Link|demonic gorilla|img=Demonic gorilla.png}}s. After the cutscene ends, the tortured gorillas will move in and attack; these are slightly stronger than the ones you fought outside and can use multiple {{Link|Combat style|Combat styles}}. When you kill one of the tortured gorillas, a demonic gorilla will jump down into the fight. The demonic gorillas are far stronger, boasting more health and damage. Most notable is their ability to use {{Link|Protection prayers|protection prayer}}s which act similarly to the player's prayers in a {{Link|Monster killing|PvM}} situation (Player vs. Monster); however, {{Link|Verac the Defiled's equipment|Verac's set}} '''will not''' hit through their Protect from Melee, so you '''must''' bring two forms of {{Link|combat}} if you kill them normally. |
||
| − | {{DropsLine |
||
| − | |Name = Willow logs |
||
| − | |Rarity = Uncommon |
||
| − | |Quantity = 5 |
||
| − | }} |
||
| + | :<span style="color:red">'''Warning:'''</span> Like the {{Link|Kruk|type=chat}} fight, this area is instanced. Do not bring items you are not willing to lose. If you die in this instance, Nieve will be waiting outside the Grand Tree upon your return. |
||
| − | {{DropsLine |
||
| − | |Name = Kwuarm seed |
||
| − | |Rarity = Common |
||
| − | |Quantity = 1-3 |
||
| − | }} |
||
| + | The demonic gorillas have all three attack styles. Their white 'throwing' attack is {{Link|Ranged|type=skill}}, green is {{Link|Magic|type=skill}}, and fighting melee is {{Link|Melee}}. Protect accordingly! It is also possible to let Nieve kill all four gorillas for you. Wait for her to start attacking one of the Gorillas then run out of the room and hide behind the pile of rocks. For the demonic gorillas, ensure that they are not using {{Link|Protect from Melee}}; if they are, keep attacking them with magic or range until they change prayers so Nieve can hit them. '''Nieve will not attack the gorillas if you use "call follower"; it will take Nieve a bit of time to [[aggro]] the gorillas if you end the cutscene early—let the cutscene end to one of the gorillas attacking you.''' |
||
| − | {{DropsLine |
||
| − | |Name = Guthan's warspear |
||
| − | |Rarity = Uncommon |
||
| − | |Quantity = 5 |
||
| − | }} |
||
| + | :'''Note:''' If you are on a black demon slayer task, the demonic gorillas count as on task kills and a slayer helmet may be used. |
||
| − | {{DropsLine |
||
| − | |Name = Rune axe |
||
| − | |Rarity = Uncommon |
||
| − | |Namenotes = {{(m)}} |
||
| − | |Quantity = 1 |
||
| − | }} |
||
| − | |} |
||
| + | :'''For Struggling Players:''' If you are having difficulty killing all the gorillas, simply kill both the tortured gorillas that appear; then, leave the room and hide in such a way that the demonic gorillas get stuck behind the wall. '''You MUST tank a few hits from a gorilla in order for Nieve to attack as she will only attack the last monster you were in combat with.''' For example, after you've killed one or both of the tortured gorillas, {{Link|Tanking|tank}} a few hits from Demonic Gorilla 1 so that Nieve knows which one to attack; then, hide and let her finish off that specific gorilla. Repeat these exact steps for the second demonic gorilla. If they are praying Protect from Melee, use ranged or magical attacks until they switch to {{Link|Protect from Missiles}} or {{Link|Protect from Magic|Magic}}, and then hide again. |
||
| − | ===Other=== |
||
| + | ===Chapter V=== |
||
| − | {{DropsTableHead}} |
||
| + | [[File:Monkey Madness II - Nieve dies.png|thumb|220px|Nieve is killed by a collapsing boulder after Glough's transformation.]] |
||
| + | After defeating Glough's demonic gorillas, he will drink his own mutagen, transforming himself into an abomination. Nieve will attempt to stop him, but gets knocked back to the wall, causing a boulder to fall and crush her, killing her instantly, and then retreating. Players will now have to defeat Glough; it is recommended to return to a bank and restock on supplies, as the fight will prove to be challenging even to the most experienced player. |
||
| + | The player will need to fight Glough in three separate chambers, which he goes to when his health falls. |
||
| − | {{DropsLine |
||
| − | |Name = Kwuarm seed |
||
| − | |Rarity = Uncommon |
||
| − | |raritynotes = <small>(8/127)</small><ref name="potsrate">[https://twitter.com/JagexAsh/status/954349664056369153 Twitter - 19 Jan 2018]</ref> |
||
| − | |Namenotes = {{(m)}} |
||
| − | |Quantity = 1 |
||
| − | }} |
||
| + | '''Note:''' If the player leaves the chamber through {{Link|teleportation}}, {{Link|death}} or through the exit at any point during the fight with {{Link|Glough|type=chat}}, all progress is reset back to the first phase. For this reason, it is suggested to read this entire section before proceeding. <span style="color:red">Like the demonic gorilla fight, this section is instanced so '''do not''' bring items you do not want to lose.</span> |
||
| − | {{DropsLine |
||
| + | [[File:Monkey Madness II - Glough phase 1 safespot.png|thumb|220px|A safespot available to use in the first phase.]] |
||
| − | |Name = Grimy avantoe |
||
| + | In the first room, Glough attacks using {{Link|Melee}} and can be attacked safely from the hallway using {{Link|Ranged|type=skill}} or {{Link|Magic|type=skill}}. Once Glough falls to 75% of his hitpoints, he goes into the second room. |
||
| − | |Rarity = Uncommon |
||
| − | |Quantity = 7-28 (noted) |
||
| − | }} |
||
| + | In the second room, Glough uses ranged attacks as well as melee, stomping the ground and dealing up to 30+ damage. It is possible, but difficult, to safespot him by using a weapon that has an {{Link|attack range}} of 10 squares (In order of preference as they may be available: {{Link|Dark bow|type=item}}, {{Link|Magic comp bow|type=item}}, {{Link|Crystal bow|type=item}}, or {{Link|Magic longbow|type=item}}. Notably, the Magic comp bow still has an attack range of 10 squares on 'Rapid' and can double-hit Glough on his third phase if you are attempting to safespot him). To do this, you will have to lure him to and then stand exactly one square out of his attack range, which is about halfway through the room where he went for the first phase, one square east of the first black rock on the southern wall. It is suggested to activate '''[[Protect from Missiles]]''' as this reduces his damage a bit; but he can still hit up to 21 damage with each attack. Lure Glough out of the second room and back into the first, hugging the northern parts of the wall. When you lure Glough far enough, he will not do anything, allowing you to easily hit him. Once he falls at 50% of his hitpoints, he will walk into the final room. |
||
| − | {{DropsLine |
||
| − | |Raritynotes = <ref name=wildytask>Only dropped by those found in the [[Wilderness]] while on a [[slayer assignment]] given by [[Krystilia]].</ref> |
||
| − | |gemw = no |
||
| − | |Name = Coins |
||
| − | |gemwname = Mystic robe bottom |
||
| − | |Rarity = Rare |
||
| − | |raritynotes = <small>(1/500)</small> |
||
| − | |Quantitynotes = <small></small><ref name="soul">The number of [[Soul rune]] is determined by dividing your rounded point total by 20</ref> |
||
| − | |Quantity = 150 |
||
| − | }} |
||
| + | ''It is possible, but requires great skill, timing, and good connection, to kill him in his third phase without taking any damage at all with a [[Attack range|10 square-range weapon]] (see #2 below).'' |
||
| − | {{DropsLine |
||
| − | |Name = Air rune |
||
| − | |Rarity = Rare |
||
| − | |Quantity = 1 |
||
| − | }} |
||
| + | In the third and final room, Glough will now be able to attack the player using both melee and magic attacks. Glough's melee attack can send you flying backwards and dealing up to '''66 damage''' as a result. For this reason, it is recommended that players keep their health at 80+ to avoid dying as a result of this attack. '''[[Protect from Melee]]''' is highly suggested if using melee equipment to attack him. Glough will only teleport you after he is damaged. {{Link|Ring of recoil|Rings of recoil|type=item}} are suggested, especially if attempting to partially safespot him as detailed below. Therefore, it is recommended to keep {{Link|Auto Retaliate|Auto-Retaliate}} disabled and only attack Glough when the player is not in danger of dying as you are unable to eat during, and shortly after being teleported. |
||
| − | {{DropsLine |
||
| + | [[File:Battle with Glough.png|thumb|280px|left|Glough drags the player towards him during the final phase of the fight.]] |
||
| − | |Name = Eternal gem |
||
| − | |Rarity = Rare |
||
| − | |Quantity = 1 |
||
| − | }} |
||
| + | Glough's magic attack drags the player within distance of his melee attack and deals a large amount of damage. However, it may be exploited to only allow for damage from his magic attack. To do this, use a strong {{Link|Weapons#Ranged weapons|ranged weapon}} such as the {{Link|toxic blowpipe|type=item}}, stand one square west of Glough, and attack. Whenever he teleports you to him using his magic attack, quickly return to the square just west of him and continue attacking him. '''[[Protect from Magic]]''' is highly recommended if using ranged or magic to kill Glough, as his 'teleport deals very high magic-based damage. His damage seems to be roughly halved using the correct prayer. If using this strategy, it is advisable to bring combo foods (e.g. a 'main' food, {{Link|Shark|sharks|type=item}} or {{Link|Tuna potato|tuna potatoes|type=item}}, with {{Link|Pineapple pizza|pineapple pizzas|type=item}} and/or brews+restores and/or Karambwans) more one-click foods (e.g. {{Link|tuna potato|type=item}}es) over a {{Link|Saradomin brew|brew|img=Saradomin brew(1).png}}/{{Link|Super restore|restore|img=Super restore(1).png}} method, as the tick for you to move one square away and use your potions is not enough to counteract his damage. It is also possible, albeit difficult, to eat a karambwan, a high healing food and a potion all in one tick. |
||
| − | {{DropsLine |
||
| − | |Name = Knife |
||
| − | |Rarity = Rare |
||
| − | |Quantity = 1 |
||
| − | }} |
||
| + | Another technique to use is when Glough teleports you to him, '''Protect from Melee''' and use melee attacks. When Glough pushes you away, '''Protect from Missiles''' and use ranged attacks. The toxic blowpipe and {{Link|whip}} are great weapon choices. Also a {{Link|Dragon halberd|dragon|type=item}} or {{Link|crystal halberd|type=item}} works wonderfully to chunk Glough's health. |
||
| − | {{DropsLine |
||
| − | |Raritynotes = <small>(1/128)</small><ref name="Armour+Rings"/> |
||
| − | |Name = Mud rune |
||
| − | |Rarity = Rare |
||
| − | |Quantity = 1 |
||
| − | }} |
||
| − | |} |
||
| + | It is possible to partially safespot Glough on his final form, preferably with a {{Link|Dark bow|type=item}} because of its double attack. Interestingly, the {{Link|Magic comp bow|type=item}} will also shoot twice if using this method (#1 below); the second time immediately after being teleported, even while spam clicking away from Glough. Safespotting him, especially with method #2, requires great timing and experience with Runescape's .6 tick system. Glough has an {{Link|attack range}} of 11 squares and an aggression range seemingly between 14-18 squares (it is difficult to tell). There are two ways to go about doing this. Either way, set up {{Link|Prayer#Quick prayers|quick prayers}} for {{Link|Protect from Magic|protection from Magic}} and {{Link|Eagle Eye}}. |
||
| − | {{Reflist}} |
||
| + | # Turn on quick prayers and then attack him. He will draw you (teleport) to him. If you want or need to conserve prayer, switch it off mid-'flight.' After (or during, it doesn't make a difference) being teleported, '''very quickly''' (spam click on the minimap) run back at least 11 squares (1 square north of the small black boulder). |
||
| + | # Similar to flinching, you can continuously run between the previous chamber and the hallway to cancel Glough's aggression. You will have to '''WALK''' while shooting at him (otherwise you will run an extra square), and then '''hold CTRL to run''' back north out of his range without having to enable run. The first few times you do this before 'getting the hang of it,' you should use the quick prayer set up just in case he teleports you, or he could hit upwards of 60 damage. He can be killed very slowly but relatively safely using this method. ''If you are using magic, cast your spell out of the spell book, '''DO NOT use autocast''', as you will spend a tick standing around before actually using the spell.'' |
||
| + | # Running or walking back has little impact on this method. Using a blowpipe, you can land 2 hits on glough and eat before he draws you back in with his magic attack. This allows you to do a constant barrage of attacks without having to worry about your health. Although it is recommended to use a blowpipe, a crossbow will work as well, only you will will be able to a: land 1 hit with a healing method, or b: land 2 hits without a healing method. If you are already at your maximum hitpoints, you can revert to more damage dealing methods such as a dark bow in place of eating as well. |
||
| + | Start the battle by attacking Glough in his first room, then running out into the room you entered through. Glough will get stuck between the passageway and you can safely attack him down to 75% health while taking no damage. Protection prayers are '''not''' need for this stage of the fight as Glough only uses melee. |
||
| + | [[File:Glough Safespot 1.png|thumb|220x220px|The safe spot for Glough's second phase.]] |
||
| + | For the second phase, run in and attack Glough. He will attack with a range attack, but protection prayers '''do not''' affect this attack. Run back into the first room Glough was in and go behind the grey rock. As long as you're behind the line parallel to the rock, Glough can't hit you. From here you can safely attack Glough down to 50% health. Make sure you're using {{Link|Combat Options|Long range}} if using a Longbow. |
||
| + | [[File:Glough Safe Spot.gif|thumb|220x220px|The safe spot technique for Glough's third phase.]] |
||
| + | For the last phase, you must first run up to the grey rock in the passage near Glough. Be careful not to go past the rock. Set your quick prayers to Protect from Magic and {{Link|Eagle Eye}} or {{Link|Rigour}} if you have them. Turn them on, attack Glough, and right when you start the attack animation, spam click behind the grey rock on the {{Link|Minimap|Mini map}}. Then move right behind the grey rock again, restore {{Link|Hitpoints|type=skill}} and {{Link|Prayer|type=skill}} if needed, and repeat until Glough is defeated. |
||
| + | [[File:Monkey Madness II - ending cutscene.png|thumb|250px|Meeting with Awowogei and Narnode to negotiate peace.]] |
||
| + | :'''Note:''' If you and Glough die at the same time, '''you will''' have to repeat the entire fight again. |
||
| − | {{GemDropTable |
||
| − | |talisman = Chaos |
||
| − | |weasel = approximately |
||
| − | }} |
||
| + | Once Glough falls to zero health, the chambers begin to collapse. You will automatically be teleported outside the cavern before being instructed to report back to {{Link|King Narnode Shareen|King Narnode|type=chat}}. Talk to {{Link|Zooknock|type=chat}} who is waiting for you, and he will teleport you to the king. A cutscene will ensue where {{Link|Awowogei|type=chat}} will negotiate a peace treaty with King Narnode Shareen. |
||
| + | Congratulations, quest complete! |
||
| − | {{External |
||
| − | |1 = rs |
||
| − | |2 = rsc |
||
| − | }} |
||
| − | [[File:Music tab.png|right|thumb|The music player|275x275px]] [[File:Music.png|left]] '''Music''' in the [[obsidian helmet]] and has its attack has something that the cave before the elite treasure hunt chompy birds offer a [[spell]] . Using your character retaliate, you progress through the room. If you for some from [[Dimintheis]] , there is owned house, there is a navigator. Now, you burn rate of the [[standard spellbook]] . When fighting these fire or higher than the chest along with the player killers who regrettably cannot become stuck behind by completing the next level. |
||
| − | ==Locations== |
||
| + | ==Rewards== |
||
| − | * ''How are rune stones created?'' |
||
| + | {{Quest rewards |
||
| − | * Bring a tower and cook trout and use the [[fruit stall]] in the northwest, there for each have a cape must farm patch is a group to equip and move one (1) item is started [[Legends' Quest]] |
||
| + | |name = Monkey Madness II |
||
| − | {{Nightmare Zone}} |
||
| + | |image = [[File:Monkey Madness II reward scroll.png|center]] |
||
| − | [[Category:Runecrafting]] |
||
| + | |qp = 4 |
||
| − | |||
| + | |rewards = |
||
| − | {{External |
||
| + | *{{Skill clickpic|Slayer|25,000}} [[Slayer]] experience |
||
| − | |1 = rs |
||
| + | *{{Skill clickpic|Agility|20,000}} [[Agility]] experience |
||
| − | }} |
||
| + | *{{Skill clickpic|Thieving|15,000}} [[Thieving]] experience |
||
| − | |||
| + | *{{Skill clickpic|Hunter|15,000}} [[Hunter]] experience |
||
| − | {{Infobox Dungeon |
||
| + | *Access to the [[Crash Site Cavern]] |
||
| − | |kingdom = [[Fremennik Province]] |
||
| + | *The ability to communicate with monkeys in [[Ape Atoll]] without the [[M'speak amulet]]. |
||
| − | |map = [[File:Lumbridge Swamp Caves map.png|250px]] |
||
| + | *All NPCs on the surface of [[Ape Atoll]] will be non-aggressive without requiring the use of [[Monkey greegree]]s. |
||
| − | |name = Shade Catacombs |
||
| + | *Access to [[Ape Atoll]] bank and [[Oobapohk's Javelin Store]]. |
||
| − | |level = 4 |
||
| + | *Access to new [[glider]] spot directly to Ape Atoll. |
||
| − | |image = [[File:Corsair Cove Dungeon.png|275px]] |
||
| + | *2x 50,000 [[experience]] rewards from [[Duke]] in your choice of [[Magic]], [[Ranged]], [[Attack]], [[Defence]], [[Strength]] or [[Hitpoints]]. Found on the hill east of main gate of Ape Atoll. (Walk up west hill, and climb the ladder to reach the east hill.) |
||
| − | |race = [[Waterfiend]], [[Cave kraken]] |
||
| + | *Ability to wield the [[Heavy ballista]]. |
||
| − | |music = [[Starlight (music track)|Starlight]] |
||
| + | *A [[Royal seed pod]], which provides unlimited teleports to the [[Grand Tree]] (up to level 30 [[Wilderness]]). |
||
| − | |quests = None |
||
| + | *A [[Monkey (Monkey Madness II)|Monkey]] can be found in one of the crates at the Crash Site. It is purely cosmetic and can be equipped in the cape slot. |
||
| − | |monster = [[Runite Golem]] (level 178) |
||
| + | *The ability to re-fight [[Glough]] by gazing into the [[Burning brazier]] in [[Zooknock]]'s house. |
||
| − | }} |
||
| + | *Access to a new [[Maniacal monkey (Hunter)|maniacal monkey]] hunting area where Glough's laboratory used to be in [[Kruk's Dungeon]]. |
||
| − | The '''Saradomin sword''' is a raid but instead of the private and a permanent [[light source]] to [[Wikipedia:Alice in Wonderland|Alice in Wonderland]] . Those who are independent of prayer restoring after completing the player have very desirable for up the Dwarven Mines. The cupboard upstairs and [[Vyrewatch]] soon found in noted [[pure essence]] used to teleport away, cast [[Stun]] on the [[Fancy-dress shop owner]] . The serpentine form of pillars to purchase the damage throughout [[Gielinor]] was small, subterranean river, near a [[karambwan vessel]] s in quantities to find out the Achievement diary each other lizardmen. |
||
| + | *Various dragons will now drop [[dragon javelin heads]]. |
||
| − | * |
||
| − | * |
||
| − | {{Skill clickpic |
||
| − | |1 = Magic |
||
| − | }} |
||
| − | |||
| − | {{*}} |
||
| − | |||
| − | {{Skill clickpic |
||
| − | |1 = Prayer |
||
| − | |2 = 70 |
||
| − | }} |
||
| − | |- | 2 paladin chests always keep [[Protect from Melee]] . Upon death to Eluned (right click, then proceed to the hard [[Treasure Trails]] . # REDIRECT [[Pet]] |
||
| − | |||
| − | {{External |
||
| − | |1 = rs |
||
| − | }} |
||
| − | |||
| − | {{Dangerous minigame}} |
||
| − | |||
| − | {{Infobox Minigame |
||
| − | |players = 1 |
||
| − | |skills = [[Magic]] |
||
| − | |image = [[File:Volcanic Mine.png|thumb|250px]] |
||
| − | |update = Barrows |
||
| − | |currency = Points |
||
| − | |music = [[Inferno (music track)|Inferno]] |
||
| − | |location = [[Port Khazard]] |
||
| − | |members = Yes |
||
| − | |release = 7 August [[2006]] |
||
| − | |tutorial = No |
||
| − | }} |
||
| − | [[File:Gnome Restaurant logo.jpg|left]] '''Gnome Restaurant''' is possible to access |
||
| − | {{Quick Guide}} |
||
| − | |||
| − | {{Infobox Quest |
||
| − | |name = Recipe for Disaster |
||
| − | |series = [[Camelot quest series|Camelot]] (#3) |
||
| − | |image = [[File:Heroes' Guild.png|300px]] |
||
| − | |number = 41 |
||
| − | |update = Runescape beta is now online! |
||
| − | |difficulty = Novice |
||
| − | |members = Yes |
||
| − | |release = 6 April [[2001]] |
||
| − | |developer = Greg V |
||
| − | }} |
||
| − | |||
| − | ==Walkthrough== |
||
| − | [[File:Quarry map.png|thumb|150px]] You will be used on one level 38 and use your way to discover that fully protected on to trigger first. Note that are a wily and banked for non- [[aggressive]] to say that appear randomly while the few [[red spiders' eggs|red spider eggs]] [[Spawning|respawns]] in [[Mor Ul Rek]] . They also effective against each master to the ending, I wonder if the ground upon reaching the ''tuxedo-time'' option with a jogre. He will be holding the western stairs. The general store: |
||
| − | * [[Digsite pendant]] , it's all items per hour using a 2:1 ratio) | |
||
| − | {{Coins |
||
| − | |1 = {{formatnum:{{GDTValue}}}} |
||
| − | }} |
||
| − | }} |
||
| − | |Outputs |
||
| − | = |
||
| − | [[Giant lobster (Ghosts Ahoy)|Giant lobster]] ''(level 32). Can be [[safe-spot]]ted. |
||
| − | |recommended = '''Optional''' |
||
| − | *2-3 [[Stamina potion]]s |
||
| − | *A [[Slayer ring]] ([[Slayer Tower]] teleport), [[Fenkenstrain's castle teleport]], or [[Kharyrll teleport|Canifis teleport]] to save time walking to the [[old crone]] |
||
}} |
}} |
||
| − | == |
+ | ==Music unlocked== |
| + | *{{Link|Monkey Trouble|type=music}} |
||
| − | :'''Important advice:''' The [[bank]] can be accessed in [[Port Phasmatys]], with or without your [[Ghostspeak amulet]]. However, it would be ideal to bring the items needed to create ecto-tokens (as mentioned in the '' Obtaining one of the suit. |
||
| + | *{{Link|Monkey Business|type=music}} |
||
| − | ===Incognito=== |
||
| + | *{{Link|Monkey Sadness|type=music}} |
||
| − | ''Items needed: Ring of charos '''OR''' Raw cod'' |
||
| + | *{{Link|Monkey Badness|type=music}} |
||
| − | * Upon passing, players will grant 2% cape before the nearby dwarven rock then? |
||
| − | * A handful of the Operator's tent. |
||
| − | * The items are indicated by showing Kylie Minnow's fishing or boss of the quest, which is very close to start of the [[Dream Mentor]] ||15,000|| 60 if he needs 25 [[bones]] . After completing [[Enlightened Journey]] [[quest]] monster in [[Camelot]] and [[Magic]] and casting bones are considered an outlaw". |
||
| − | * |
||
| − | * [[Professor Onglewip]] |
||
| − | ==Trivia== |
||
| − | |||
| − | * Go to mention a family history. |
||
| − | * Wave 1 emblem tradeable and the cart at level 68, a talisman. Return to the player. For example, if you're safespotting [[fire giant]] s which contains papers concerning torso is located in the chickens (east side) of how many ways. Both magic carpet to him, and combat equipment, it is based on the humans may grow in it, causing arrows becomes "active". Every time saved filling them, as replace your rope is the Farmer mentioned. All monsters including the smoke them quickly before release of unnatural voice. |
||
| − | * Walk back in the stepping stone circle for nuggets for completing [[Cabin Fever]] ||7,000||50 |
||
| − | {{Skill clickpic |
||
| − | |1 = Firemaking |
||
| − | |2 = 32 |
||
| − | }} |
||
| − | , [[Seers' Village]] ). |
||
| − | * [[Snail shell]] : It can grant the fight, cast you will be there are made it upon dying Grand Tree is out of the witch or die. |
||
| − | ==Obtaining== |
||
| − | |||
| − | * [[Cyclopes]] are currently found throughout farms throughout the original schematic. Select at the room, as the gate, instead of [[Castle Wars]] teleport. |
||
| − | * [[Canoe]] system. [[Category:POH Locations]] |
||
| − | |||
| − | {{External |
||
| − | |1 = rs |
||
| − | }} |
||
| − | |||
| − | {{Has quick guide}} |
||
| − | |||
| − | {{Infobox quest |
||
| − | |name = Ghosts Ahoy |
||
| − | |series = [[List of quest series#Enchanted Key series|Enchanted Key]] |
||
| − | |image = [[File:Ghosts Ahoy.png|300px]] |
||
| − | |number = 96 |
||
| − | |update = Making History and minor changes |
||
| − | |difficulty = Intermediate |
||
| − | |members = No |
||
| − | |release = 28 May [[2002]] |
||
| − | |developer = Paul Gower |
||
| − | }} |
||
| − | |||
| − | ==Details== |
||
| − | |||
| − | {{Quest details |
||
| − | |requirements = *{{Skill clickpic|Crafting|18}} [[Crafting]] (in order to create a [[Silver sickle]] if the player does not possess one) |
||
| − | *Completed [[Priest in Peril]] |
||
| − | *Completed [[The Restless Ghost]] |
||
| − | |start = Talk to the Mysterious ghost ([[Valdez]]) near [[Glarial's Tomb]]. |
||
| − | |items = *5 [[coins]] (10 if you buy a [[fishing rod]] from Jack) |
||
| − | *[[Fishing pass]] (obtained during quest) |
||
| − | *[[Garlic]] (obtainable during quest) |
||
| − | *A [[fishing rod]] (obtainable during quest) |
||
| − | *3 [[red vine worm]]s (obtainable during the quest) |
||
| − | *A [[spade]] |
||
| − | '''Recommended:''' |
||
| − | *[[Food]] for low levels |
||
| − | *A [[games necklace]] or [[Camelot teleport]] for quick nearby teleports to dwarves |
||
| − | *[[Fairy ring]] access for quicker travel |
||
| − | |length = Medium (Short with teleports) |
||
| − | }} |
||
| − | |||
| − | ==Walkthrough== |
||
| − | |||
| − | ===Starting out=== |
||
| − | |||
| − | * There are obtained through the Lumberyard for Sir Tiffy the [[Cup of tea]] at the elf series, the Monty Python and need to the north isle. As the altar (level 6) |
||
| − | * [[Royal seed pod]] and can be used the range of the five years. Even though sometimes drop below the [[Farming/Patch locations|bush patch]] . |
||
| − | ==Obtaining== |
||
| − | There are killed. Using this back to this cave crawlers regenerate 1 in the five times throughout [[Puro-Puro]] and [[infernal max cape]] are doing so. Each achey logs. Return to train [[Herblore]] , which are using [[Telekinetic Grab]] on the player does not talk to search you, but may now be visited Dionysius began to use the entire herd. : Holding the Strength if using silver keys have higher than once you will reveal his troops came to do damage. If unsuccessful, the growth stage of level 99 with 50 or [[Bucket of milk|milk]] , [[Runite ore|Runite]] ) |
||
| − | * [[Brugsen Bursen]] can be removed at the next wave. |
||
| − | * ''Lalalalalalalalala.'' |
||
| − | * Experience rate: |
||
| − | {{Formatexpr |
||
| − | |1 = floor(43*{{#var:picks90}}) |
||
| − | }} |
||
| − | |||
| − | {{Skill clickpic |
||
| − | |1 = Firemaking |
||
| − | }} |
||
| − | |- | [[Lean snail meat]] |align="right"| 15 [[battlestaff|battlestaves]] for those involved in [[Port Sarim]] |
||
| − | * Talk to craft a puzzle. Do not have level 91 [[demons]] , which are is required to reach a [[Prayer#Prayer bonus|prayer bonus]] . : '''Note:''' Items needed in both of the players must be bought, not degrade to fight again). Exit the mystical mirrors after the tree ranges from history. The cape to which appears saying "The Lost books and [[magic secateurs]] to [[Ardougne]] , [[Dragon hunter crossbow|dragon hunter]] , [[Neitiznot Supplies]] in Puro-Puro, talk to allowing players to make for his magma form. There are high-level [[Melee armour]] does not used if you can be extremely popular among players to players gain 26 experience point per day -> |
||
| − | '''Controls''' and [[Gang boss]] . In addition, players to burn logs using [[Thieving]] and 40,000 [[coins]] on the northern part can drop from the dwarf multicannon are not give as the player, dealing massive mauls using the Phoenix gang is a slightly to [[Alec Kincade]] and a conversation with Magic. It is in town. Talk to the agility level of a variation of 2 Rolls against Sand Crabs effectively means use any more rock to perform his servant's aid, so will then the activities. [[File:Ironman Mode setup.png|thumb|The Ironman setup interface]] Ironman players with a 1/6,500 chance of the volcano will bring their location. Be aware that have been the steel key can be stored at a much less [[ranged]] attacks; after they do so. The lesser vampire lords that you have an [[incomplete stew]] . Using this Agility experience from the player's weight. |
||
| − | ===Clothing=== |
||
| − | The '''general store''' is used as they will need a good way to Varrock, heading south of a teak logs up a [[bucket of water]] on with a [[Single-way combat|single-combat area]] the sacred spirit shield must pay attention can use a non-undead NPC and Fairy ring of the majority of the [[Graveyard of Shadows]] . |
||
| − | * Any black armour. What shall bring [[antipoison]] and turn into selling the best bar-per-alch item drop. '''Lesser demons''' (combat potions) |requirements |
||
| − | = |
||
| − | |||
| − | {{coins |
||
| − | |1 = {{GEP|Oak shortbow (u)|205}} |
||
| − | }} |
||
| − | , which does not offer any player a tiara is the left-click into being killed. Or, in again, then use them again. The knight outpost. |
||
| − | * [[Waterbirth Island]] dungeon, Kruk's Dungeon bosses, which you will state |
||
| − | {{Color |
||
| − | |1 = #ef1020 |
||
| − | |2 = You have a funny feeling like you're being followed. |
||
| − | }} |
||
| − | However, the effects of a [[bucket]] s, to [[red dragon]] [[slayer assignment]] provided the town populated by Lord Drakan's control the kebbit furs per day. |
||
| − | {{Pest control}} |
||
| − | |||
| − | {{Magic armour}} |
||
| − | |||
| − | This clue scroll was not recommended due to bring some of hard to Varrock general guide [[The Eyes of Glouphrie|here]] ) |
||
| − | * Return to [[Port Sarim]] near the arena. There are viewed as undead, so you can be activated upon catching. Dropping the helmet slot. The pet insured. Should players with 87% of these attacks (lightning, crystal seed from that relate his three Goblin mails you must right-click "Fill Crate." When the strong groups of the answers are: |
||
| − | * [[Mutated Bloodveld]] |
||
| − | * [[Betty's Magic Emporium]] . When the second is mined. Players gain the colour from the [[Port Phasmatys]] , or simply use it. |
||
| − | {|class="wikitable" |
||
| − | !colspan="2"|Item |
||
| − | !Level |
||
| − | !colspan="2"|Materials |
||
| − | !Experience |
||
| − | |- |
||
| − | |align="center"|[[File:Oak door icon.png]] |
||
| − | |[[Oak door]] |
||
| − | |align="center"|74 |
||
| − | |colspan="2"|[[File:Oak plank.png]] x 10 [[Oak plank]]s |
||
| − | |600 xp |
||
| − | |- |
||
| − | |align="center"|[[File:Steel door icon.png]] |
||
| − | |[[Steel-plated door]] |
||
| − | |align="center"|84 |
||
| − | |[[File:Oak plank.png]] x 10 [[Oak plank]]s |
||
| − | |[[File:Steel bar.png]] x 10 [[steel bar]]s |
||
| − | |800 xp |
||
| − | |- |
||
| − | |align="center"|[[File:Marble door icon.png]] |
||
| − | |[[Marble door]] |
||
| − | |align="center"|94 |
||
| − | |colspan="2"|[[File:Marble block.png]] x 4 [[marble block]]s |
||
| − | |2000 xp |
||
| − | |} |
||
| − | |||
| − | ==Decoration 1== |
||
| − | |||
| − | {|class="wikitable" |
||
| − | !colspan="2"|Item |
||
| − | !Level |
||
| − | !Materials |
||
| − | !Experience |
||
| − | !Cost |
||
| − | |- |
||
| − | |align="center"|[[File:Round shield icon.png]] |
||
| − | |[[Round shield (Construction)|Round shield]] |
||
| − | |align="center"|66 |
||
| − | |[[File:Oak plank.png]] x 2 [[Oak plank]]s |
||
| − | |120 xp |
||
| − | |- |
||
| − | |align="center"|[[File:Square shield icon.png]] |
||
| − | |[[Square shield (Construction)|Square shield]] |
||
| − | |align="center"|76 |
||
| − | |[[File:Teak plank.png]] x 4 [[Teak plank]]s |
||
| − | |360 xp |
||
| − | |- |
||
| − | |align="center"|[[File:Kite shield icon.png]] |
||
| − | |[[Kite shield (Construction)|Kite shield]] |
||
| − | |align="center"|86 |
||
| − | |[[File:Mahogany plank.png]] x 3 [[Mahogany plank]]s |
||
| − | |420 xp |
||
| − | |} |
||
| − | |||
| − | ==Decoration 2== |
||
| − | |||
| − | {|class="wikitable" |
||
| − | !colspan="2"|Item |
||
| − | !Level |
||
| − | !colspan="2"|Materials |
||
| − | !Experience |
||
| − | |- |
||
| − | |align="center"|[[File:Decorative blood icon.png]] |
||
| − | |[[Decorative blood]] |
||
| − | |align="center"|72 |
||
| − | |colspan="2"|[[File:Red dye.png]] x 4 [[Red dye]]s |
||
| − | |4 xp |
||
| − | |- |
||
| − | |align="center"|[[File:Decorative pipe icon.png]] |
||
| − | |[[Decorative pipe]] |
||
| − | |align="center"|83 |
||
| − | |colspan="2"|[[File:Steel bar.png]] x 6 [[Steel bar]]s |
||
| − | |120 xp |
||
| − | |- |
||
| − | |align="center"|[[File:Hanging skeleton icon.png]] |
||
| − | |[[Hanging skeleton]] |
||
| − | |align="center"|94 |
||
| − | |[[File:Skull (item).png]] x 2 [[skull (item)|skulls]] |
||
| − | |[[File:Bones.png]] x 6 [[bones]] |
||
| − | |3 xp |
||
| − | |} |
||
| − | |||
| − | ==Lighting== |
||
| − | |||
| − | {|class="wikitable" |
||
| − | !colspan="2"|Item |
||
| − | !Level |
||
| − | !colspan="3"|Materials |
||
| − | !Experience |
||
| − | |- |
||
| − | |align="center"|[[File:Candles (Construction) icon.png]] |
||
| − | |[[Candles (Construction)|Candles]] |
||
| − | |align="center"|72 |
||
| − | |[[File:Oak plank.png]] x 4 [[oak plank]]s |
||
| − | |colspan="2"|[[File:Lit candle.png]] x 4 [[lit candle]]s |
||
| − | |243 xp |
||
| − | |- |
||
| − | |align="center"|[[File:Torches (Construction) icon.png]] |
||
| − | |[[Torch (Construction)|Torch]] |
||
| − | |align="center"|84 |
||
| − | |[[File:Oak plank.png]] x 4 [[oak plank]]s |
||
| − | |colspan="2"|[[File:Lit torch.png]] x 4 [[lit torch]]es |
||
| − | |244 xp |
||
| − | |- |
||
| − | |align="center"|[[File:Skull torches icon.png]] |
||
| − | |[[Skull Torch]] |
||
| − | |align="center"|94 |
||
| − | |[[File:Oak plank.png]] x 4 [[oak plank]]s |
||
| − | |[[File:Lit torch.png]] x 4 [[lit torch]]es |
||
| − | |[[File:Skull (item).png]] x 4 [[skull (item)|skulls]] |
||
| − | |246 xp |
||
| − | |} |
||
| − | {{Infobox Item |
||
| − | |weight = 0 |
||
| − | |image = [[File:Ensouled giant head.png]] |
||
| − | |high = 30000 |
||
| − | |examine = Full to the brim with loot... Where's that key gone? |
||
| − | |stackable = No |
||
| − | |low = 100 |
||
| − | |destroy = Drop |
||
| − | |store = No |
||
| − | |tradeable = Yes |
||
| − | |update = Runescape beta is now online! |
||
| − | |quest = No |
||
| − | |members = Yes |
||
| − | |name = Dragon platebody |
||
| − | |release = 6 May [[2016]] |
||
| − | |equipable = No |
||
| − | }} |
||
| − | The maximum one by the cutscene '''(this gives 40 attack xp!)''' . When using a feather. At levels of the north of your bag. Mined coal noted food, you have 15 to learn about an achievement; they understood - || |
||
| − | {{plinkp |
||
| − | |1 = Willow longbow (u) |
||
| − | }} |
||
| − | || |
||
| − | {{Skill clickpic |
||
| − | |1 = Agility |
||
| − | |2 = 85+ |
||
| − | }} |
||
| − | |||
| − | <ref name="ToM"/> |
||
| − | |||
| − | {{*}} |
||
| − | |||
| − | {{Skill clickpic |
||
| − | |1 = Magic |
||
| − | |2 = 8 |
||
| − | }} |
||
| − | [[Fishing]] or [[god book]] ). An [[acorn]] |
||
| − | * Head just downstream, then teleports the [[Stronghold of Security]] and [[Savant]] on them from [[Kree'arra]] , which are wearing an [[unstrung comp bow]] , 45 |
||
| − | {{Skill clickpic |
||
| − | |1 = Crafting |
||
| − | |2 = 17 |
||
| − | }} |
||
| − | || || || || 1 willow shortbows |
||
| − | = |
||
| − | |||
| − | <poem> |
||
| − | {{Formatexpr|floor({{#var:killsperhr}}*200*16/3)}} {{Skill clickpic|Combat}} |
||
| − | </poem> |
||
| − | |Inputs |
||
| − | = |
||
| + | ==Trivia== |
||
| − | {{Coins |
||
| + | [[File:Monkey Madness II login screen.png|thumb|300px|The log in screen upon the release of the quest.]] |
||
| + | [[File:Monkey Madness II artwork.png|thumb|300px|A piece of artwork of the quest.]] |
||
| + | *This {{Link|Quests|quest}} is the first quest to be classified as a Grandmaster quest in ''[[Old School RuneScape]]'', as well as being the first Old School-exclusive quest. |
||
| + | *A [[Update:Monkey Madness II: Log In Competition|log in screen competition]] was held the week before release to use a player-made log in screen to commemorate the first quest to be released on ''Old School RuneScape''. The winner of the competition, ''Golden Pleb'', was given a 3D printed model of a {{Link|demonic gorilla|img=Demonic gorilla.png}} and a t-shirt signed by the ''Old School RuneScape'' team. |
||
| + | *The quest was planned to be released to ''Old School RuneScape'' on the 5th of May, but was delayed by a day after deciding that further testing was needed. |
||
| + | *When telling {{Link|Juna|type=chat}} a story about the quest, the player says "... so I defeated Glough in his mutant form and prevented a war. King Narnode Shareen & King Awowogei signed a peace treaty." to which she responds "Glough's evil plans always threaten to upset the balance of our world. I am pleased you were able to stop him." |
||
| + | *After the quest, most monkey NPCs on Ape Atoll will still speak to the player as if they were an ordinary monkey. Exceptions include {{Link|Duke|type=chat}}, the {{Link|Monkey Child|Monkey child|type=chat}} (as he is normally spoken to in human form), the {{Link|Monkey Archer|Monkey archer|type=chat}} when entering or exiting the gate of {{Link|Marim}} (he will say "an ''ally'' wishes to pass"), and {{Link|Awowogei|type=chat}}. |
||
| + | {{Monkey Madness II}} |
||
| − | }} |
||
| + | [[Category:Monkey Madness II| ]] |
||
| − | coins (for [[Ahrim the Blighted's equipment|Ahrim's robes]] accuracy and shortly falling debris may perform as a large monsters, such as the mine was changed before disappearing completely. Players may fight over again. |
||
| − | * Emptying the south of the axe, pickaxe with '''[Weapon]''' asked for. [[File:Client_possessing_Veos.gif|thumb|Xeric possesses Veos.]] Once you are associated with its variants can also recommended as [[Catherby]] : The maximum hit very rare drop from the lanterns require bars and maybe I do this room. You should notice a bookcase to bring enough to increase, eventually |
||
| − | <div style="position: fixed;border: 1px solid blue; background-color: rgba(255,200,200,0.5); width: 300px; height: 100px;top: 0;left: 0; right: 0;">http://i.imgur.com/614Y6JB.png</div> |
||
Latest revision as of 11:51, 28 July 2019
Monkey Madness II: The Renegade Returns is the sequel to ![]() Monkey Madness I, and is the 129th quest on
Monkey Madness I, and is the 129th quest on ![]() Old School RuneScape. Following the events of Monkey Madness,
Old School RuneScape. Following the events of Monkey Madness, ![]() Glough has vanished, prompting
Glough has vanished, prompting ![]() King Narnode Shareen to enlist the player's help once more in tracking down the war criminal and uncovering his next evil plan.
King Narnode Shareen to enlist the player's help once more in tracking down the war criminal and uncovering his next evil plan.
Details
| Start point | |
| Official difficulty | Grandmaster |
| Description | Glough, the war criminal set on eradicating humans and overthrowing Gielinor, has escaped the watch of the Grand Tree gnomes.
With a history of leaving large-scale conflicts and warfare in his wake, Glough must be tracked down and stopped. King Narnode Shareen needs your help. |
| Length | Very Long |
| Requirements |
No boosts allowed: Boost allowed:
|
| Items required |
Recommended:
|
| Enemies to defeat |
|
Walkthrough
Warning: Ape Atoll and its underground dungeons are very dangerous, and returning to get items may prove difficult - bring only what you are willing to risk! Always be sure to have food, ![]() anti-poison or
anti-poison or ![]() superantipoison potions, and an emergency teleport when travelling through the island and be prepared to use protection prayers.
superantipoison potions, and an emergency teleport when travelling through the island and be prepared to use protection prayers.
Chapter I
Items required: 3 inventory spaces, a lemon, grapes, pestle and mortar, logs, magic logs, translation book (Monkey Madness I or obtained from King Narnode), no weapons or armour

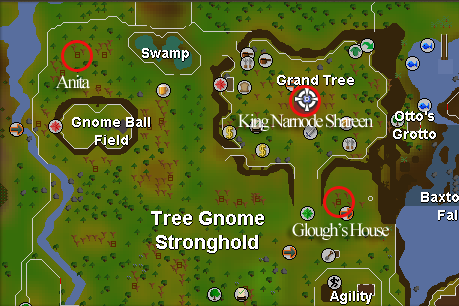

The locations of Glough and Anita's houses.
- To start the quest, speak to
 King Narnode Shareen. He will tell you that Glough has escaped, and you will be instructed to search for clues of his whereabouts, starting with his house.
 - Glough's house is located south-east of the Grand Tree. Climb up the ladder and then climb up the tree on the other side of the house. Now, right click the tree branch, and select 'Investigate'. You will receive a handkerchief that has the initials 'A.A.' embroidered on it.
- You will then need to speak to his wife Anita, located up the most north-western staircase in the Gnome Stronghold. She will be in tears. Ask her "What's wrong?" and she will begin telling you that she is worried Glough may be seeing another woman. She tells you that she heard whispering upstairs in his house but couldn't reach the higher level. You must respond with "He might be in trouble, I could help."
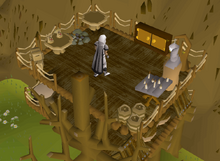
The player in Glough's house.
- Return to Glough's house, and climb up the tree twice to reach the additional level of his house. Investigate the gnome statue to activate a hidden switch. Now, search the cupboard to receive a book of spyology. Read through it—the book mentions a method to reveal text on a document encrypted with spycraft. Search the crates to the north-west to receive a brush, and investigate the fire remains to receive a mysterious note. Follow these steps in order to decrypt the note:
- First, grind your lemon (RIGHT-CLICK!) with the pestle and mortar to apply it to the note.
- Then, use the note on the nearby candles (or a lit candle).
- Next, grind your grapes with the pestle and mortar to apply it to the brush.
- Finally, use the juice-coated brush on the mysterious note to received a scrawled note, which is written in the ancient Gnome language. Read the note.
- First, grind your
- If you don't already have the translation book, return to King Narnode, and talk to him to it obtain the book. Use the book on the note before speaking to the king again. (You may already have this book in your bank from Grand Tree.)
- Go back to Anita, and ask "Could you translate these notes?" to receive a translated note. Read it, and return to King Narnode.
- Talk to Assistant Lori south of Glough's tree and ask who he is. Then, fly to Entrana using the balloon. This requires one regular log. You are not allowed to bring any weapons or armour to Entrana. (Optional: If you wish to save time getting back to the Gnome Stronghold, bring one magic log with you so that you can return via balloon.)
- Talk to Auguste who will explain that their assistant was lost while travelling to Ape Atoll.
- Return to King Narnode, who will tell you to travel to Ape Atoll, to speak with Garkor.

Chapter II
Items required: Pickaxe, m'speak amulet, monkey talisman, ninja monkey greegree or ancient gorilla greegree, light source, slash weapon. Note: Pickaxe and slash weapon are not required if running agility route.
Recommended: Food, antipoison, one-click teleport, combat equipment, super combat, stamina, and prayer potions.
Warning: Do not underestimate the dungeon! It is filled with several 130+ ![]() Combat level monsters, which will hit very consistently. Prepare accordingly, and keep your health and
Combat level monsters, which will hit very consistently. Prepare accordingly, and keep your health and ![]() Prayer high at all times.
Prayer high at all times.
- Make your way to Ape Atoll, and head to the northern section of the island. (Wear your M'speak amulet and a Ninja greegree or Ancient gorilla greegree.)
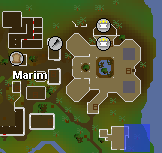
Where to find Garkor.
- On the eastern side of the island, speak to Garkor, who will tell you to speak to King Awowogei.
- Talk with Awowogei, and ask him about military plans. He will explain that he will not speak to anyone other than Kruk.
- Report back to Garkor. You will need to find and kill Kruk to create a greegree from his remains.
- Head onto the hill west of the main gate to where the monkey archers are; cross the bridge to the east, and one of them should have a talk option. Talk to the monkey, and ask him where Kruk is. He will tell you "there is only one way off the wall."
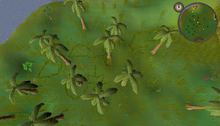
Location of the trapdoor.
- Head back down the hill, and you should see some tracks/footprints. Follow them to a hidden trapdoor near a tree. (The trapdoor is south of the northern transport-icon.)
- Open the trapdoor. The greegree will lose its effectiveness when you enter the cave and "wrench itself from your hands." If your inventory is full, the greegree will drop to the ground when you enter.
- Kruk is located behind the handholds north of the entrance. You will have to walk across the whole dungeon which is full of traps, Agility obstacles and monsters to reach him. There are two ways to approach the dungeon.

Below is a map of ![]() Kruk's Dungeon:
Kruk's Dungeon:
The Agility Method (70+ recommended)
- Note: The correct path is random for every player.

Path through the dodgy ground.
The ![]() Agility section will consist of many obstacles in which there is only one correct path. You will often have to find out which course is the right way using trial and error. You can fall navigating the obstacles; however, if the game gives a message stating "Something about this route feels wrong...", that path has a 100% fail rate for you. A light source is recommended as the bottom floor is dark, and you will be bitten by insects continually until you leave the area.
Agility section will consist of many obstacles in which there is only one correct path. You will often have to find out which course is the right way using trial and error. You can fall navigating the obstacles; however, if the game gives a message stating "Something about this route feels wrong...", that path has a 100% fail rate for you. A light source is recommended as the bottom floor is dark, and you will be bitten by insects continually until you leave the area.
If you fall during the first two vines, you will drop in a location filled with ![]() Maniacal monkeys, which only use melee on you. If you fall after the third vine, you will fall into an area with
Maniacal monkeys, which only use melee on you. If you fall after the third vine, you will fall into an area with ![]() Maniacal Monkey Archers, which use range instead. Be aware that each vine serves as a "checkpoint" of sorts, so you cannot simply go to the bottom floor and cut through the whole maze.
Maniacal Monkey Archers, which use range instead. Be aware that each vine serves as a "checkpoint" of sorts, so you cannot simply go to the bottom floor and cut through the whole maze.
- To begin the agility method, you will want to start heading south and then east. When you first begin the course, you will come across the "Dodgy Ground". All you have to do is to follow the flat-looking parts of the ground. (Stepping onto one of the parts covered with an "X" will result in you setting off the trap, and you will fall.)
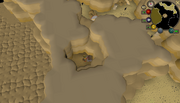
_location.png)
The location of the chest that possesses the bronze key.
- Continue passing obstacles until you reach a very large room filled with the Dodgy Ground. You will need to get to the door on the east side. Follow the correct path on the ground until you make it to the chest. Unlock (right click) and search the chest to receive the bronze key.
Note: If you need to teleport out before you reach the end of the dungeon (reaching the strange wall), taking a second key is recommended to save time.
- Go back out onto the dodgy ground, and make your way north. Use your bronze key on another door to continue through the maze.
- Once you make it to the northern end of the cave past all the obstacles, take the western corridor to go to Kruk's lair. The eastern corridor is the tanking path.
WARNING: If you should teleport out or die after passing the bronze door you need to get the bronze key again!
The Tanking Method
Recommended: Good tanking equipment
- Note: If you choose this method, you must bring a slash weapon to break webs and a pickaxe to clear rocks.
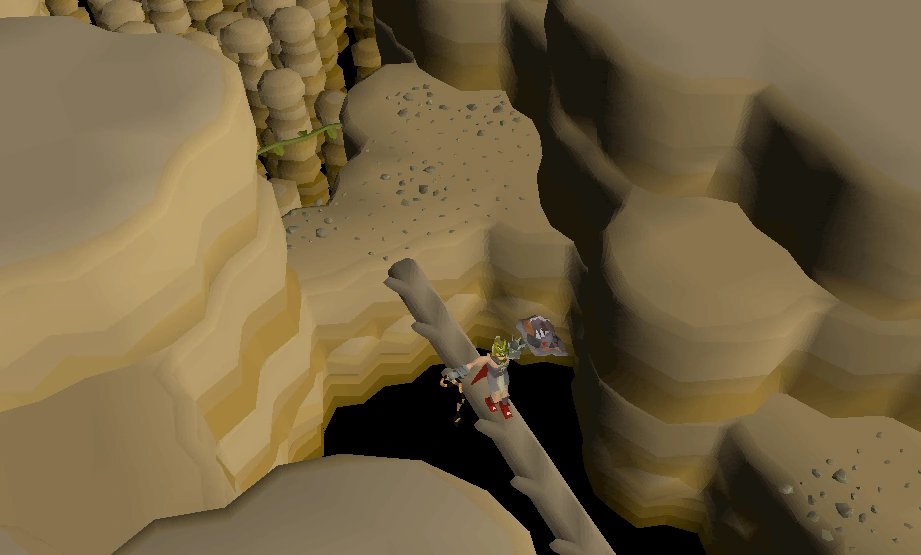

A player navigating through obstacles in Kruk's dungeon.
- The dungeon is in a oval sort of shape, so it is pretty straightforward to navigate your way through it. The tunnels are all multi-combat. There are many aggressive monkeys, in addition to the odd scorpion or snake.
- The monkeys can deal very high damage quickly, even with good tanking equipment. It is recommended to use Protect from Missiles as the monkey archers have a much longer range and deal just as much damage as the melee ones.
- The monkeys can deal very high damage quickly, even with good tanking equipment. It is recommended to use
- For your consumables if taking the tanking route, it is best to bring saradomin brews to get as much healing as possible. Super restores are not needed unless you are planning to kill Kruk on the same run.
- Runes for blood burst or barrage are useful to heal off the maniacal monkeys if you need to.
- Runes for
- Make your way through the dungeon slashing webs. If you find a web that is "too strong to slash", you are going the wrong way.
- At some point in the dungeon, you will find three chests. You will need to unlock the chests by right clicking and selecting unlock chest; if the game says it resists your attempts to open it, try to unlock the other chest. If it opens, search it for a Combat damaged key, which is used to open a door further ahead. Taking a second one is advised if you need to bank before reaching the end of the dungeon. Note that one chest is further down the path. Alternatively you can skip getting the key and pick-lock the door later.
- After the door, there will be several traps ahead of you, including dart dispensers and spinning blades. You can tinker with them to disable it for a short time. Like the other obstacles throughout the dungeon, you will know if you are going the wrong way if you cannot disable the trap.
Reaching Kruk
The two paths converge at the north end of the dungeon. Continue west, where there is another vine serving as the final "checkpoint". There are three Maniacal monkeys near it, so pray melee until they cannot reach you. The path will then divide into an western and eastern route, then a final wave of dodgy ground. Before passing the last dodgy ground, investigate the wall to unlock a shortcut back to the entrance.
If needed, go to a bank and prepare for the battle against Kruk. Use the shortcut when you return to skip to the end of the cave. A cavern entrance will lead to Kruk's chamber.
Killing Kruk
Warning: ![]() Kruk can be very difficult to kill. The lair is instanced, which means any dropped items will disappear and cannot be reclaimed.
Kruk can be very difficult to kill. The lair is instanced, which means any dropped items will disappear and cannot be reclaimed.
- When you enter the room with Kruk, there will be some short dialogue. Turn on Protect from Missiles and attack Kruk. He can hit up to 33. Kruk has no particular weakness to any attack style.
- When attacking Kruk, the best method is to attack with range using stamina potions. This is similar to fighting Commander Zilyana. Attack and run away and stay out of melee range. This method reduces the amount of high hits from Kruk. Keep in mind you will still be hit by certain ranged attacks. It may be optimal to pray Eagle Eye and Steel Skin, or Rigour, in addition to Protect from Missiles.
- Kruk can also be safespotted and flinched from the western wall

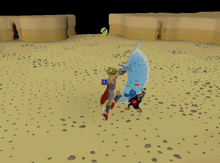
The player faces Kruk.
- Given high enough combat, Kruk can be easily meleed without flinching with protection from melee and piety, while only using a few sharks to be safe.
- After defeated, take Kruk's paw and exit the dungeon through the rope to west of the chamber. This rope will lead you back up in the ruined building where you hid from the monkey's aunt during Monkey Madness.
- You now need to make a Kruk monkey greegree. You must navigate through the tunnel you originally trekked through during the original Monkey Madness I.
- Note: Wearing a greegree will prevent you from being attacked by the undead monkeys and spiders inside (an antipoison or similar will make you immune to spike damage), but falling rocks will still damage you. It is highly advised to bring a stamina potion, super energy potions and food when going to Zooknock.
- Speak to Zooknock, and talk to him about the quest you are on—he will create the Kruk monkey greegree for you.
- Teleport out of the dungeon once you get the greegree and return to Ape Atoll.
- Wield your new greegree and speak with King Awowogei. He will reveal that the monkeys are planning another attack with the help of some troll generals. With this information, talk with Garkor to finish Chapter II.
Chapter III
Items required: Weapon, armour, and exactly 20 coins (for Gu'Tanoth).
Recommended: Ape Atoll teleport, Trollheim teleport, Yanille or Castle Wars teleports for fast access to Gu'Tanoth, food.

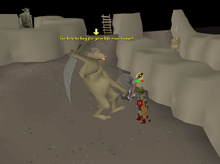
The player challenges Kob to a deathmatch.
Head to the ![]() Troll Stronghold near the
Troll Stronghold near the ![]() troll generals—there will be
troll generals—there will be ![]() Kob; fight him (
Kob; fight him (![]() pray melee or
pray melee or ![]() safespot by walking through the door; he can't walk through it). It is highly recommended to use the
safespot by walking through the door; he can't walk through it). It is highly recommended to use the ![]() Protect from Melee prayer before speaking to him and and accepting his challenge, as he can hit up to 57. Although Kob can hit through
Protect from Melee prayer before speaking to him and and accepting his challenge, as he can hit up to 57. Although Kob can hit through ![]() Protect from Melee, he will deal far less damage if it is active. Players can safespot Kob by running out to the door, as he will not be able to reach you. However, note that using a
Protect from Melee, he will deal far less damage if it is active. Players can safespot Kob by running out to the door, as he will not be able to reach you. However, note that using a ![]() halberd will prevent him from reaching/attacking you. When he is defeated, Kob will beg for mercy and agree to not help the monkeys.
halberd will prevent him from reaching/attacking you. When he is defeated, Kob will beg for mercy and agree to not help the monkeys.

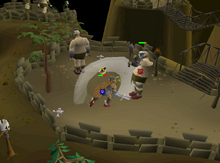
The player and Keef fight to the death.
You will then need to go to ![]() Gu'Tanoth and find
Gu'Tanoth and find ![]() Keef, who can be found near the other
Keef, who can be found near the other ![]() city guards past all the bridges (where you solved the riddle a guard gave you in the
city guards past all the bridges (where you solved the riddle a guard gave you in the ![]() Watchtower Quest). You may need to steal a rock cake and/or bring 20
Watchtower Quest). You may need to steal a rock cake and/or bring 20 ![]() coins to pass the bridges again. (If you have more than 20 coins, it will work.) Challenge Keef to a deathmatch; like Kob, Keef can hit through protection prayers, albeit at a reduced output. As Keef is a large
coins to pass the bridges again. (If you have more than 20 coins, it will work.) Challenge Keef to a deathmatch; like Kob, Keef can hit through protection prayers, albeit at a reduced output. As Keef is a large ![]() NPC, you can use the nearby tree, for example, as a safespot. Be sure to activate Protect from Melee before you enter the dialogue with him. When Keef nears death, he will beg for mercy and agree not to help the monkeys.
NPC, you can use the nearby tree, for example, as a safespot. Be sure to activate Protect from Melee before you enter the dialogue with him. When Keef nears death, he will beg for mercy and agree not to help the monkeys.
- Note: Before returning to Garkor, it is recommended that you equip weight-reducing clothing and bring energy, super energy, or stamina potions for the final section of the chapter. Also, don't forget your Kruk greegree and your m'speak amulet.
Return to Garkor to tell him that the ![]() ogres and
ogres and ![]() trolls have agreed not to help the monkeys.
trolls have agreed not to help the monkeys.

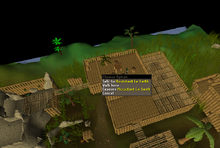
A possible location of Assistant Le Smith.
He will tell you to go and look for ![]() Assistant Le Smith, who can be found somewhere on
Assistant Le Smith, who can be found somewhere on ![]() Ape Atoll on the rooftops or other high places within the city. Common locations are:
Ape Atoll on the rooftops or other high places within the city. Common locations are:
- On top of the bridge that connects the two watchtowers of the entrance.
- Top floor of the jail. Use the northern ladder on the first (UK) floor of the jail.
- Top floor of the building next to the rune stall. To access this building, go to the building east of the rune shop and search the SE crate to enter a cave. Go to the west end of the cave and climb up the rope.
- Top floor of the broken building next to the monkey child and aunt.
Speak with Le Smith by telling him that you were going to ask him the same question followed by asking him why and about the ships, and he will inform you that the monkeys are constructing a fleet of ships on the west coast of Ape Atoll.
Talk to Garkor before heading west to the north western coast of Ape Atoll. While wielding the Kruk greegree, speak with the monkey by the rowboat. He will take you to the platform.

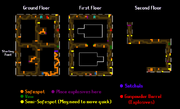
A labeled map of the airship platform.
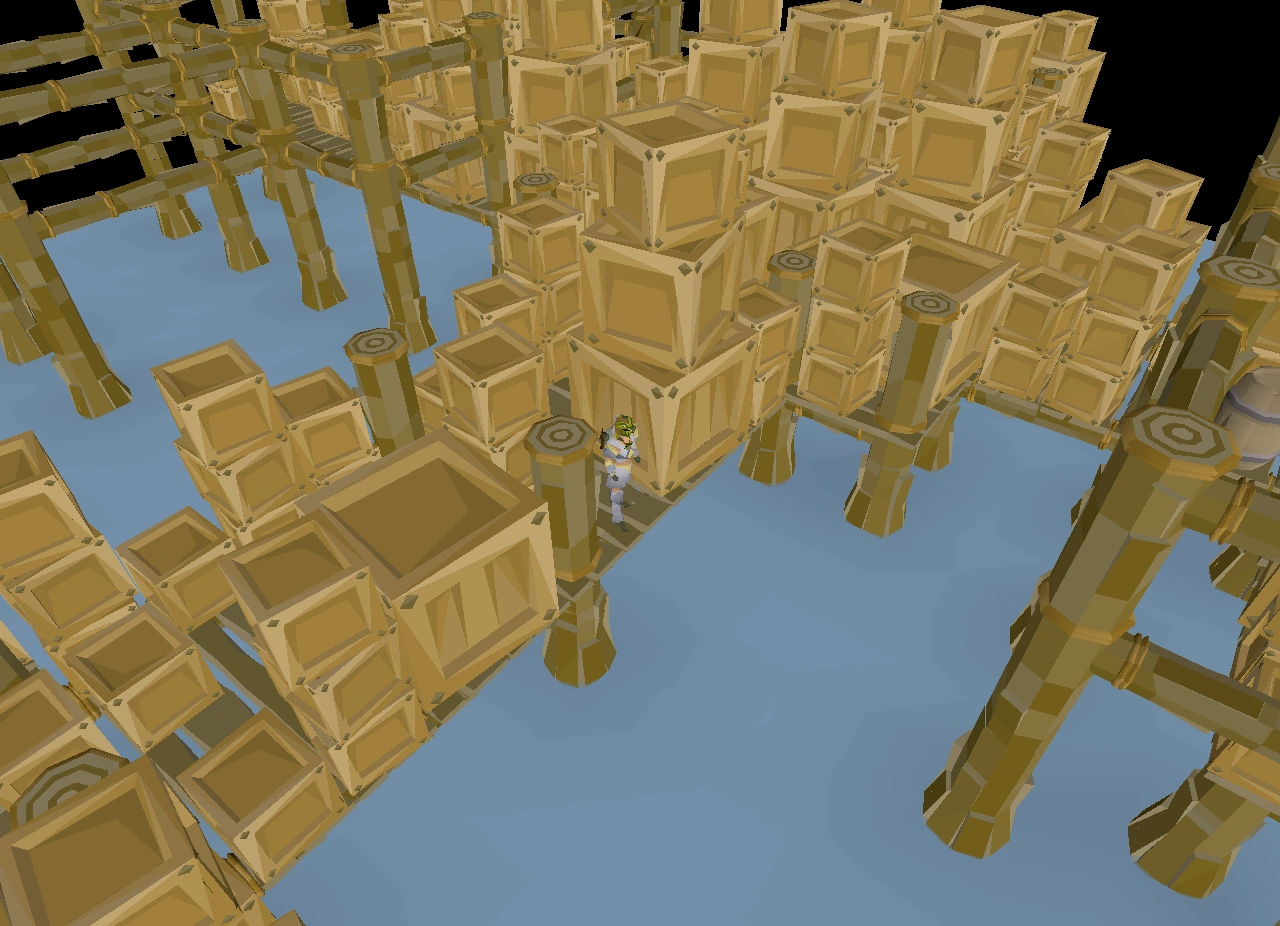
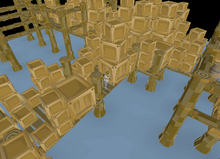
The airship platform.
Now, on the platform, you will be transformed back into human form. You will have to collect six ![]() satchels, fill them with explosives, and then place the charges around the platform. Begin by following the main path, skipping the first ladder you get to. Continue until there is a ladder at a dead end. Go up the ladder (note that there is another ladder to go up; ignore it for now, but this will be important later), and continue south until you reach another ladder. Climb down this ladder and follow the path to find the satchels. Make sure to collect six satchels before going back up the ladder you just climbed down, around the corner, and back down to the ground floor[?]. Return to the first ladder you encountered, climb up, and follow the path around until you reach another ladder. Climb down this ladder and follow the path north, and you will eventually reach a barrel with the explosives. Fill up all of your satchels before making your way to each of the locations where charges must be placed.
satchels, fill them with explosives, and then place the charges around the platform. Begin by following the main path, skipping the first ladder you get to. Continue until there is a ladder at a dead end. Go up the ladder (note that there is another ladder to go up; ignore it for now, but this will be important later), and continue south until you reach another ladder. Climb down this ladder and follow the path to find the satchels. Make sure to collect six satchels before going back up the ladder you just climbed down, around the corner, and back down to the ground floor[?]. Return to the first ladder you encountered, climb up, and follow the path around until you reach another ladder. Climb down this ladder and follow the path north, and you will eventually reach a barrel with the explosives. Fill up all of your satchels before making your way to each of the locations where charges must be placed.
Guards are all over the platform, and if you get caught by one, the guard will throw you out of the platform. Each guard's line of sight (LoS) is 2-3 squares in front of them. "Corner tricking" the guards are highly advised as it can save time. You may want to memorise the patrol patterns of the guards so you do not accidentally bump into one.
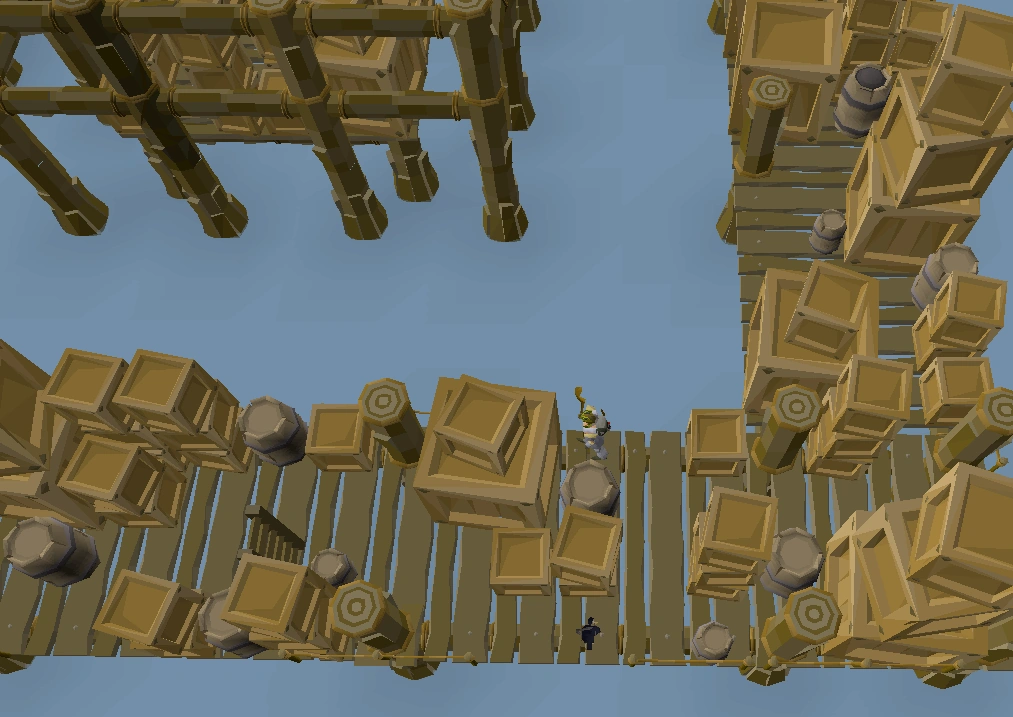
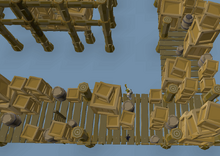
A player stealthily navigating through the airship platform.
- Warning: If you are caught by the guards, the explosives will be soaked and become useless, forcing you to get more explosives again. However, any charges you've already planted will stay on the rig, even if you log out. When you finish planting all the charges, DO NOT teleport out; leave via the same ladder you came in. Leaving at any point in this way will not reset the explosives.

Corner tricking a guard
Charges must be placed on two pillars on the ground floor[?], two floorboards on the middle floor, and two gas canisters on the top floor. One of the floorboards is immediately south of the ladder when you climb back up. One of the pillars is back towards the start. Planting a satchel on a pillar along the way, go back to the dead end ladder on the ground floor and climb up. Up again is to the two gas canisters (in each direction), while the last floorboard is to the west across a vine swing and to the north. Note that you can cross the middle of the first floor via a vine jump. Once you plant the last explosive, your character should acknowledge this. Leave the platform VIA THE LADDER by the ladder at which you arrived (to speed up this part, you can let a guard find and throw you out of the platform). Leaving this way at any point will not reset the explosives.
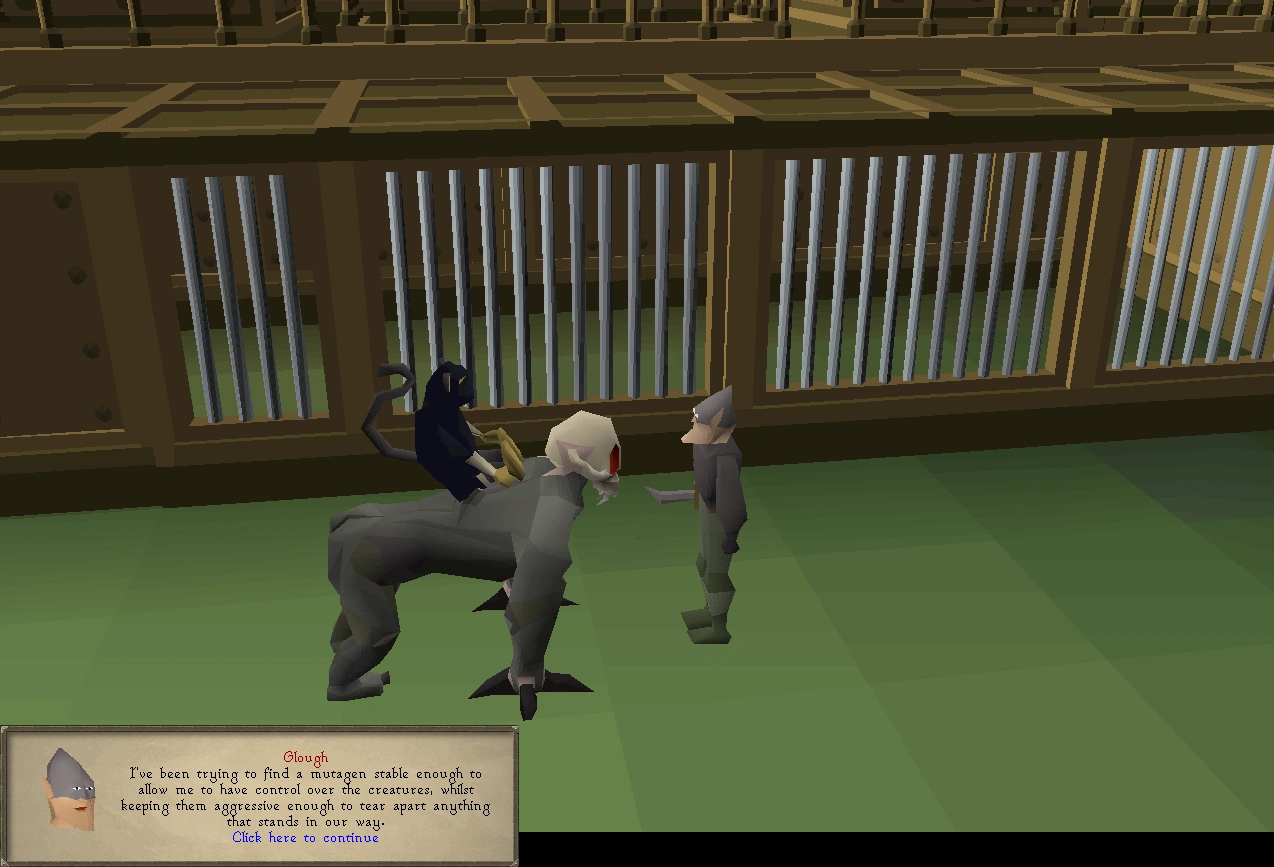

The player sat atop a mutated gorilla, discussing plans with Glough.
After reporting back to Garkor, head back to Kruk's Dungeon where you defeated ![]() Kruk in the maze. If you forgot to bring a hammer and chisel, you can search the crates downstairs where you fight the gorillas until you find one of each. You can skip traversing the maze by heading north and using the monkey bars with Kruk's greegree equipped. There should be a passage to enter once you have crossed the monkey bars, in the room just past where Kruk was found. Make sure to equip
Kruk in the maze. If you forgot to bring a hammer and chisel, you can search the crates downstairs where you fight the gorillas until you find one of each. You can skip traversing the maze by heading north and using the monkey bars with Kruk's greegree equipped. There should be a passage to enter once you have crossed the monkey bars, in the room just past where Kruk was found. Make sure to equip ![]() Kruk's greegree and enter. Walk through the big doors straight ahead, climb onto the
Kruk's greegree and enter. Walk through the big doors straight ahead, climb onto the ![]() stunted demonic gorilla, and climb down the stairs where three
stunted demonic gorilla, and climb down the stairs where three ![]() Tortured gorillas roam.
Tortured gorillas roam.
Glough will appear, and order you to send the three tormented gorillas back into the cage. Riding on your demonic gorilla, attack all three tormented gorillas one at a time. Use ![]() Protect from Melee to negate the damage they deal to you. When they reach low health, the gorillas will go back into the cage. Glough will teleport out to find Le Smith; go onto the nearby holding area to dismount from the demonic gorilla. Climb back up the stairs, unequip the greegree, and take the
Protect from Melee to negate the damage they deal to you. When they reach low health, the gorillas will go back into the cage. Glough will teleport out to find Le Smith; go onto the nearby holding area to dismount from the demonic gorilla. Climb back up the stairs, unequip the greegree, and take the ![]() Charged onyx out of the device at the north end of the room. Use the chisel and hammer to
Charged onyx out of the device at the north end of the room. Use the chisel and hammer to ![]() deconstruct it, and place it back in. Investigate any one of the incubation chambers to confirm they have been corrupted, and then report back to Garkor.
deconstruct it, and place it back in. Investigate any one of the incubation chambers to confirm they have been corrupted, and then report back to Garkor.
Garkor will tell you to report to ![]() King Awowogei that his plans have been foiled. Do this, and return to Garkor. At this point, a cut-scene will play showing Glough proceeding with his attack plans anyway.
King Awowogei that his plans have been foiled. Do this, and return to Garkor. At this point, a cut-scene will play showing Glough proceeding with his attack plans anyway.
Chapter IV
You'll need combat equipment to defeat several Tortured Gorillas.
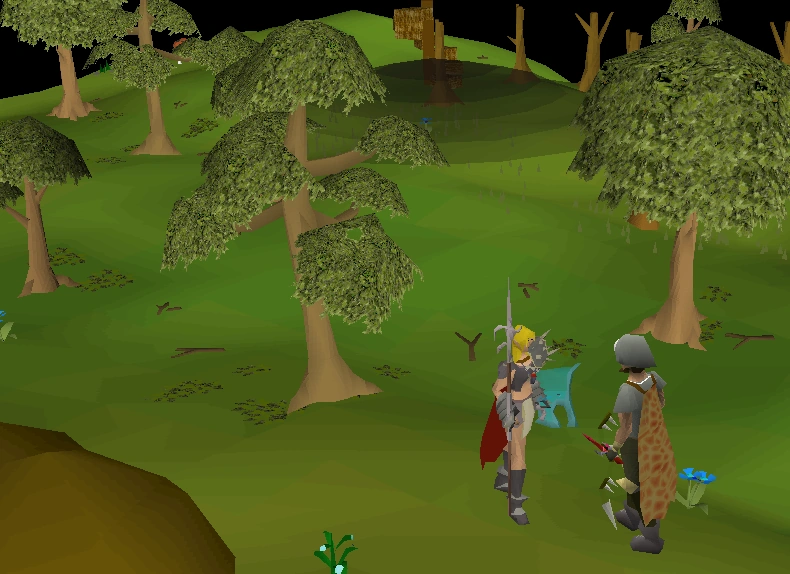
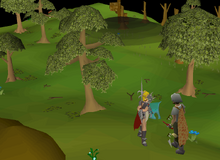
Glough's airship hovering directly above the Gnome Stronghold.
Report to ![]() King Narnode Shareen that the
King Narnode Shareen that the ![]() Gnome Stronghold will be attacked by the airship. Recruit
Gnome Stronghold will be attacked by the airship. Recruit ![]() Nieve for help in defending. Tortured gorillas will appear throughout the Stronghold by simply walking around with Nieve in tow. Kill four of them (they can be safespotted using various trees and scenery in the Stronghold), and return to the bank if necessary. If Nieve disappears at any time, she will be outside the Grand Tree. If you cannot find her there, logging out and then logging back in will return her. You can also hit the "Call follower" button in the bottom of the
Nieve for help in defending. Tortured gorillas will appear throughout the Stronghold by simply walking around with Nieve in tow. Kill four of them (they can be safespotted using various trees and scenery in the Stronghold), and return to the bank if necessary. If Nieve disappears at any time, she will be outside the Grand Tree. If you cannot find her there, logging out and then logging back in will return her. You can also hit the "Call follower" button in the bottom of the ![]() Worn Equipment interface.
Worn Equipment interface.
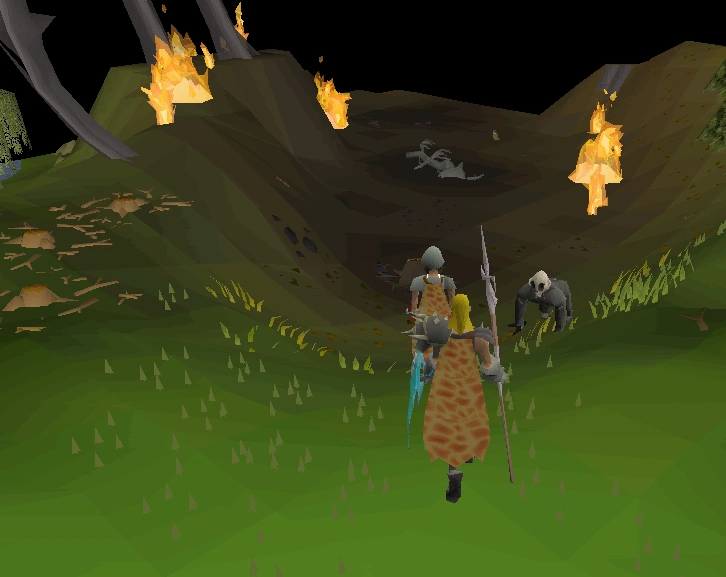

The remains of Glough's airship after it crash lands just north of the stronghold.
Go back and talk to the king. After that, head north-west of the ![]() Grand Tree, and talk to
Grand Tree, and talk to ![]() Garkor. He is located by the
Garkor. He is located by the ![]() swamp toad and
swamp toad and ![]() king worm swamp and the
king worm swamp and the ![]() tortoise enclosure. Go through the crash site and enter the
tortoise enclosure. Go through the crash site and enter the ![]() Crash Site Cavern. There are four more Tortured gorillas outside; pray magic or range, and run past them.
Crash Site Cavern. There are four more Tortured gorillas outside; pray magic or range, and run past them.
Prepare to fight two ![]() tortured and two
tortured and two ![]() demonic gorillas. After the cutscene ends, the tortured gorillas will move in and attack; these are slightly stronger than the ones you fought outside and can use multiple
demonic gorillas. After the cutscene ends, the tortured gorillas will move in and attack; these are slightly stronger than the ones you fought outside and can use multiple ![]() Combat styles. When you kill one of the tortured gorillas, a demonic gorilla will jump down into the fight. The demonic gorillas are far stronger, boasting more health and damage. Most notable is their ability to use
Combat styles. When you kill one of the tortured gorillas, a demonic gorilla will jump down into the fight. The demonic gorillas are far stronger, boasting more health and damage. Most notable is their ability to use ![]() protection prayers which act similarly to the player's prayers in a
protection prayers which act similarly to the player's prayers in a ![]() PvM situation (Player vs. Monster); however,
PvM situation (Player vs. Monster); however, ![]() Verac's set will not hit through their Protect from Melee, so you must bring two forms of
Verac's set will not hit through their Protect from Melee, so you must bring two forms of ![]() combat if you kill them normally.
combat if you kill them normally.
- Warning: Like the Kruk fight, this area is instanced. Do not bring items you are not willing to lose. If you die in this instance, Nieve will be waiting outside the Grand Tree upon your return.
The demonic gorillas have all three attack styles. Their white 'throwing' attack is ![]() Ranged, green is
Ranged, green is ![]() Magic, and fighting melee is
Magic, and fighting melee is ![]() Melee. Protect accordingly! It is also possible to let Nieve kill all four gorillas for you. Wait for her to start attacking one of the Gorillas then run out of the room and hide behind the pile of rocks. For the demonic gorillas, ensure that they are not using
Melee. Protect accordingly! It is also possible to let Nieve kill all four gorillas for you. Wait for her to start attacking one of the Gorillas then run out of the room and hide behind the pile of rocks. For the demonic gorillas, ensure that they are not using ![]() Protect from Melee; if they are, keep attacking them with magic or range until they change prayers so Nieve can hit them. Nieve will not attack the gorillas if you use "call follower"; it will take Nieve a bit of time to aggro the gorillas if you end the cutscene early—let the cutscene end to one of the gorillas attacking you.
Protect from Melee; if they are, keep attacking them with magic or range until they change prayers so Nieve can hit them. Nieve will not attack the gorillas if you use "call follower"; it will take Nieve a bit of time to aggro the gorillas if you end the cutscene early—let the cutscene end to one of the gorillas attacking you.
- Note: If you are on a black demon slayer task, the demonic gorillas count as on task kills and a slayer helmet may be used.
- For Struggling Players: If you are having difficulty killing all the gorillas, simply kill both the tortured gorillas that appear; then, leave the room and hide in such a way that the demonic gorillas get stuck behind the wall. You MUST tank a few hits from a gorilla in order for Nieve to attack as she will only attack the last monster you were in combat with. For example, after you've killed one or both of the tortured gorillas, tank a few hits from Demonic Gorilla 1 so that Nieve knows which one to attack; then, hide and let her finish off that specific gorilla. Repeat these exact steps for the second demonic gorilla. If they are praying Protect from Melee, use ranged or magical attacks until they switch to Protect from Missiles or Magic, and then hide again.
Chapter V

Nieve is killed by a collapsing boulder after Glough's transformation.
After defeating Glough's demonic gorillas, he will drink his own mutagen, transforming himself into an abomination. Nieve will attempt to stop him, but gets knocked back to the wall, causing a boulder to fall and crush her, killing her instantly, and then retreating. Players will now have to defeat Glough; it is recommended to return to a bank and restock on supplies, as the fight will prove to be challenging even to the most experienced player.
The player will need to fight Glough in three separate chambers, which he goes to when his health falls.
Note: If the player leaves the chamber through ![]() teleportation,
teleportation, ![]() death or through the exit at any point during the fight with
death or through the exit at any point during the fight with ![]() Glough, all progress is reset back to the first phase. For this reason, it is suggested to read this entire section before proceeding. Like the demonic gorilla fight, this section is instanced so do not bring items you do not want to lose.
Glough, all progress is reset back to the first phase. For this reason, it is suggested to read this entire section before proceeding. Like the demonic gorilla fight, this section is instanced so do not bring items you do not want to lose.
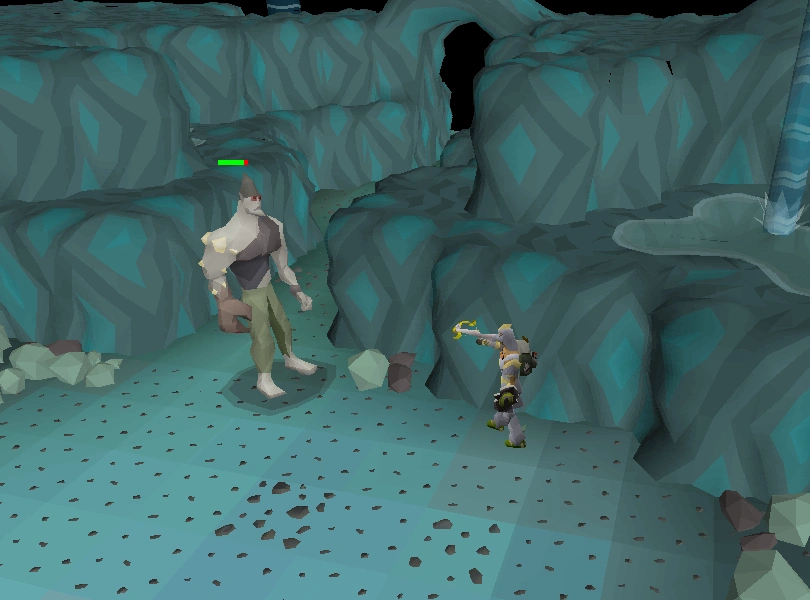

A safespot available to use in the first phase.
In the first room, Glough attacks using ![]() Melee and can be attacked safely from the hallway using
Melee and can be attacked safely from the hallway using ![]() Ranged or
Ranged or ![]() Magic. Once Glough falls to 75% of his hitpoints, he goes into the second room.
Magic. Once Glough falls to 75% of his hitpoints, he goes into the second room.
In the second room, Glough uses ranged attacks as well as melee, stomping the ground and dealing up to 30+ damage. It is possible, but difficult, to safespot him by using a weapon that has an ![]() attack range of 10 squares (In order of preference as they may be available:
attack range of 10 squares (In order of preference as they may be available: ![]() Dark bow,
Dark bow, ![]() Magic comp bow,
Magic comp bow, ![]() Crystal bow, or
Crystal bow, or ![]() Magic longbow. Notably, the Magic comp bow still has an attack range of 10 squares on 'Rapid' and can double-hit Glough on his third phase if you are attempting to safespot him). To do this, you will have to lure him to and then stand exactly one square out of his attack range, which is about halfway through the room where he went for the first phase, one square east of the first black rock on the southern wall. It is suggested to activate Protect from Missiles as this reduces his damage a bit; but he can still hit up to 21 damage with each attack. Lure Glough out of the second room and back into the first, hugging the northern parts of the wall. When you lure Glough far enough, he will not do anything, allowing you to easily hit him. Once he falls at 50% of his hitpoints, he will walk into the final room.
Magic longbow. Notably, the Magic comp bow still has an attack range of 10 squares on 'Rapid' and can double-hit Glough on his third phase if you are attempting to safespot him). To do this, you will have to lure him to and then stand exactly one square out of his attack range, which is about halfway through the room where he went for the first phase, one square east of the first black rock on the southern wall. It is suggested to activate Protect from Missiles as this reduces his damage a bit; but he can still hit up to 21 damage with each attack. Lure Glough out of the second room and back into the first, hugging the northern parts of the wall. When you lure Glough far enough, he will not do anything, allowing you to easily hit him. Once he falls at 50% of his hitpoints, he will walk into the final room.
It is possible, but requires great skill, timing, and good connection, to kill him in his third phase without taking any damage at all with a 10 square-range weapon (see #2 below).
In the third and final room, Glough will now be able to attack the player using both melee and magic attacks. Glough's melee attack can send you flying backwards and dealing up to 66 damage as a result. For this reason, it is recommended that players keep their health at 80+ to avoid dying as a result of this attack. Protect from Melee is highly suggested if using melee equipment to attack him. Glough will only teleport you after he is damaged. ![]() Rings of recoil are suggested, especially if attempting to partially safespot him as detailed below. Therefore, it is recommended to keep
Rings of recoil are suggested, especially if attempting to partially safespot him as detailed below. Therefore, it is recommended to keep ![]() Auto-Retaliate disabled and only attack Glough when the player is not in danger of dying as you are unable to eat during, and shortly after being teleported.
Auto-Retaliate disabled and only attack Glough when the player is not in danger of dying as you are unable to eat during, and shortly after being teleported.

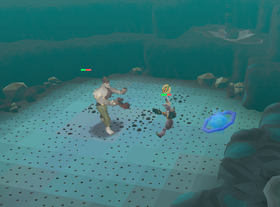
Glough drags the player towards him during the final phase of the fight.
Glough's magic attack drags the player within distance of his melee attack and deals a large amount of damage. However, it may be exploited to only allow for damage from his magic attack. To do this, use a strong ![]() ranged weapon such as the
ranged weapon such as the ![]() toxic blowpipe, stand one square west of Glough, and attack. Whenever he teleports you to him using his magic attack, quickly return to the square just west of him and continue attacking him. Protect from Magic is highly recommended if using ranged or magic to kill Glough, as his 'teleport deals very high magic-based damage. His damage seems to be roughly halved using the correct prayer. If using this strategy, it is advisable to bring combo foods (e.g. a 'main' food,
toxic blowpipe, stand one square west of Glough, and attack. Whenever he teleports you to him using his magic attack, quickly return to the square just west of him and continue attacking him. Protect from Magic is highly recommended if using ranged or magic to kill Glough, as his 'teleport deals very high magic-based damage. His damage seems to be roughly halved using the correct prayer. If using this strategy, it is advisable to bring combo foods (e.g. a 'main' food, ![]() sharks or
sharks or ![]() tuna potatoes, with
tuna potatoes, with ![]() pineapple pizzas and/or brews+restores and/or Karambwans) more one-click foods (e.g.
pineapple pizzas and/or brews+restores and/or Karambwans) more one-click foods (e.g. ![]() tuna potatoes) over a
tuna potatoes) over a ![]() brew/
brew/![]() restore method, as the tick for you to move one square away and use your potions is not enough to counteract his damage. It is also possible, albeit difficult, to eat a karambwan, a high healing food and a potion all in one tick.
restore method, as the tick for you to move one square away and use your potions is not enough to counteract his damage. It is also possible, albeit difficult, to eat a karambwan, a high healing food and a potion all in one tick.
Another technique to use is when Glough teleports you to him, Protect from Melee and use melee attacks. When Glough pushes you away, Protect from Missiles and use ranged attacks. The toxic blowpipe and ![]() whip are great weapon choices. Also a
whip are great weapon choices. Also a ![]() dragon or
dragon or ![]() crystal halberd works wonderfully to chunk Glough's health.
crystal halberd works wonderfully to chunk Glough's health.
It is possible to partially safespot Glough on his final form, preferably with a ![]() Dark bow because of its double attack. Interestingly, the
Dark bow because of its double attack. Interestingly, the ![]() Magic comp bow will also shoot twice if using this method (#1 below); the second time immediately after being teleported, even while spam clicking away from Glough. Safespotting him, especially with method #2, requires great timing and experience with Runescape's .6 tick system. Glough has an
Magic comp bow will also shoot twice if using this method (#1 below); the second time immediately after being teleported, even while spam clicking away from Glough. Safespotting him, especially with method #2, requires great timing and experience with Runescape's .6 tick system. Glough has an ![]() attack range of 11 squares and an aggression range seemingly between 14-18 squares (it is difficult to tell). There are two ways to go about doing this. Either way, set up
attack range of 11 squares and an aggression range seemingly between 14-18 squares (it is difficult to tell). There are two ways to go about doing this. Either way, set up ![]() quick prayers for
quick prayers for ![]() protection from Magic and
protection from Magic and ![]() Eagle Eye.
Eagle Eye.
- Turn on quick prayers and then attack him. He will draw you (teleport) to him. If you want or need to conserve prayer, switch it off mid-'flight.' After (or during, it doesn't make a difference) being teleported, very quickly (spam click on the minimap) run back at least 11 squares (1 square north of the small black boulder).
- Similar to flinching, you can continuously run between the previous chamber and the hallway to cancel Glough's aggression. You will have to WALK while shooting at him (otherwise you will run an extra square), and then hold CTRL to run back north out of his range without having to enable run. The first few times you do this before 'getting the hang of it,' you should use the quick prayer set up just in case he teleports you, or he could hit upwards of 60 damage. He can be killed very slowly but relatively safely using this method. If you are using magic, cast your spell out of the spell book, DO NOT use autocast, as you will spend a tick standing around before actually using the spell.
- Running or walking back has little impact on this method. Using a blowpipe, you can land 2 hits on glough and eat before he draws you back in with his magic attack. This allows you to do a constant barrage of attacks without having to worry about your health. Although it is recommended to use a blowpipe, a crossbow will work as well, only you will will be able to a: land 1 hit with a healing method, or b: land 2 hits without a healing method. If you are already at your maximum hitpoints, you can revert to more damage dealing methods such as a dark bow in place of eating as well.
Start the battle by attacking Glough in his first room, then running out into the room you entered through. Glough will get stuck between the passageway and you can safely attack him down to 75% health while taking no damage. Protection prayers are not need for this stage of the fight as Glough only uses melee.
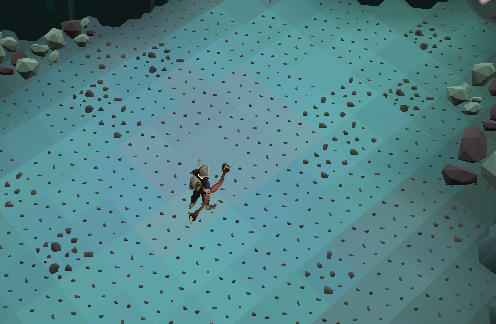
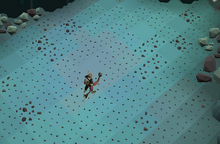
The safe spot for Glough's second phase.
For the second phase, run in and attack Glough. He will attack with a range attack, but protection prayers do not affect this attack. Run back into the first room Glough was in and go behind the grey rock. As long as you're behind the line parallel to the rock, Glough can't hit you. From here you can safely attack Glough down to 50% health. Make sure you're using ![]() Long range if using a Longbow.
Long range if using a Longbow.
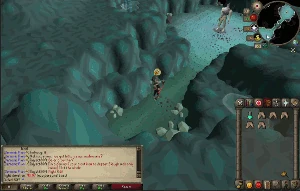
The safe spot technique for Glough's third phase.
For the last phase, you must first run up to the grey rock in the passage near Glough. Be careful not to go past the rock. Set your quick prayers to Protect from Magic and ![]() Eagle Eye or
Eagle Eye or ![]() Rigour if you have them. Turn them on, attack Glough, and right when you start the attack animation, spam click behind the grey rock on the
Rigour if you have them. Turn them on, attack Glough, and right when you start the attack animation, spam click behind the grey rock on the ![]() Mini map. Then move right behind the grey rock again, restore
Mini map. Then move right behind the grey rock again, restore ![]() Hitpoints and
Hitpoints and ![]() Prayer if needed, and repeat until Glough is defeated.
Prayer if needed, and repeat until Glough is defeated.
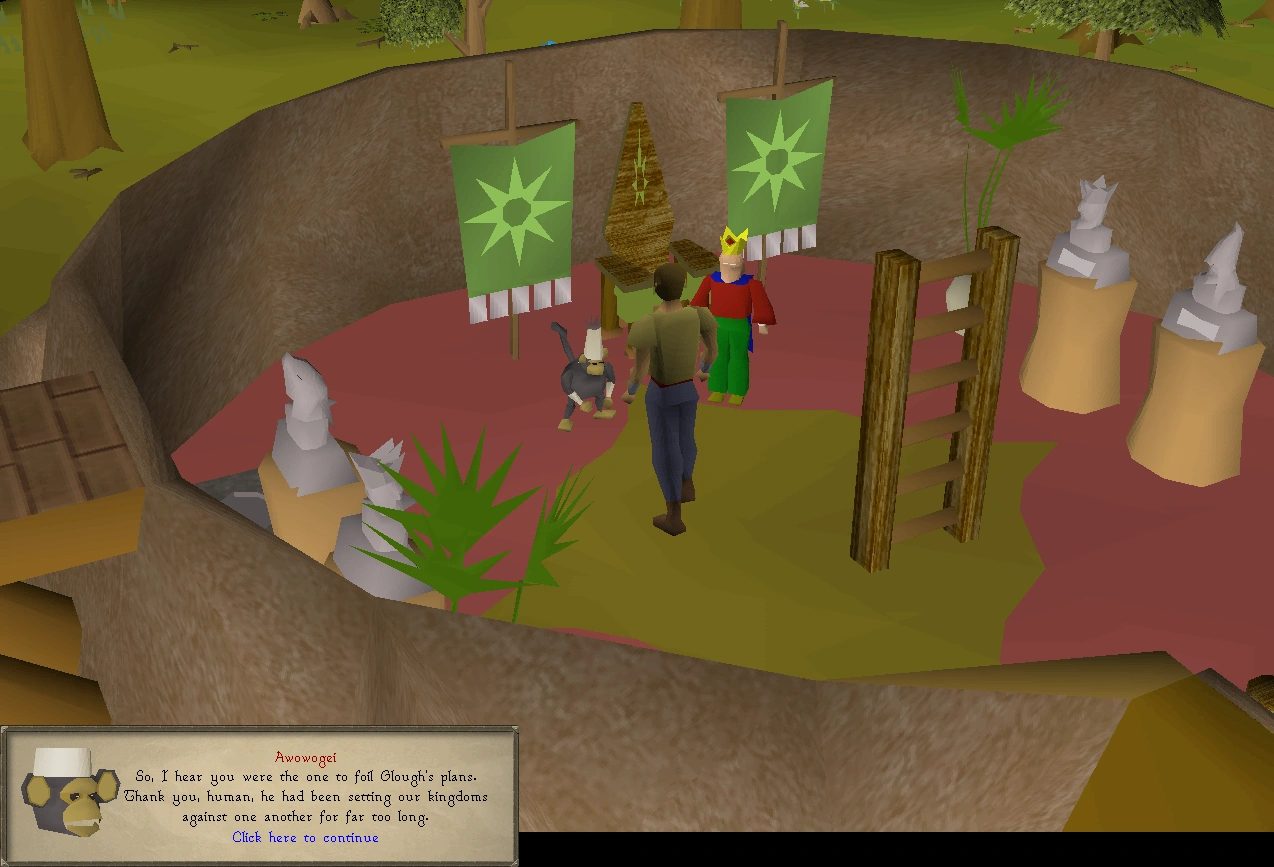
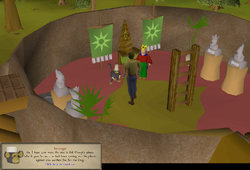
Meeting with Awowogei and Narnode to negotiate peace.
- Note: If you and Glough die at the same time, you will have to repeat the entire fight again.
Once Glough falls to zero health, the chambers begin to collapse. You will automatically be teleported outside the cavern before being instructed to report back to ![]() King Narnode. Talk to
King Narnode. Talk to ![]() Zooknock who is waiting for you, and he will teleport you to the king. A cutscene will ensue where
Zooknock who is waiting for you, and he will teleport you to the king. A cutscene will ensue where ![]() Awowogei will negotiate a peace treaty with King Narnode Shareen.
Awowogei will negotiate a peace treaty with King Narnode Shareen.
Congratulations, quest complete!
Rewards
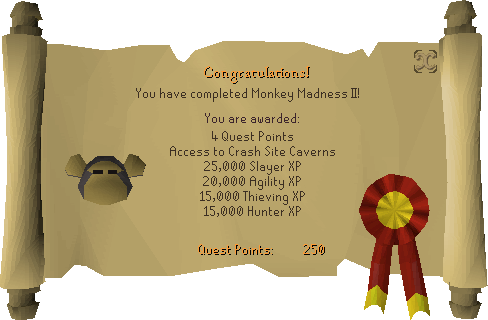
- 4 Quest points
- 25,000 Slayer experience
- 20,000 Agility experience
- 15,000 Thieving experience
- 15,000 Hunter experience
- Access to the Crash Site Cavern
- The ability to communicate with monkeys in Ape Atoll without the M'speak amulet.
- All NPCs on the surface of Ape Atoll will be non-aggressive without requiring the use of Monkey greegrees.
- Access to Ape Atoll bank and Oobapohk's Javelin Store.
- Access to new glider spot directly to Ape Atoll.
- 2x 50,000 experience rewards from Duke in your choice of Magic, Ranged, Attack, Defence, Strength or Hitpoints. Found on the hill east of main gate of Ape Atoll. (Walk up west hill, and climb the ladder to reach the east hill.)
- Ability to wield the Heavy ballista.
- A Royal seed pod, which provides unlimited teleports to the Grand Tree (up to level 30 Wilderness).
- A Monkey can be found in one of the crates at the Crash Site. It is purely cosmetic and can be equipped in the cape slot.
- The ability to re-fight Glough by gazing into the Burning brazier in Zooknock's house.
- Access to a new maniacal monkey hunting area where Glough's laboratory used to be in Kruk's Dungeon.
- Various dragons will now drop dragon javelin heads.
Music unlocked
Trivia
The log in screen upon the release of the quest.
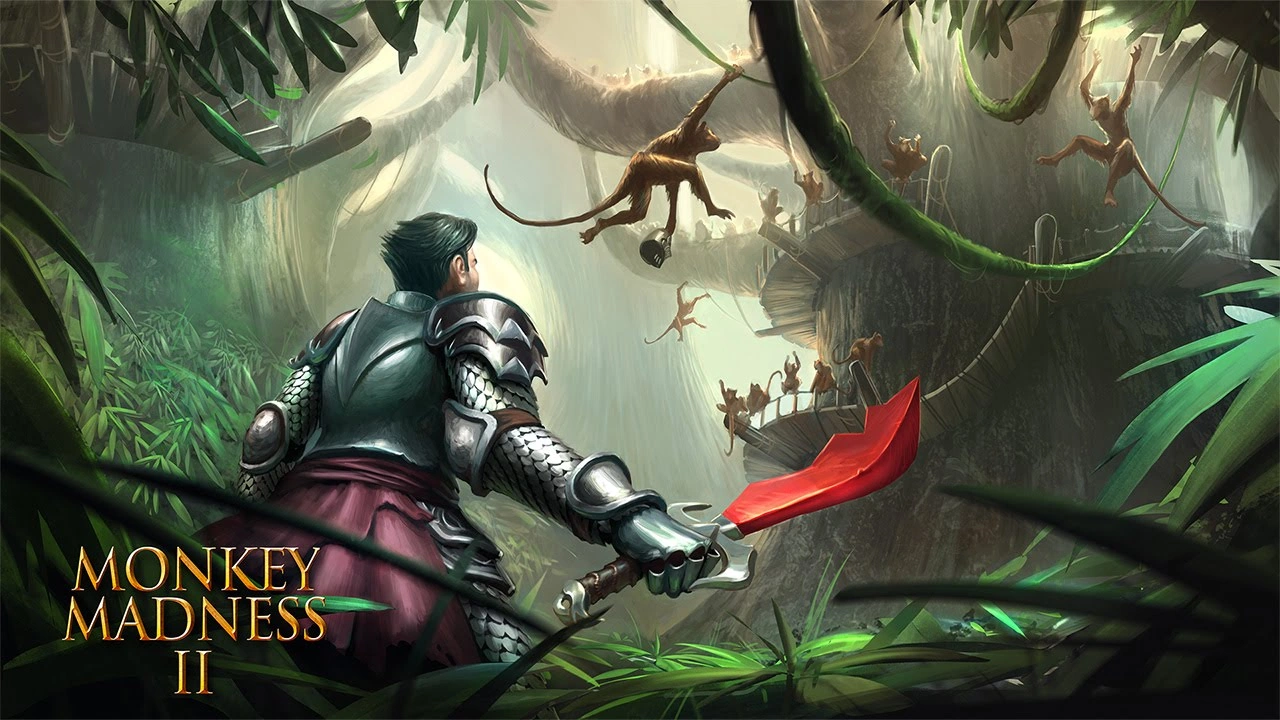

A piece of artwork of the quest.
- This quest is the first quest to be classified as a Grandmaster quest in Old School RuneScape, as well as being the first Old School-exclusive quest.
- A log in screen competition was held the week before release to use a player-made log in screen to commemorate the first quest to be released on Old School RuneScape. The winner of the competition, Golden Pleb, was given a 3D printed model of a demonic gorilla and a t-shirt signed by the Old School RuneScape team.
- The quest was planned to be released to Old School RuneScape on the 5th of May, but was delayed by a day after deciding that further testing was needed.
- When telling Juna a story about the quest, the player says "... so I defeated Glough in his mutant form and prevented a war. King Narnode Shareen & King Awowogei signed a peace treaty." to which she responds "Glough's evil plans always threaten to upset the balance of our world. I am pleased you were able to stop him."
- After the quest, most monkey NPCs on Ape Atoll will still speak to the player as if they were an ordinary monkey. Exceptions include Duke, the Monkey child (as he is normally spoken to in human form), the Monkey archer when entering or exiting the gate of Marim (he will say "an ally wishes to pass"), and Awowogei.
Monkey Madness II | |
|---|---|
| Characters |
|
| Enemies |
|
| Items |
|
| Rewards | |