(→Tips) Tag: Visual edit |
(→Trivia: "with average luck" sounds very weird) Tag: Visual edit |
||
| Line 124: | Line 124: | ||
==Trivia== |
==Trivia== |
||
| − | *Although it is possible to obtain the [[Tangleroot]] through Tithe Farm, it is extremely unlikely. |
+ | *Although it is possible to obtain the [[Tangleroot]] through Tithe Farm, it is extremely unlikely. It would take roughly 3 billion experience or 25,000 hours to hit the droprate. |
{{Tithe Farm}} |
{{Tithe Farm}} |
||
Revision as of 18:53, 25 June 2018
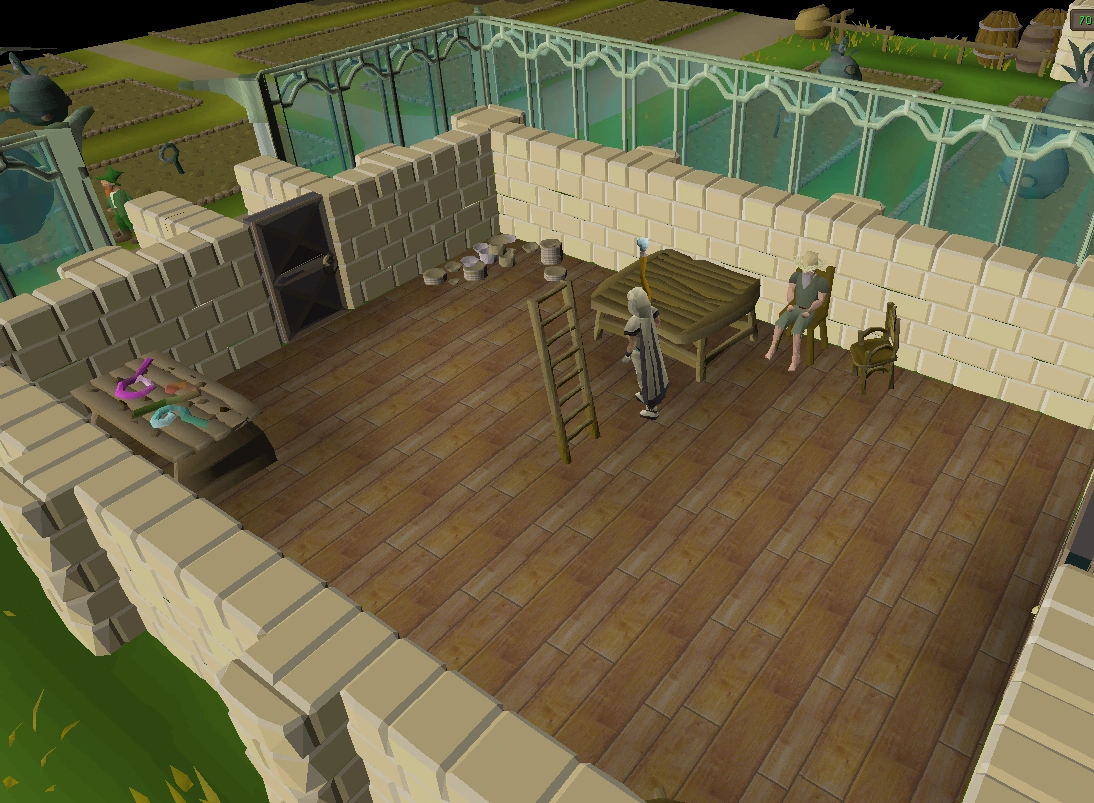
The Tithe Farm entrance. Players must take seeds from the table before entering.
Tithe Farm is a farming based minigame that is located in the Hosidius House in Great Kourend. The minigame revolves around intensively planting special seeds into farming patches, tending them until harvest, and depositing the produce into sacks in order to earn points.
This minigame is safe, meaning you will not lose items on death; however, any items you drop manually on the ground will be lost, as the minigame area is instanced. Players can speak to Farmer Gricoller for information on how to play.
If you leave the area before depositing, you will lose your progress and will have to restart from the very beginning. If you log out during a session, however, your score will remain but planted crops will not be protected.
There can be a maximum of 100 fruits gained per individual instance. As explained in the Rewards section, if you deposit only 74 fruits or fewer and leave the area, you will get no points (at the most, you may receive experience). Therefore, it is highly recommended to leave only after having deposited 100 fruits.
Requirements
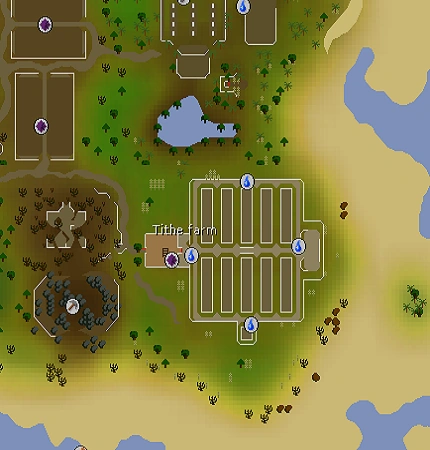
The entrance to the tithe farm is on the eastern side of the Hosidius House.
In order to play this minigame, players must have 100% favour with the Hosidius house in Great Kourend.
Three types of seeds can be found on the table near Farmer Gricoller, each requiring a specific Farming level. Players can only take one type of seed, and boosts can be used, but boosted levels must be maintained when planting seeds.
- Golovanova seeds (34 Farming)
- Bologano seeds (54 Farming)
- Logavano seeds (74 Farming)
Players will also need a spade, a seed dibber and a watering can (6 to 8 watering cans are recommended).
Gameplay
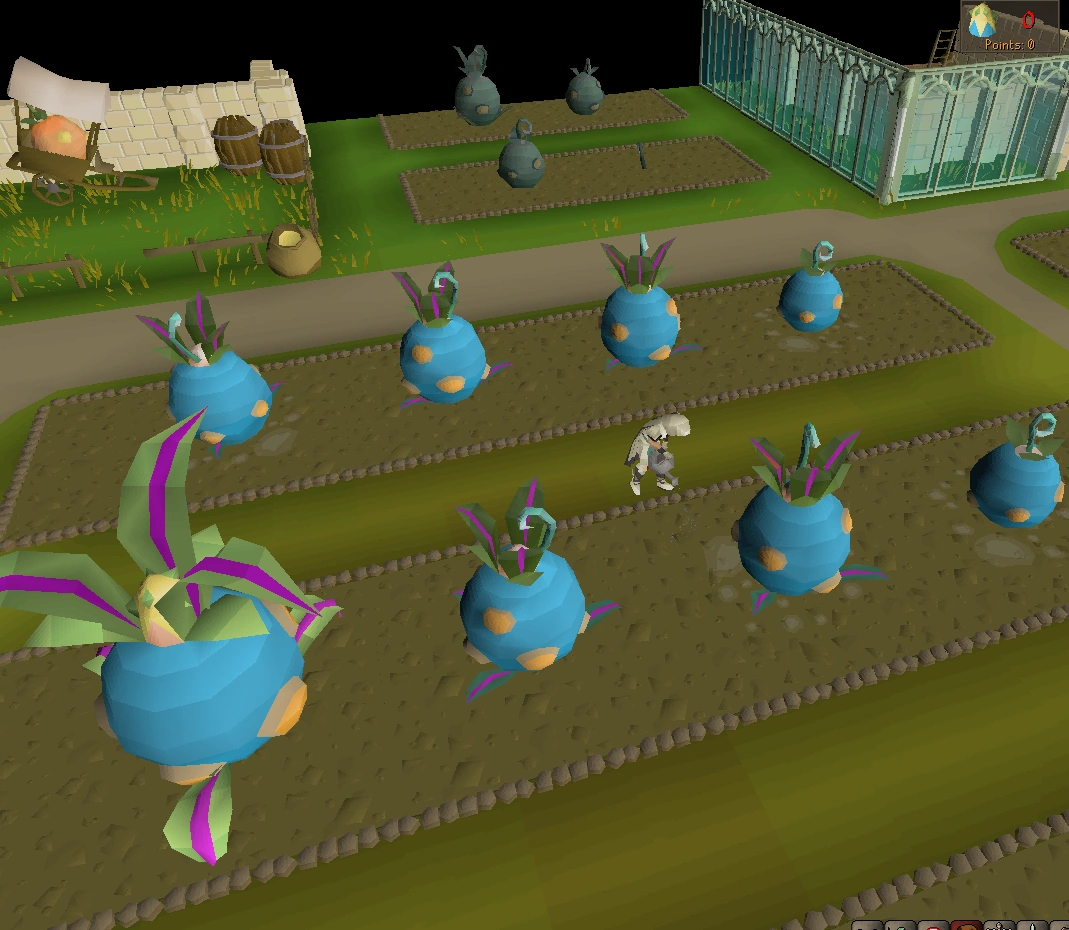
A player tending to several bologano fruit plants.
Once players have chosen the seed appropriate to their level, they may enter the farm. Players must plant the seeds in empty patches. The plants grow very quickly and need to be watered every time they grow, or they will die fast.
The plants will take 3 minutes to grow fully; players can double the growth rate by using Gricoller's fertiliser (not recommended, see Strategy section), which is provided when players enter the minigame area.
After the plants have grown, players should harvest the fruit and deposit it into sacks. Should they successfully harvest more than 75% of the plants, players will receive an experience bonus.
Strategy
Always remember to have a spade, seed dibber and enough filled watering cans with you for the run(s) you're about to do.
If you are new at the minigame, it might be worthwhile to test the water with fewer plants per run until you have gotten some practice.


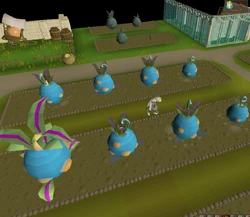
The general strategy will use the plant layout and order in the image to the right. You do not need to use these specific patches, just any five in this pattern. It should be noted that using Gricoller's fertiliser is not recommended, as it speeds up the growth of the plants, and makes it very difficult to handle more than eight or so plants at a time. You will need 6-8 watering cans for this strategy, depending on how many plants you do at a time. It is recommended to simply bring 8 to allow flexibility in your method.
The optimal strategy is to grow plants in all 20 spots. This means that you only need to do five runs, and with a good connection and some practice, it is straightforward. Note that you must plant and water the seeds when you start a new run. The general tips outlined below provide the most benefit when you are using this strategy.
If growing 20 plants at a time is difficult due to inexperience or frequent disconnections, then it is possible to do different numbers of runs. For example, it is possible to do 5 runs of 17 plants followed by one run of 15 plants, or 5 runs of 14 plants followed by 2 runs of 15 plants. Regardless of how many plants you grow at once, using the given layout in the map leads to the least amount of running and thus the easiest way to manage more crops.
It is not recommended to grow more than 20 plants at once, as it becomes very difficult and stressful to manage more than 5 rows at a time.
Tips
- Full Graceful is invaluable for this minigame. While you should not use all of your energy if you start each run at 100%, you will be able to do consecutive runs more quickly if you have full Graceful. Alternatively, Stamina potions may help.
- The Humidify spell from the Lunar spellbook allows for much faster refilling of watering cans. (Note: This requires completion of the Dream Mentor quest).
- When planting seeds or watering plants, you do not need to wait for the animation to finish. You can cut the time spent planting seeds or watering plants by almost half if you do this, making it an invaluable part of managing 20 plants at once. This can take some practice to master, but as a starting point, watering plants "finishes" as soon as the patches of water appear, allowing you to water the next spot. It is recommended to alternate between watering cans, because this will allow you to pre-select a can without having to wait for the amount of water in the can you just used to update.
- It is a good idea to have your camera rotated to be as far above you as possible, as this makes it easier to plant seeds and water plants in adjacent spots.
- If using the Farmer's outfit, you only need to equip it when harvesting the plants or depositing the fruit. At all other times, the graceful outfit or other weight-reducing items should be worn. The extra experience from harvesting the fruit is very minimal so don't worry if you forget to change outfits. However, the extra experience from depositing the fruit in the sack is well-worth changing outfits for.
Rewards
After harvesting the plants, players should deposit the harvest into the sacks found nearby. Depositing harvests will reward players with points and farming experience. It is worth noting that the player may deposit fruits in any amount - you don't have to deposit all 100 at a time.
You may plant and harvest a total of 100 seeds. Harvesting a fruit provides 6, 14, or 23 experience (for Golovanova, Bologano, and Logavano fruits respectively). The first 74 fruits deposited will each give 0 points as well as 60, 140, or 230 experience per fruit (10 times the harvest amount). The next 26 fruits (fruits 75-100) deposited will give 1 point and double experience per fruit (120, 280, or 460 experience). In addition, reaching 75 fruits will result in bonus experience of 1,500, 3,500, and 5,750 (250 times the harvest amount) for the respective fruits.
The total experience earned per batch of seeds (100 fruits) is 9,660 for Golovanova seeds, 22,540 for Bologano seeds, and 37,030 for Logavano seeds. To calculate this, let P be the harvest experience for the tier of seeds used (6, 14, or 23). 100 x P experience is received from harvesting, 74 x 10 x P from the first 74 fruits deposited, 26 x 20 x P from the last 26 fruits deposited, and 250 x P from the bonus. The sum gives 1610 x P.
Wearing the full farmer's outfit will also boost experience from depositing fruit by 2.5%, bringing total experience per 100 fruits deposited to 9,901.5 for Golovanova, 23,103.5 for Bologano, and 37,955.75 for Logavano.
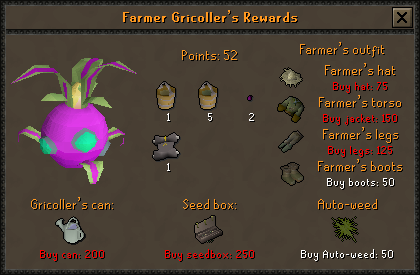
Players can only have a maximum of 1,000 points.
| Rewards | Points required | Notes | |
|---|---|---|---|
| Compost | 1 | Reduces chance of crops becoming diseased while growing throughout the plant cycle and increasing the minimum and maximum number of crops received upon harvest. The supercompost version is more potent. | |
| Supercompost | 5 | ||
| Grape seed | 2 | A tradeable seed that can be planted in the Vinery to harvest grapes. | |
| Bologa's blessing | 1 | Converts 1 grapes into 1 Zamorak's grapes per scroll when harvesting them from the Vinery. Purchasing this requires level 50 Prayer and a one-time payment to Bologa for 75,000 coins while wearing an item affiliated to Zamorak. | |
| Farmer's strawhat | 75 | A piece of the farmer's outfit. Appearance differs between genders. | |
| Farmer's jacket/shirt | 150 | A piece of the farmer's outfit. Jacket is obtained if male, shirt is obtained if female. | |
| Farmer's boro trousers | 125 | A piece of the farmer's outfit. Appearance differs between genders. | |
| Farmer's boots | 50 | A piece of the farmer's outfit. | |
| Gricoller's can | 200 | Holds 1,000 doses of water. To recharge Gricoller's can, it costs 1 point for every 5% (20 points if completely empty). | |
| Seed box | 250 | Stores any six types of seeds. | |
| Auto-weed | 50 | When enabled, weeds no longer grow in your Farming patches. This doesn't remove weeds that have already grown there, but it stops them from growing back. Once purchased, the ability can be turned on and off freely. Note: This doesn't affect Miscellania farming patches. | |
Trivia
- Although it is possible to obtain the Tangleroot through Tithe Farm, it is extremely unlikely. It would take roughly 3 billion experience or 25,000 hours to hit the droprate.
Tithe Farm | |||||||
|---|---|---|---|---|---|---|---|
| NPCs | |||||||
| Items |
| ||||||
| Rewards |
| ||||||
| Team games |
Barbarian Assault • Blast Furnace • Burthorpe Games Room • Castle Wars • Fishing Trawler • Nightmare Zone • Pest Control • Shades of Mort'ton • Trouble Brewing • Volcanic Mine |
| Solo games |
Barrows • Blast mine • Brimhaven Agility Arena • Champions' Challenge • Gnome Ball • Gnome Restaurant • Impetuous Impulses • Inferno • Mage Arena • Mage Training Arena • Pyramid Plunder • Ranging Guild Activities • Rat Pits • Rogue Trader • Rogues' Den • Sorceress's Garden • Tai Bwo Wannai Cleanup • Tears of Guthix • Temple Trekking • Tithe Farm • Treasure Trails • TzHaar Fight Cave |
| PvP games |
Bounty Hunter • Castle Wars • Clan Wars • Duel Arena • Last Man Standing • TzHaar Fight Pit |