(cleanup) |
m (cleanup) |
| (5 intermediate revisions by 5 users not shown) | |
(No difference)
| |
Latest revision as of 10:12, 8 June 2019
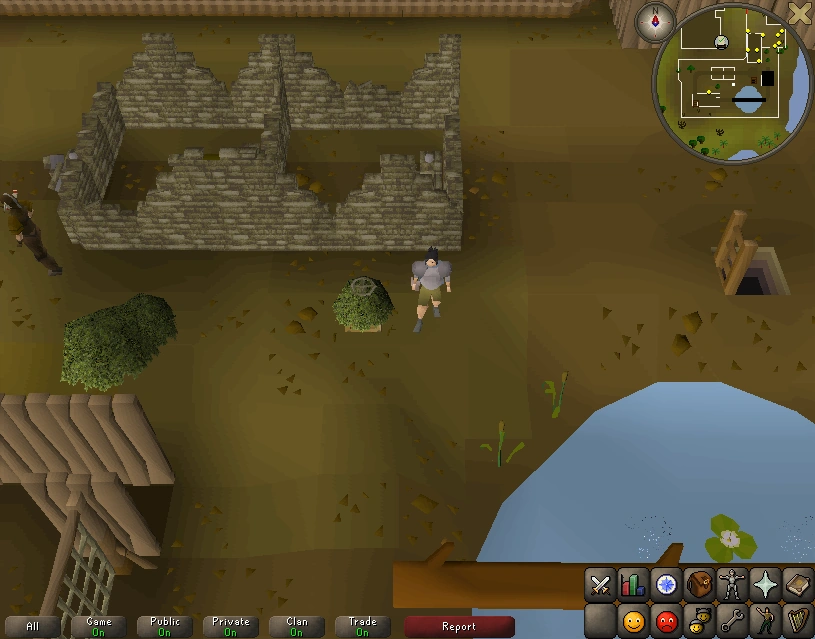
For the main article, see Treasure Trails.
Preparation
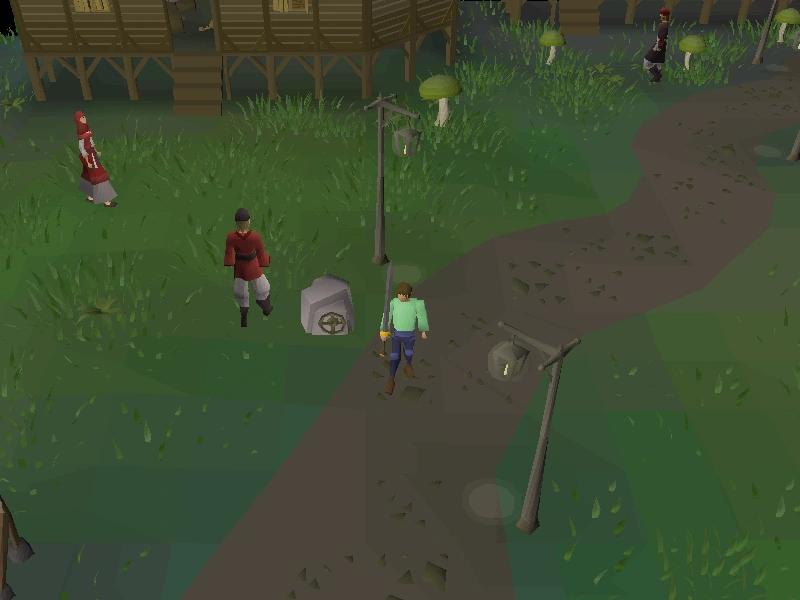
Medium clue scrolls can be between three and five clues long with some quest requirements.
See also: Treasure Trails/Guide/Emote clues/Items
| Picture | Item | Use |
|---|---|---|
| Clue scroll | Used to solve clues and required to exchange for a new clue scroll. | |
| Spade | Use this to dig for a clue. | |
| Teleportation runes and enchanted jewellery | Use this to travel over large distances. | |
| Stamina, Super or Energy potions | Use these to restore energy. | |
| Money | Use this to buy items needed for emote clues and travel costs. | |
| Ring of charos (a) | Used for extra benefits. | |
| Dramen or lunar staff | Use this to access the Fairy ring network shortly into Fairytale II - Cure a Queen. | |
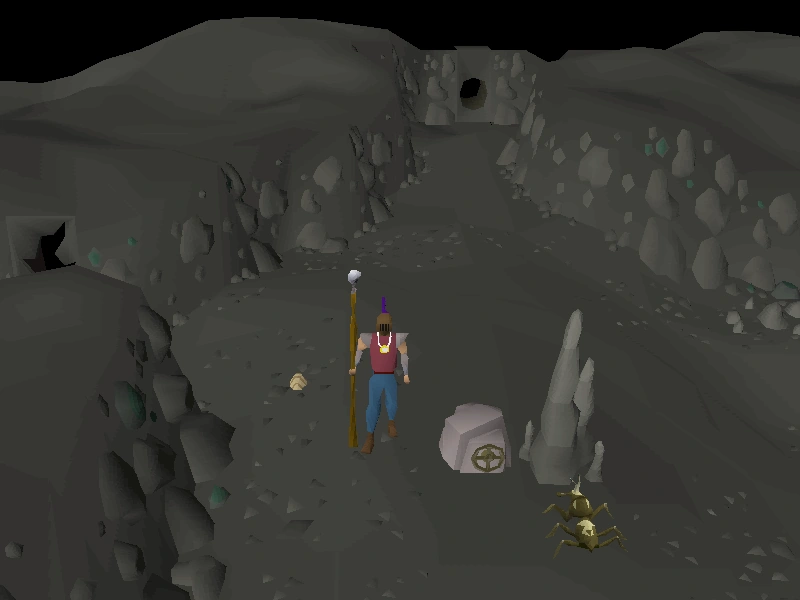
| Weapon | You will have to kill a few low-levelled monsters while doing medium clues. |
Anagrams
An anagram is a string of letters, which can be rearranged into another word or phrase. For example: orchestra is an anagram of carthorse.
The solution of an anagram is always the name of an NPC. Once the solution is found, the player can get their next clue by talking to that NPC. Often, when talking to an NPC, the player will receive a challenge scroll, puzzle box or light box that they must solve before receiving the next clue.
The anagrams in clue scrolls do not correspond with the number of spaces in a name; an anagram with no spaces may have an answer with a name corresponding with one or more spaces.
| Anagram | Solution | Location | Challenge answer |
|---|---|---|---|
| A Baker | Baraek | Varrock Square (fur trader) | 5 |
| A Basic Anti Pot | Captain Tobias | Port Sarim | 7 |
| A Heart | Aretha | Soul altar | 2 |
| Aha Jar | Jaraah | The hospital of the Duel Arena. | None |
| Arc O Line | Caroline | North Witchaven next to the row boat. After the Sea Slug quest, she is found wandering the coast. | 11 |
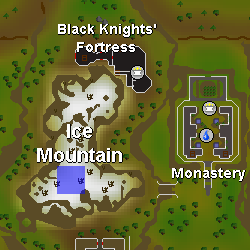
| Are Col | Oracle | The peak of Ice Mountain west of Edgeville. | 48 |
| Armchair The Pelt | Charlie the Tramp | Next to the south entrance of Varrock. | 0 |
| A Bas | Saba | Found in the cave on the path towards the Death Plateau west of Burthorpe. | None |
| Area Chef Trek | Father Aereck | Found in the church in Lumbridge.
Note: If players failed to save Jarvis during the 2017 Hallowe'en event, the answer is 20 instead of 19. |
19 |
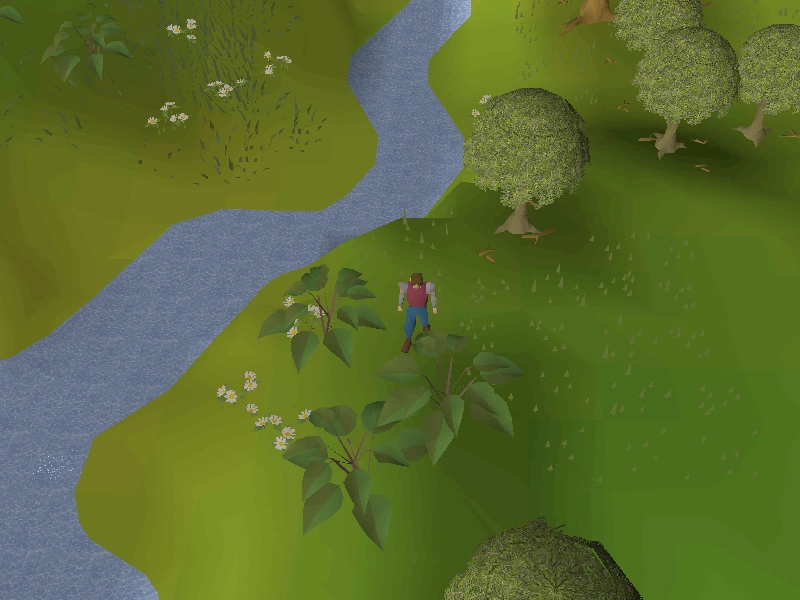
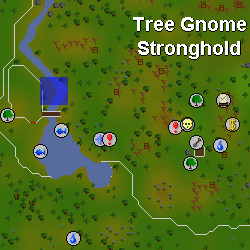
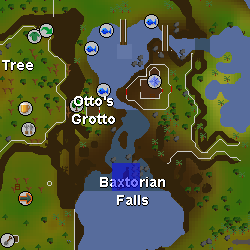
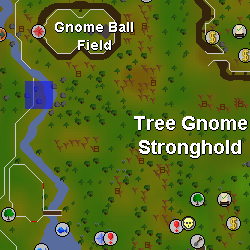
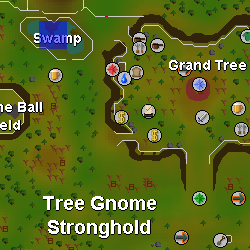
| Bail Trims | Brimstail | In the cave west of the Stronghold Slayer Cave entrance in the Tree Gnome Stronghold. | None |
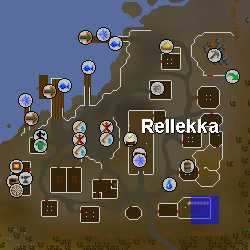
| Dt Run B | Brundt the Chieftain | Rellekka, inside the main hall. | 4 |
| Eek Zero Op | Zookeeper | Ardougne Zoo | 40 |
| El Ow | Lowe | Varrock archery store | None |
| Err Cure It | Recruiter | West Ardougne centre square | 20 |
| Goblin Kern | King Bolren | Tree Gnome Village, next to the Spirit Tree. | None |
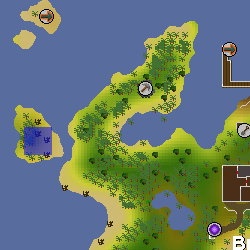
| Got A Boy | Gabooty | Centre of Tai Bwo Wannai. | 11 |
| Goblets Odd Toes | Otto Godblessed | South of the Barbarian Outpost, in Otto's Grotto. | 2 |
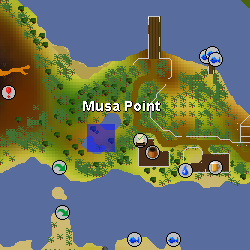
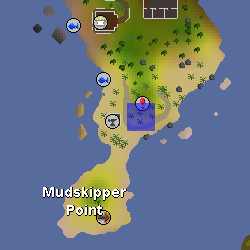
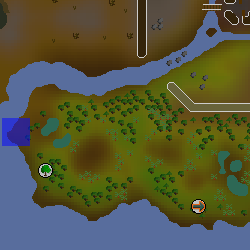
| Halt Us | Luthas | The owner of the banana plantation on Musa Point (Karamja). | 33 (or none) |
| Heoric | Eohric | Burthorpe Castle, top floor. | 36 |
| HIS PHOR | Horphis | Zeah, Arceuus House Library | 1 |
| I Am Sir | Marisi | Marisi is a farmer along the south coast of Great Kourend, in the allotment patch located within the Hosidius House. | 5 |
| Icy Fe | Fycie | Rantz's cave, south-east of Gu'Tanoth and far eastern portion of Feldip Hills (near the coast, north-east of gnome glider and AKS). | None |
| I Doom Icon Inn | Dominic Onion | Nightmare Zone | 9,500 |
| I Even | Nieve | The slayer master in Gnome Stronghold. | 2 |
| Kay Sir | Sir Kay | The courtyard in Camelot Castle. | 6 |
| Leakey | Kaylee | Rising Sun Inn in Falador. | 18 |
| Lark In Dog | King Roald | Ground floor of Varrock Palace. | 24 |
| Low Lag | Gallow | Vinery in the Great Kourend. | 12 |
| Me if | Femi | Just outside the gates of Tree Gnome Stronghold. | None |
| Nod Med | Edmond | Behind the most northwestern house in East Ardougne. | 3 |
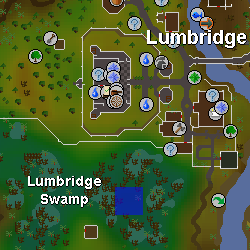
| Ok Co | Cook | Ground floor of Lumbridge Castle. | 9 |
| Pacinng a taie | Captain Ginea | Building east of Shayzien combat ring. | 113 |
| Peak Reflex | Flax keeper | Flax field south of Seers' Village. | 676 |
| Peaty Pert | Party Pete | Falador Party Room | None |
| Que Sir | Squire | Falador Castle Courtyard | 654 |
| R Ak Mi | Karim | Al Kharid kebab shop just south of the furnace. | 5 |
| Ratai | Taria | Rimmington bush patch | 7 |
| R SLICER | Clerris | Arceuus essence mine | 738 |
| Sand Nut | Dunstan | Anvil in northeastern Burthorpe. | 8 |
| Snah | Hans | Lumbridge Castle courtyard | None |
| Tamed Rocks | Dockmaster | Piscarilius House on Great Kourend, building north-east of the general store. | 5 |
| Thickno | Hickton | Hickton's Archery Emporium in Catherby. Second house east of the bank. | 2 |
| Veste | Steve | Up the stairs in the Asgarnian Ice Dungeon wyvern area. If Monkey Madness II is completed, he can be found by the entrance to the Stronghold Slayer Cave. | 2 |
Ciphers
Ciphers are a method of encrypting information. In Old School RuneScape, ciphers are used as a step in a Treasure Trail. They use a Caesar Shift in order to encrypt a NPC's name.
| Cipher | Solution | Location | Challenge answer |
|---|---|---|---|
| BMJ UIF LFCBC TFMMFS | Ali the Kebab seller | Pollnivneach | 399 |
| ECRVCKP MJCNGF | Captain Khaled | Large eastern building in Piscarilius House | 5 |
| GUHCHO | Drezel | Paterdomus temple; Drezel can be found in the cave north of the Paterdomus temple, which lies next to Canifis. Drezel is also an NPC for several quests where you might know him of. (fairy code CKS and then go north-west to the end of the bridge. Where you can climb down the trapdoor to find Drezel) | 7 |
| QSPGFTTPS HSBDLMFCPOF | Professor Gracklebone | Arceuus House Library, ground floor (fairy ring code CIS, if 80,000 coins paid) | 9 |
| USBJCPSO | Traiborn | Wizards' Tower, 1st floor[?] (fairy ring code DIS) | 3150 |
| ZCZL | Adam | Ironman tutor outside Lumbridge Castle | 666 |
Coordinates
Quick links: 00 01 02 03 04 05 06 07 08 09 10 11 12 13 14 15 16 17 18 19 20 21 22 23 24 25
During a Treasure Trail, a coordinate clue is a clue scroll that contains a set of coordinates. Much like the real-world longitude & latitude geographic coordinate system, coordinates in RuneScape indicate a precise point somewhere on the surface where the next clue scroll, or potentially the treasure casket, is buried. Coordinates are presented in the following format:
03 degrees 00 minutes north/south
02 degrees 00 minutes east/west
In RuneScape, one square of space is equivalent to 1.875 minutes.
Although a chart, sextant and watch may be used to determine one's present coordinates, players only need a spade in their inventory to dig up the clue.
On hard Treasure Trails, digging on the correct spot will cause a level 108 Saradomin wizard to appear, which must be defeated before the next clue scroll or the treasure casket may be dug up. If the coordinates are located in the Wilderness, a weaker level 65 Zamorak wizard will appear instead, which must also be defeated in order to dig up the next clue scroll or the treasure casket. Saradomin wizards are poisonous and use both Melee, using a Dragon dagger (p++), and the Magic spell Saradomin Strike. It is advised to wear dragonhide armour and use the Protect from Melee prayer when fighting Saradomin wizards. Zamorak wizards use only the spell Flames of Zamorak. It is advised to use the Protect from Magic prayer when fighting the Zamorak wizard in the Wilderness, and to look out for player-killers, as other players can interrupt your fight.
On elite Treasure Trails, digging on the correct spot will cause either a level 97 Armadylian guard or a level 125 Bandosian guard to appear, which must be defeated before the next clue scroll or the treasure casket may be dug up. Armadylian guards must be killed with either Ranged or Magic attacks, since they are in the form of an Aviansie. It is advised to use the Protect from Missiles prayer when fighting them, and Protect from Melee when fighting Bandosian guards.
Due to the current threat of player-killers, if the coordinates for your scroll is near level 36 Wilderness, it is advisable to use the waka canoe, which requires 57 Woodcutting. This can take you to level 36 Wilderness so that potential player-killers don't immediately spot you going into the Wilderness and kill you. In addition, potential player-killers won't know whether you went into the Wilderness or to a different area. As a result, you should go to one or more different locations, and then take the waka to the Wilderness. This is because if another player spots you in the Wilderness, they might attempt to kill you. Using a games necklace and teleporting to Corporeal Beast works in similar fashion.
On master Treasure Trails, digging in the correct spot will cause either three Ancient Wizards (levels 112, 98, 98) in multi-combat, or a level 140 Brassican Mage, which need to be defeated before the next clue scroll or the treasure casket may be dug up. If the coordinates are located in a multi-combat area, three Ancient wizards each attacking with a unique attack style. Melee wizards are poisonous with poison dealing 8 damage to a player. In single-combat zones, a Brassican Mage will appear, and its attacks cannot be stopped by protection prayers.
Following is a list of all known coordinate clues and their corresponding locations. The list is organised into ascending numerical value (for example, 00:00 north first, then 00:05 south, then 00:13 north, continuing accordingly). Shorthand writing is used together with normal writing. An example: 09.34N, 25.12E = 09 degrees and 34 minutes north, 25 degrees and 12 minutes east.
Remember: You must have a spade with you to dig up coordinate clues.
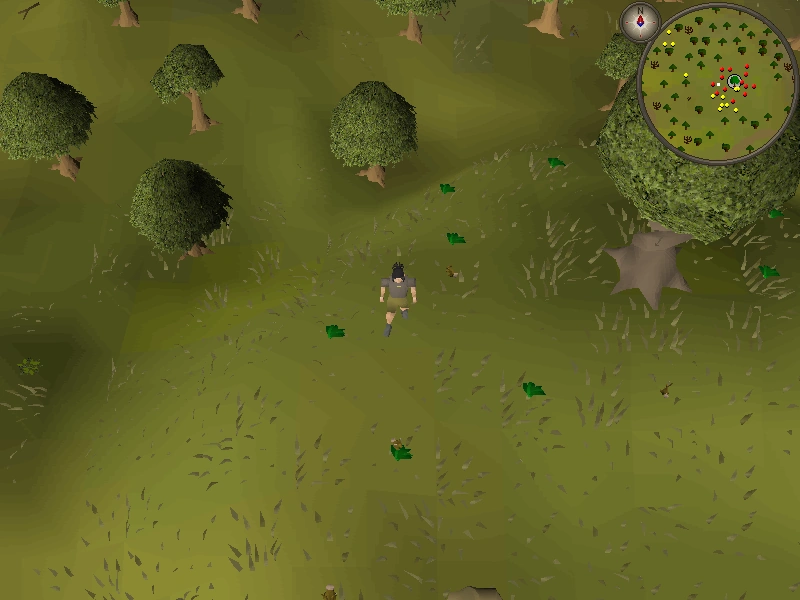
Note that some of the clues may require skill or quest requirements before you will be able to get to that location.' These quests, which must be finished or partially completed, include: Bone Voyage, Regicide, Legends' Quest, Nature Spirit, The Grand Tree, Fairytale II - Cure a Queen, Troll Stronghold, Cabin Fever, The Fremennik Trials, and Watchtower. Some coordinates will also require a certain skill levels to complete the clue, though the required level is low.
| Coordinates | Shorthand | Requirements | Fight |
|---|---|---|---|
| 00 degrees 05 minutes south, 01 degrees 13 minutes east |
00.05S, 01.13E |
None. | |
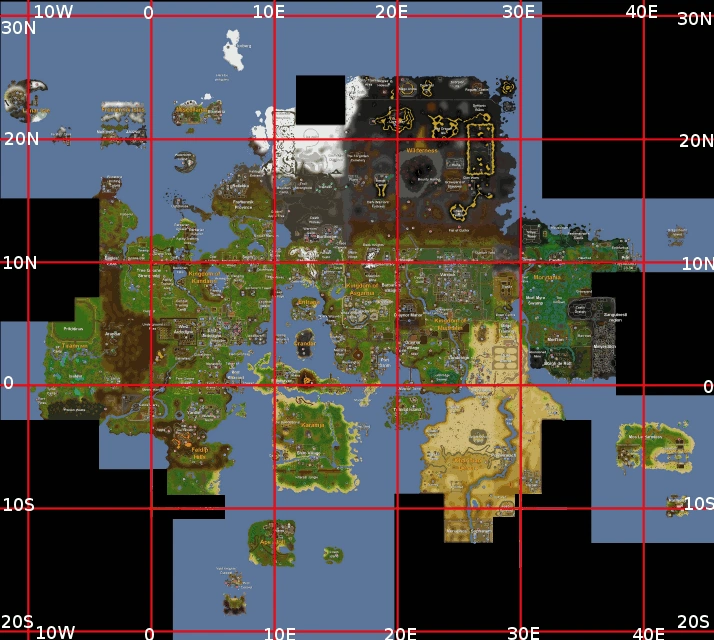
| Image | Map | ||
|
| ||
| Location notes | |||
| West of the Tree Gnome Village, almost directly south of the fruit tree patch. On the east side of the river from the Observatory. | |||
| Coordinates | Shorthand | Requirements | Fight |
|---|---|---|---|
| 00 degrees 13 minutes south, 13 degrees 58 minutes east |
00.13S, 13.58E |
None. | |
| Image | Map | ||
|
| ||
| Location notes | |||
| On Karamja, west of the general store in the free-to-play section of the island, in the middle of the two small lakes. Close to Amulet of glory teleport. | |||
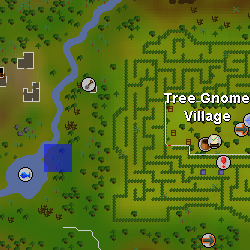
| Coordinates | Shorthand | Requirements | Fight |
|---|---|---|---|
| 00 degrees 18 minutes south, 09 degrees 28 minutes east |
00.18S, 09.28E |
None. | |
| Image | Map | ||
|
| ||
| Location notes | |||
| South-west of Brimhaven at the gold mine near the entrance to the Brimhaven Dungeon. Dig one space south of the gold rock in front of the dungeon door. | |||
| Coordinates | Shorthand | Requirements | Fight |
|---|---|---|---|
| 00 degrees 20 minutes south, 23 degrees 15 minutes east |
00.20S, 23.15E |
None. | |
| Image | Map | ||
|
| ||
| Location notes | |||
| South of the Water altar ruins. | |||
| Coordinates | Shorthand | Requirements | Fight |
|---|---|---|---|
| 00 degrees 30 minutes north, 24 degrees 16 minutes east |
00.30N, 24.16E |
None. | |
| Image | Map | ||
|
| ||
| Location notes | |||
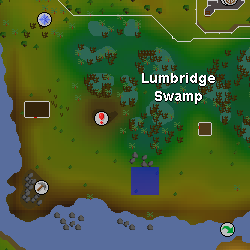
| North-east of the Zanaris shed entrance located in the Lumbridge Swamp. | |||
| Coordinates | Shorthand | Requirements | Fight |
|---|---|---|---|
| 00 degrees 31 minutes south, 17 degrees 43 minutes east |
00.31S, 17.43E |
None. | |
| Image | Map | ||
|
| ||
| Location notes | |||
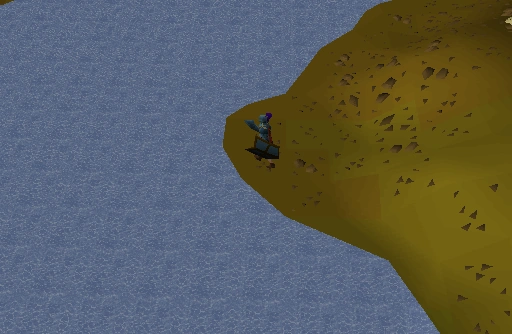
| South of Port Sarim, just south of the ladder to the Asgarnian Ice Dungeon, on the edge of the cliff. Close to fairy ring AIQ. | |||
| Coordinates | Shorthand | Requirements | Fight |
|---|---|---|---|
| 01 degrees 18 minutes south, 14 degrees 15 minutes east |
01.18S, 14.15E |
None. | |
| Image | Map | ||
|

| ||
| Location notes | |||
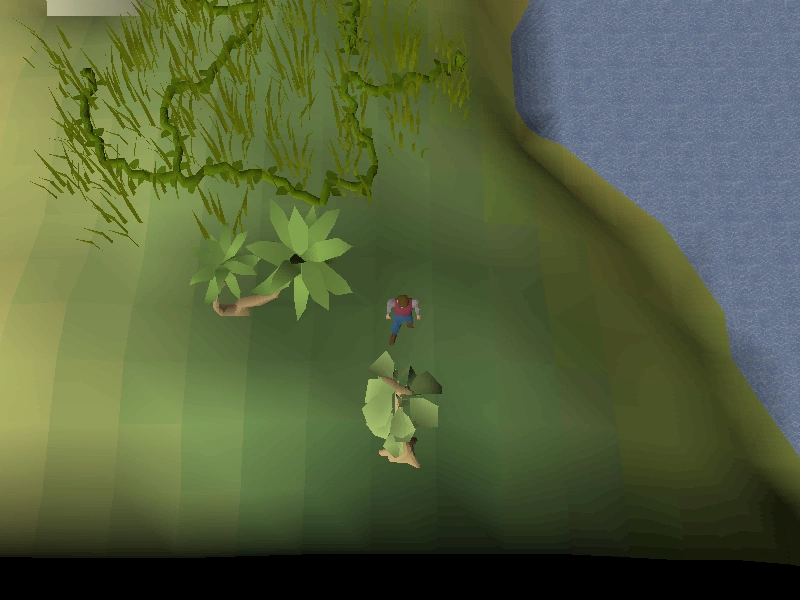
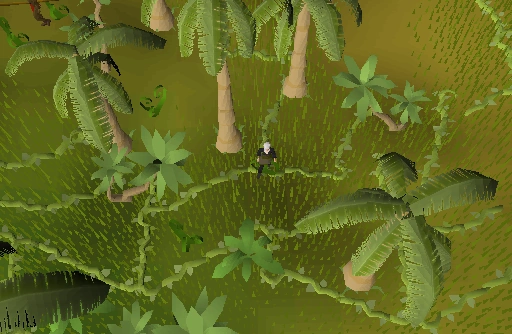
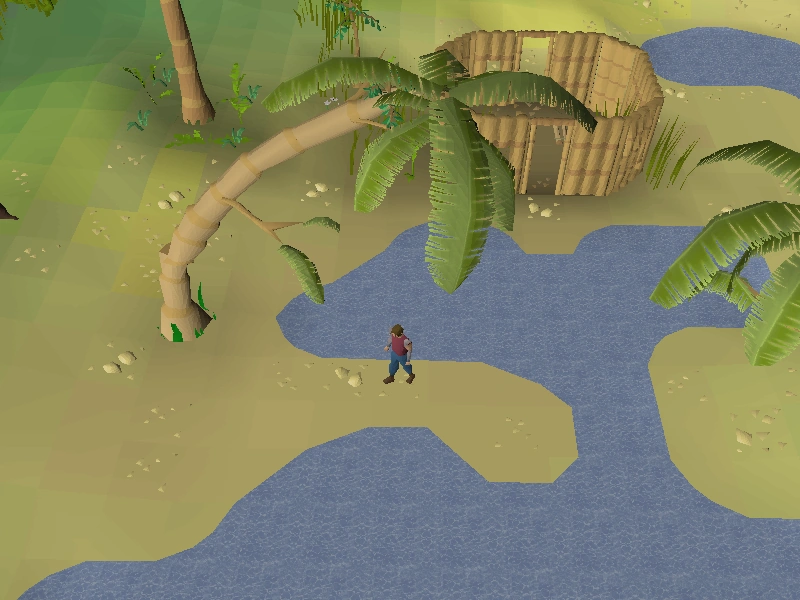
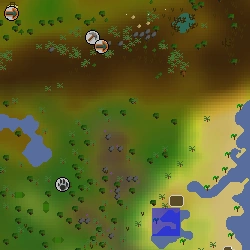
| Across the water from Musa Point, on the western seaweed spawn next to the river. Tiadeche from the Tai Bwo Wannai Trio quest can be found to the east. Use fairy ring code DKP or the gnome glider transport to Karamja. | |||
| Coordinates | Shorthand | Requirements | Fight |
|---|---|---|---|
| 01 degrees 26 minutes north, 08 degrees 01 minutes east |
01.26N, 08.01E |
10 |
|
| Image | Map | ||
|
| ||
| Location notes | |||
| In the centre of Moss Giant Island west of Brimhaven. The island can be found by swinging on the rope swings west of Brimhaven. | |||
| Coordinates | Shorthand | Requirements | Fight |
|---|---|---|---|
| 01 degrees 35 minutes south, 07 degrees 28 minutes east |
01.35S, 07.28E |
None. | |
| Image | Map | ||
|
| ||
| Location notes | |||
| On the penisula to Hazelmere's house, directly east of Yanille. Use the fairy ring code CLS and run north. Dig between a boulder, a leafy tree, and a creeping plant. | |||
| Coordinates | Shorthand | Requirements | Fight |
|---|---|---|---|
| 02 degrees 43 minutes south, 33 degrees 26 minutes east |
02.43S, 33.26E |
None. | |
| Image | Map | ||
|
| ||
| Location notes | |||
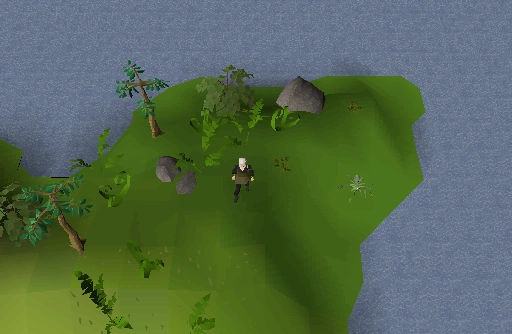
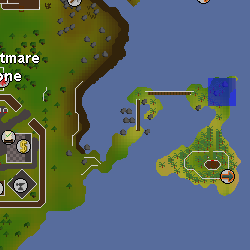
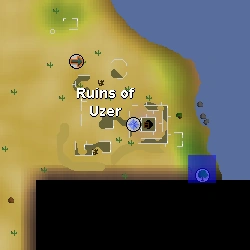
| Directly north of the teak tree south-east of Uzer. Can be reached relatively easily via fairy ring DLQ in Nardah by running north and then east following the map border. | |||
| Coordinates | Shorthand | Requirements | Fight |
|---|---|---|---|
| 02 degrees 48 minutes north, 22 degrees 30 minutes east |
02.48N, 22.30E |
None. | |
| Image | Map | ||

|
| ||
| Location notes | |||
| Just west of the trapdoor leading to the H.A.M. Hideout, dig 2 spaces east and 1 south of the nearest tree to the building. | |||
| Coordinates | Shorthand | Requirements | Fight |
|---|---|---|---|
| 02 degrees 50 minutes north, 06 degrees 20 minutes east |
02.50N, 06.20E |
None. | |
| Image | Map | ||
|
| ||
| Location notes | |||
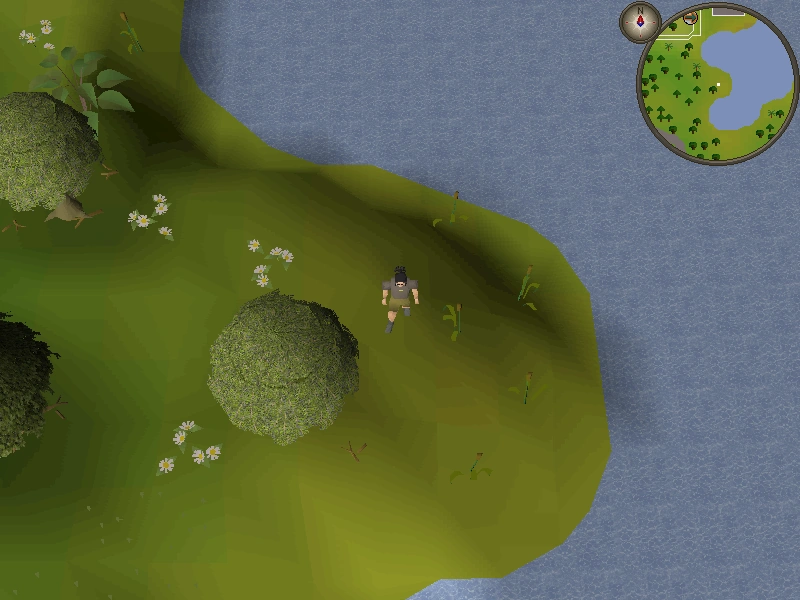
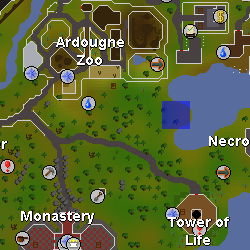
| South of Ardougne Zoo, on a small cape. Can be reached easily via DJP next to the Tower of Life. | |||
| Coordinates | Shorthand | Requirements | Fight |
|---|---|---|---|
| 03 degrees 07 minutes south, 03 degrees 41 minutes west |
03.07S, 03.41W |
None. | |
| Image | Map | ||
|
| ||
| Location notes | |||
| Just south-west of Castle Wars, fairy ring code BKP. | |||
| Coordinates | Shorthand | Requirements | Fight |
|---|---|---|---|
| 03 degrees 35 minutes south, 13 degrees 35 minutes east |
03.35S, 13.35E |
None. | |
| Image | Map | ||
|
| ||
| Location notes | |||
| On Karamja, north of the nature altar. | |||
| Coordinates | Shorthand | Requirements | Fight |
|---|---|---|---|
| 04 degrees 00 minutes south, 12 degrees 46 minutes east |
04.00S, 12.46E |
None. | |
| Image | Map | ||
|
| ||
| Location notes | |||
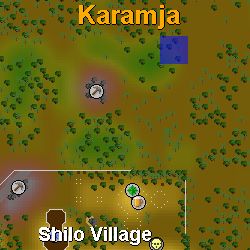
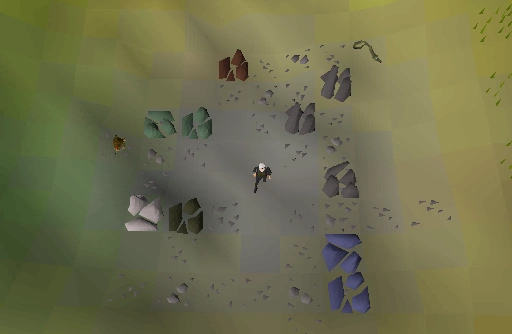
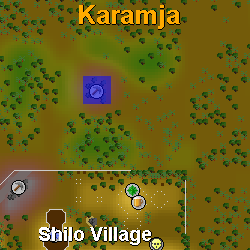
| In the centre of the mine, north of Shilo Village. This is not the gem rock mine, but rather the one just north-west of the nature altar, where you find volencia moss during the Jungle Potion quest. Dig two spaces north-west of a mithril rock. You can use fairy ring code CKR and run north. | |||
| Coordinates | Shorthand | Requirements | Fight |
|---|---|---|---|
| 04 degrees 13 minutes north, 12 degrees 45 minutes east |
04.13N, 12.45E |
Partial completion of Dragon Slayer | |
| Image | Map | ||
|
| ||
| Location notes | |||
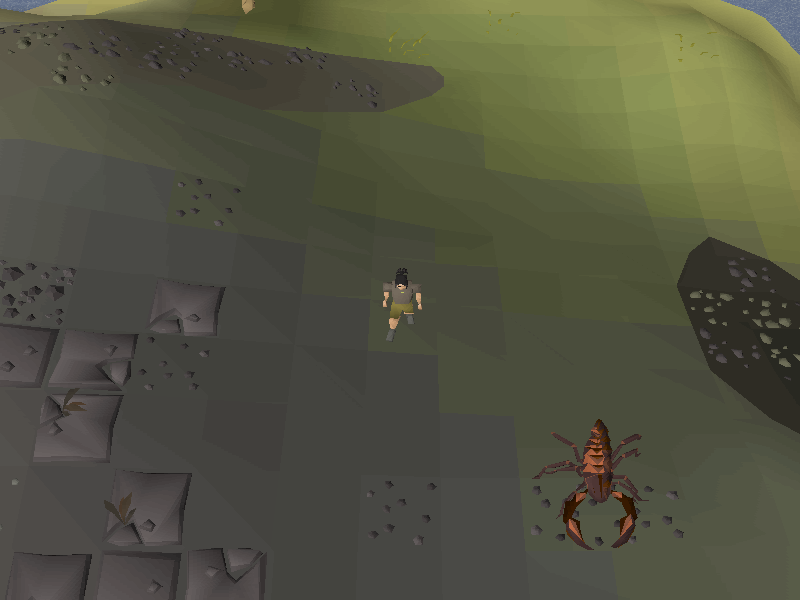
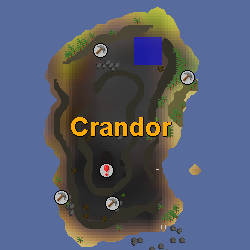
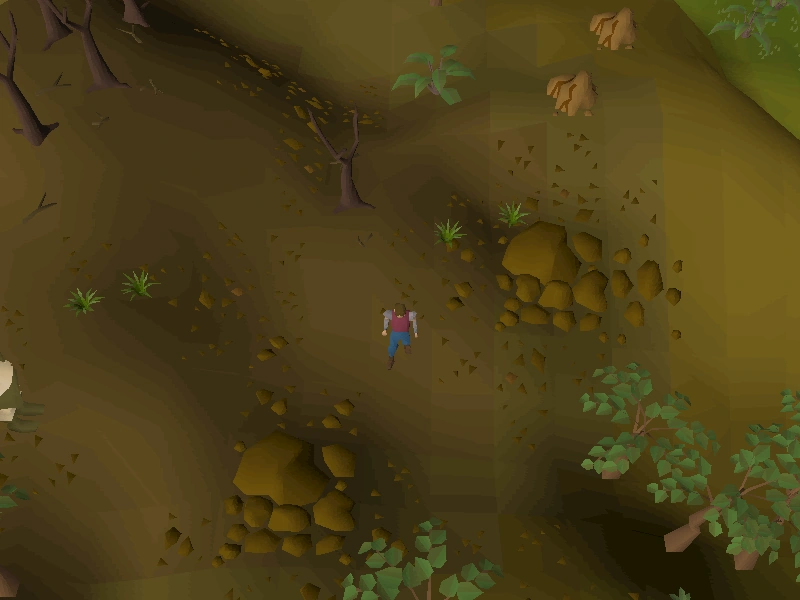
| North side of Crandor. King Scorpions can be aggressive to low levelled players. | |||
| Coordinates | Shorthand | Requirements | Fight |
|---|---|---|---|
| 05 degrees 20 minutes south, 04 degrees 28 minutes east |
05.20S, 04.28E |
None. | |
| Image | Map | ||
|
| ||
| Location notes | |||
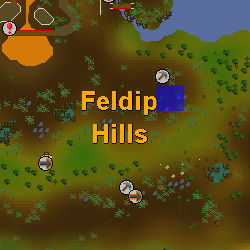
| Feldip Hills, south-east of Gu'Tanoth and north of fairy ring code AKS. | |||
| Coordinates | Shorthand | Requirements | Fight |
|---|---|---|---|
| 05 degrees 43 minutes north, 23 degrees 05 minutes east |
05.43N, 23.05E |
None. | |
| Image | Map | ||
|
| ||
| Location notes | |||
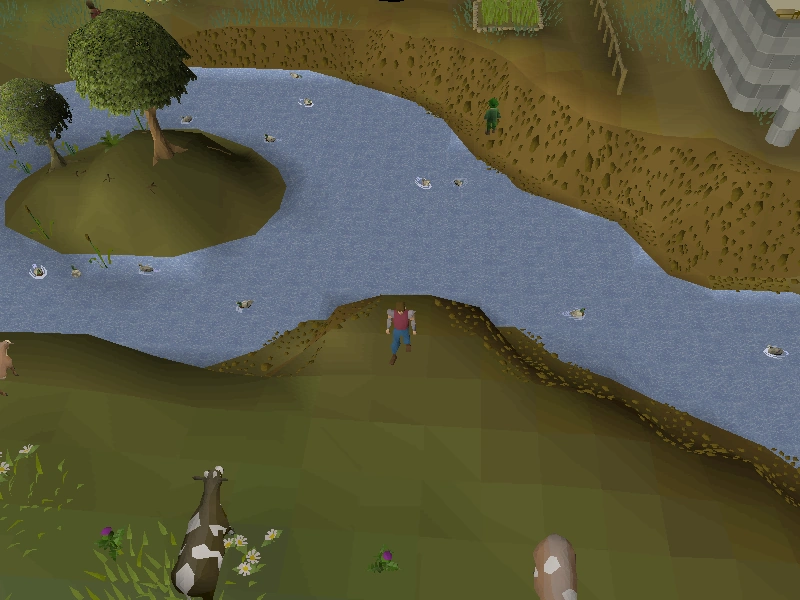
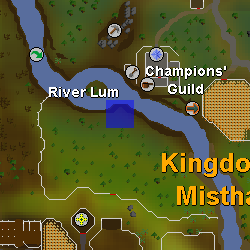
| Just south of the Champions' Guild, opposite side of the River Lum in Lumbridge | |||
| Coordinates | Shorthand | Requirements | Fight |
|---|---|---|---|
| 06 degrees 31 minutes north, 01 degrees 46 minutes west |
06.31N, 01.46W |
None. | |
| Image | Map | ||
|
| ||
| Location notes | |||
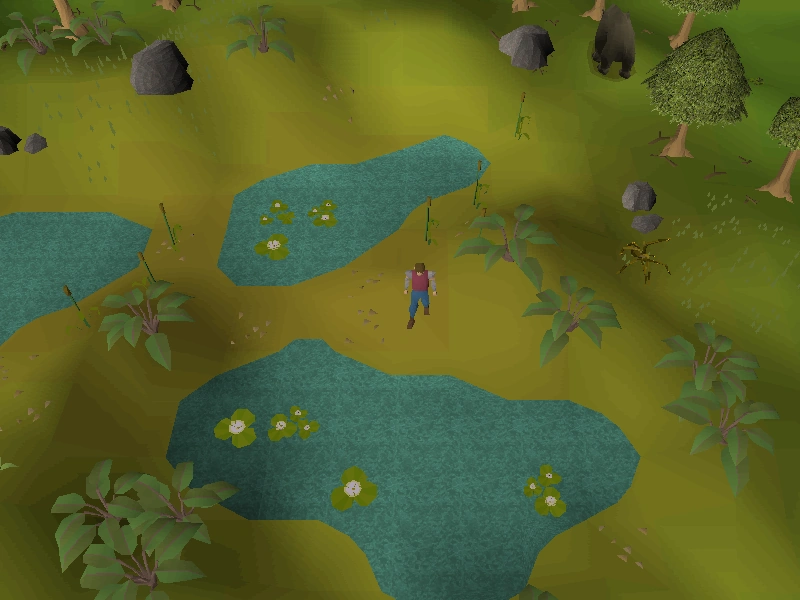
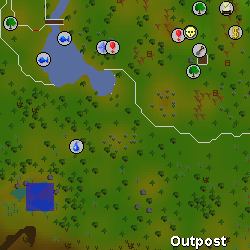
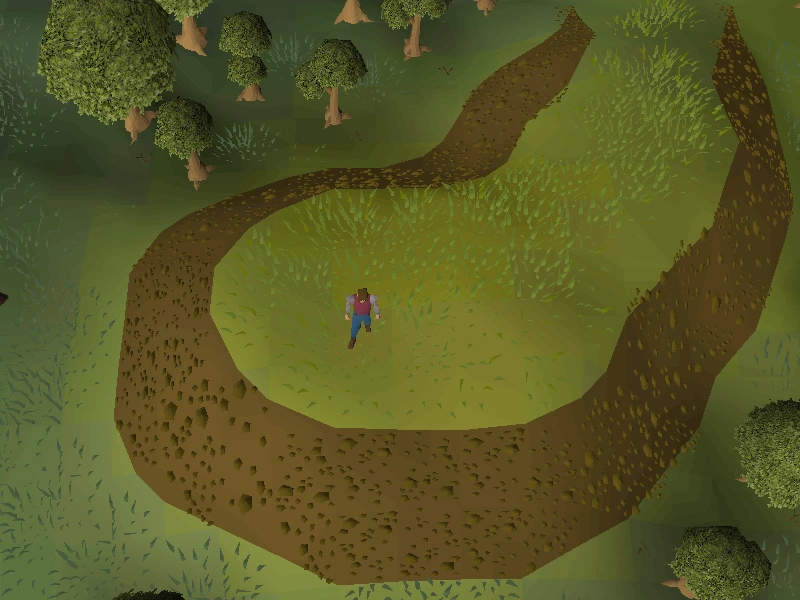
| Travel south-west of the Tree Gnome Stronghold, and you will come across three ponds. Dig in between the two eastern ponds. Easily reached by teleporting with the Necklace of passage by teleporting to the Outpost. | |||
| Coordinates | Shorthand | Requirements | Fight |
|---|---|---|---|
| 06 degrees 41 minutes north, 27 degrees 15 minutes east |
06.41N, 27.15E |
None | |
| Image | Map | ||
|
| ||
| Location notes | |||
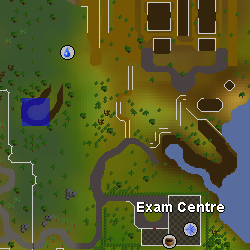
| Dig on the hill north-west of the Exam Centre. | |||
| Coordinates | Shorthand | Requirements | Fight |
|---|---|---|---|
| 06 degrees 58 minutes north, 21 degrees 16 minutes east |
06.58N, 21.16E |
None. | |
| Image | Map | ||
|
| ||
| Location notes | |||
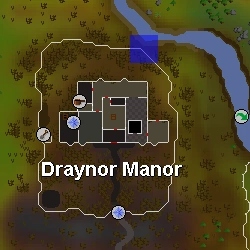
| Located at the north-east fence outside of Draynor Manor, on the southern side of the River Lum. | |||
| Coordinates | Shorthand | Requirements | Fight |
|---|---|---|---|
| 07 degrees 05 minutes north, 30 degrees 56 minutes east |
07.05N, 30.56E |
Priest in Peril (to enter Canifis) | |
| Image | Map | ||
|
| ||
| Location notes | |||
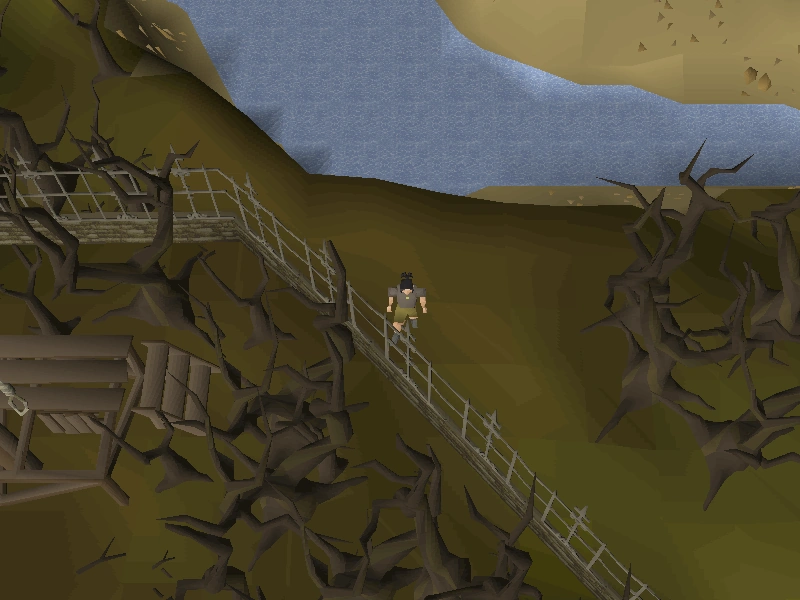
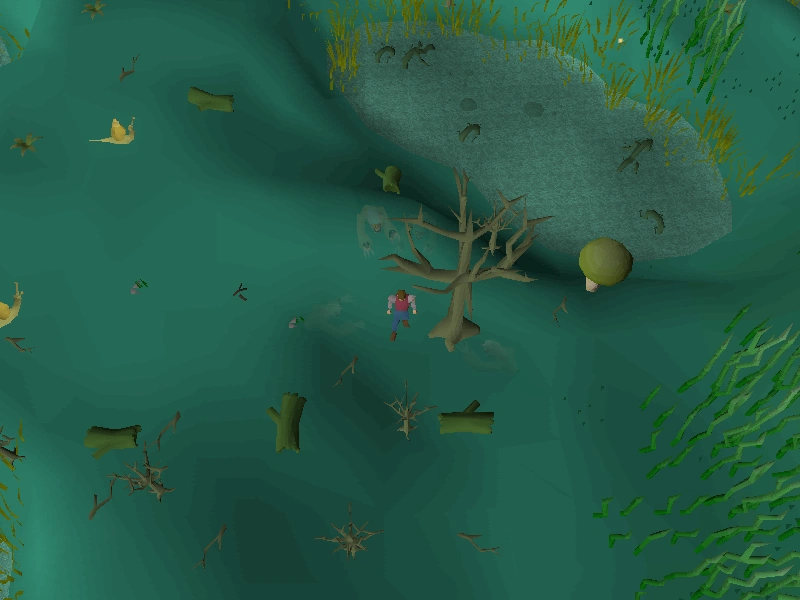
| In Mort Myre Swamp, north of the Nature Grotto. Next pond south of the two most western fishing spots. Dig west of a rotting swamp tree. Note that there are ghasts in the swamp, so be sure to bring some druid pouches. One can use fairy ring BKR and run south-west. | |||
| Coordinates | Shorthand | Requirements | Fight |
|---|---|---|---|
| 07 degrees 33 minutes north, 15 degrees 00 minutes east |
07.33N, 15.00E |
None. | |
| Image | Map | ||
|
| ||
| Location notes | |||
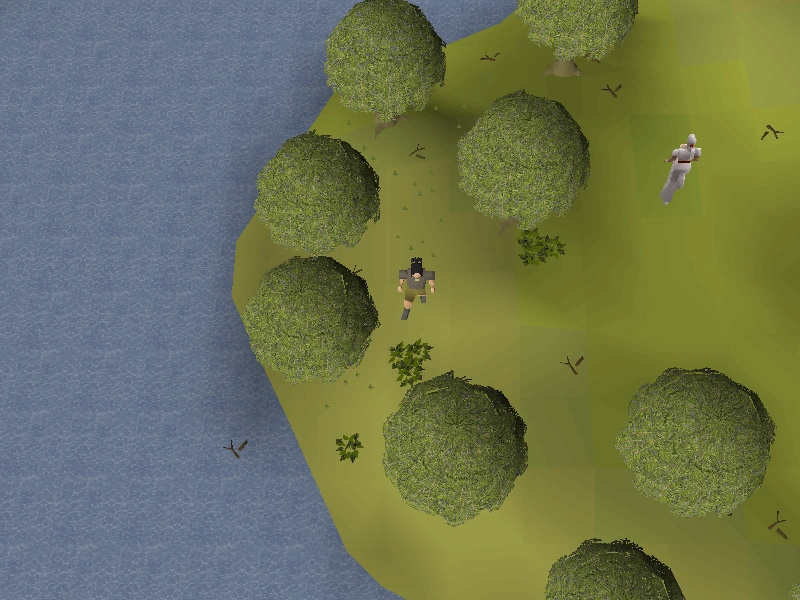
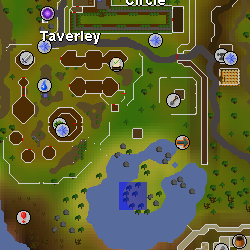
| South-east of Taverley, on the peninsula where the Lady of the Lake wanders around. Dig north of the non-examinable bush on the western part of the peninsula. | |||
| Coordinates | Shorthand | Requirements | Fight |
|---|---|---|---|
| 08 degrees 11 minutes south, 04 degrees 48 minutes east |
08.11S, 04.48E |
Spade | |
| Image | Map | ||
|
| ||
| Location notes | |||
| South-east edge of Feldip Hills, by the crimson swifts. South-east of fairy ring AKS. | |||
| Coordinates | Shorthand | Requirements | Fight |
|---|---|---|---|
| 08 degrees 33 minutes north, 01 degrees 39 minutes west |
08.33N, 01.39W |
None. | |
| Image | Map | ||
|
| ||
| Location notes | |||
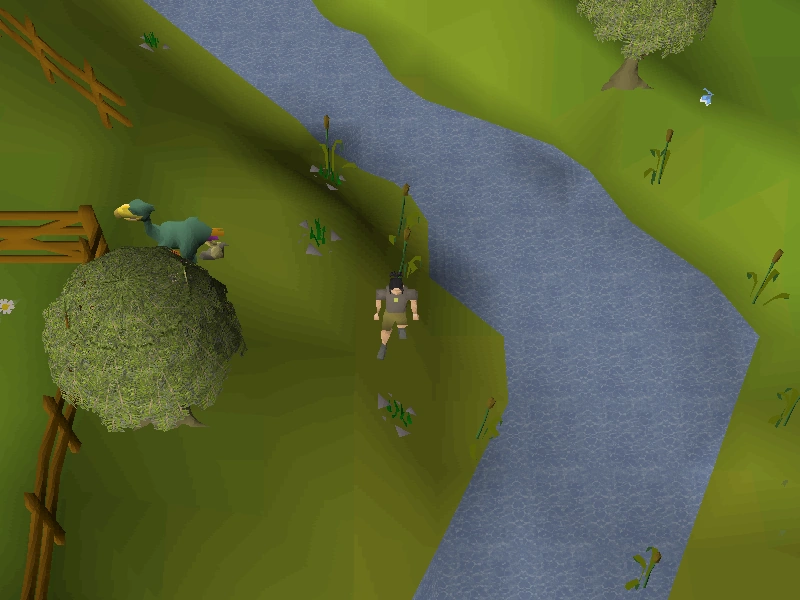
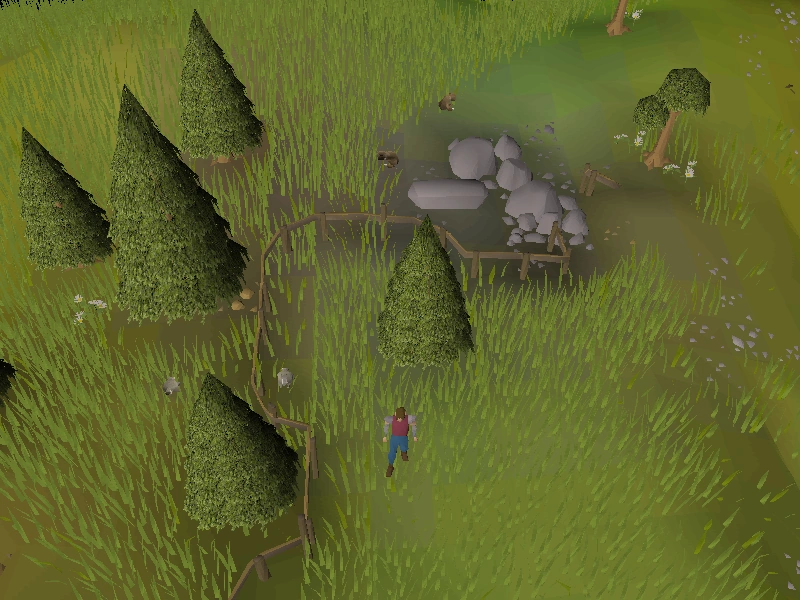
| At Tree Gnome Stronghold, in the south-western section there is a bridge, and a pen containing terrorbirds. Open the gate in the east of the pen and go to the edge of the river as far east as possible and dig there. | |||
| Coordinates | Shorthand | Requirements | Fight |
|---|---|---|---|
| 09 degrees 33 minutes north, 02 degrees 15 minutes east |
09.33N, 02.15E |
Started Waterfall Quest
Rope |
|
| Image | Map | ||
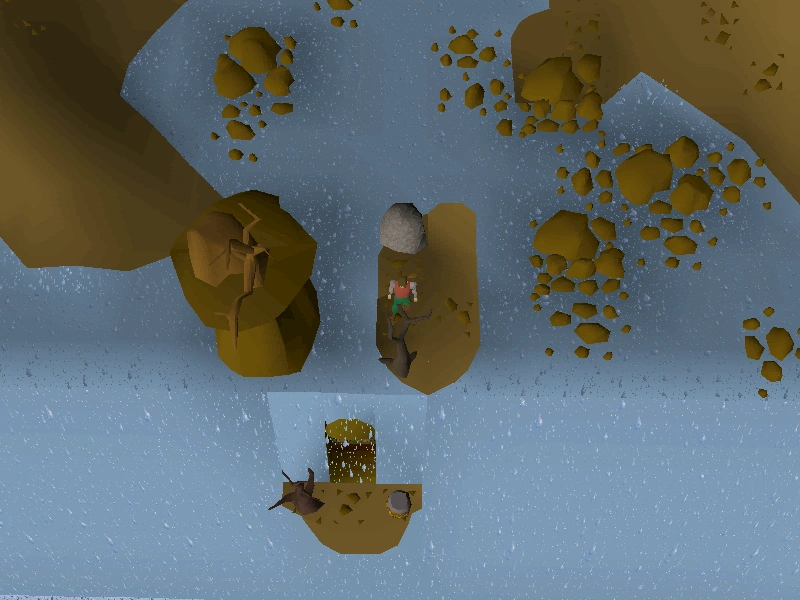
|
| ||
| Location notes | |||
| Go to the Baxtorian Falls, board the log raft, use a rope with the rock to get to the second island with the dead tree. Dig north of the dead tree. | |||
| Coordinates | Shorthand | Requirements | Fight |
|---|---|---|---|
| 09 degrees 35 minutes north, 01 degrees 50 minutes west |
09.35N, 01.50W |
None. | |
| Image | Map | ||
|
| ||
| Location notes | |||
| This is on the west side of the river in the Gnome Stronghold. Walk north of the terrorbird pen and dig right above the rock. | |||
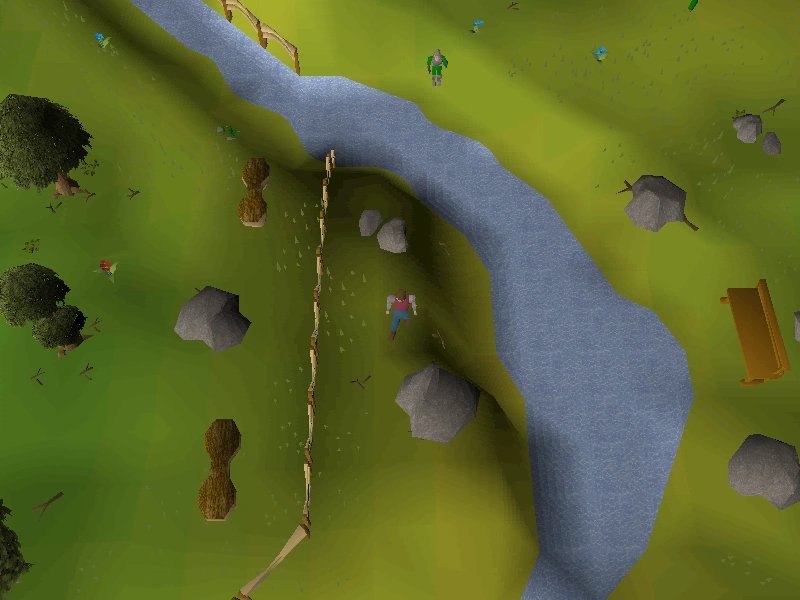
| Coordinates | Shorthand | Requirements | Fight |
|---|---|---|---|
| 09 degrees 48 minutes north, 17 degrees 39 minutes east |
09.48N, 17.39E |
None. | |
| Image | Map | ||
|
| ||
| Location notes | |||
| Ice Mountain, located north of Barbarian Village. | |||
| Coordinates | Shorthand | Requirements | Fight |
|---|---|---|---|
| 10 degrees 45 minutes north, 04 degrees 31 minutes east |
10.45N, 04.31E |
20 Agility for Shortcut | |
| Image | Map | ||
|
| ||
| Location notes | |||
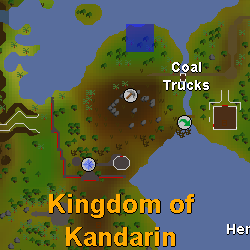
| By the shore line north of the Coal Trucks. | |||
| Coordinates | Shorthand | Requirements | Fight |
|---|---|---|---|
| 11 degrees 03 minutes north, 31 degrees 20 minutes east |
11.03N, 31.20E |
Completion of Priest in Peril | |
| Image | Map | ||
|
| ||
| Location notes | |||
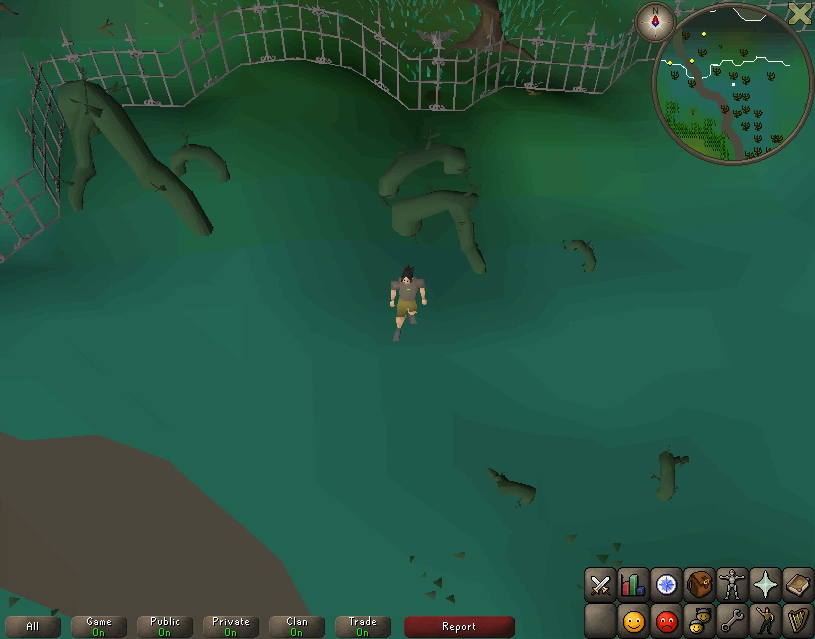
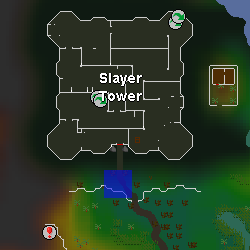
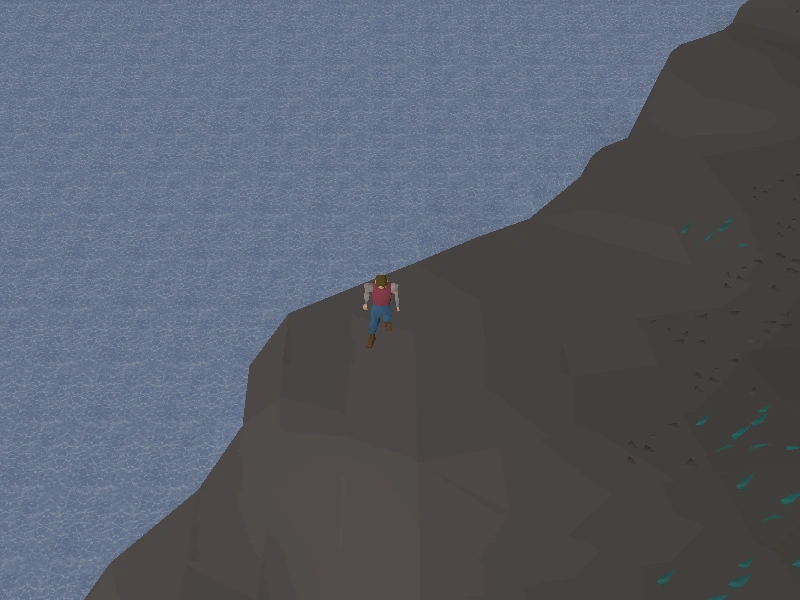
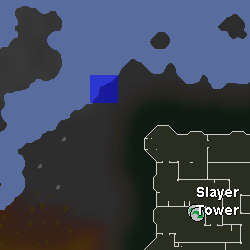
| South of the big roots that are found east of the path to the Slayer Tower. North of the fairy ring code CKS. | |||
| Coordinates | Shorthand | Requirements | Fight |
|---|---|---|---|
| 11 degrees 05 minutes north, 00 degrees 45 minutes west |
11.05N, 00.45W |
None. | |
| Image | Map | ||
|
| ||
| Location notes | |||
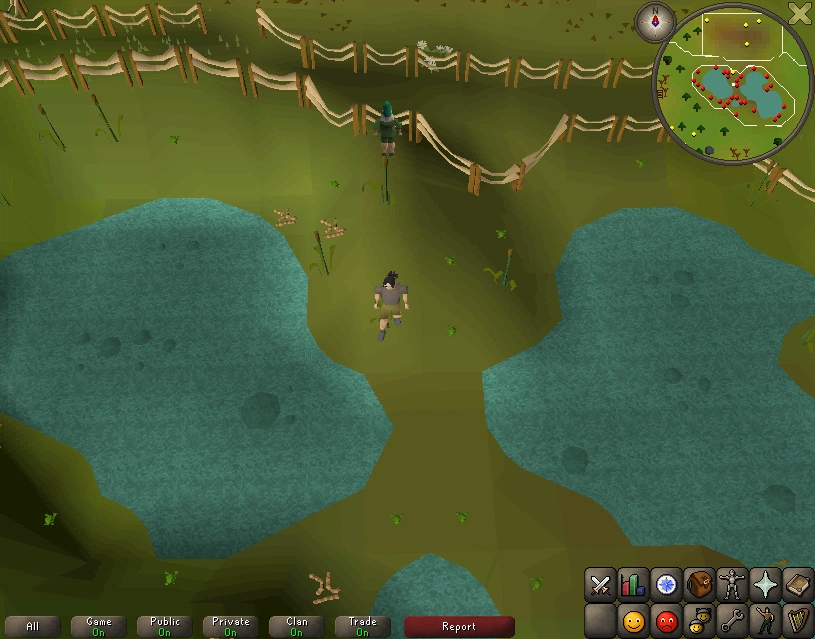
| In the swamp located in the north-west corner of the Tree Gnome Stronghold, west of the Grand Tree, directly south of the tortoise pen. | |||
| Coordinates | Shorthand | Requirements | Fight |
|---|---|---|---|
| 11 degrees 18 minutes north, 30 degrees 54 minutes east |
11.18N, 30.54E |
Completion of Priest in Peril. | |
| Image | Map | ||
|
| ||
| Location notes | |||
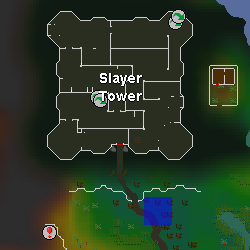
| On the path to the Slayer Tower, just before the entrance. Easily reached by teleporting with fairy ring code CKS. | |||
| Coordinates | Shorthand | Requirements | Fight |
|---|---|---|---|
| 11 degrees 33 minutes north, 02 degrees 24 minutes west |
11.33N, 02.24W |
None. | |
| Image | Map | ||
|
| ||
| Location notes | |||
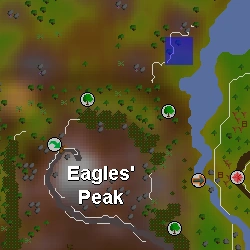
| North-east of Eagles' Peak. Dig on the eastern side of the fence just slightly south of the coniferous tree. Easily reached by teleporting with the fairy rings with code AKQ. | |||
| Coordinates | Shorthand | Requirements | Fight |
|---|---|---|---|
| 11 degrees 41 minutes north, 14 degrees 58 minutes east |
11.41N, 14.58E |
None. | |
| Image | Map | ||
|
| ||
| Location notes | |||
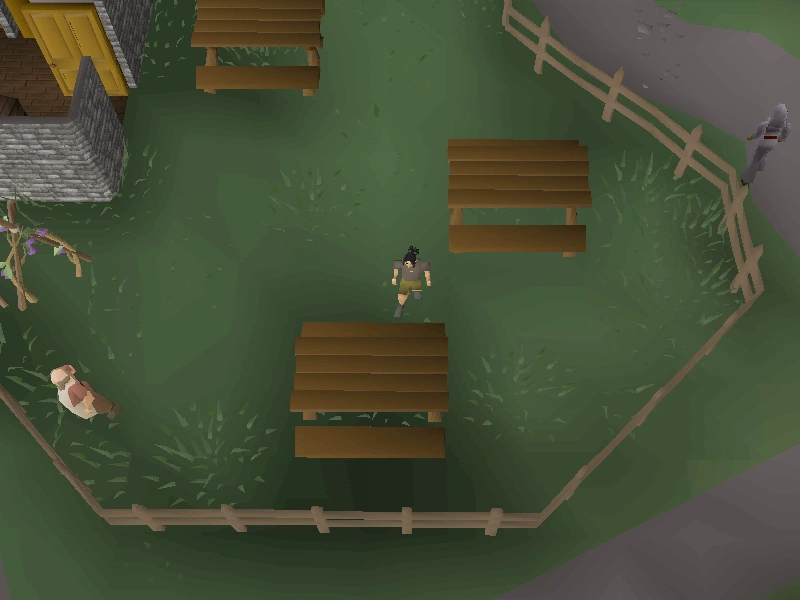
| Immediately north of a table in Burthorpe located east of the pub and west of Turael's house. | |||
| Coordinates | Shorthand | Requirements | Fight |
|---|---|---|---|
| 12 degrees 28 minutes north, 34 degrees 37 minutes east |
12.28N, 34.37E |
Priest in Peril | |
| Image | Map | ||

|
| ||
| Location notes | |||
| In the castle grounds of Fenkenstrain's Castle in Morytania. Dig two steps north of the northernmost door. | |||
| Coordinates | Shorthand | Requirements | Fight |
|---|---|---|---|
| 13 degrees 28 minutes north, 29 degrees 43 minutes east |
13.28N, 29.43E |
None. | |
| Image | Map | ||
|
| ||
| Location notes | |||
| As far as you can go east in level 9 Wilderness, north-west of the Slayer Tower on the map. | |||
| Coordinates | Shorthand | Requirements | Fight |
|---|---|---|---|
| 14 degrees 20 minutes north, 30 degrees 45 minutes west |
14.20N, 30.45W |
None. | |
| Image | Map | ||
|
| ||
| Location notes | |||
| Dig in the graveyard just east of the hill giants west of the Shayzien House bank in Great Kourend. Easily reached by teleporting with the fairy rings with code DJR. | |||
| Coordinates | Shorthand | Requirements | Fight |
|---|---|---|---|
| 14 degrees 54 minutes north, 9 degrees 13 minutes east |
14.54N, 9.13E |
None. | |
| Image | Map | ||
|
| ||
| Location notes | |||
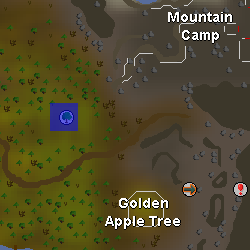
| Two paces west of the Swaying tree, located east of Rellekka. Easily reached by using the fairy ring code AJR. | |||
| Coordinates | Shorthand | Requirements | Fight |
|---|---|---|---|
| 15 degrees 22 minutes north, 07 degrees 31 minutes east |
15.22N, 07.31E |
None. | |
| Image | Map | ||
|
| ||
| Location notes | |||
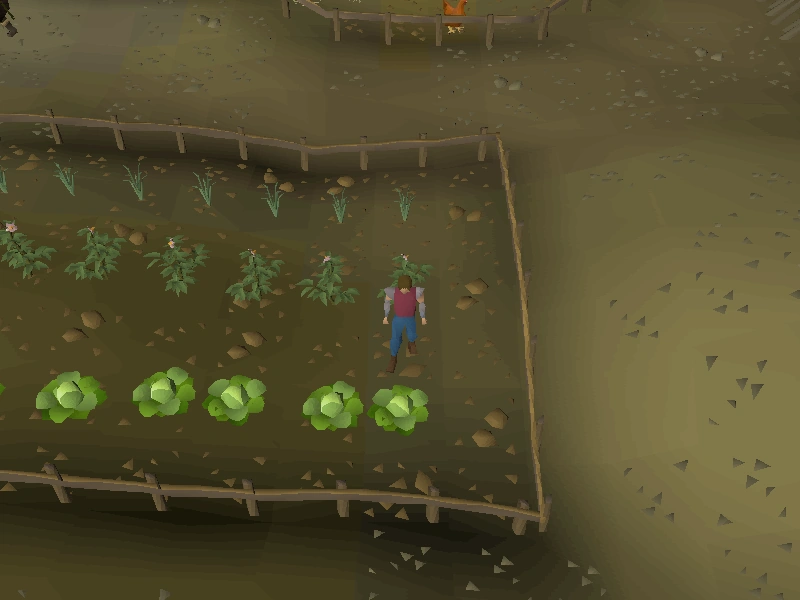
| In Pontak's garden in south-eastern Rellekka, between the cabbages and the potatoes. Easily reached by teleporting with the lyre or Fremennik sea boots. | |||
| Coordinates | Shorthand | Requirements | Fight |
|---|---|---|---|
| 22 degrees 30 minutes north, 03 degrees 01 minutes east |
22.30N, 03.01E |
Completion of the Fremennik Trials quest | |
| Image | Map | ||
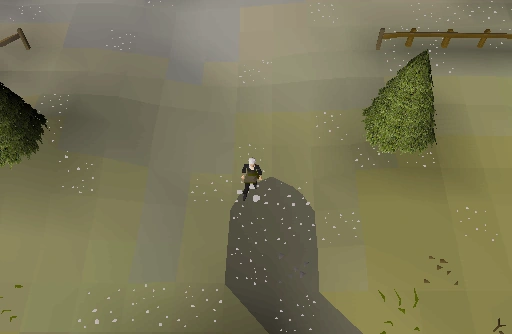
|
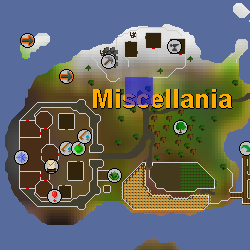
| ||
| Location notes | |||
| At the end of the path leading to the mining area on Miscellania. Accessible via fairy ring code CIP or teleporting with the Ring of wealth. | |||
Cryptic clues
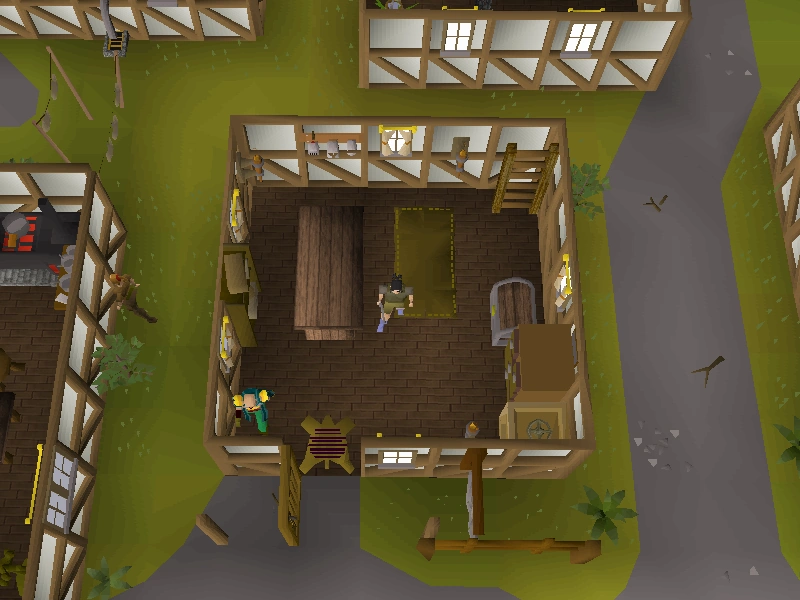
Cryptic clues are common riddle clues that can be found in all level Treasure Trails. These clues demand a fairly wide variety of tasks. The tasks can be from speaking to an NPC, searching a designated crate, or directing the player to dig in some fairly obscure location. For higher difficulty Treasure Trails, players may have to complete additional side tasks in order to complete the clue. These side task challenges may include finding a key or completing a puzzle box.
When doing medium Treasure Trails, clues will occasionally lead to a locked chest or drawer, which requires a key to open. Attempting to open the chest or drawer will provide a clue to which specific, usually local, monster to kill. Monsters that drop treasure trail keys drop them only when the player is in possession of that clue. It is worth noting that for clue steps involving keys, it is possible to obtain the key before reading the hint, which could save the player some time.
During hard or master clues, players may receive a puzzle box challenge from a NPC. Players must unscramble the image in order to receive the next clue or the reward.
During master clues, players are given three cryptic clues. Players must go to the destination each cryptic provides and dig at the correct spot to obtain a torn part of the clue scroll. When all three are obtained they automatically fuse to become the next step in the treasure trail or a casket.
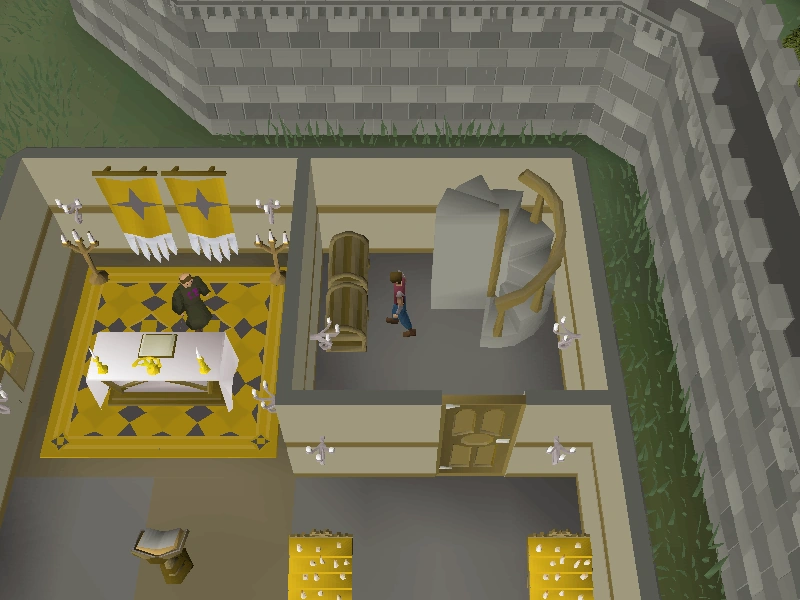
| Clue | Notes | Task | Image |
|---|---|---|---|
| A town with a different sort of night-life is your destination.
Search for some crates in one of the houses. |
Search the crate inside of the clothes shop in Canifis. | 
| |
| Find a crate close to the monks that like to paaarty! | The crate is in the east side of the Kandarin Monastery, which is south of Ardougne and where Brother Omad is found. | 
| |
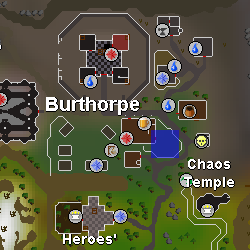
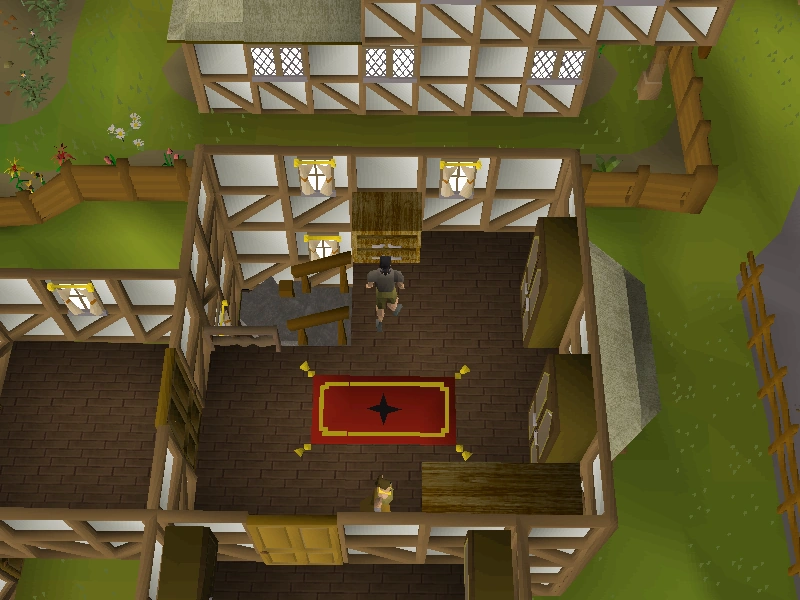
| Go to the village being attacked by trolls, search the drawers in one of the houses. | Go to Dunstan's house in the north-east corner of Burthorpe. Kill Penda in the Toad and Chicken to obtain the key. | 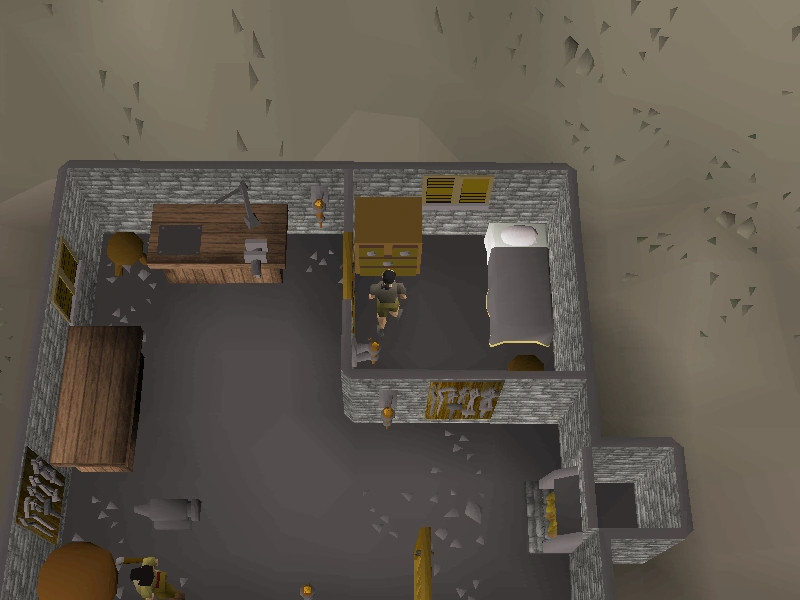
| |
| Go to this building to be illuminated, and check the drawers while you are there. | The 1st floor[?] of the Lighthouse (fairy ring code ALP).
Kill a Rellekka marketplace guard to obtain the key. (NOTE: Starting the Horror from the Deep quest and speaking to Gunnjorn to obtain the Lighthouse key is required! Level 35 Agility is required to talk to Gunnjorn. You must also repair the bridge with two wooden planks, a hammer and 60 steel nails.) |
| |
| In a town where everyone has perfect vision, seek some locked drawers in a house that sits opposite a workshop. | The drawers is in Seers' Village in the house south of the Elemental Workshop entrance.
Kill any chicken to obtain a key. (Note: The closest chicken is just by the entrance of the Ranging Guild, west of Seers' Village.) |
| |
| In a town where the guards are armed with maces, search the upstairs rooms of the Public House. | Search the drawers in the pub north of Ardougne Castle.
Kill a guard dog at Handelmort Mansion to obtain the key. |
| |
| In a town where thieves steal from stalls, search for some drawers in the upstairs of a house near the bank. | Kill any guard located around East Ardougne for a medium key. Then, search the drawers in the upstairs hallway of Jerico's house, which is the house with pigeon cages located south of the northern East Ardougne bank. | 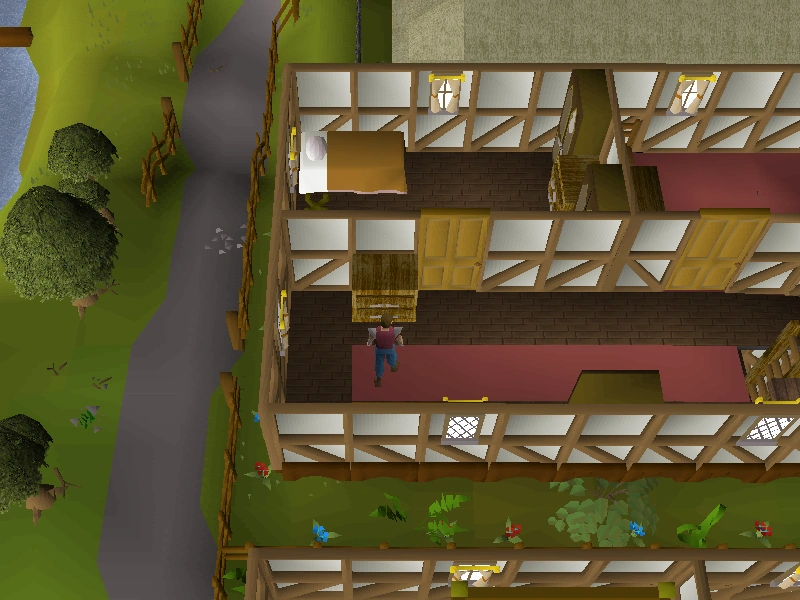
| |
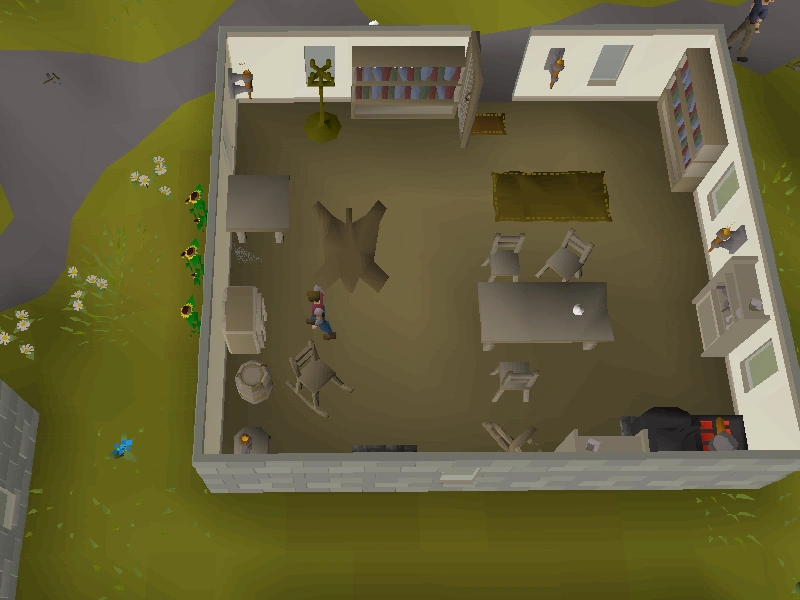
| In a town where wizards are known to gather, search upstairs in a large house to the north. | Travel to Yanille and head to the house northwest of the bank. Kill a man nearby to receive a key. Go upstairs in the house and search the chest. | 
| |
| In a village made of bamboo, look for some crates under one of the houses. | Search the crate by the house at the northern point of the broken jungle fence in Tai Bwo Wannai. | 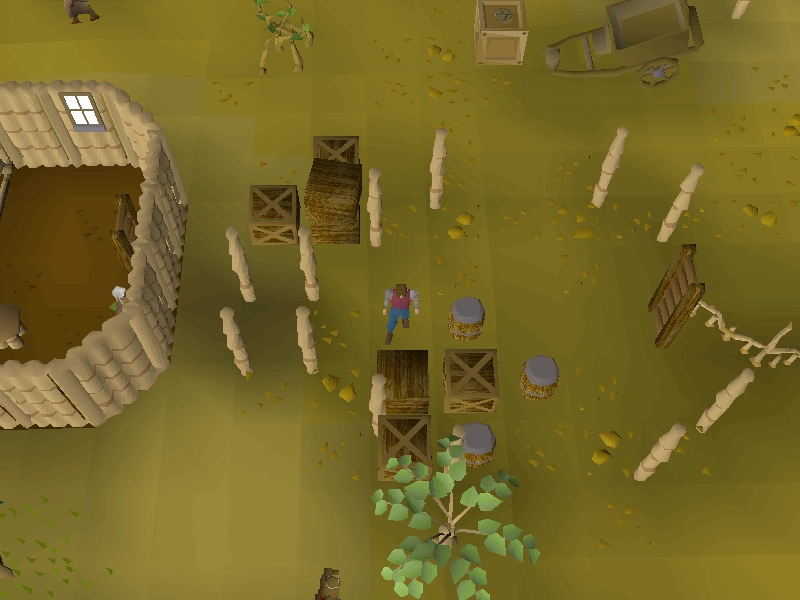
| |
| Probably filled with wizards socks. | Kill one of the wizards for the key. Search the drawers in the basement of the Wizards' Tower south of Draynor Village. (Fairy Ring D-I-S) | 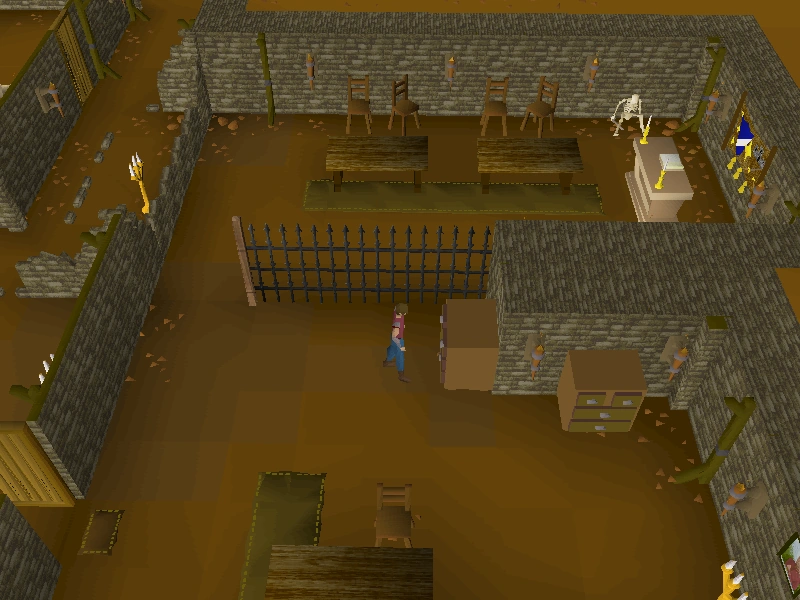
| |
| Search the upstairs drawers of a house in a village where pirates are known to have a good time. | The house in the south-east corner of Brimhaven, north-east of Davon's Amulet Store. | 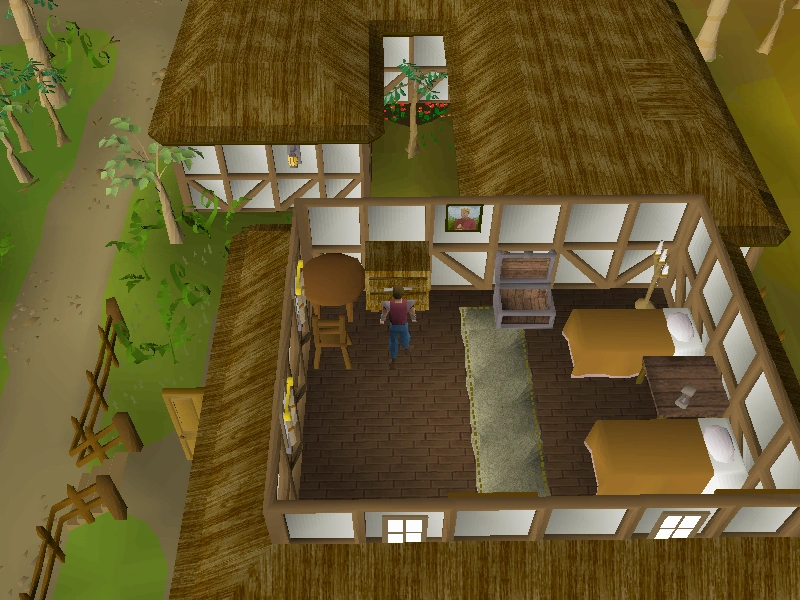
| |
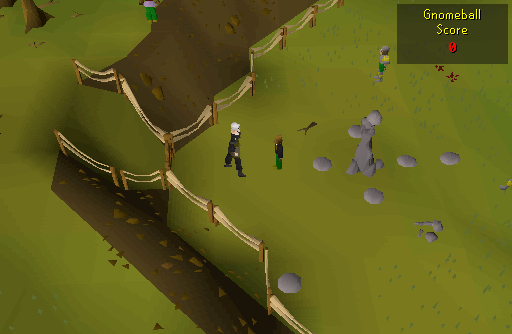
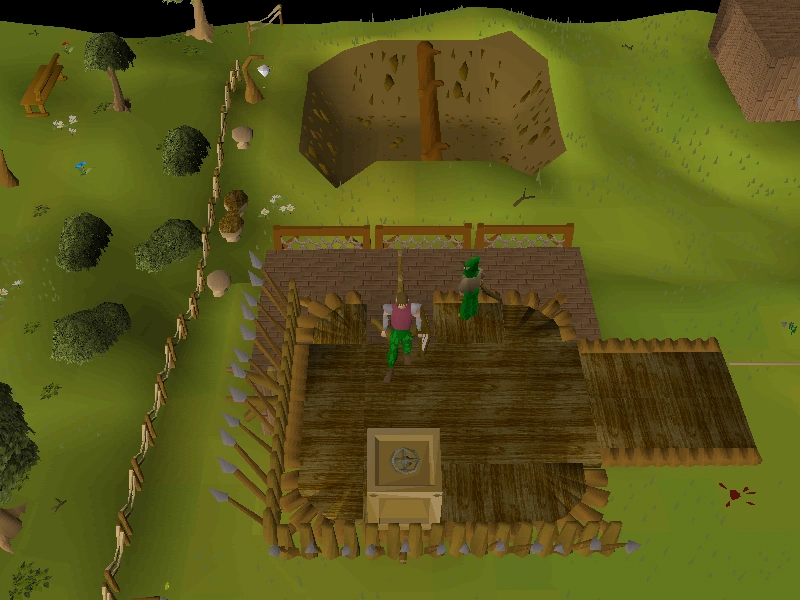
| Speak to a referee. | Talk to a Gnome ball referee found on the Gnome Ball field in the Gnome Stronghold. You will receive a challenge scroll that you have to answer.
Answer: 5096 |
| |
| Speak to Donovan, the Family Handyman. | Donovan the Family Handyman is found on the 1st floor[?] of Sinclair Mansion. | 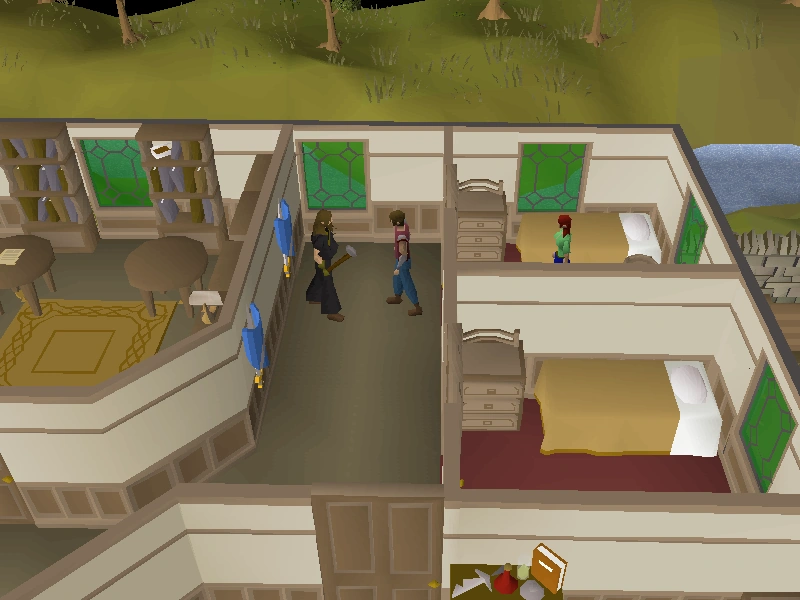
| |
| Speak to Hajedy. | Hajedy is found by the cart, located just south of the Brimhaven docks. | 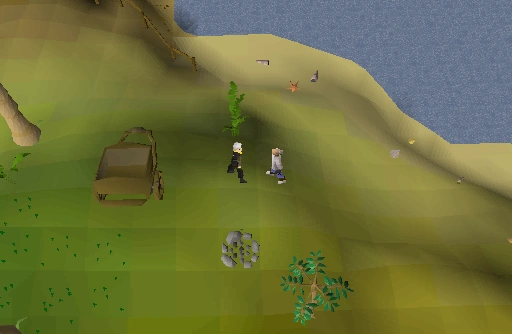
| |
| Speak to Hazelmere. | Hazelmere is located east of Yanille. The code CLS will take you directly next to his house. Answer: 6859 | File:Cryptic clue - speak hazelmere.png | |
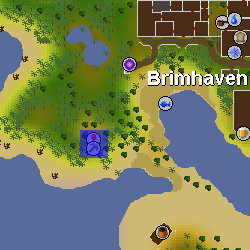
| Speak to Kangai Mau. | Kangai Mau is found in the Shrimp and Parrot in Brimhaven. | 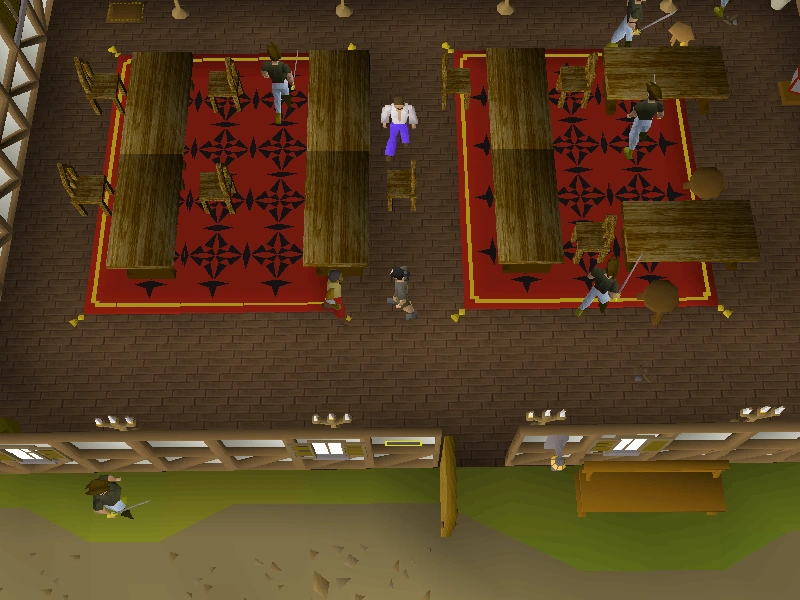
| |
| Speak to Ulizius. | Ulizius is the monk who guards the gate into Mort Myre Swamp. | 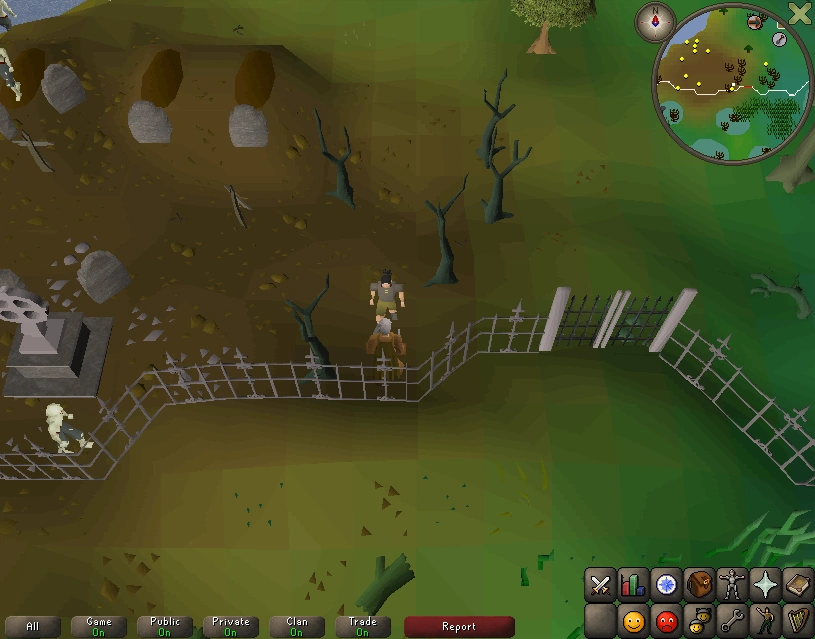
| |
| Speak to Roavar. | Talk to Roavar in the Canifis tavern. | 
| |
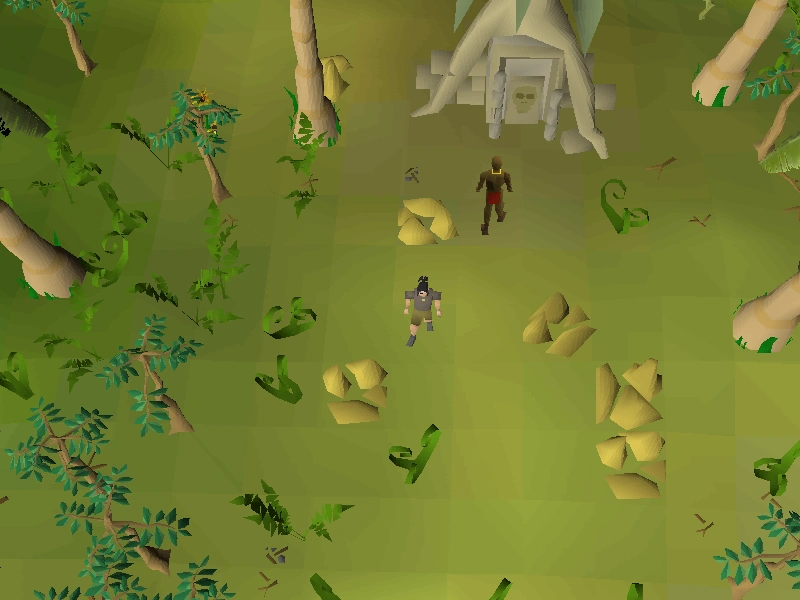
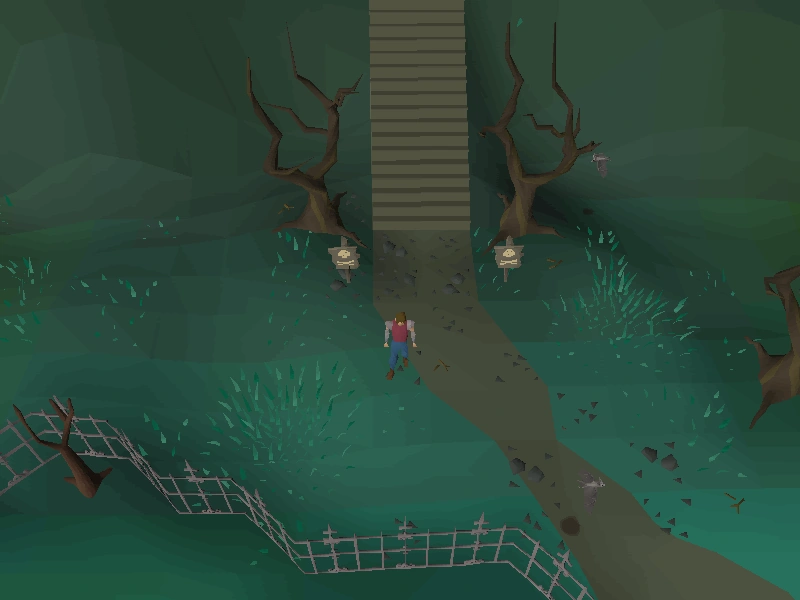
| The dead, red dragon watches over this chest. He must really dig the view. | Search the chest underneath the Red Dragon's head in the Exam Centre.
Kill a MALE barbarian in Barbarian Village or Barbarian Outpost to receive the key. |
| |
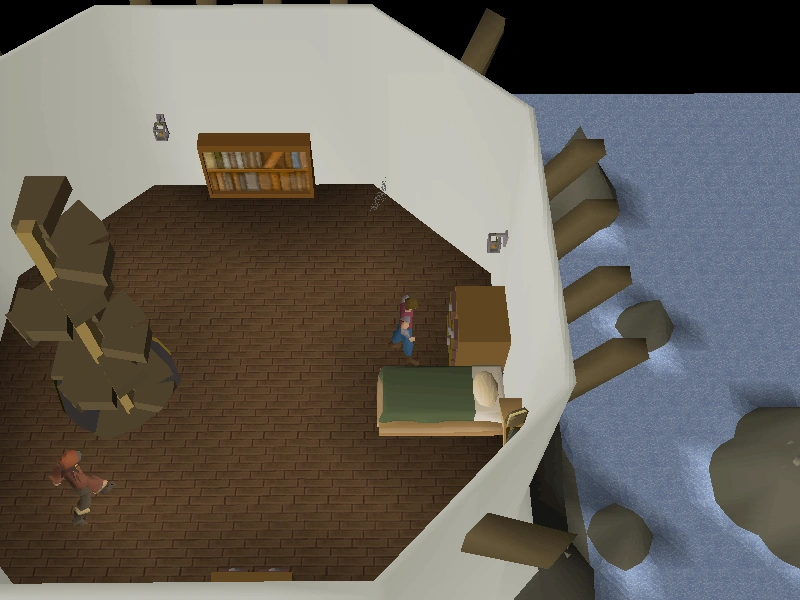
| Try not to step on any aquatic nasties while searching this crate. | Search the crate in Bailey's house on the Fishing Platform. | 
| |
| This crate holds a better reward than a broken arrow. | Inside the Ranging Guild. Search the crate behind the northern most building. | 
| |
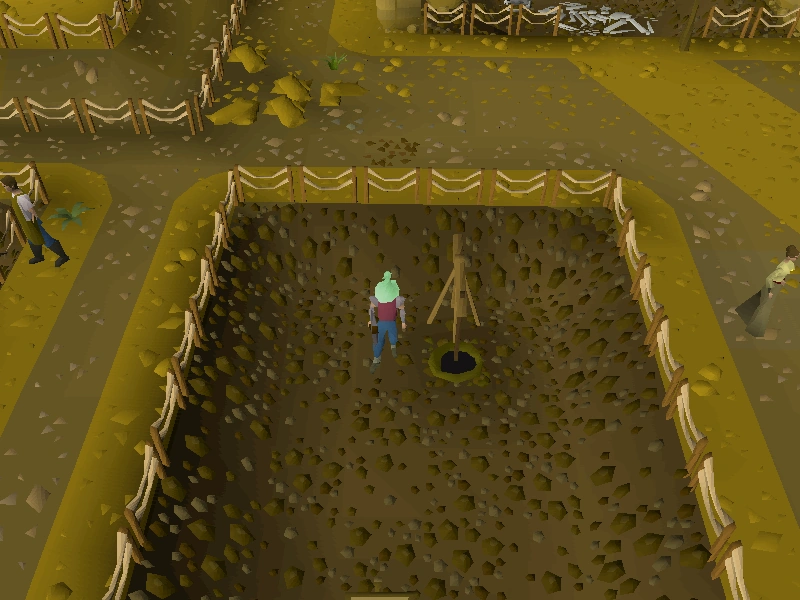
| This crate is mine, all mine, even if it is in the middle of the desert. | Center of Desert Mining Camp. Search the crates. Requires the metal key from Tourist Trap to enter. | 
| |
| The treasure is buried in a small building full of bones. Here is a hint: it's not near a graveyard. | It's in the western building at the Rag and Bone Man's site near the limestone quarry east of Varrock. Dig south of the box of bones in the smaller building. | 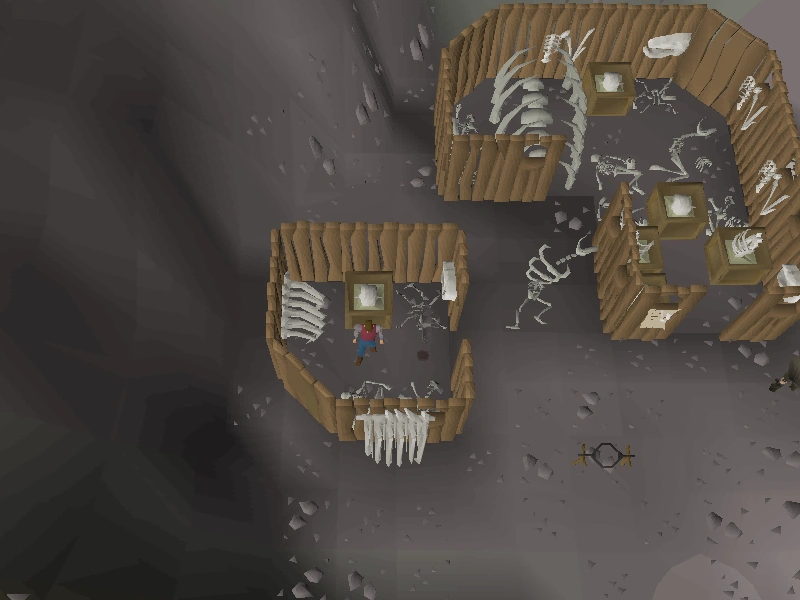
| |
| You'll need to look for a town with a central fountain. Look for a locked chest in the town's chapel. | Search the chest by the stairs in the Varrock church, east of the palace.
Kill a monk in Ardougne Monastery to obtain the key. |
|
Emote clues
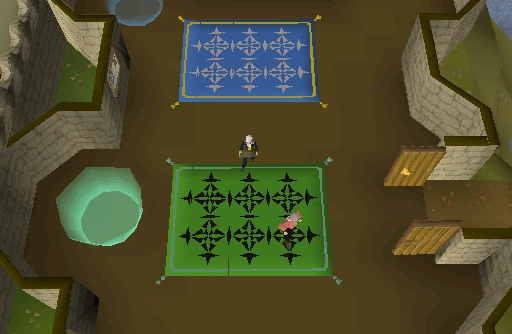
Emote clues involve equipping certain items in a particular location and performing an emote. These types of clues are featured in all levels of Treasure Trails. Once the emote has been performed, Uri will appear and give the player the next clue (or the reward, if the emote clue was the final step of the Treasure Trail). If the player has been requested to do another emote before talking to Uri, and they forgot to do it, he will say, I don't believe we have any business... but will not leave. The player can still perform the second emote and then talk to Uri to finish the clue. Easy clues require performing one emote, medium clues require performing two, and hard and above clues require performing one emote, then fighting an enemy such as the Double Agent.
Note that wearing any version of a required item different than the standard one will not work (for example, a Rune platebody (t) will not work in place of a Rune platebody).
For players who do Treasure Trails frequently, it is not recommended to keep items for all emote clues banked, as hundreds of different items are used across the Treasure Trail levels and can take up bank space. Players with the appropriate construction level can build STASH units to store emote clue items near where the emote clue is located, saving bank space.
| Clue | Items | Notes | Map |
|---|---|---|---|
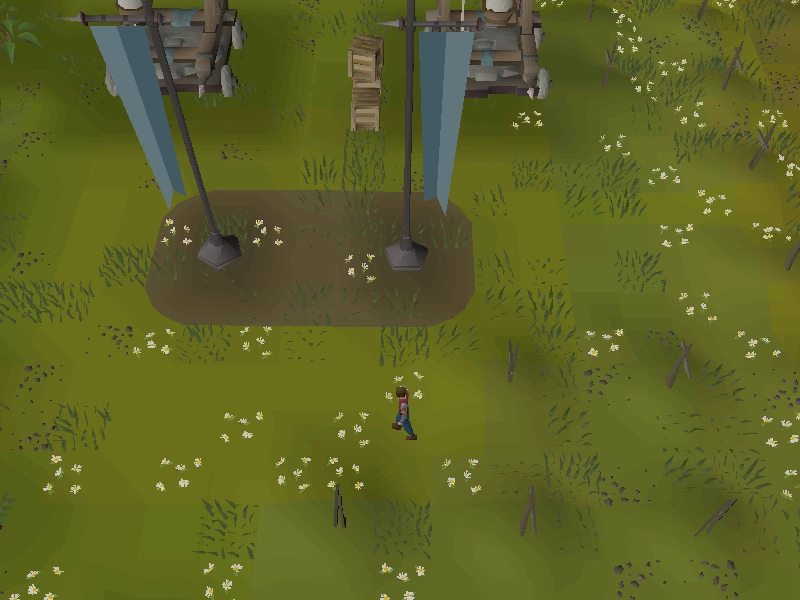
| Beckon in Tai Bwo Wannai. Clap before you talk to me.
Equip green d'hide chaps, a ring of dueling and a mithril med helm. |
Do the emotes within the barricaded part of Tai Bwo Wannai. | 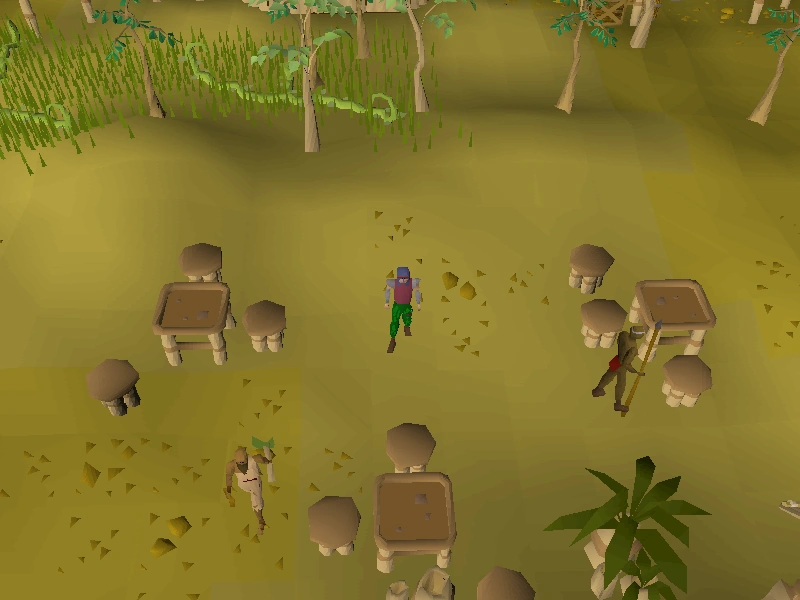
| |
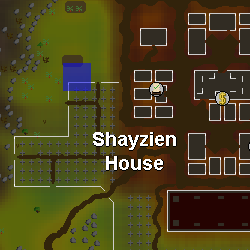
| Beckon in the combat ring of Shayzien. Show your anger before you talk to me. Equip an adamant platebody, adamant full helm and adamant platelegs. | The combat ring of Shayzien is located south-east of the bank. | 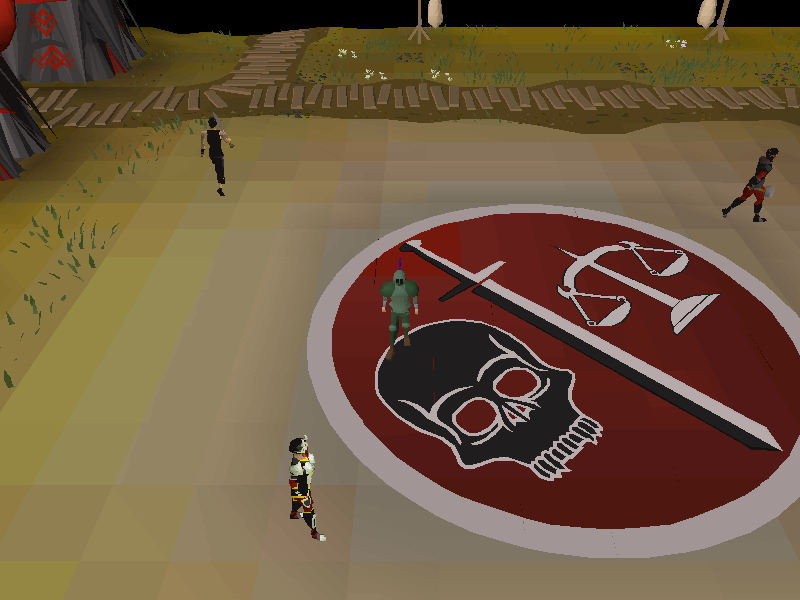
| |
| Beckon in the Digsite, near the eastern winch. Bow before you talk to me
Equip a green hat snakeskin boots and an iron pickaxe. |
| ||
| Cheer in the Barbarian Agility Arena. Headbang before you talk to me.
Equip a steel platebody, maple shortbow and a Wilderness cape. |
Requires miniquest Alfred Grimhand's Barcrawl and 30 in Ranged (to wield the maple shortbow)
While level 35 Agility is required to enter the arena itself, the clue can be completed without it. Upon entering from the gate, walk into the building located to the south. Inside the building, walk to the most south-eastern corner, and do the emote. |
| |
| Cheer in the Edgeville general store. Dance before you talk to me.
Equip a brown apron, leather boots and leather gloves. |
| ||
| Cheer in the Ogre Pen in the Training Camp. Show you are angry before you talk to me.
Equip a green d'hide body and chaps and a steel square shield. |
Access to the Combat Training Camp requires completion of the Biohazard quest. Equipping the green d'hide body requires completion of Dragon Slayer. | 
| |
| Clap in Seers court house. Spin before you talk to me.
Equip an adamant halberd, blue mystic robe bottom and a diamond ring. |
Ironman accounts must start the Regicide quest to purchase an adamant halberd. | 
| |
| Cry in the Catherby Ranging shop. Bow before you talk to me.
Equip blue gnome boots, a hard leather body and an unblessed silver sickle. |
| ||
| Cry in the Draynor Village jail. Jump for joy before you talk to me. Equip an adamant sword, a sapphire amulet and an adamant plateskirt. | 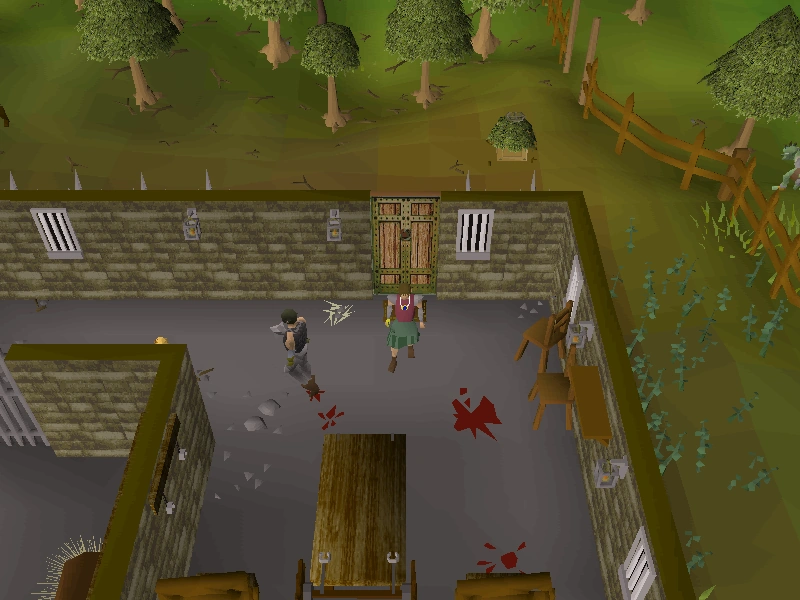
| ||
| Cry on the shore of Catherby beach. Laugh before you talk to me. Equip an adamant sq shield, a bone dagger and mithril platebody. | 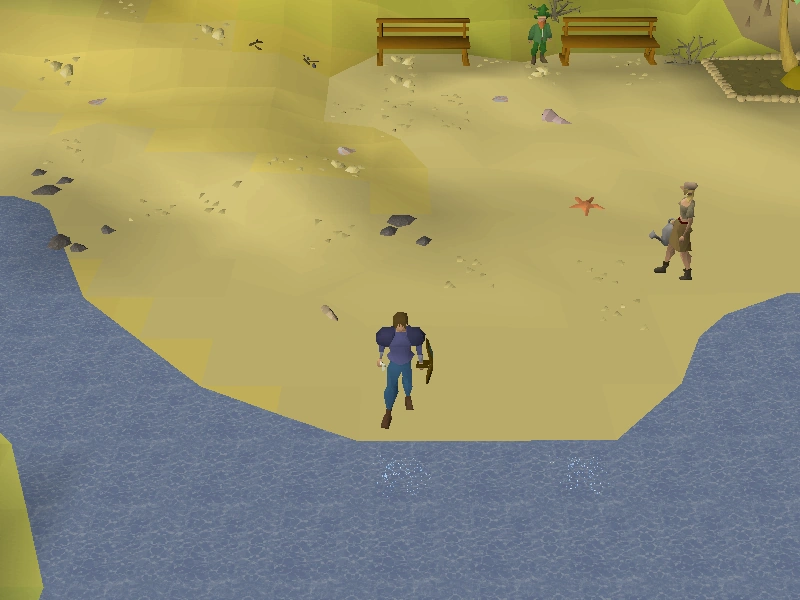
| ||
|
Cry on top of the western tree in the Gnome Agility Arena. Indicate 'no' before you talk to me. Equip a steel kiteshield, ring of forging, and green d'hide chaps. |
| ||
| Dance a jig under Shantay's Awning. Bow before you talk to me.
Equip a bruise blue snelm, an air staff and a bronze square shield. |
South of Al Kharid, Shantay Pass. | 
| |
| Dance in the centre of Canifis. Bow before you talk to me.
Equip a green gnome robe top, mithril platelegs and an iron two-handed sword. |
| ||
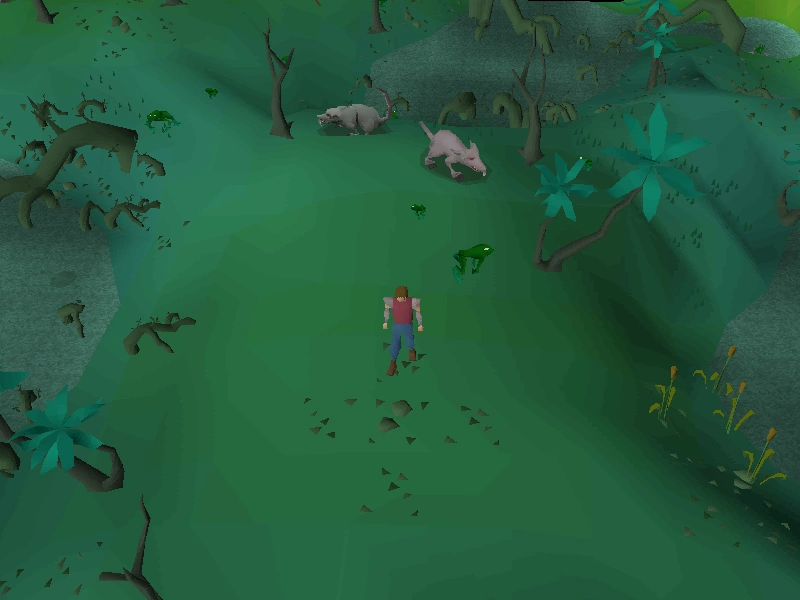
| Dance in the dark caves beneath Lumbridge Swamp. Blow a kiss before you talk to me.
Equip an air staff, Bronze full helm and an Amulet of power. |
You need a rope to enter this cave the first time. You always need a light source in the caves. If using the Lumbridge Castle basement to access the caves via the northern entrance, you will need to step one square south of the cave entrance as the square next to the entrance does not work when you dance. Two STASH units are provided, one near each of the main entrances. Building one of them will automatically build the other one. |
| |
| Jump for joy in the TzHaar sword shop. Shrug before you talk to me.
Equip a steel longsword, blue d'hide body and blue mystic gloves. |
blp | 
| |
| Jump for joy in Yanille bank. Dance a jig before you talk to me.
Equip a brown apron, adamantite medium helm and snakeskin chaps. |
| ||
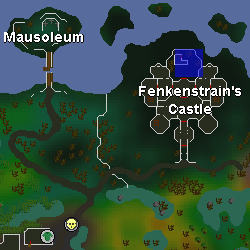
| Panic by the mausoleum in Morytania. Wave before you speak to me.
Equip a mithril plate skirt[sic], maple longbow and no boots. |
Starting Creature of Fenkenstrain quest is required to access the area. Go north-west through the Experiment cave, entered through the tombstone south-east of the castle. Remember, no boots. | 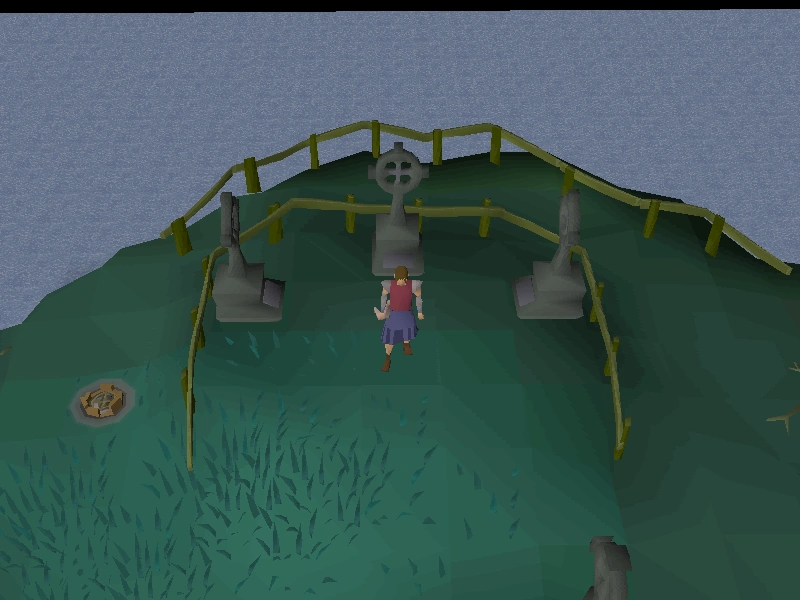
| |
| Shrug in Catherby bank. Yawn before you talk to me.
Equip a maple longbow, green d'hide chaps and an iron med helm. |
| ||
| Spin on the bridge by the Barbarian Village. Salute before you talk to me.
Equip purple gloves, a steel kiteshield and a mithril full helm. |
| ||
| Think in the centre of the Observatory. Spin before you talk to me.
Equip a mithril chainbody, green d'hide chaps and a ruby amulet. |
Players who have completed the Observatory Quest with level 23 Agility, 24 Ranged and 28 Strength may use a shortcut by using the grapple-able rock just outside the observatory; players need only bring a crossbow and grapple for the first trip.
Otherwise, players must navigate through the Observatory Dungeon to reach this clue. |
| |
| Yawn in the Castle Wars lobby. Shrug before you talk to me.
Equip ruby amulet, a mithril scimitar and a Wilderness cape. |
|
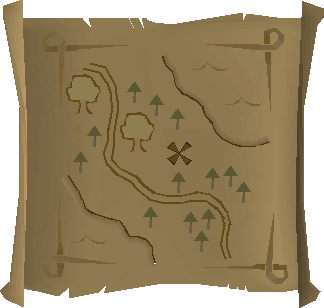
Maps
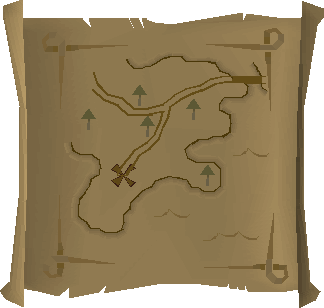
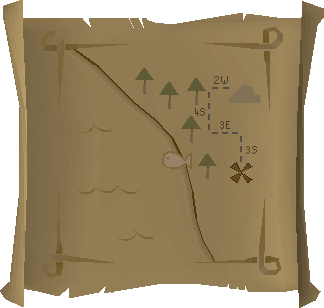
Map clues are an image of a location the player needs to search to advance along their trail. Maps are found across all clue scroll difficulties. They are rough pictures of a very local area. If the map leads to an X, the player needs to take a spade to the place indicated on the map with the X and dig there. If the map leads to a crate, it must simply be searched. Sometimes, players may find a small pile of crates, or a multitude of them. Search all of them until the next clue or the reward is found. Maps can include landmarks such as buildings, fish to indicate fishing spots, roads, rivers, bridges, and so on.
Digging in the location pointed to by a map clue will never spawn any monsters.
Maps are sorted by boxes and then by X, and then from left to right based on the location of the mark.
| Map | Location | Image |
|---|---|---|
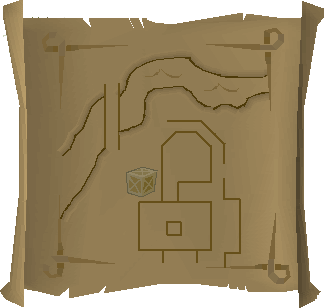
|
Search the crate by the Clock Tower, south-west of East Ardougne. Ardougne cloak is fastest travel method. Spirit tree to Battlefield of Khazard is also close. | 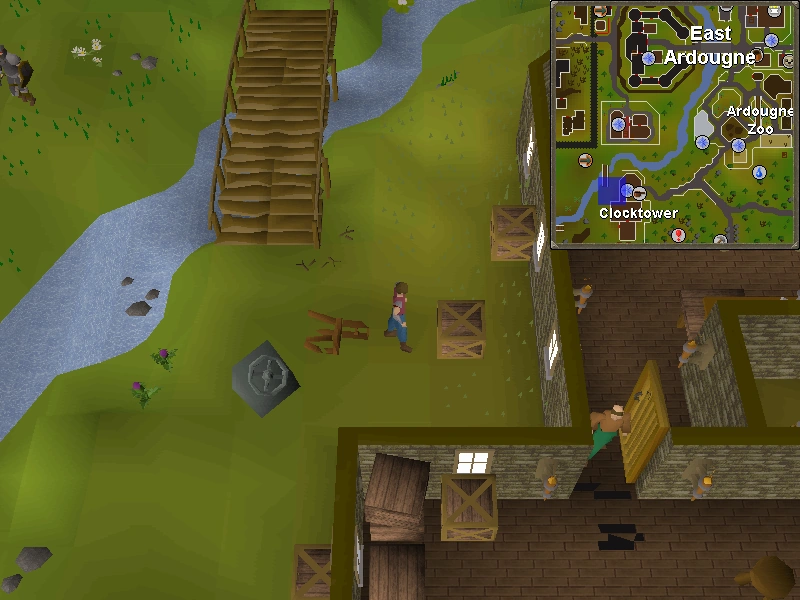
|
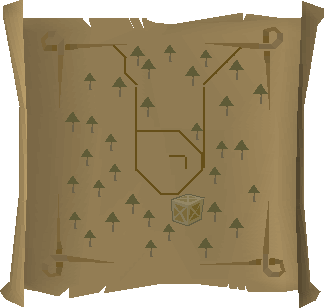
|
Inside McGrubor's Wood, west of Seers' Village. Fairy ring code ALS. If approaching from outside, squeeze through the broken fence by the northern half of the hut in the center and search the crate south of the house. | 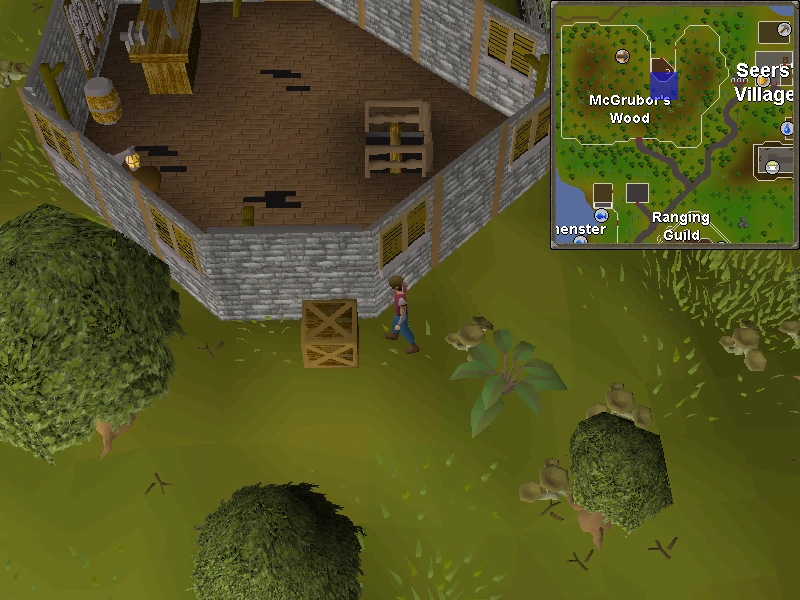
|
|
Road between Rellekka and the Lighthouse. | 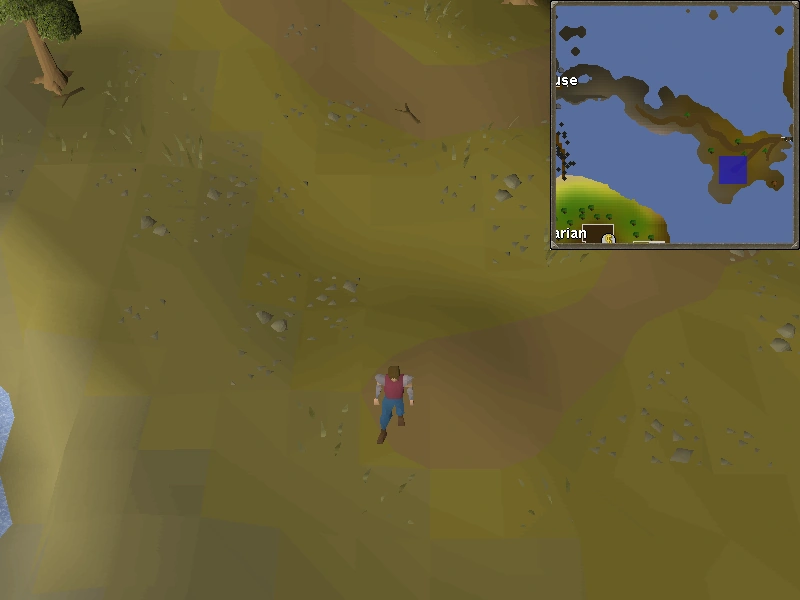
|

|
By the entrance to the Ourania Cave. | 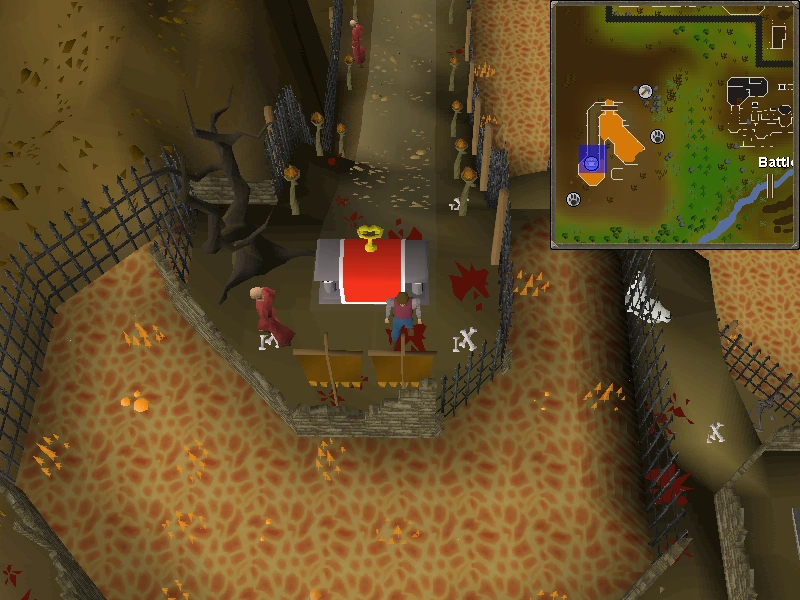
|
|
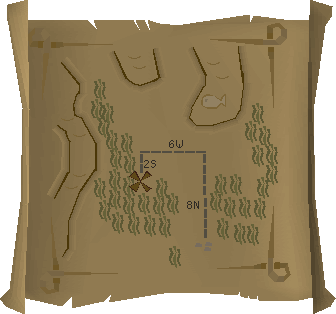
South of the path to Mort'ton; fairy ring BIP is nearby (50 Agility is required when you use the fairy ring). | 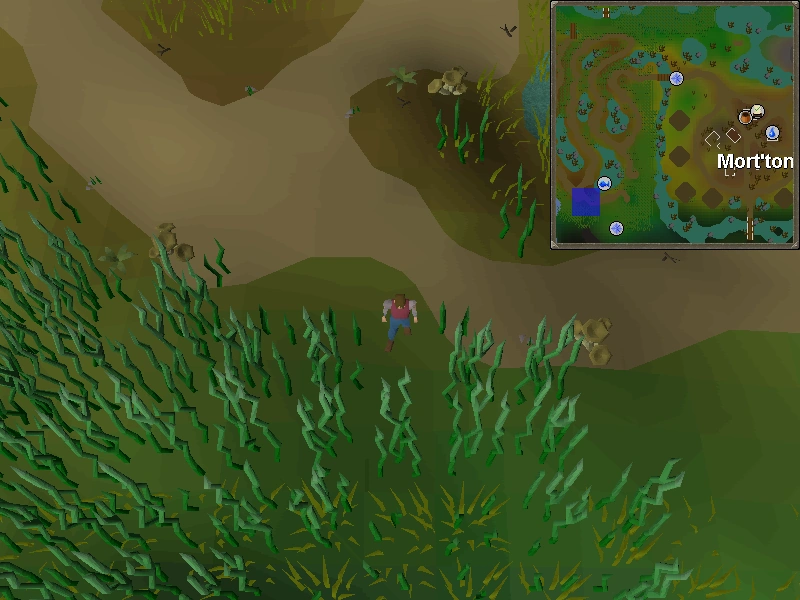
|
|
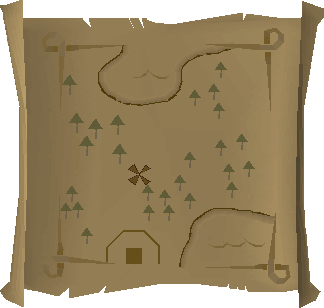
Just south of East Ardougne, (straight south of town square) north of the Tower of Life, near the Necromancer Tower. Dig two spaces north of the smaller crate that Bonafido is leaning on. Fairy ring code DJP is very close, or use any Ardougne Cloak to the Monastery. | 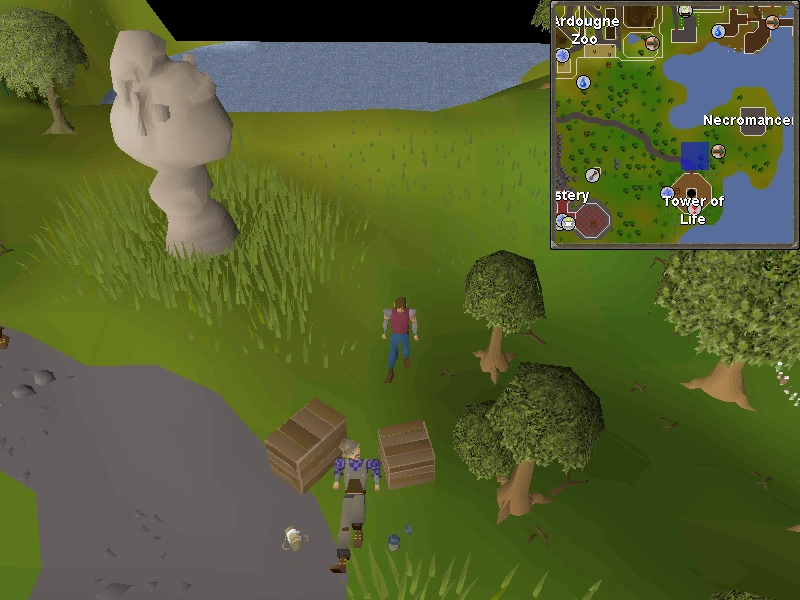
|
|
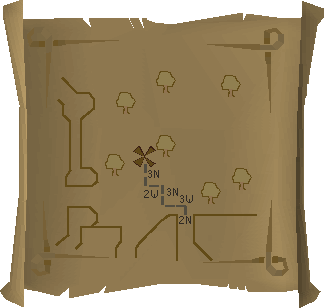
On Miscellania, one of the Fremennik Isles, just east of the castle. Fairy ring code CIP accessible only after completing Fremennik Trials. | 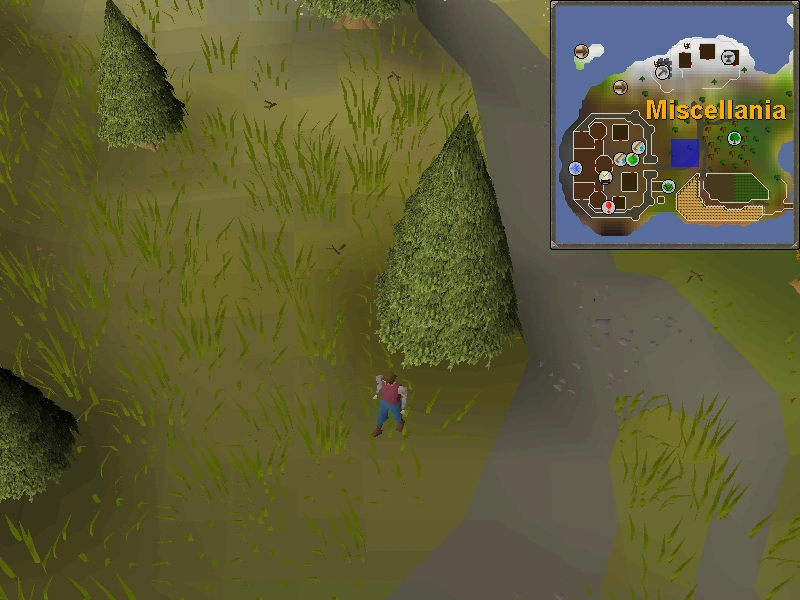
|
|
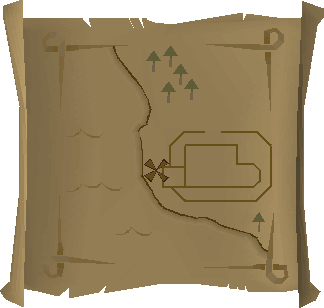
Just west of the Chemist's house in Rimmington. South of Falador, west of Port Sarim. | 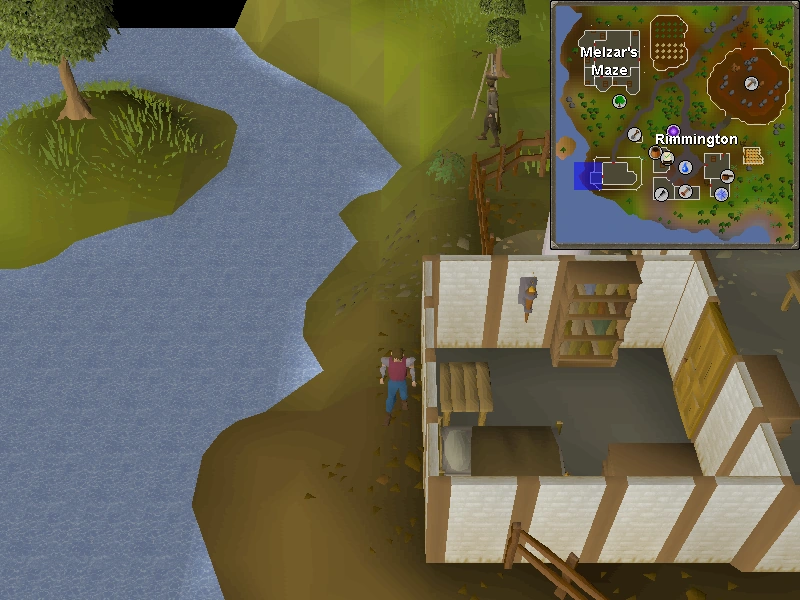
|

|
West of the Crafting Guild. Dig north of the sandpile at the tip of the peninsula. | 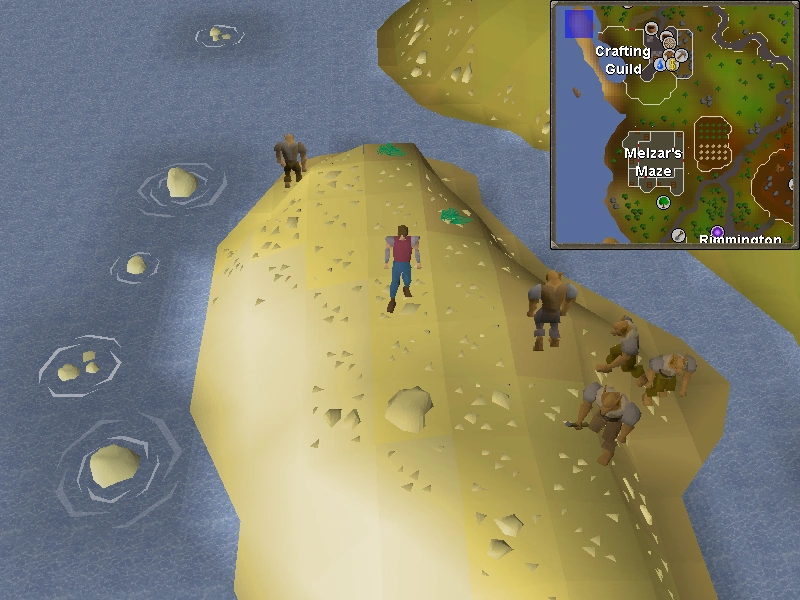
|
|
North of Seers' Village, along the path towards Rellekka. | 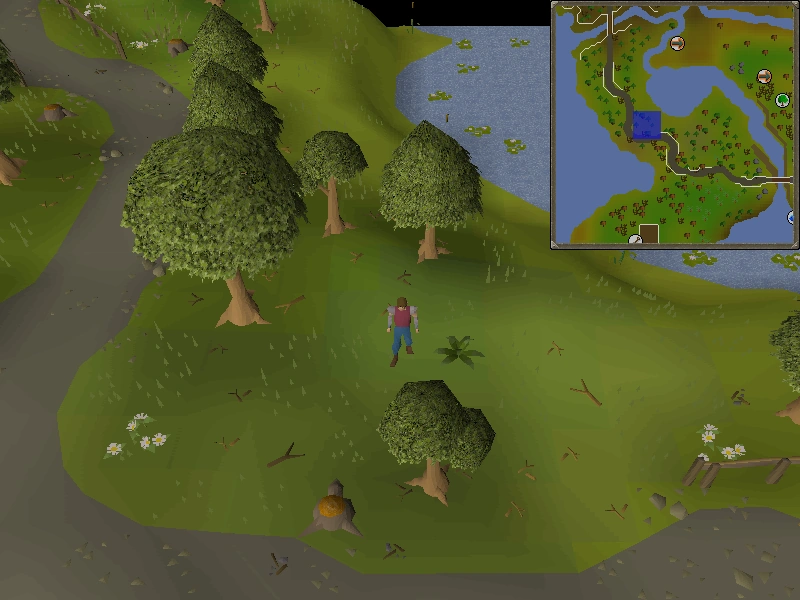
|
|
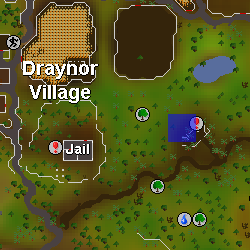
South of Draynor Village bank, by the fishing spot. | 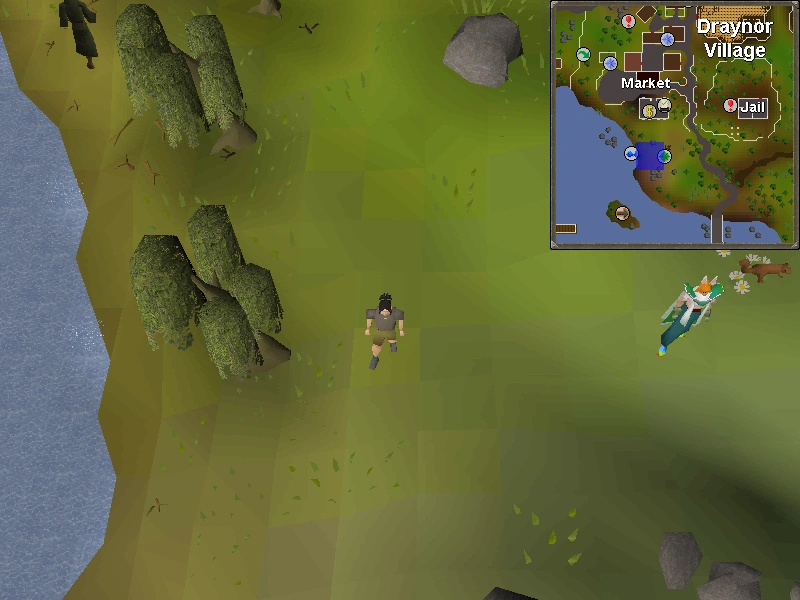
|
| Items | |||||
| Guides |
| ||||
| NPCs |
Uri • Sherlock • Falo the Bard • Double agent • Ancient Wizard • Armadylian guard • Bandosian guard • Brassican Mage • Saradomin wizard • Zamorak wizard | ||||
| Other |
Clue droppers (Easy • Medium • Hard • Elite) • Emote items • Rewards • STASH • World map | ||||