No edit summary Tag: sourceedit |
(cleanup) |
||
| (48 intermediate revisions by 35 users not shown) | |||
| Line 1: | Line 1: | ||
{{shortcut|ttghc}} |
{{shortcut|ttghc}} |
||
| − | __NOTOC__ |
||
| − | {{Floor}} |
||
| − | |||
[[File:Strange device detail.png|left|100px]] |
[[File:Strange device detail.png|left|100px]] |
||
| − | '''Hot Cold''' clues are clues in which a [[strange device]] obtained from talking to [[Jorral]] will tell the player in the [[Chat interface|chatbox]] whether the player is ''Hot'' (close to) or ''Cold'' (far away from) the intended location to dig. This is based on an {{wp|Hunt the Thimble|older children's game}}. There are 116 unique Hot/Cold locations |
+ | '''Hot Cold''' clues are clues in which a [[strange device]] obtained from talking to [[Jorral]] will tell the player in the [[Chat interface|chatbox]] whether the player is ''Hot'' (close to) or ''Cold'' (far away from) the intended location to dig. This is based on an {{wp|Hunt the Thimble|older children's game}}. There are 116 unique Hot/Cold locations. |
| − | |||
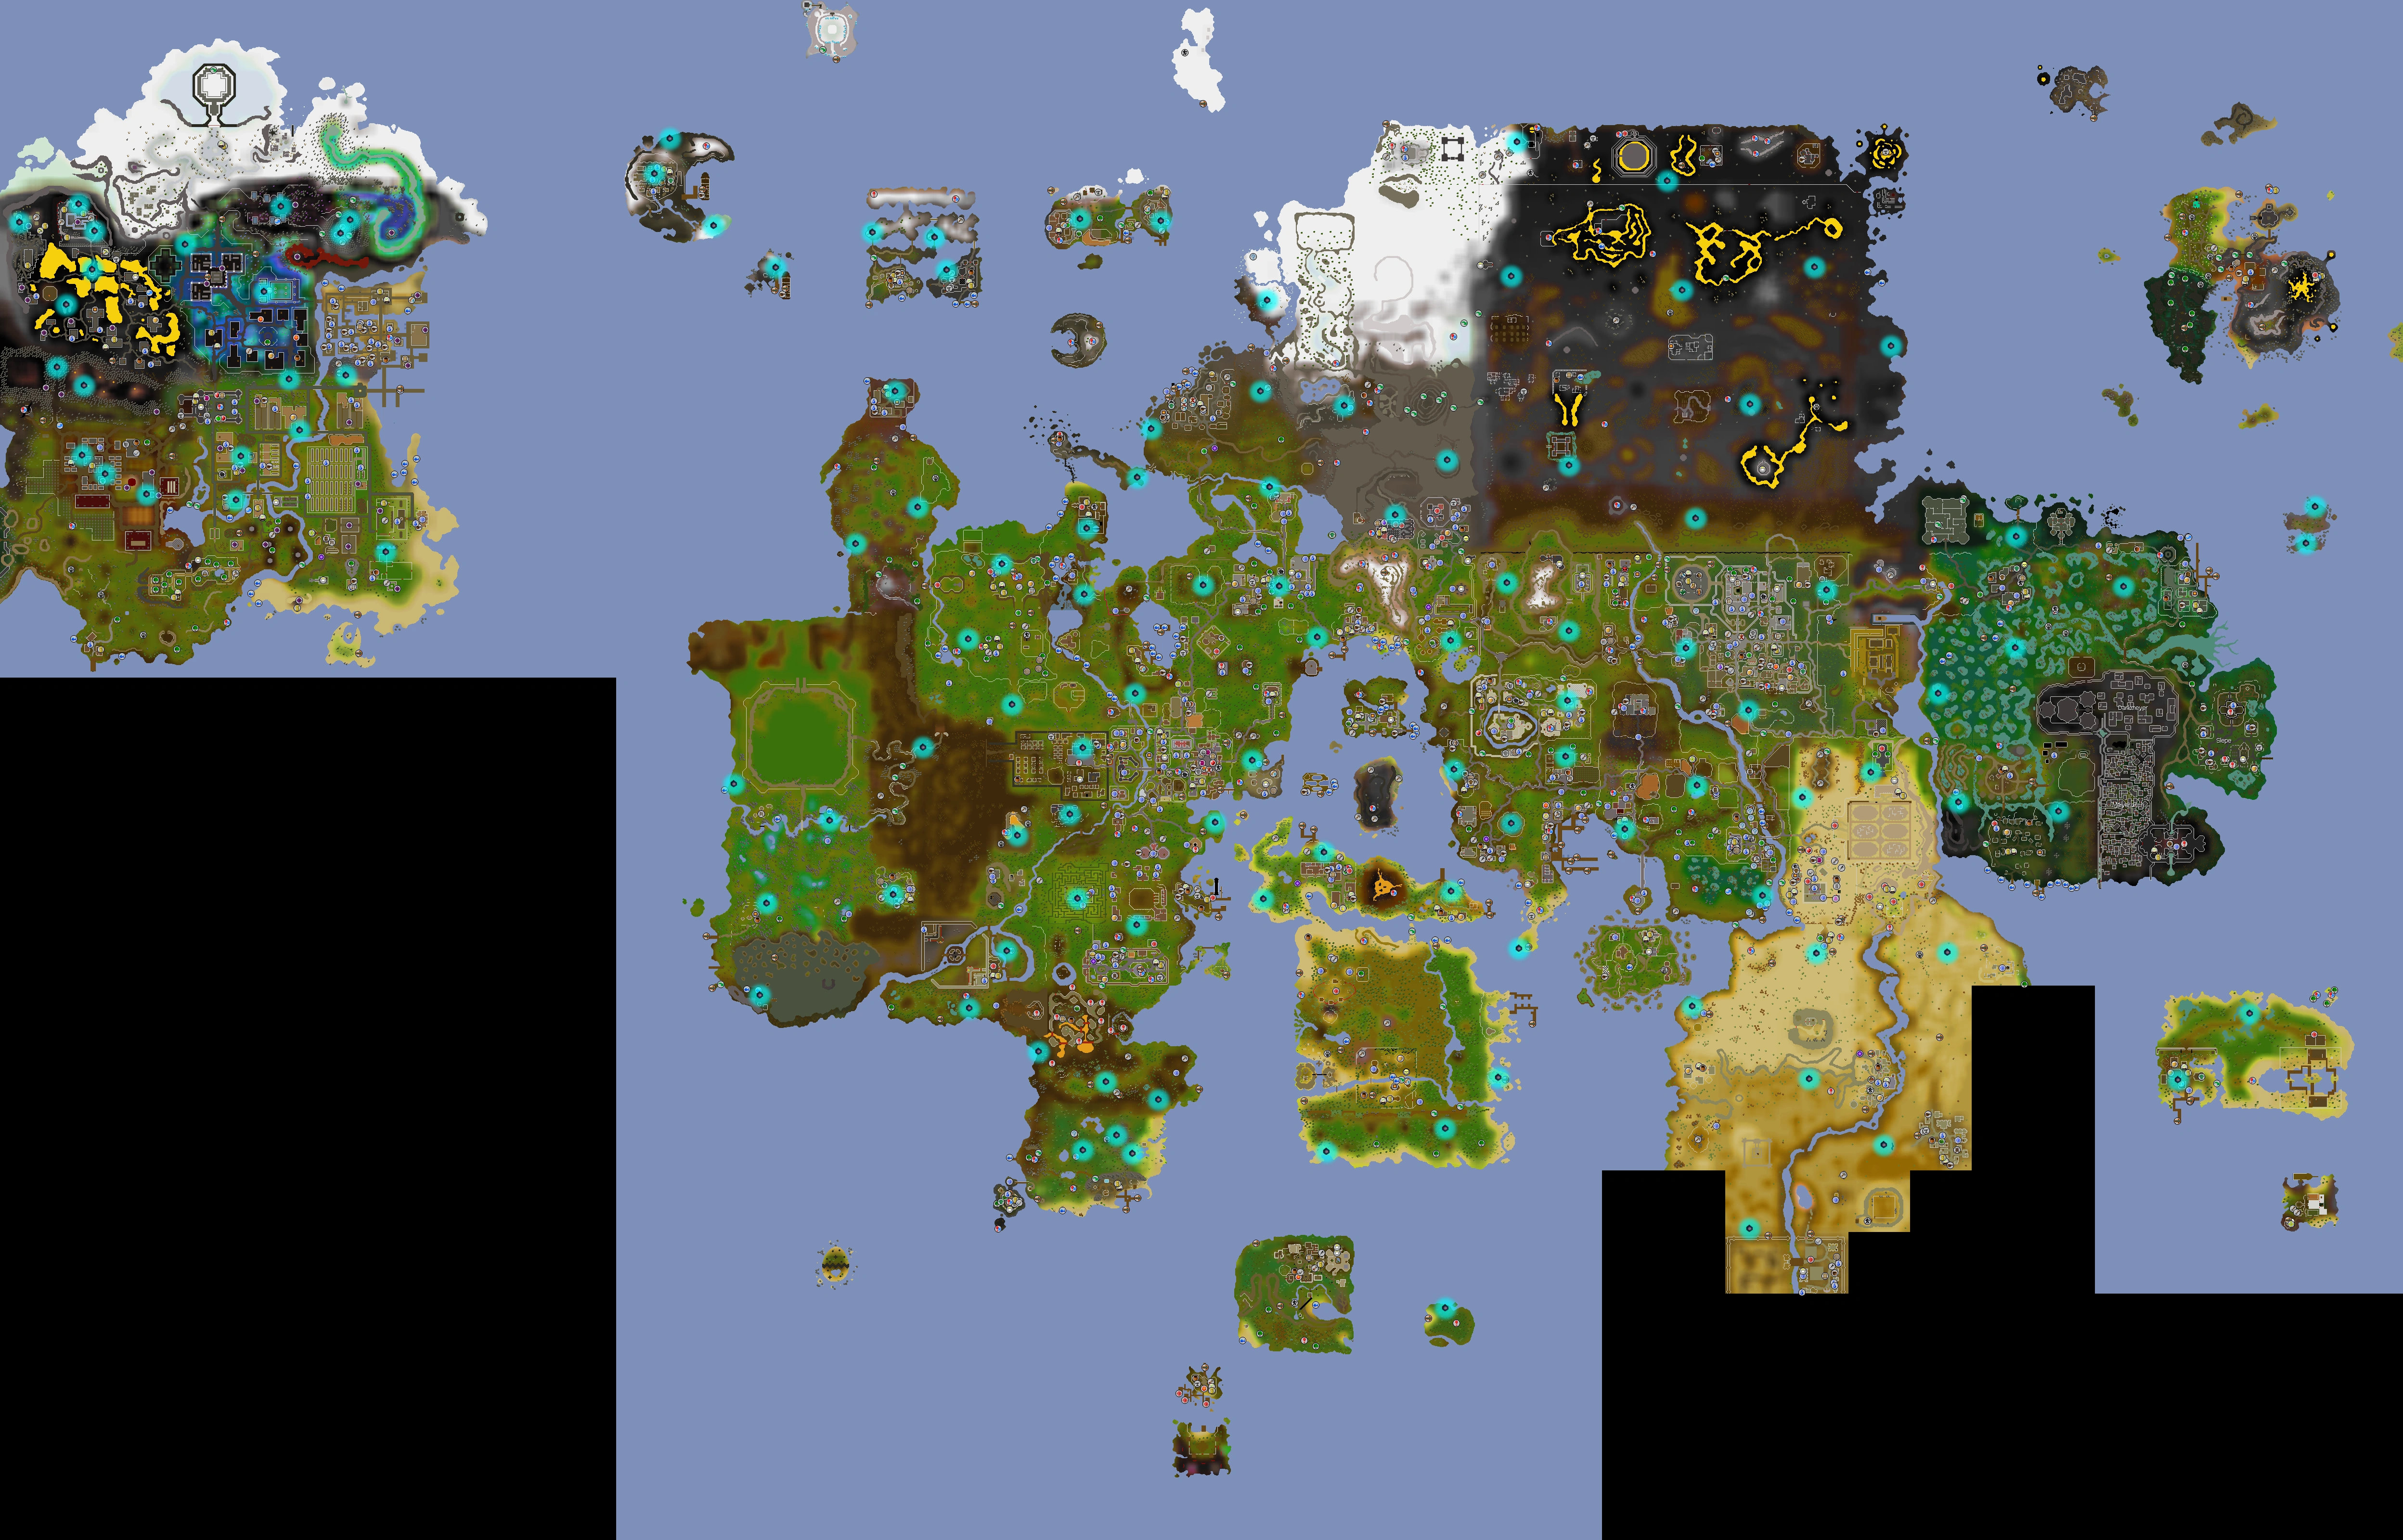
| ⚫ | To find your location, click on the strange device and it will tell you how close you are to the treasure. (you will also take some damage). Its temperature is based on the distance of the treasure from the player, measured in the number of steps it would take to reach the treasure, ignoring any obstacles (this is the {{wp|Chebyshev distance}} between the player and treasure). Then, teleport or walk to another location, and check to see if the strange device has gotten warmer. Repeat to pinpoint a location. You can also use the list or map to help you find your location. [[File:Strange device dig locations.png|thumb|370px|A map of RuneScape displaying all possible locations.<br>For a full sized image, [https://vignette.wikia.nocookie.net/2007scape/images/5/50/Strange_device_dig_locations.png/revision/latest?cb=20180501022612 click here].]] |
||
| ⚫ | |||
| ⚫ | To find your location, click on the strange device and it will tell you how close you are to the treasure |
||
| − | When you dig at the dig spot, you will be attacked by a [[Brassican Mage]] in a [[single-combat area]], or three [[Ancient Wizard]]s if your clue leads you to a [[multi-combat area]]. |
+ | When you dig at the dig spot, you will be attacked by a [[Brassican Mage]] in a [[single-combat area]], or three [[Ancient Wizard]]s if your clue leads you to a [[multi-combat area]]. |
| − | In the fight against the Brassican Mage, his attacks are not affected [[protection prayers]]; however, [[ranged armour]] seems to help. The three Ancient Wizards are a lot stronger and will use all three combat styles alongside [[poison |
+ | In the fight against the Brassican Mage, his attacks are not affected by [[protection prayers]]; however, [[ranged armour]] seems to help. The three Ancient Wizards are a lot stronger and will use all three combat styles alongside [[poison]]ing you (poison cannot be blocked by protection prayers) |
| ⚫ | |||
| − | ===Locations=== |
||
| − | [[File:Strange device dig locations.png|thumb|right|200px|Because of display limits on the Wiki, the full size cannot be displayed on this page. In order to view the full-size image, please click [https://vignette2.wikia.nocookie.net/2007scape/images/5/50/Strange_device_dig_locations.png/revision/20170711150204 here].]] |
||
| ⚫ | |||
| − | |||
| − | '''Note:''' Supposedly all locations are shown in the current map. However, not all of them have been confirmed yet and might be removed (pink glowing devices are unconfirmed). |
||
| − | {{clear}} |
||
{| class="messagebox" style="width:80%; margin:1em auto; font-size:95%; color:black; text-align:center;" |
{| class="messagebox" style="width:80%; margin:1em auto; font-size:95%; color:black; text-align:center;" |
||
| − | | '''Jump to'''<br />{{#ifeq:{{lc:{{{nums}}}}}|no||}} [[#Asgarnia|Asgarnia]] {{*}} [[#Feldip Hills|Feldip Hills]] {{*}} [[#Fremennik Province|Fremennik Province]] {{*}} [[#Kandarin|Kandarin]] {{*}} [[#Karamja|Karamja]] {{*}} [[#Misthalin|Misthalin]] {{*}} [[#Morytania|Morytania |
+ | | '''Jump to'''<br />{{#ifeq:{{lc:{{{nums}}}}}|no||}} [[#Asgarnia|Asgarnia]] {{*}} [[#Desert|Desert]] {{*}} [[#Feldip Hills|Feldip Hills]] {{*}} [[#Fremennik Province|Fremennik Province]] {{*}} [[#Kandarin|Kandarin]] {{*}} [[#Karamja|Karamja]] {{*}} [[#Misthalin|Misthalin]] {{*}} [[#Morytania|Morytania]] {{*}} [[#Western Provinces|Western Provinces]] {{*}} [[#Wilderness|Wilderness]] {{*}} [[#Zeah|Zeah]] |
|} |
|} |
||
| Line 70: | Line 60: | ||
|[[File:Hot cold clue - troll arena.png|centre|300px]] |
|[[File:Hot cold clue - troll arena.png|centre|300px]] |
||
|[[File:Hot cold clue - troll arena map.png|centre|200px]] |
|[[File:Hot cold clue - troll arena map.png|centre|200px]] |
||
| ⚫ | |||
| + | |||
| ⚫ | |||
| ⚫ | |||
| ⚫ | |||
| ⚫ | |||
| ⚫ | |||
| ⚫ | |||
| ⚫ | |||
| ⚫ | |||
| ⚫ | |||
| ⚫ | |||
| ⚫ | |||
| ⚫ | |||
| ⚫ | |||
| ⚫ | |||
| ⚫ | |||
| ⚫ | |||
| ⚫ | |||
| ⚫ | |||
| ⚫ | |||
| ⚫ | |||
| ⚫ | |||
| ⚫ | |||
| ⚫ | |||
| ⚫ | |||
| ⚫ | |||
| ⚫ | |||
| ⚫ | |||
| ⚫ | |||
| ⚫ | |||
| ⚫ | |||
| ⚫ | |||
| ⚫ | |||
| ⚫ | |||
| ⚫ | |||
| ⚫ | |||
| ⚫ | |||
| ⚫ | |||
|} |
|} |
||
| Line 102: | Line 131: | ||
|[[File:Hot cold clue - south of hunting expert map.png|centre|200px]] |
|[[File:Hot cold clue - south of hunting expert map.png|centre|200px]] |
||
|- |
|- |
||
| − | |South-east of the ∩-shaped lake, near the [[File:Hunter training |
+ | |South-east of the ∩-shaped lake, near the [[File:Hunter training icon.png]] icon. |
|[[File:Hot cold clue - near hunting icon.png|centre|300px]] |
|[[File:Hot cold clue - near hunting icon.png|centre|300px]] |
||
|[[File:Hot cold clue - near hunting icon map.png|centre|200px]] |
|[[File:Hot cold clue - near hunting icon map.png|centre|200px]] |
||
| Line 121: | Line 150: | ||
|[[File:Hot cold clue - Mountain Camp map.png|centre|200px]] |
|[[File:Hot cold clue - Mountain Camp map.png|centre|200px]] |
||
|- |
|- |
||
| − | |At the [[Rellekka Hunter area]], near the [[File:Hunter training |
+ | |At the [[Rellekka Hunter area]], near the [[File:Hunter training icon.png]] icon. |
|[[File:Hot cold clue - Polar Hunter area.png|centre|300px]] |
|[[File:Hot cold clue - Polar Hunter area.png|centre|300px]] |
||
|[[File:Hot cold clue - Polar Hunter area map.png|centre|200px]] |
|[[File:Hot cold clue - Polar Hunter area map.png|centre|200px]] |
||
| Line 216: | Line 245: | ||
|[[File:Hot cold clue - northwest of NMZ map.png|centre|200px]] |
|[[File:Hot cold clue - northwest of NMZ map.png|centre|200px]] |
||
|- |
|- |
||
| − | |[[Tree Gnome Village]], near the [[File:General store icon.png]] icon. |
+ | |[[Tree Gnome Village (location)|Tree Gnome Village]], near the [[File:General store icon.png]] icon. |
|[[File:Hot cold clue - Tree Gnome Village.png|centre|300px]] |
|[[File:Hot cold clue - Tree Gnome Village.png|centre|300px]] |
||
|[[File:Hot cold clue - Tree Gnome Village map.png|centre|200px]] |
|[[File:Hot cold clue - Tree Gnome Village map.png|centre|200px]] |
||
| Line 360: | Line 389: | ||
|[[File:Hot cold clue - south Dragontooth Island.png|centre|300px]] |
|[[File:Hot cold clue - south Dragontooth Island.png|centre|300px]] |
||
|[[File:Hot cold clue - south Dragontooth Island map.png|centre|200px]] |
|[[File:Hot cold clue - south Dragontooth Island map.png|centre|200px]] |
||
| ⚫ | |||
| − | |||
| − | ====Desert==== |
||
| ⚫ | |||
| ⚫ | |||
| ⚫ | |||
| ⚫ | |||
| ⚫ | |||
| ⚫ | |||
| ⚫ | |||
| ⚫ | |||
| ⚫ | |||
| ⚫ | |||
| ⚫ | |||
| ⚫ | |||
| ⚫ | |||
| ⚫ | |||
| ⚫ | |||
| ⚫ | |||
| ⚫ | |||
| ⚫ | |||
| ⚫ | |||
| ⚫ | |||
| ⚫ | |||
| ⚫ | |||
| ⚫ | |||
| ⚫ | |||
| ⚫ | |||
| ⚫ | |||
| ⚫ | |||
| ⚫ | |||
| ⚫ | |||
| ⚫ | |||
| ⚫ | |||
| ⚫ | |||
| ⚫ | |||
| ⚫ | |||
| ⚫ | |||
| ⚫ | |||
|} |
|} |
||
| Line 467: | Line 457: | ||
|- |
|- |
||
|East of the [[Wilderness]] [[canoe]] exit, level 35 Wilderness. |
|East of the [[Wilderness]] [[canoe]] exit, level 35 Wilderness. |
||
| + | |||
| + | NOTE: This area is on the single/multi-combat border. It is recommended to dig in the single combat area, so you get the Brassican Mage instead of the Ancient Wizards. |
||
|[[File:Hot cold clue - east of wilderness canoe exit.png|centre|300px]] |
|[[File:Hot cold clue - east of wilderness canoe exit.png|centre|300px]] |
||
|[[File:Hot cold clue - east of wilderness canoe exit map.png|centre|200px]] |
|[[File:Hot cold clue - east of wilderness canoe exit map.png|centre|200px]] |
||
| Line 500: | Line 492: | ||
|[[File:Hot cold clue - blast mine north.png|centre|300px]] |
|[[File:Hot cold clue - blast mine north.png|centre|300px]] |
||
|[[File:Hot cold clue - blast mine north map.png|centre|200px]] |
|[[File:Hot cold clue - blast mine north map.png|centre|200px]] |
||
| + | |- |
||
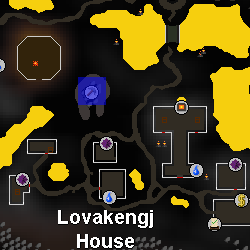
| + | |Next to the [[lovakite]] [[furnace]] in the [[Lovakengj House]]. |
||
| + | |[[File:Hot cold clue - Lovakengj lovakite furnace.png|centre|300px]] |
||
| + | |[[File:Hot cold clue - Lovakengj lovakite furnace map.png|centre|200px]] |
||
|- |
|- |
||
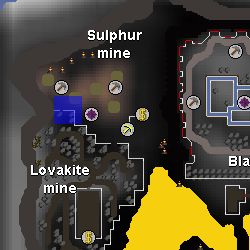
|Next to [[mithril rock]] in the [[Lovakengj mine]]. |
|Next to [[mithril rock]] in the [[Lovakengj mine]]. |
||
| Line 569: | Line 565: | ||
|[[File:Hot cold clue - east of Watson's house map.png|centre|200px]] |
|[[File:Hot cold clue - east of Watson's house map.png|centre|200px]] |
||
|- |
|- |
||
| − | |North of [[Vannah's Farm Store]], between the [[chicken]] coop and [[willow |
+ | |North of [[Vannah's Farm Store]], between the [[chicken]] coop and [[willow tree]]s. |
|[[File:Hot cold clue - north of Vannah's Farm Store.png|centre|300px]] |
|[[File:Hot cold clue - north of Vannah's Farm Store.png|centre|300px]] |
||
|[[File:Hot cold clue - north of Vannah's Farm Store map.png|centre|200px]] |
|[[File:Hot cold clue - north of Vannah's Farm Store map.png|centre|200px]] |
||
|} |
|} |
||
| − | {{Clue}} |
+ | <noinclude>{{Clue}}</noinclude> |
| − | [[Category:Treasure Trail guides]] |
||
Latest revision as of 11:51, 28 July 2019
Hot Cold clues are clues in which a strange device obtained from talking to Jorral will tell the player in the chatbox whether the player is Hot (close to) or Cold (far away from) the intended location to dig. This is based on an older children's game. There are 116 unique Hot/Cold locations.
To find your location, click on the strange device and it will tell you how close you are to the treasure. (you will also take some damage). Its temperature is based on the distance of the treasure from the player, measured in the number of steps it would take to reach the treasure, ignoring any obstacles (this is the Chebyshev distance between the player and treasure). Then, teleport or walk to another location, and check to see if the strange device has gotten warmer. Repeat to pinpoint a location. You can also use the list or map to help you find your location.
A map of RuneScape displaying all possible locations.
For a full sized image, click here.
When you dig at the dig spot, you will be attacked by a Brassican Mage in a single-combat area, or three Ancient Wizards if your clue leads you to a multi-combat area.
In the fight against the Brassican Mage, his attacks are not affected by protection prayers; however, ranged armour seems to help. The three Ancient Wizards are a lot stronger and will use all three combat styles alongside poisoning you (poison cannot be blocked by protection prayers)
The locations in this guide are grouped by region:
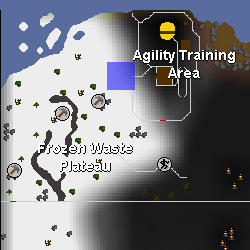
Asgarnia
| Location | Image | Map |
|---|---|---|
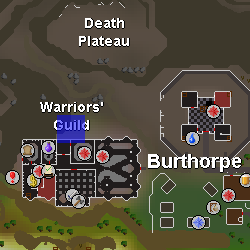
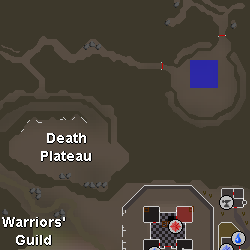
| North of the Warriors' Guild in Burthorpe. | 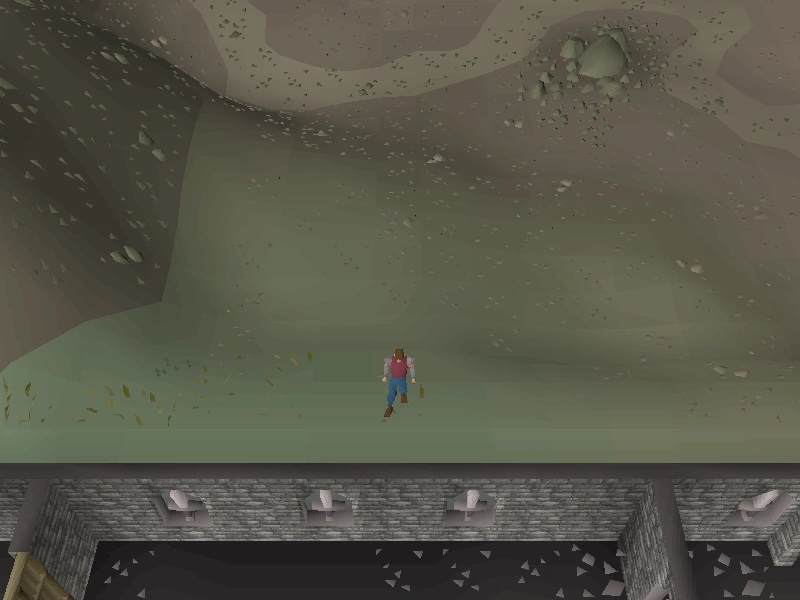 |
 |
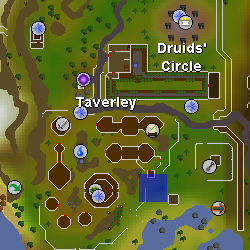
| East of Jatix's Herblore Shop in Taverley. | 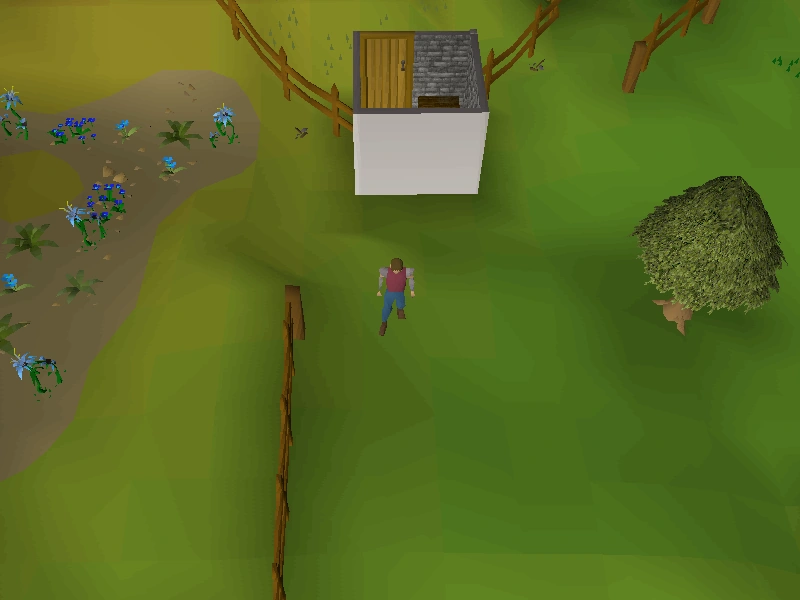 |
 |
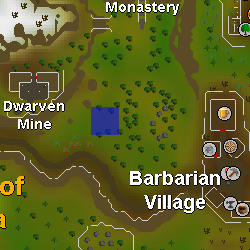
| West of Barbarian Village. | 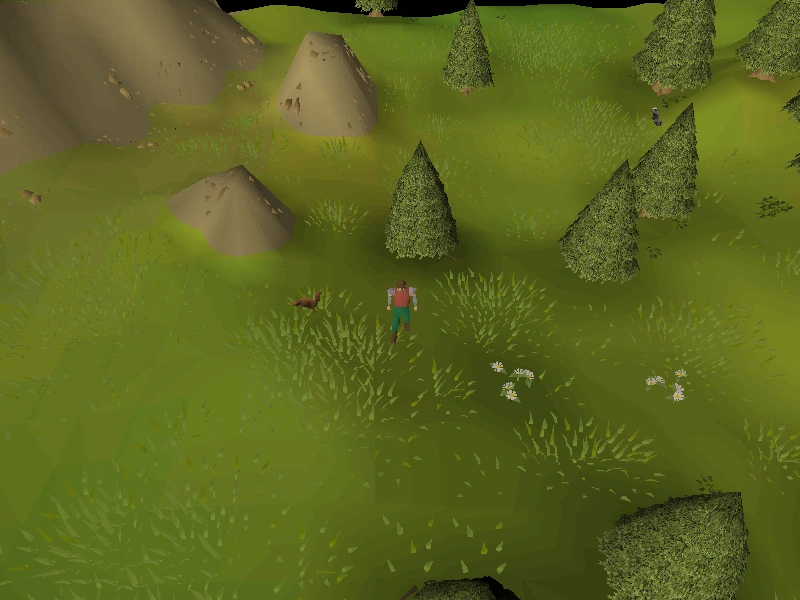 |
 |
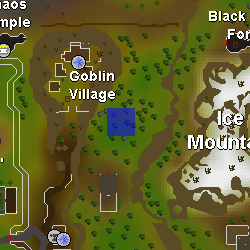
| North of Miazrqa's tower, outside Goblin Village. | 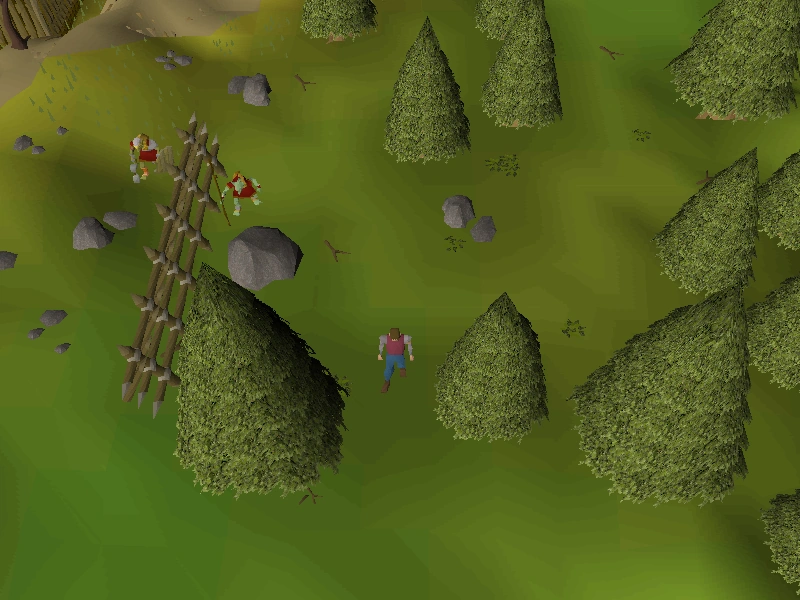 |
 |
| In the cow pen north of Sarah's Farming Shop. | 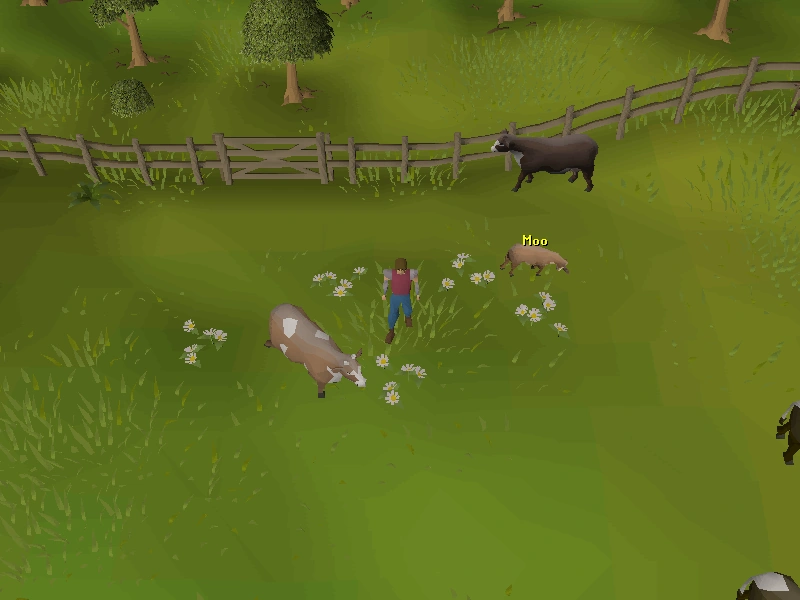 |
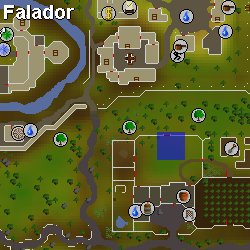 |
| Outside the Falador Party Room. | 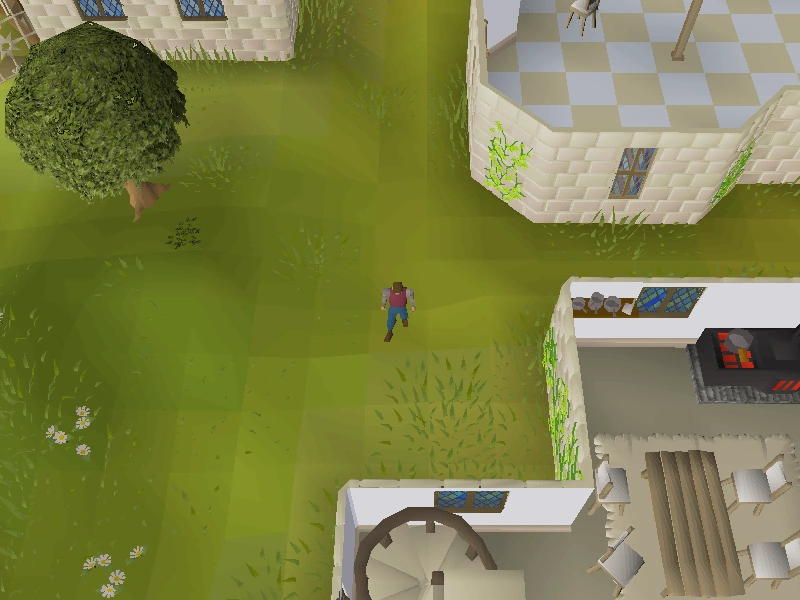 |
 |
| Outside the Crafting Guild cow pen. |  |
 |
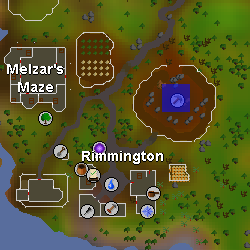
| In the centre of the Rimmington mine. | 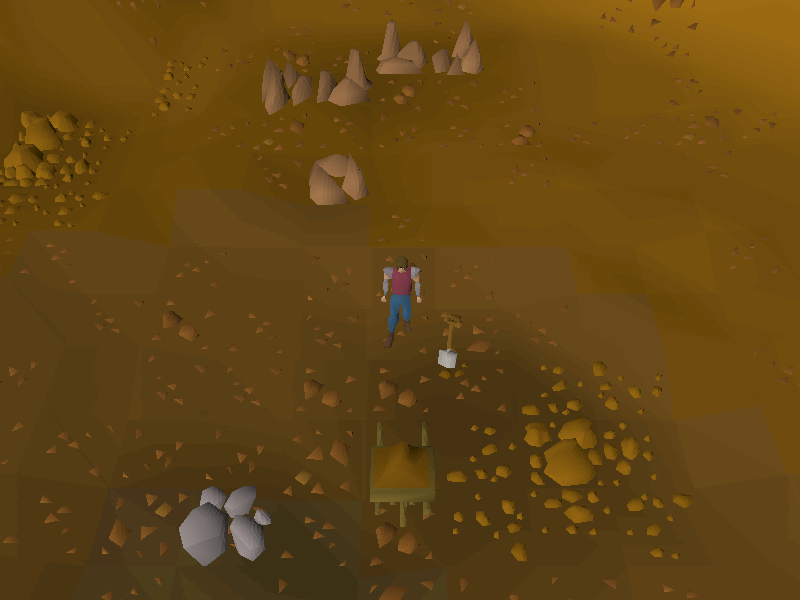 |
 |
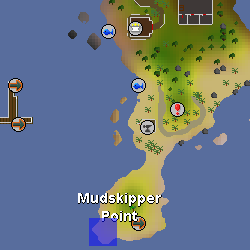
| Mudskipper Point, on the starfish in the south-west corner. | 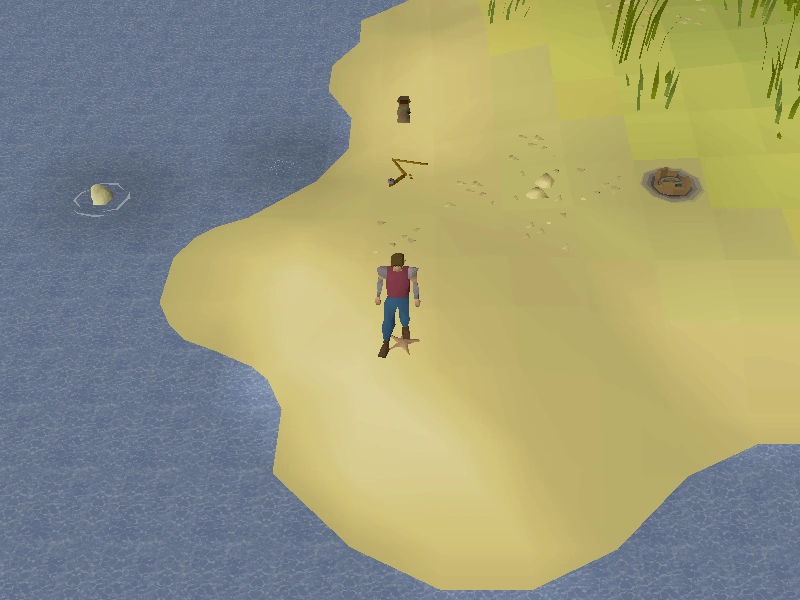 |
 |
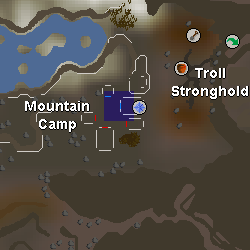
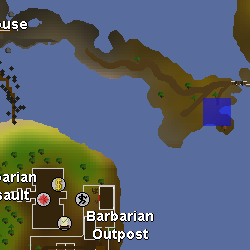
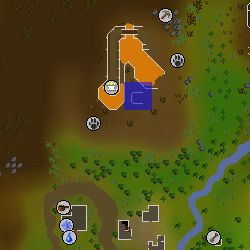
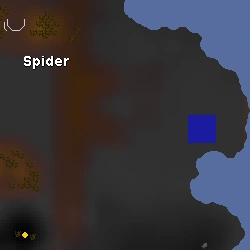
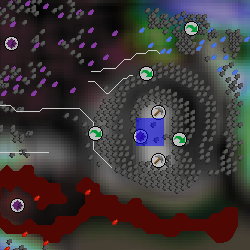
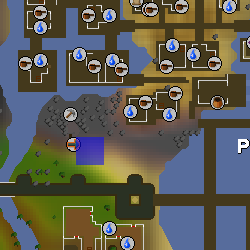
| The Troll arena, where the player fights Dad during the Troll Stronghold quest. Bring climbing boots. | 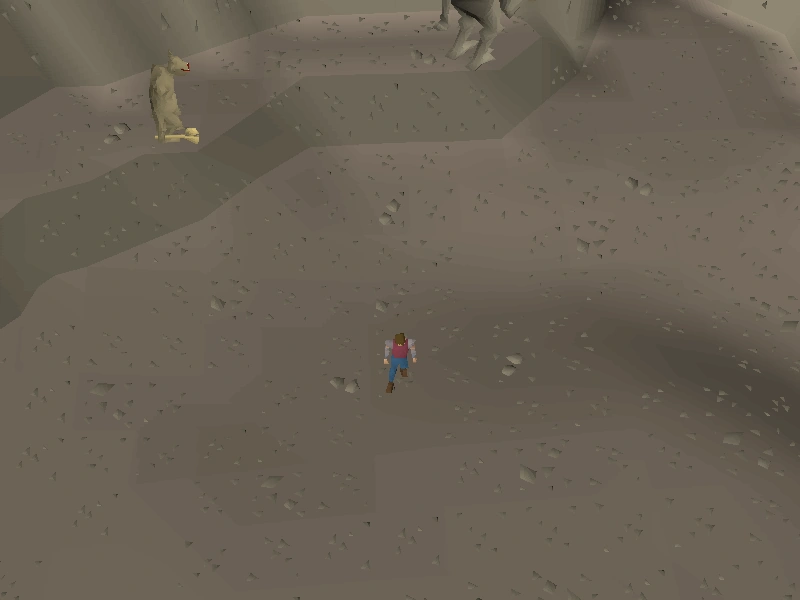 |
 |
Desert
| Location | Image | Map |
|---|---|---|
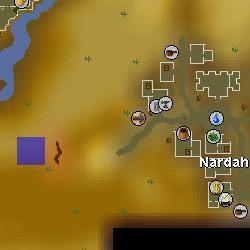
| West of Nardah genie cave. | 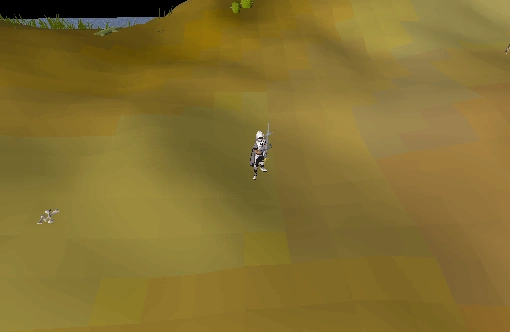 |
 |
| West of Al Kharid mine. | 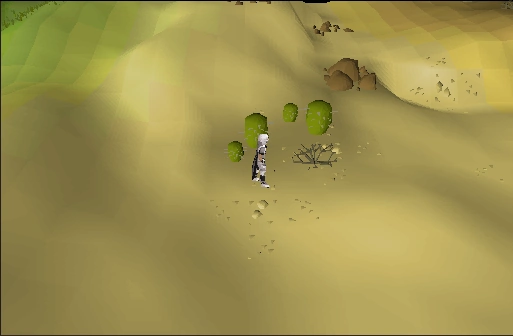 |
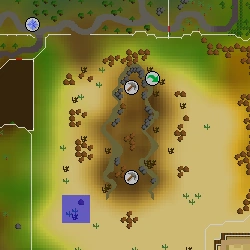 |
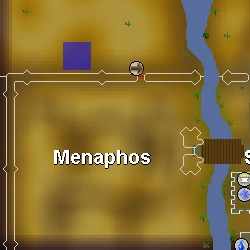
| North of Menaphos gate. | 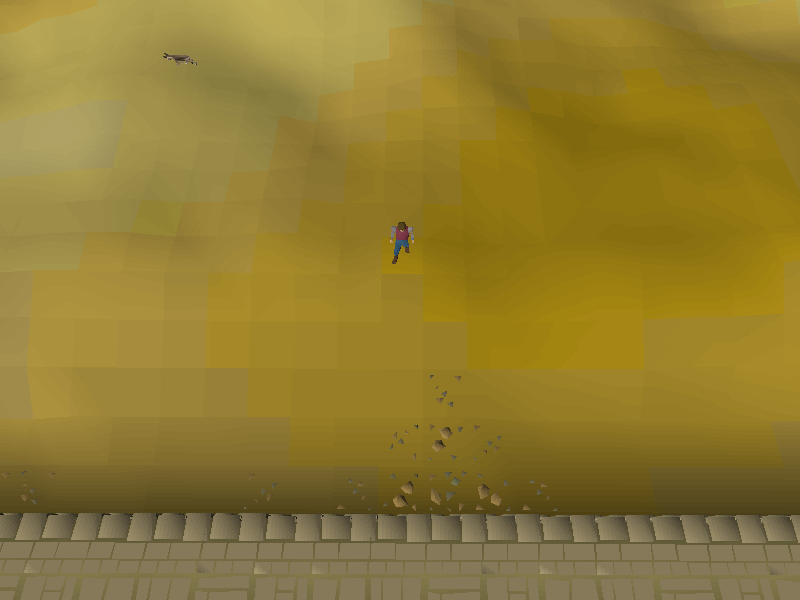 |
 |
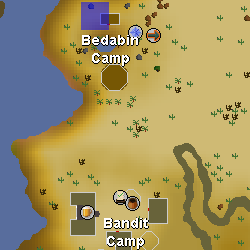
| Bedabin Camp, dig around the north tent. | 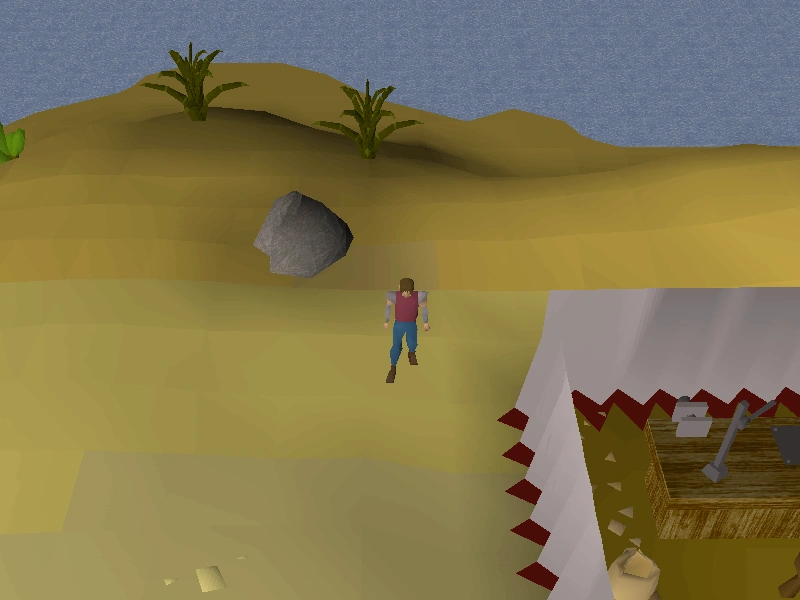 |
 |
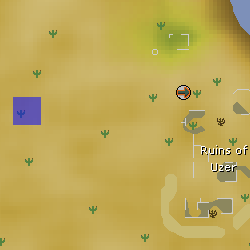
| West of Uzer. | 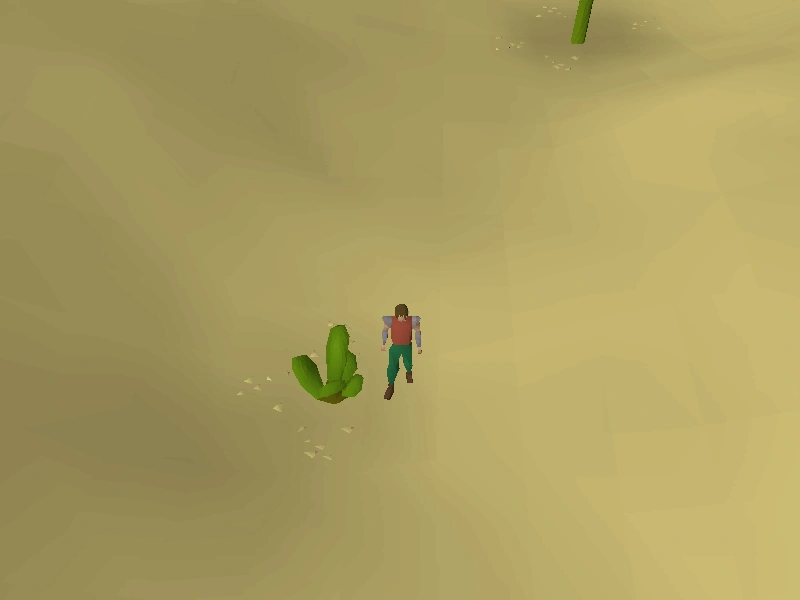 |
 |
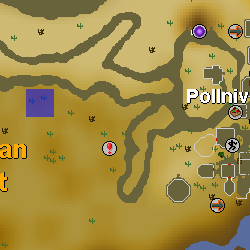
| West of Pollnivneach. |  |
 |
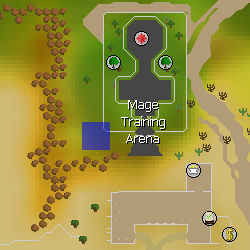
| Next to Mage Training Arena. | 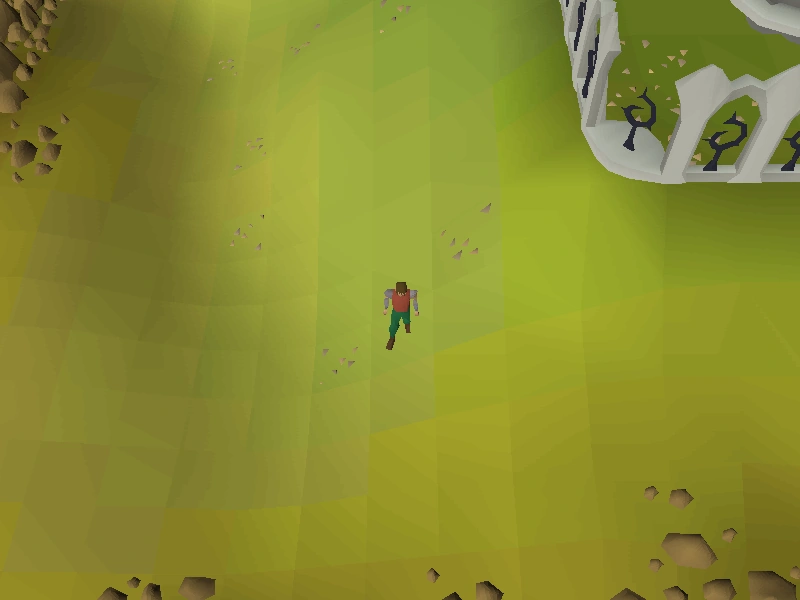 |
 |
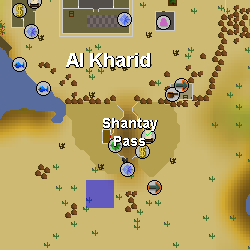
| South-west of Shantay Pass. | 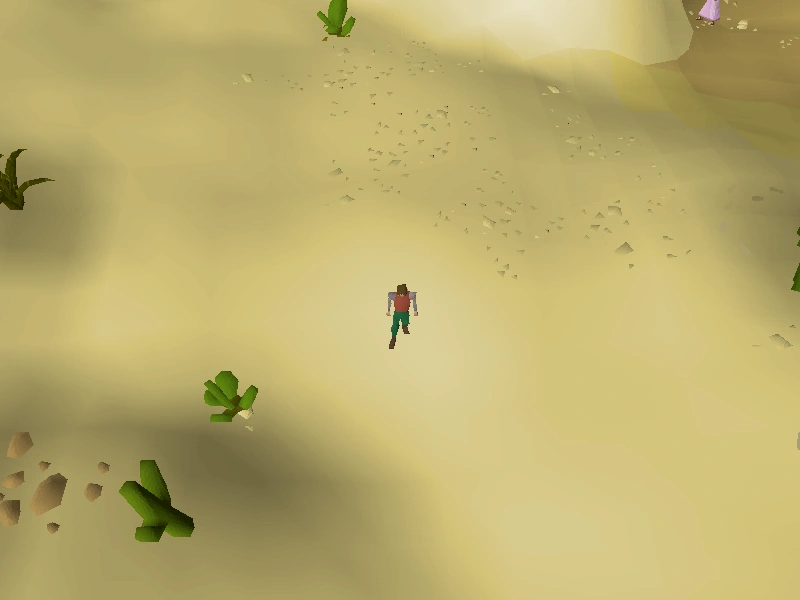 |
 |
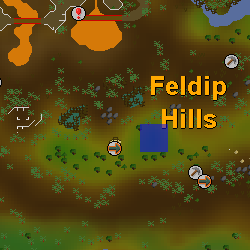
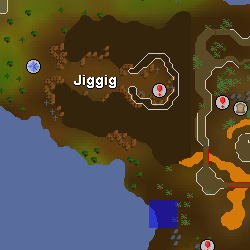
Feldip Hills
| Location | Image | Map |
|---|---|---|
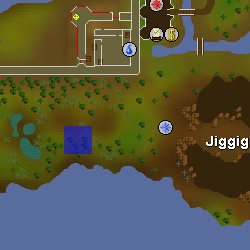
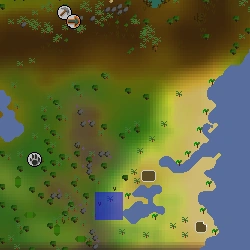
| West of Jiggig, east of the fairy ring BKP. |  |
 |
| West of the southeasternmost lake in Feldip Hills. | 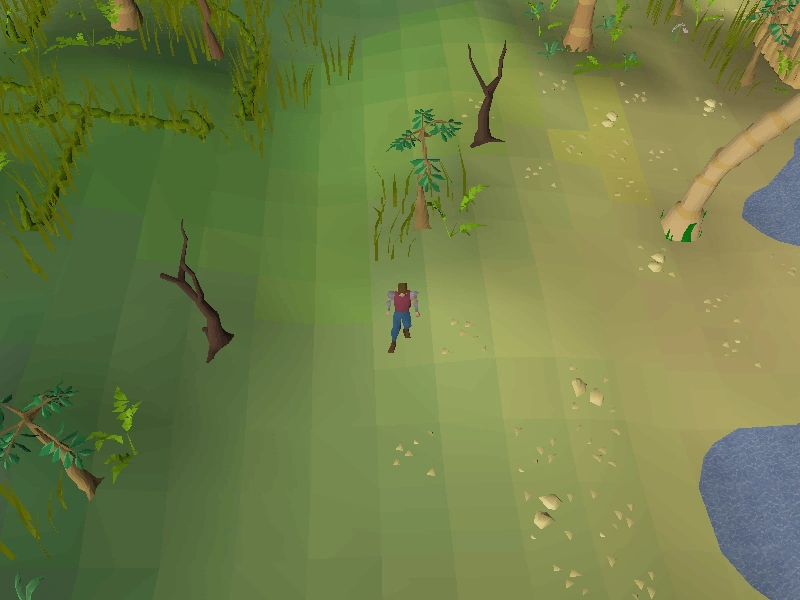 |
 |
| East of the gnome glider (Lemantolly Undri). | 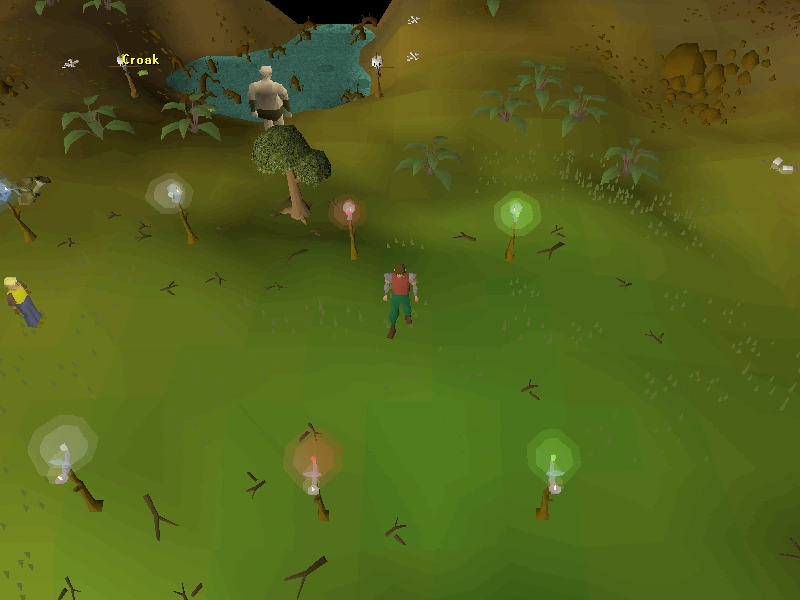 |
 |
| South of Rantz, six steps west of the empty glass bottles. | 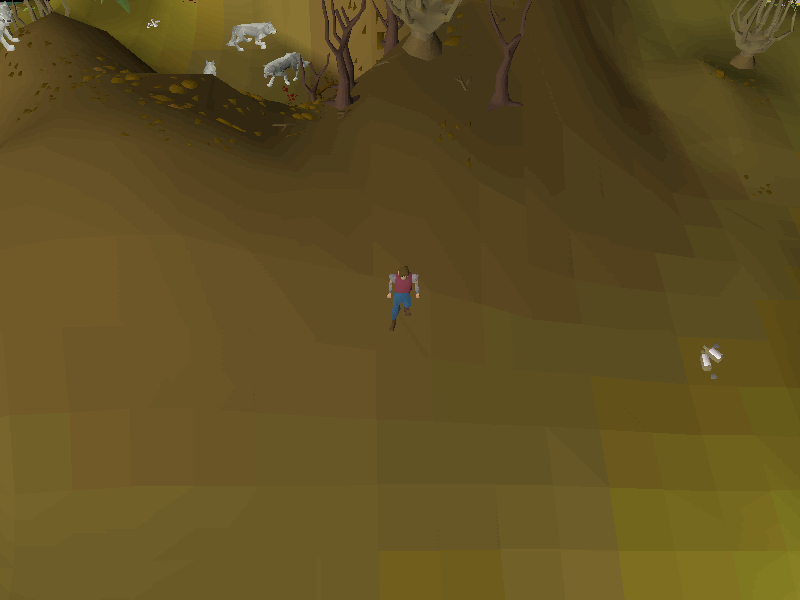 |
 |
| South of Jiggig. | 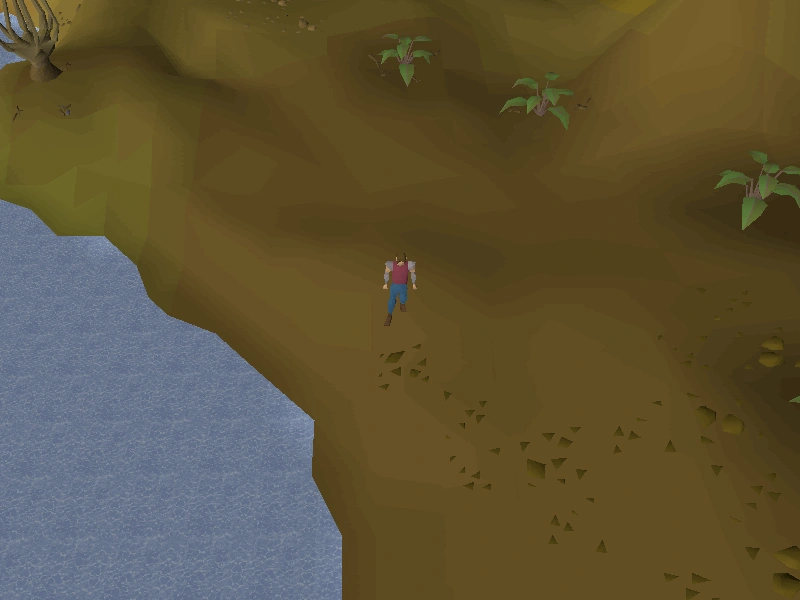 |
 |
| Outside the red chinchompa hunting ground entrance, south of the Hunting expert's hut. | 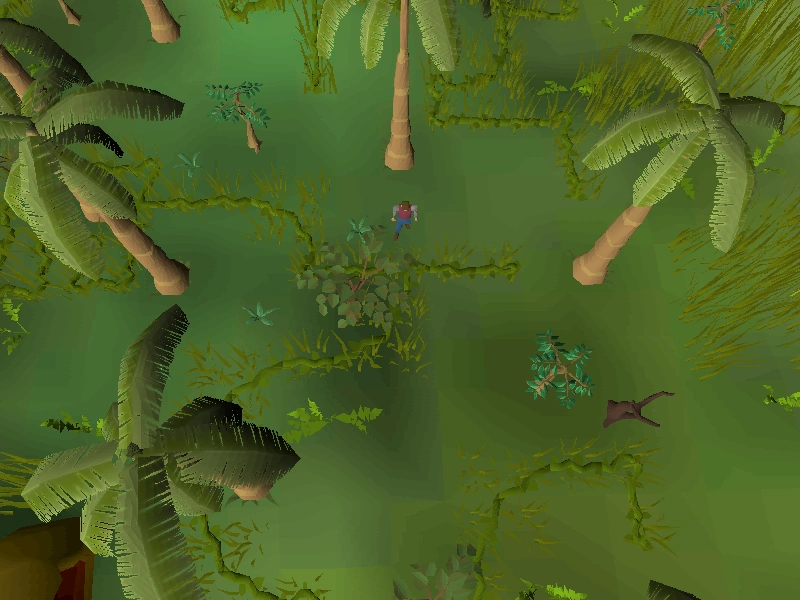 |
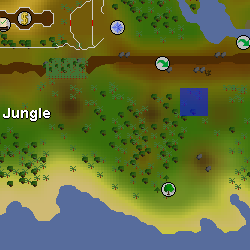
 |
| South-east of the ∩-shaped lake, near the |
||
| Directly west of the Castle Wars balloon. | 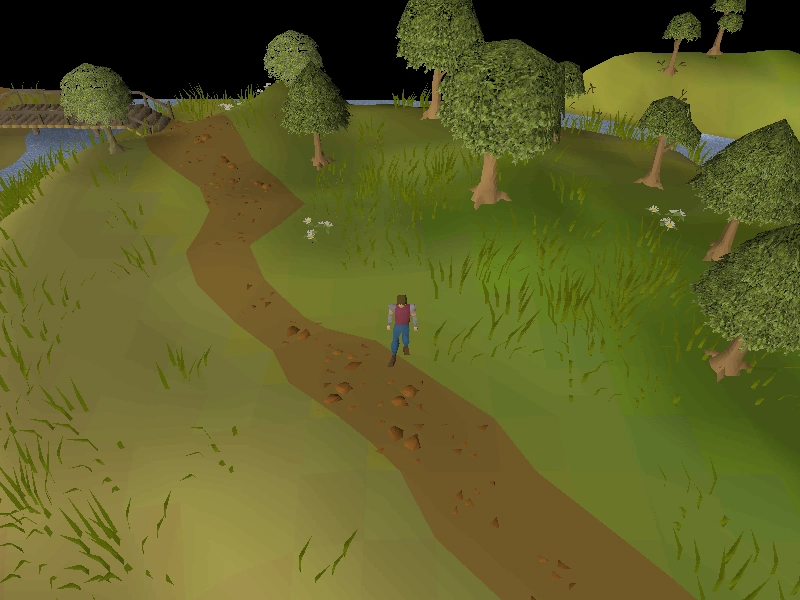 |
 |
Fremennik Province
| Location | Image | Map |
|---|---|---|
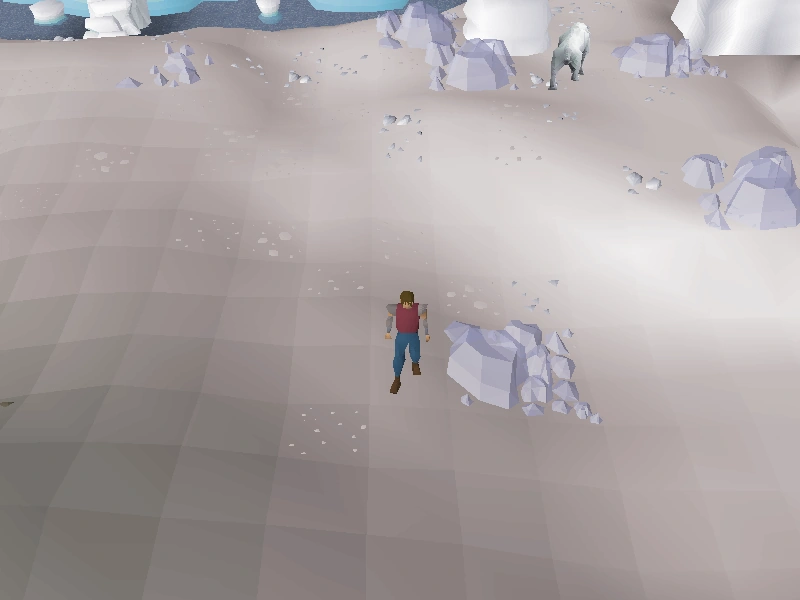
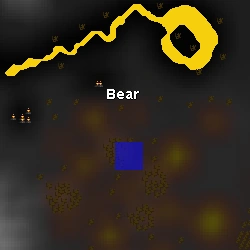
| At the Mountain Camp. | 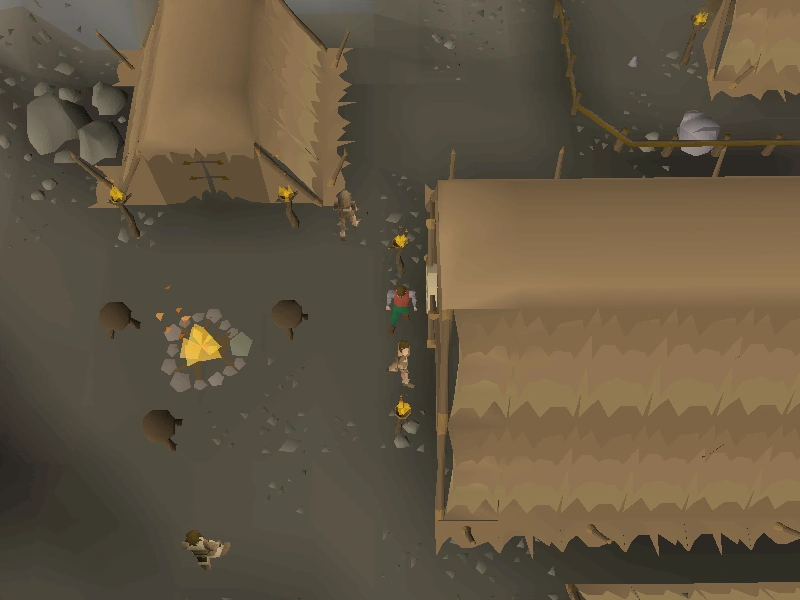 |
 |
| At the Rellekka Hunter area, near the |
 |
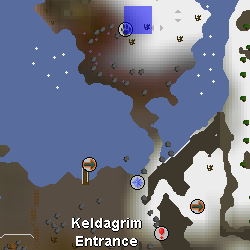 |
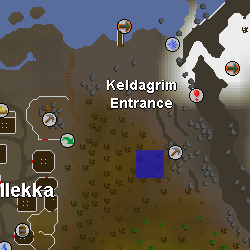
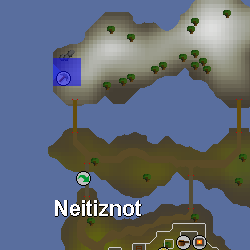
| West of the Keldagrim entrance mine. | 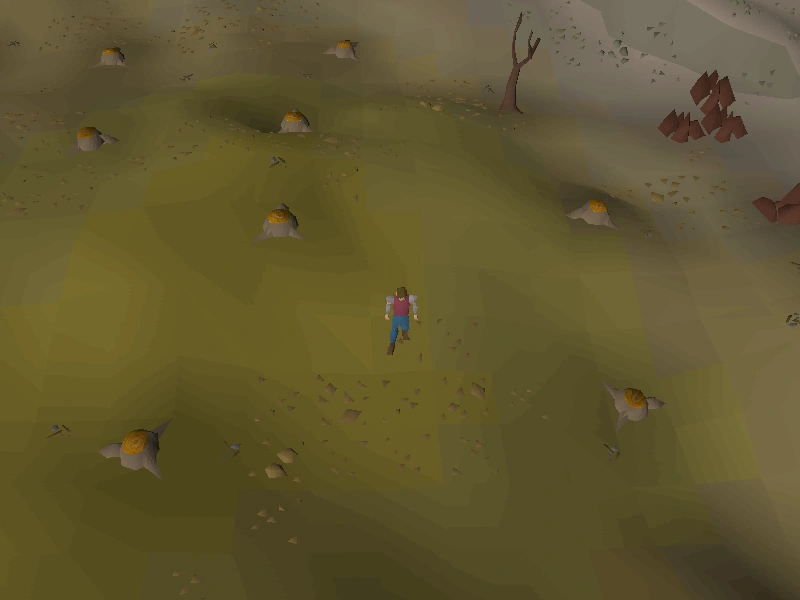 |
 |
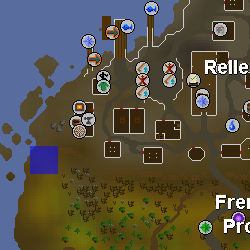
| Outside the fence in the south-western corner of Rellekka. | 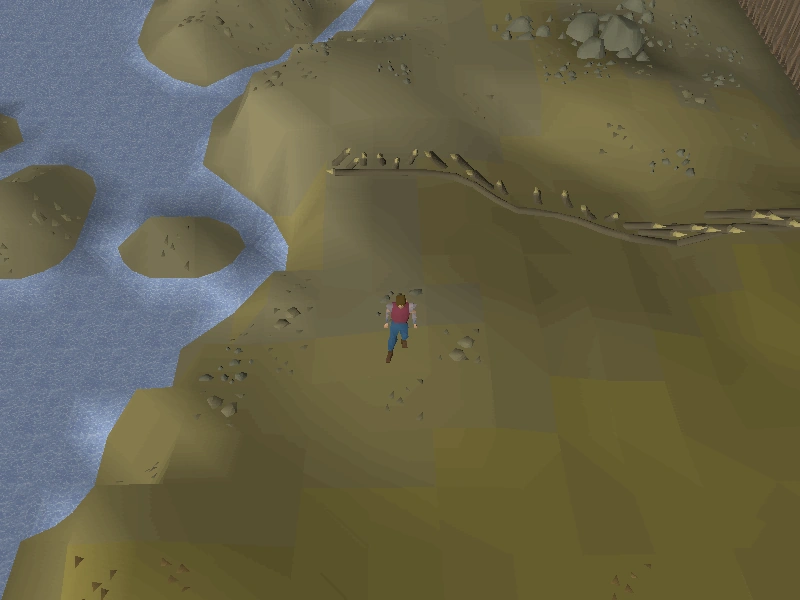 |
 |
| South-east of the Lighthouse. | 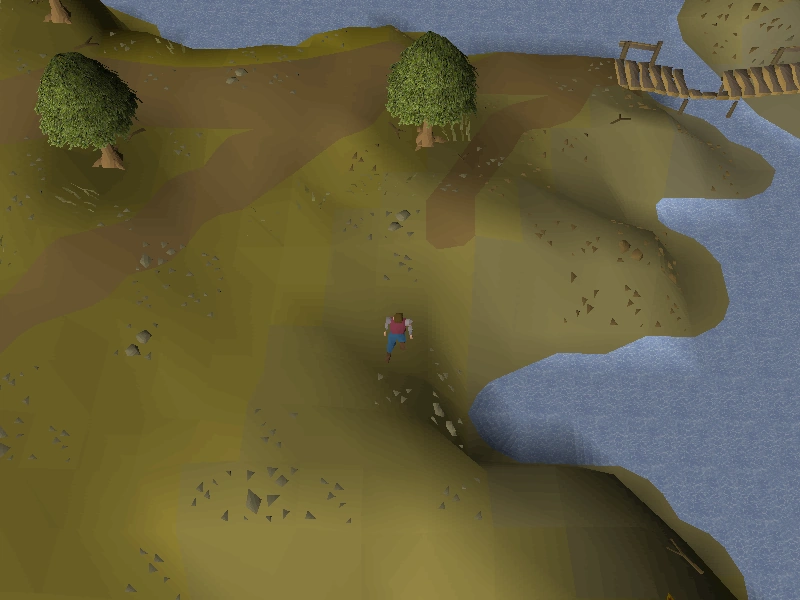 |
 |
| Inside Etceteria's castle, in the southern staircase. |  |
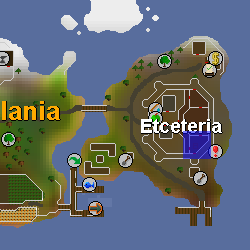 |
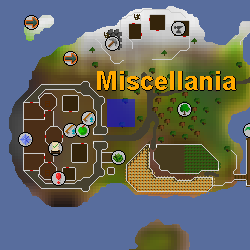
| Outside Miscellania's courtyard. | 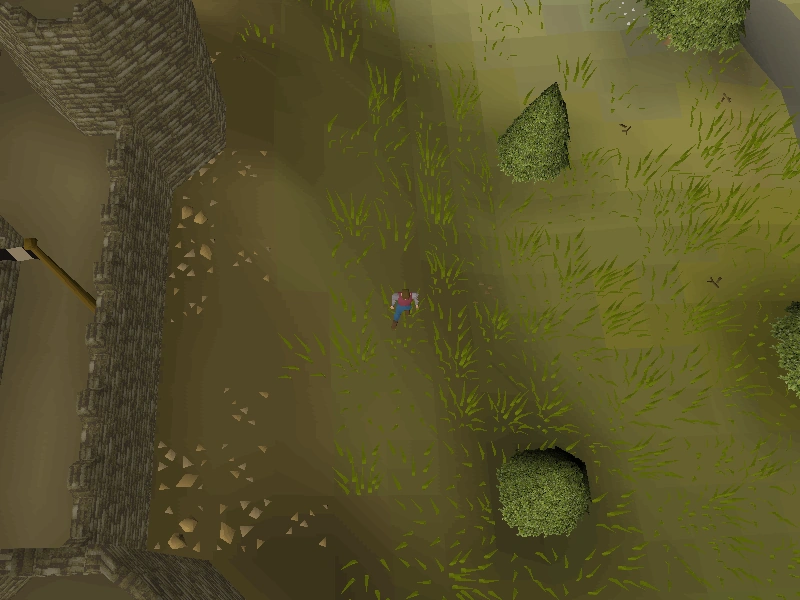 |
 |
| Central Fremennik Isles mine. | 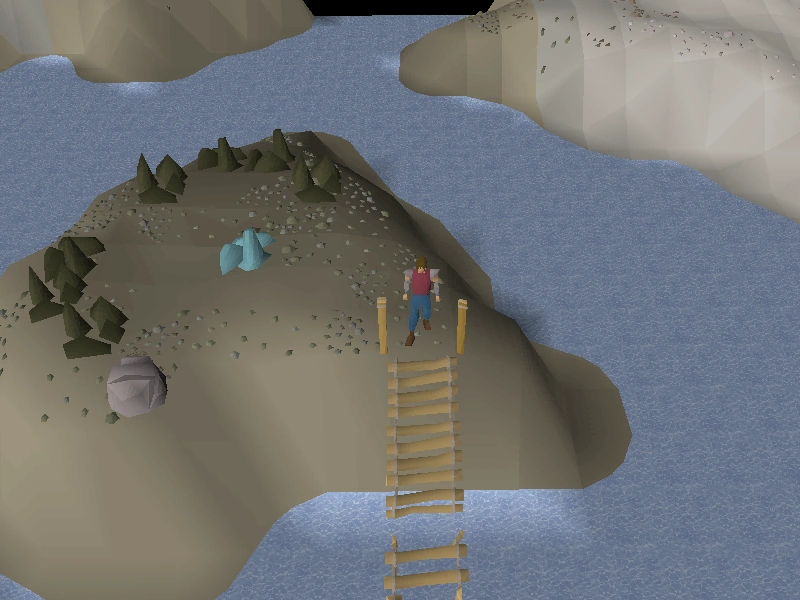 |
 |
| West Fremennik Isles mine. | 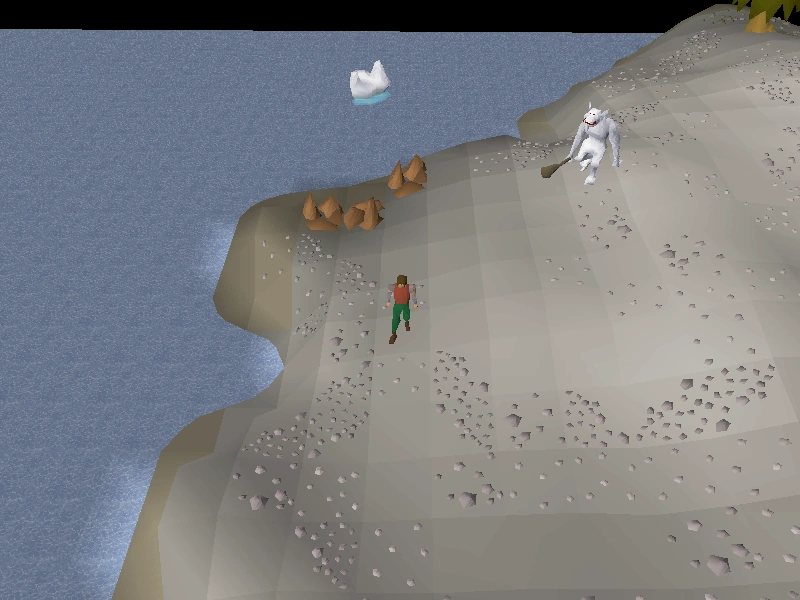 |
 |
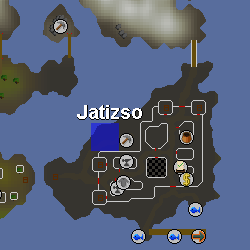
| West of the Jatizso mine entrance. | 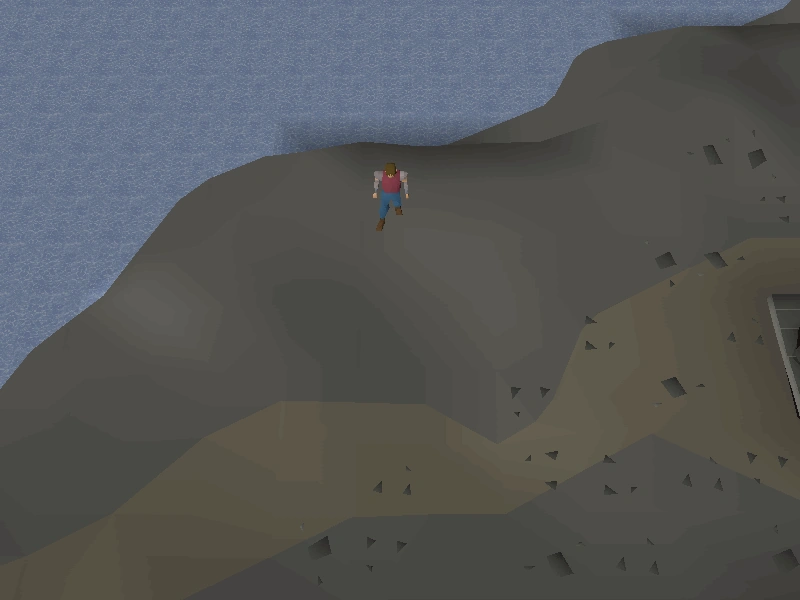 |
 |
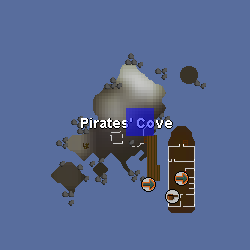
| Pirates' Cove | 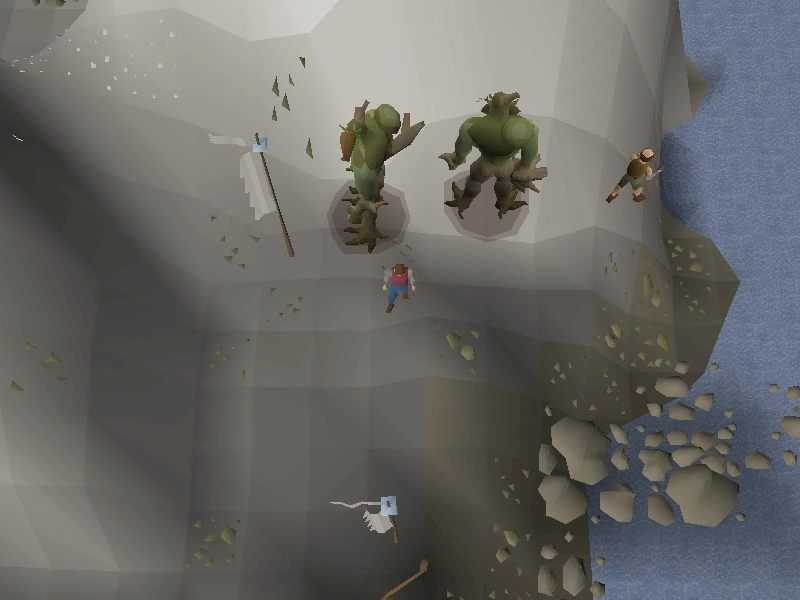 |
 |
| Astral altar | 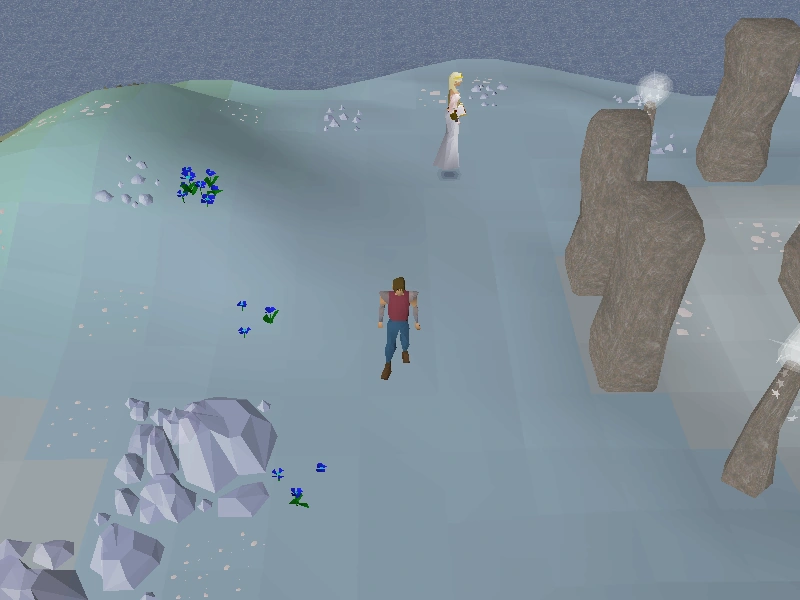 |
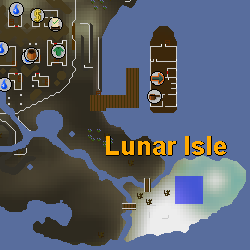 |
| Lunar Isle, inside the village. | 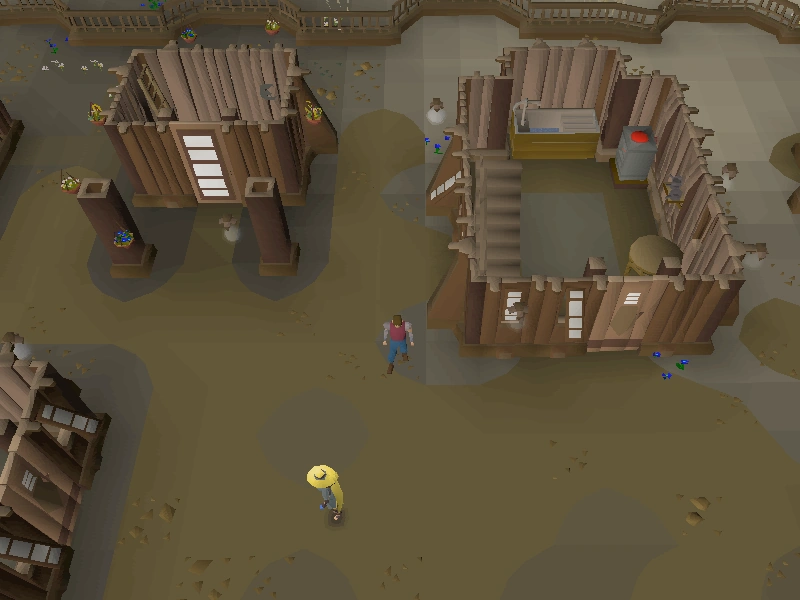 |
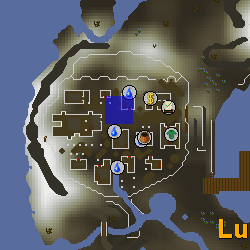 |
| Lunar Isle, north of the village. | 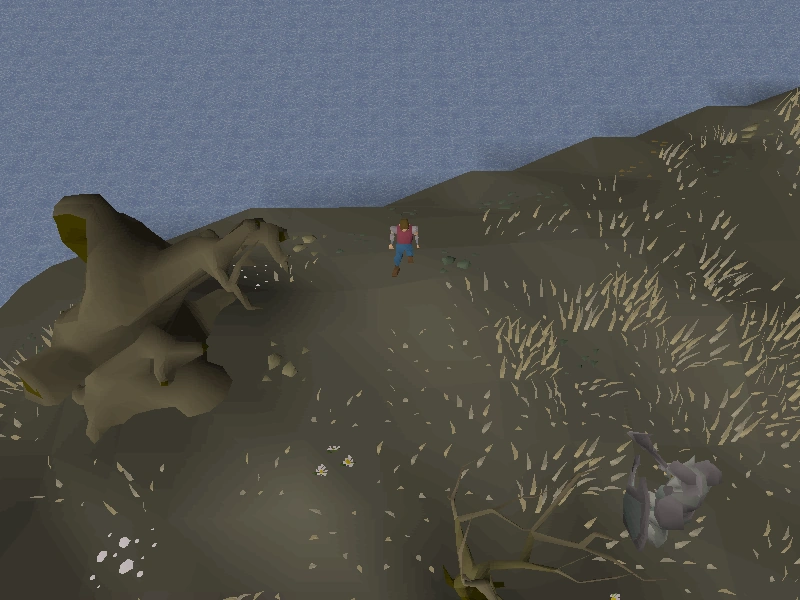 |
 |
Kandarin
| Location | Image | Map |
|---|---|---|
| North-west of the Sinclair Mansion, near the log balance shortcut. | 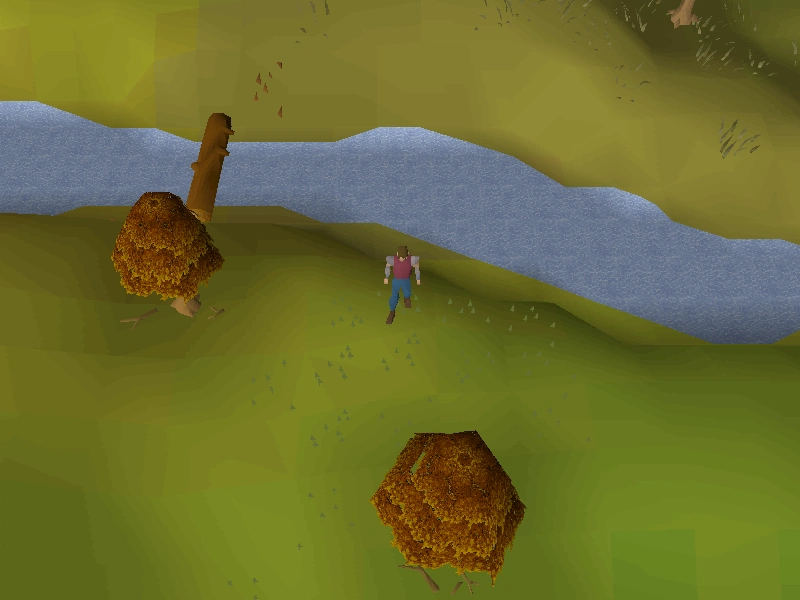 |
 |
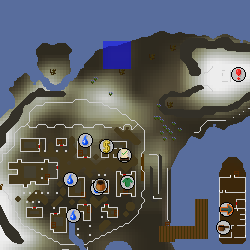
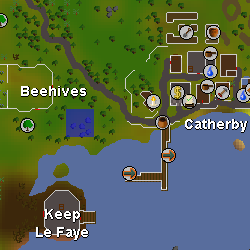
| Catherby, between the bank and the beehives, near small rock formation. | 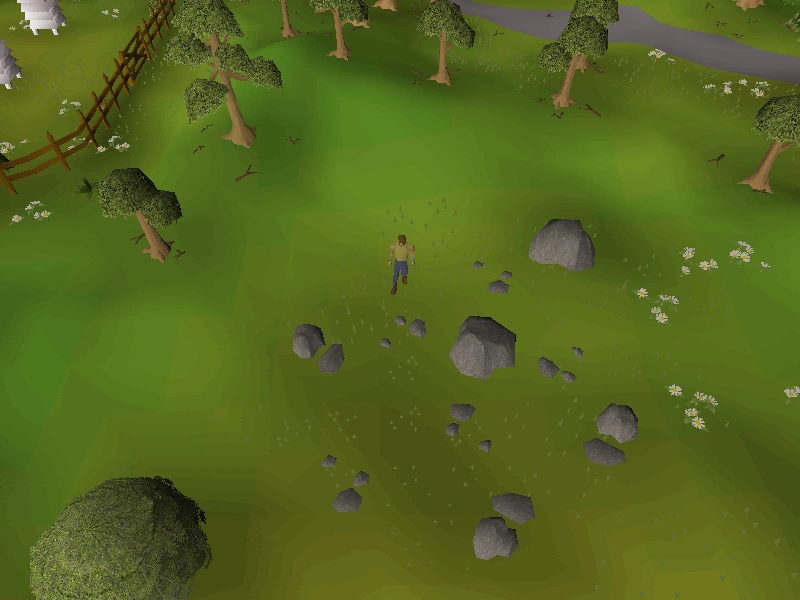 |
 |
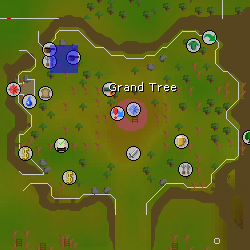
| Grand Tree, just east of the terrorchick gnome enclosure. |  |
 |
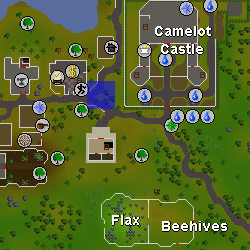
| Between the Seers' Village bank and Camelot. | 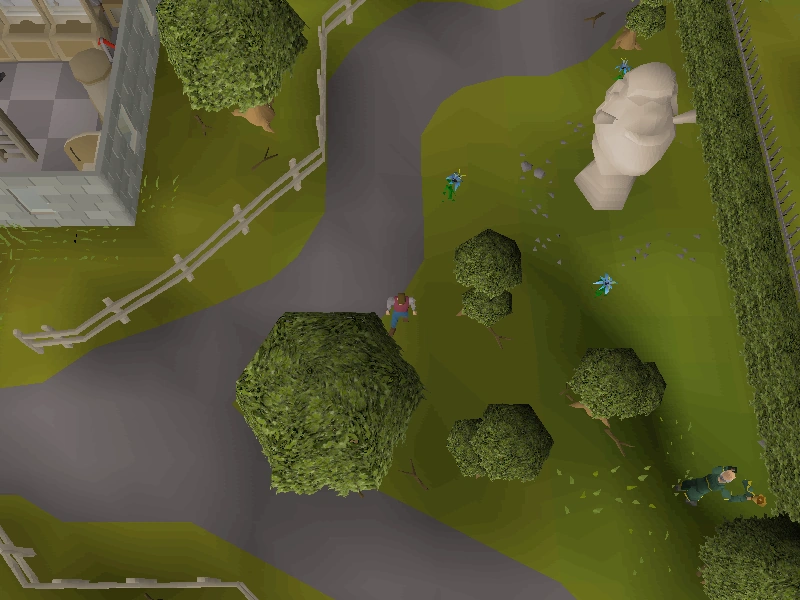 |
 |
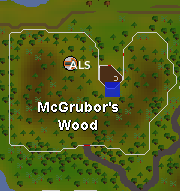
| McGrubor's Wood | 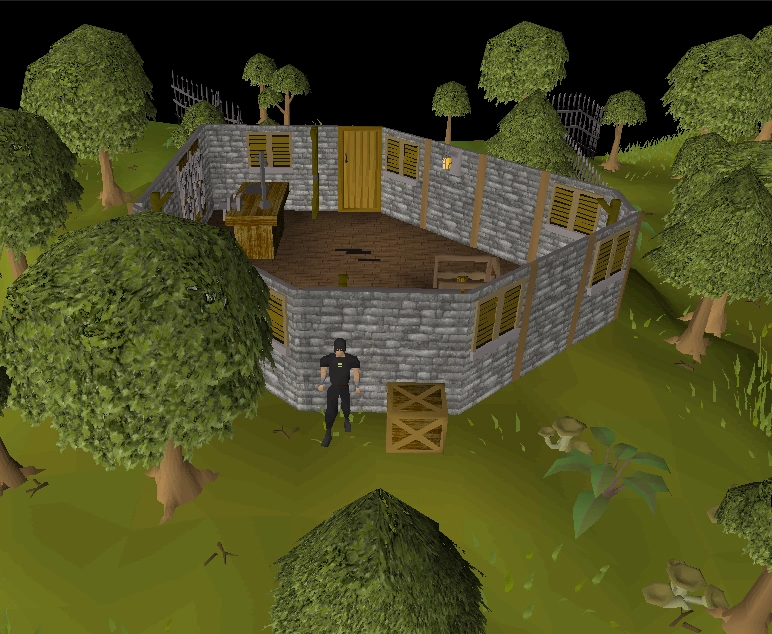 |
 |
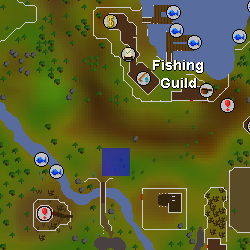
| South of Fishing Guild | 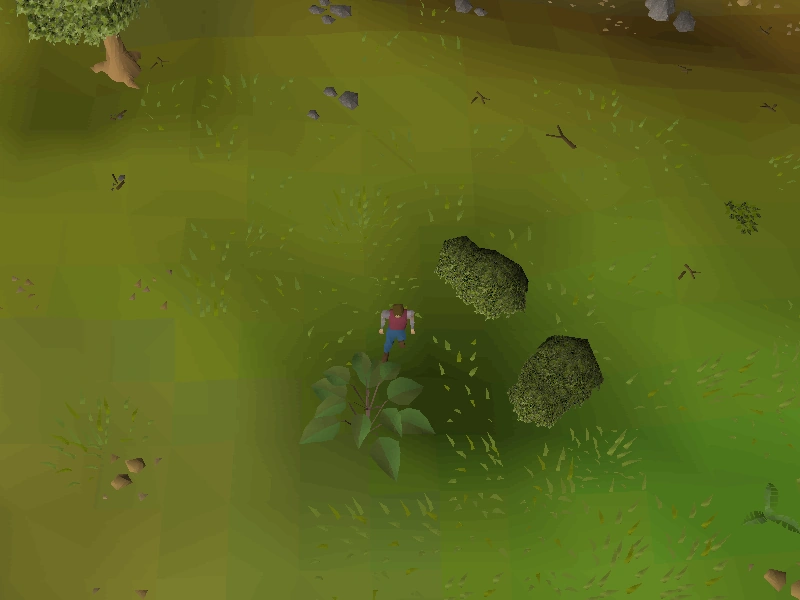 |
 |
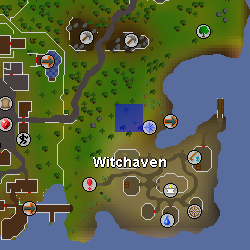
| Outside Witchaven, west of Jeb, Holgart, and Caroline. |  |
 |
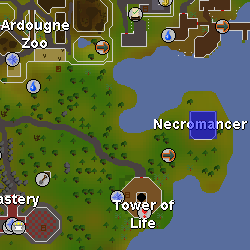
| Ground floor inside the Necromancer Tower. Easily accessed by using fairy ring code DJP. | 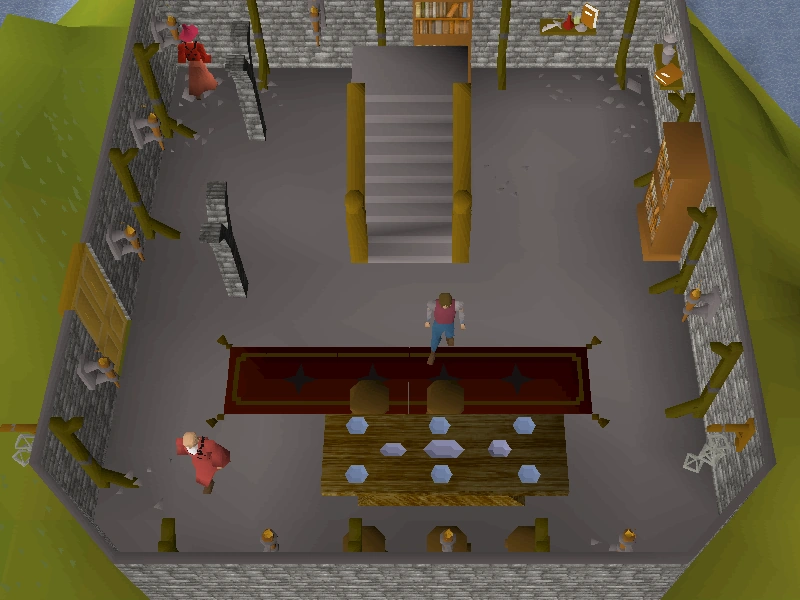 |
 |
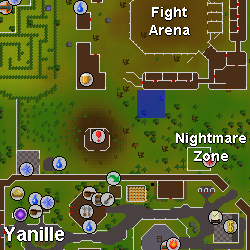
| South of the Fight Arena, north-west of the Nightmare Zone. | 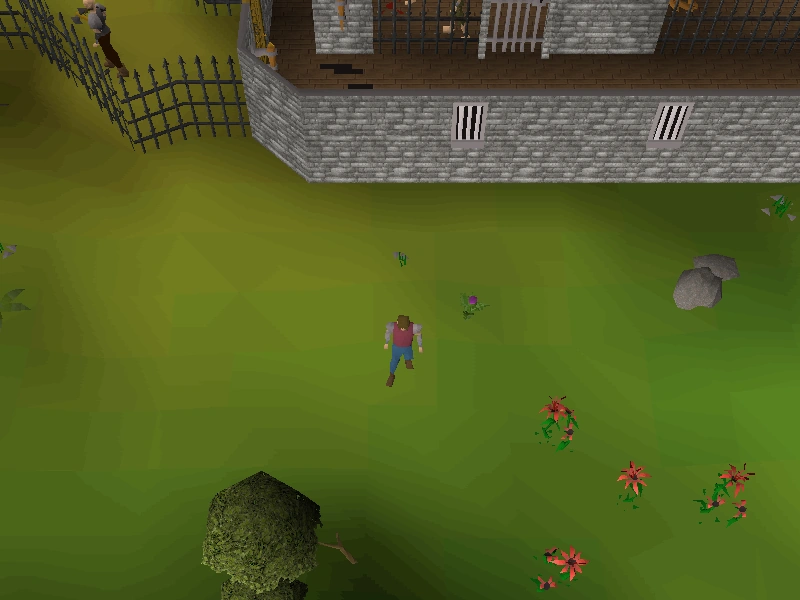 |
 |
| Tree Gnome Village, near the |
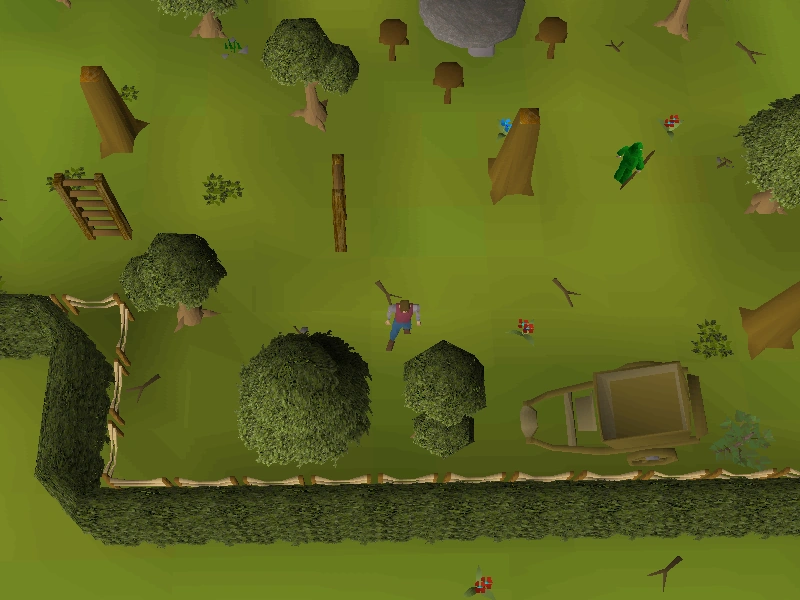 |
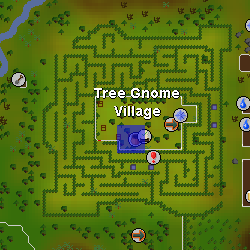 |
| Grave of Scorpius | 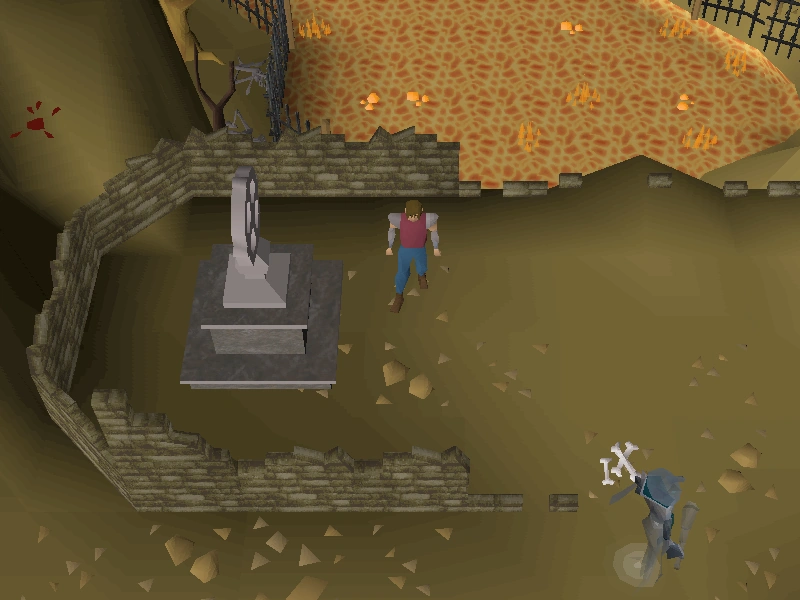 |
 |
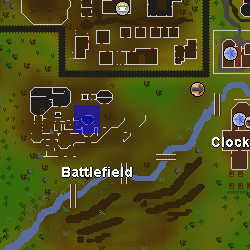
| Khazard Battlefield, in the small ruins south of tracker gnome 2. | 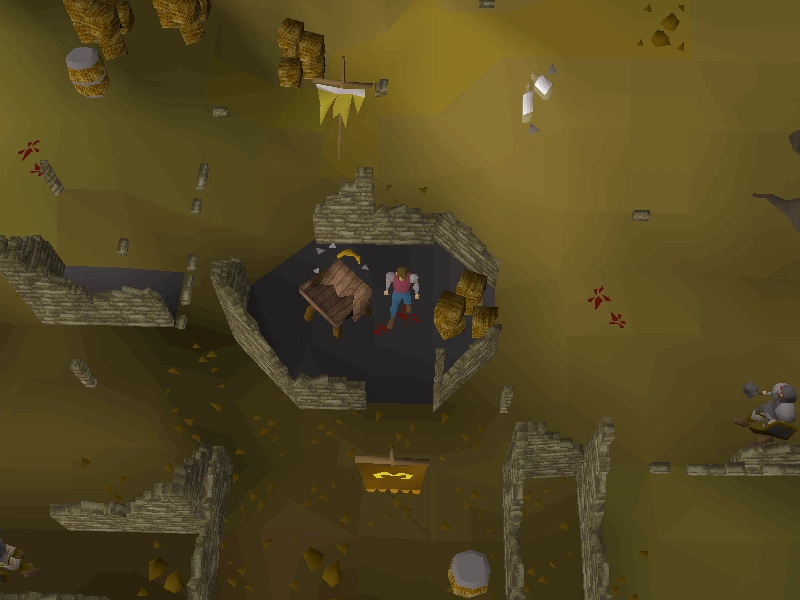 |
 |
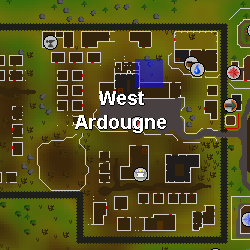
| West Ardougne, near the staircase outside the Civic Office. | 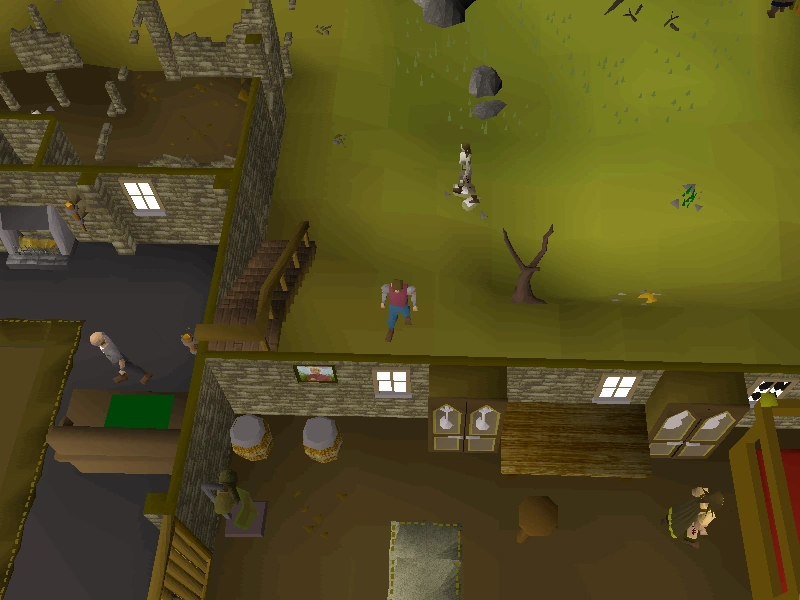 |
 |
| South-west Tree Gnome Stronghold | 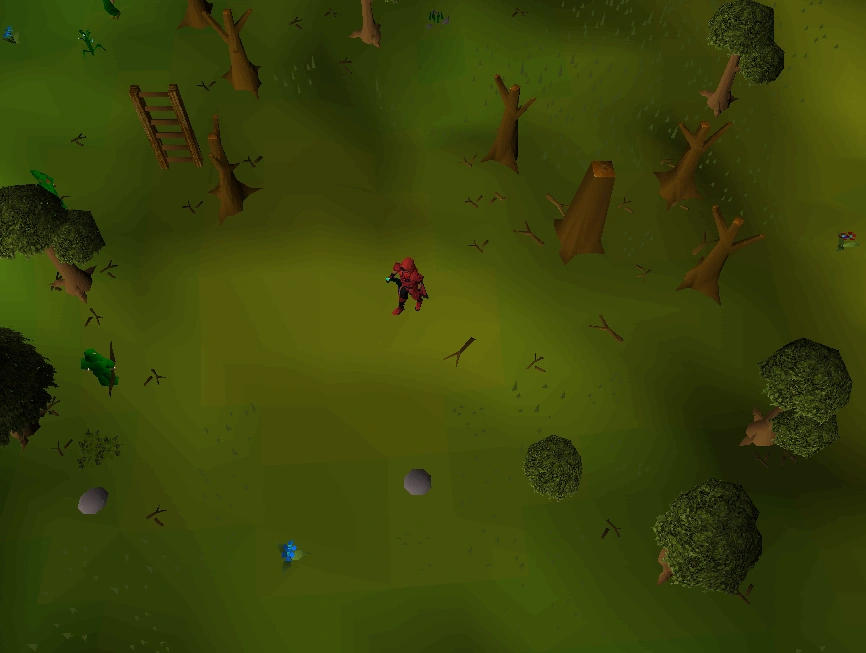 |
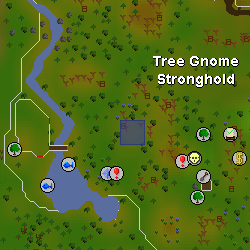 |
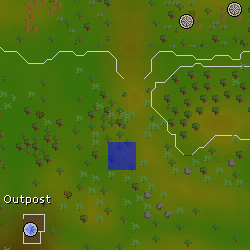
| South of the Tree Gnome Stronghold, north-east of the Outpost. | 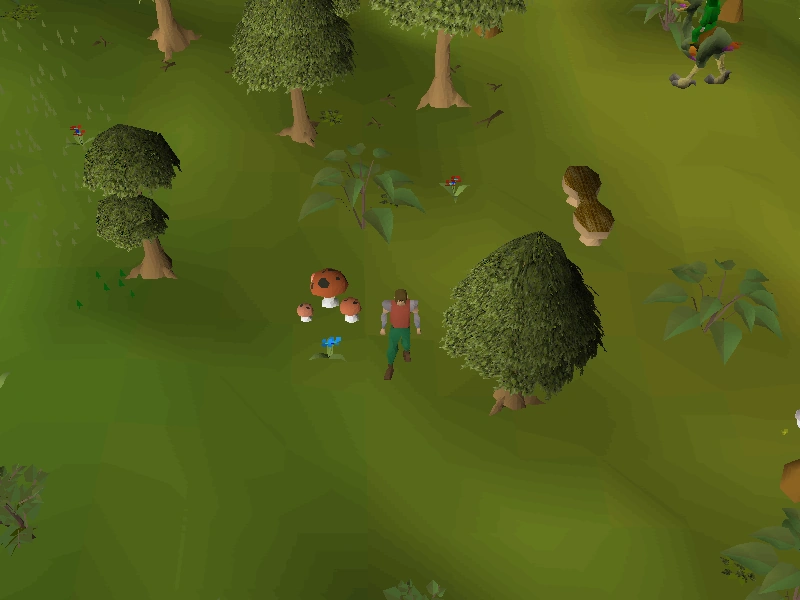 |
 |
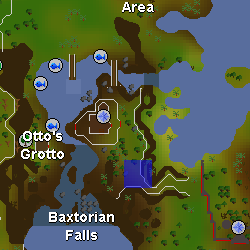
| South-east of Almera's house on Baxtorian Falls. | 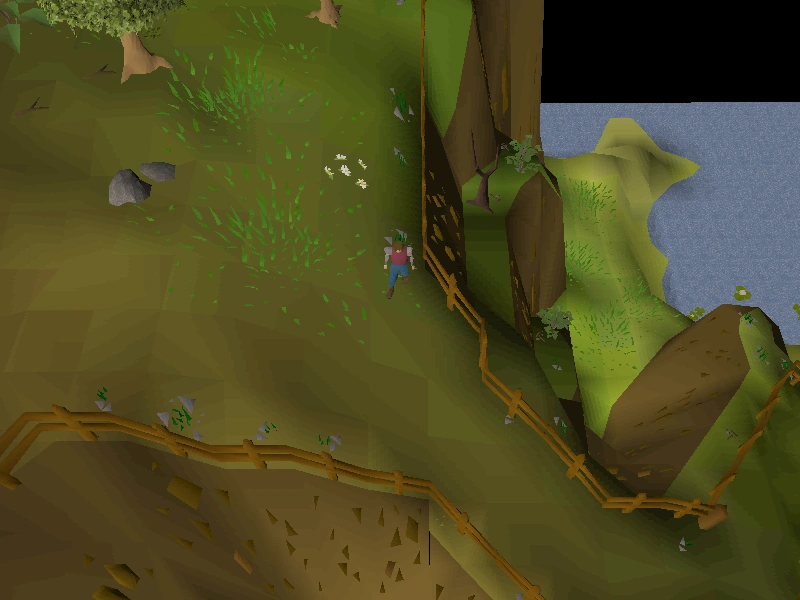 |
 |
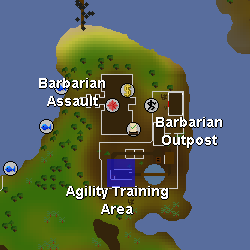
| Inside the Barbarian Agility Course. Completion of Alfred Grimhand's Barcrawl is required. | 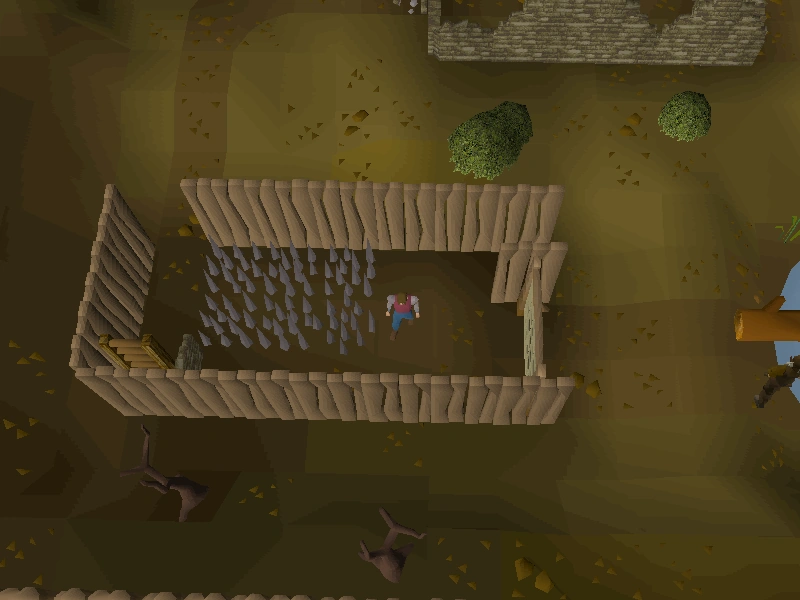 |
 |
Karamja
| Location | Image | Map |
|---|---|---|
| Musa Point, banana plantation. | 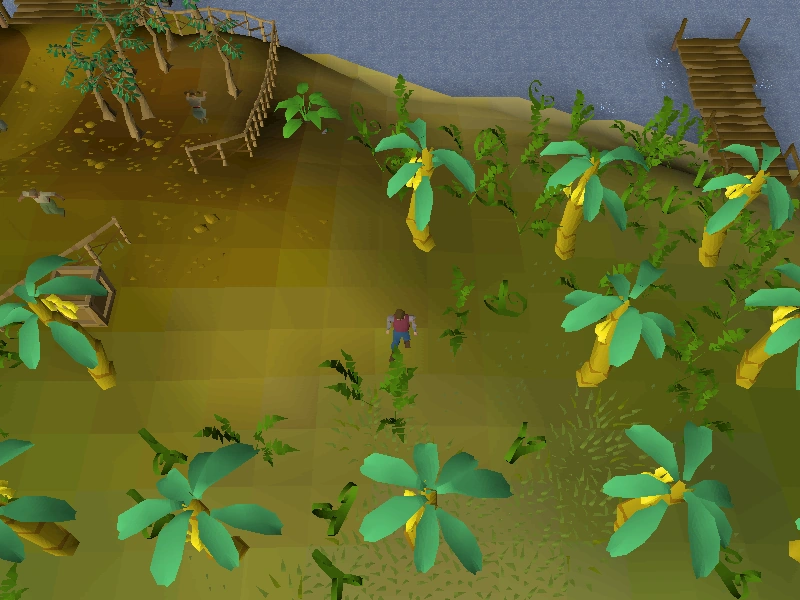 |
 |
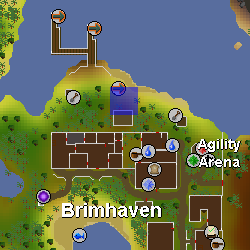
| Brimhaven, east of the fruit tree patch. |  |
 |
| West of Brimhaven. | 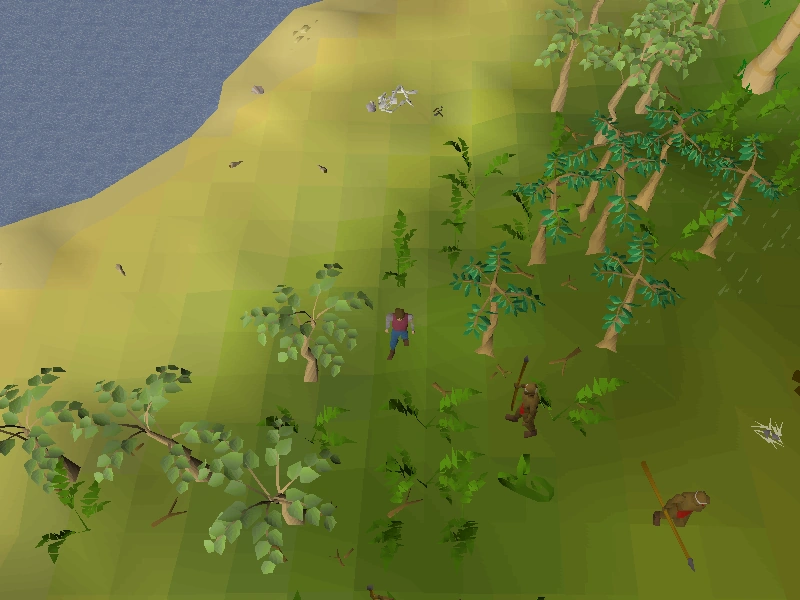 |
 |
| West of the gnome glider. | 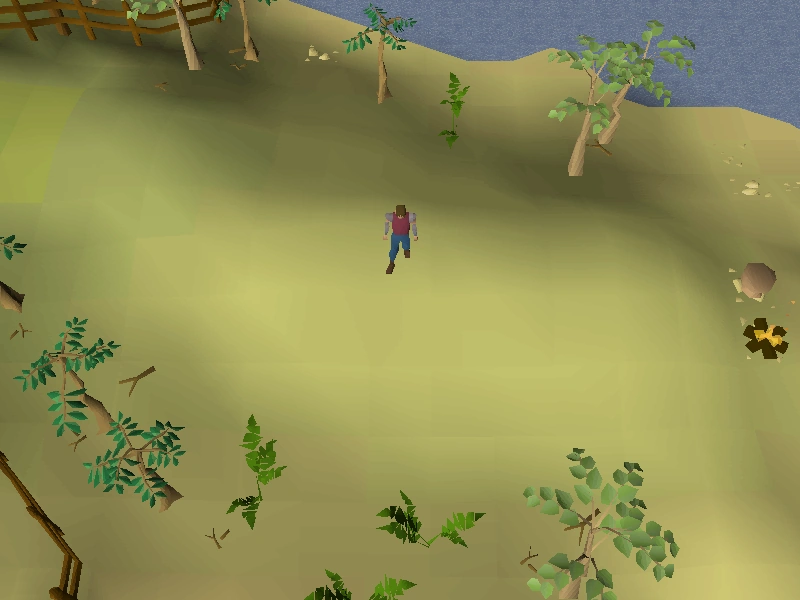 |
 |
| North-eastern part of Kharazi Jungle. |  |
 |
| South-western part of Kharazi Jungle. | 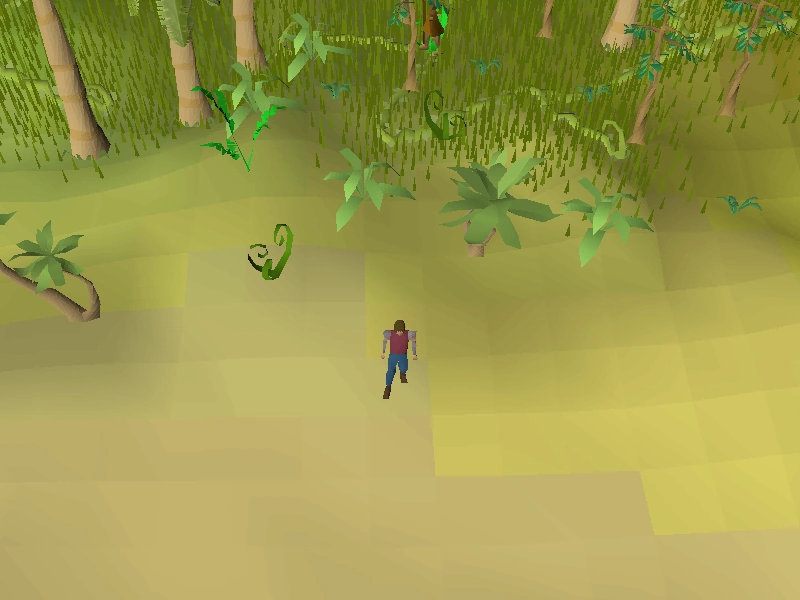 |
 |
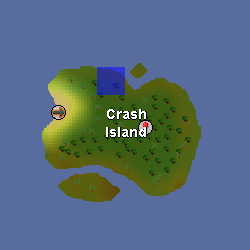
| Northern part of Crash Island. | 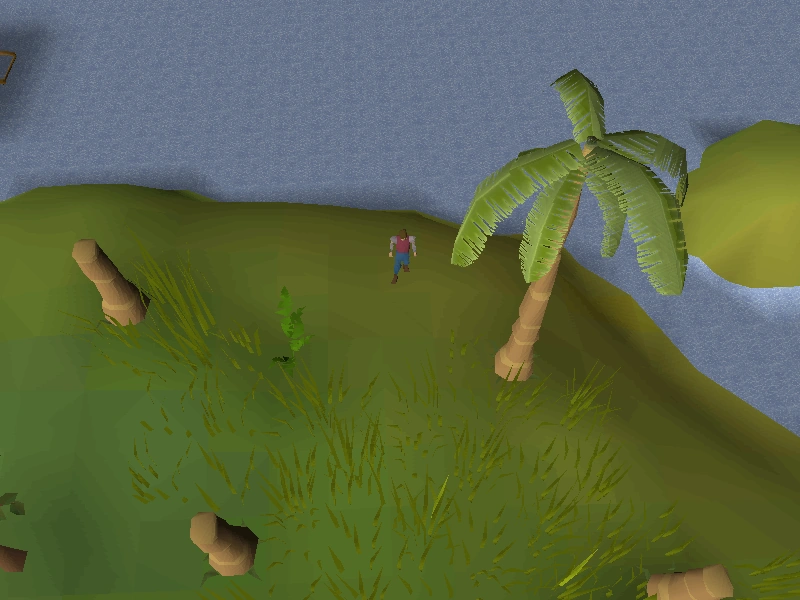 |
 |
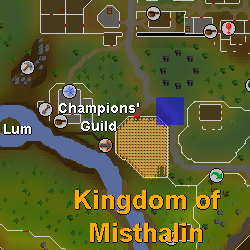
Misthalin
| Location | Image | Map |
|---|---|---|
| South of the stone circle near Varrock's entrance. | 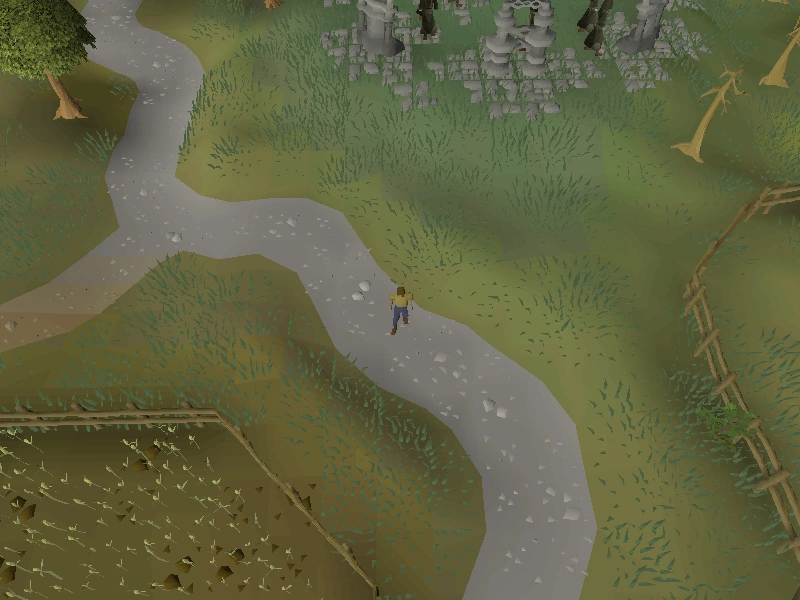 |
 |
| Just north-west of the Lumbridge Fishing tutor. | 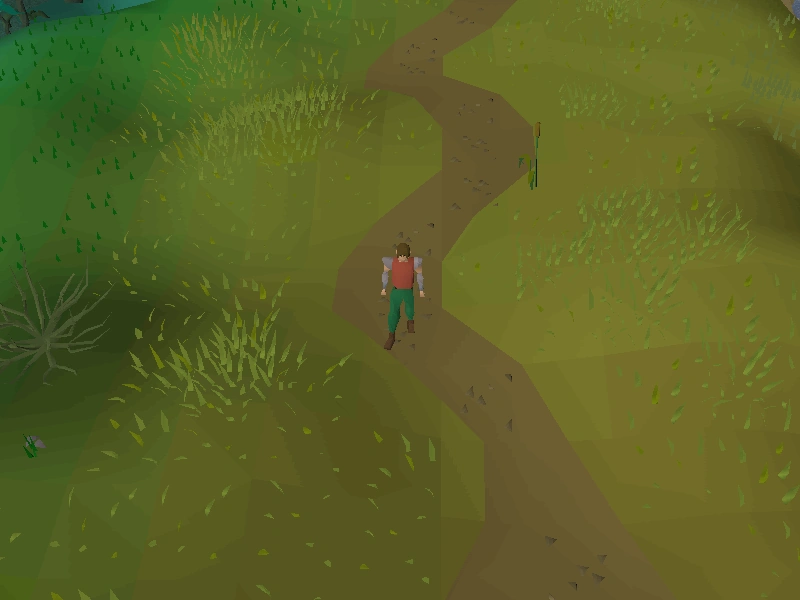 |
 |
| North of the pond between Lumbridge and Draynor Village. |  |
 |
| Nort-east of Gertrude's house west of Varrock. | 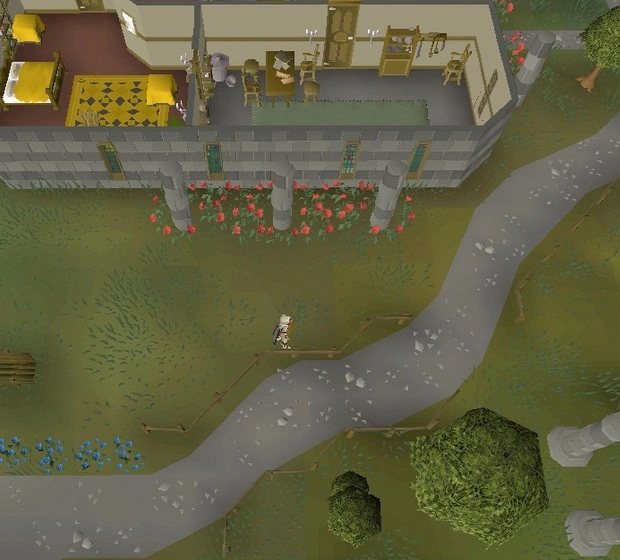 |
 |
| South of Draynor Village bank. | 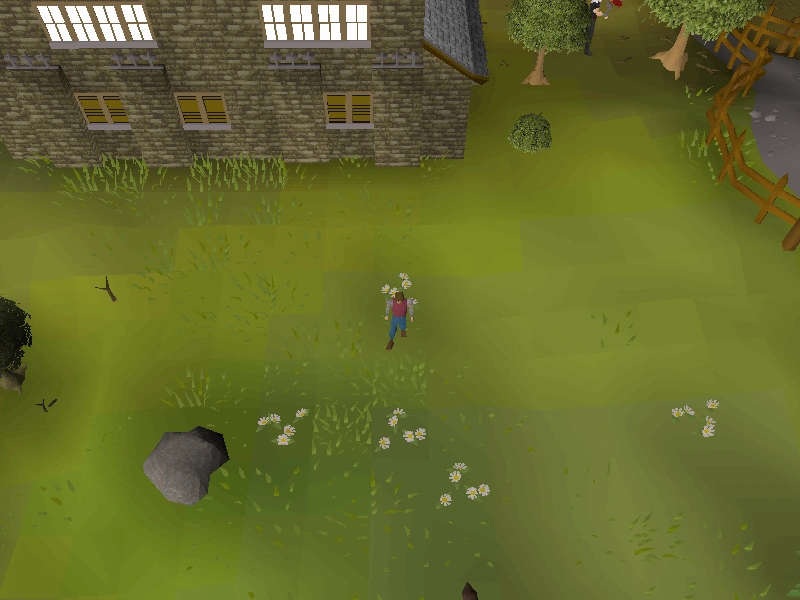 |
 |
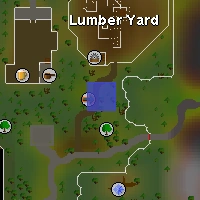
| South of Lumber Yard, east of Assistant Serf. | 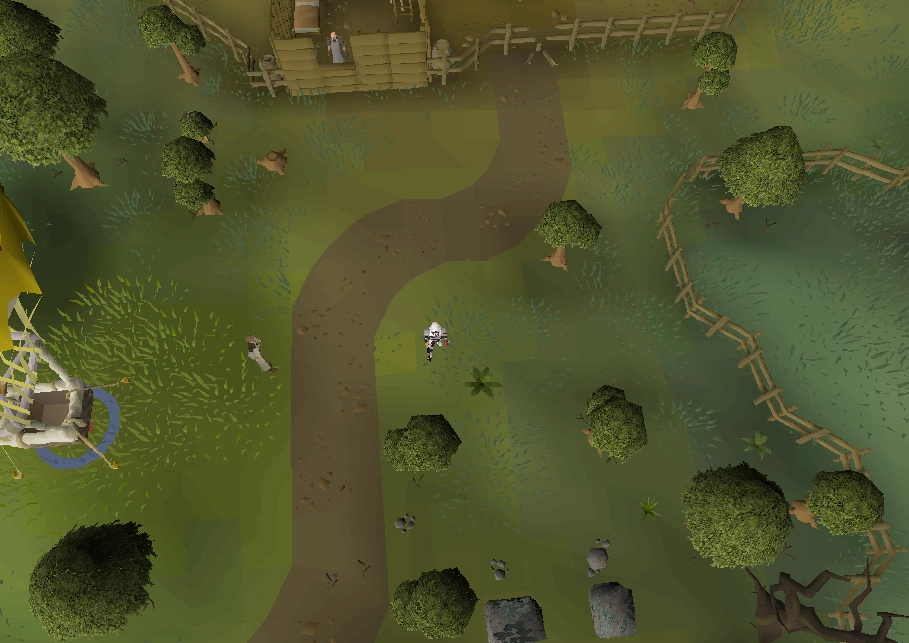 |
 |
Morytania
| Location | Image | Map |
|---|---|---|
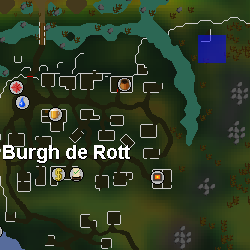
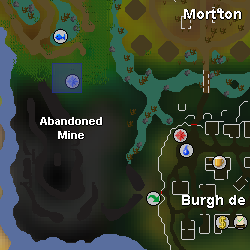
| In the north-east area of Burgh de Rott, by the reverse-L-shaped ruins. | 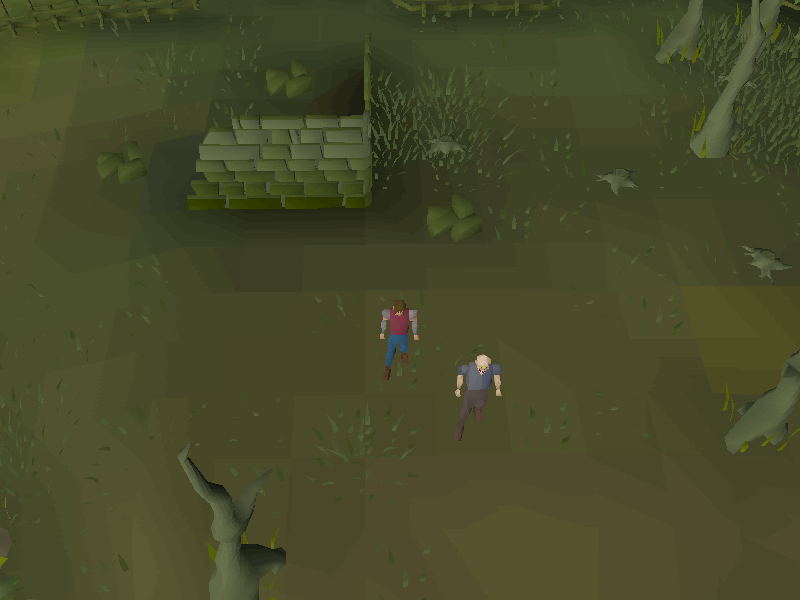 |
 |
| West of Port Phasmatys, south-east of fairy ring. | 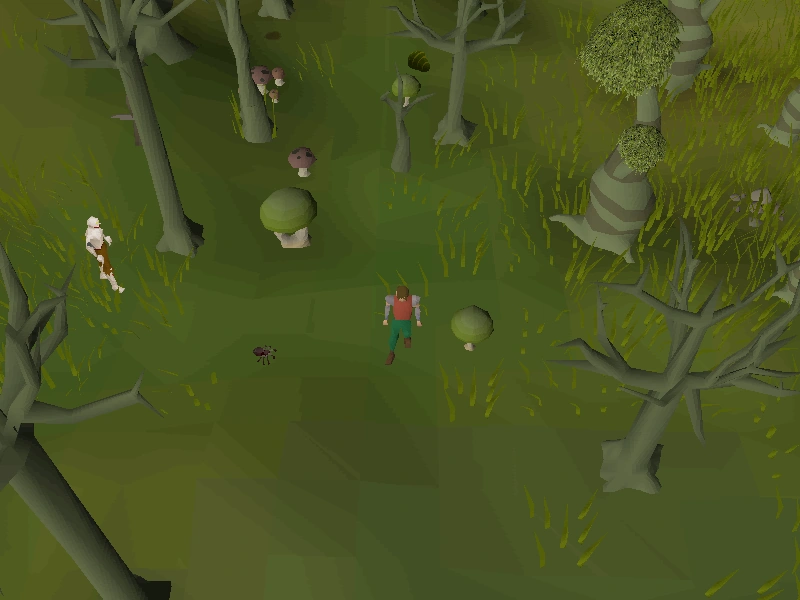 |
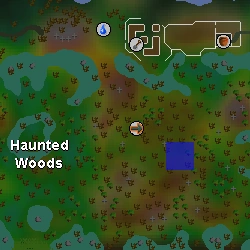 |
| Inside The Hollows, south of the bridge which was repaired in a quest. | 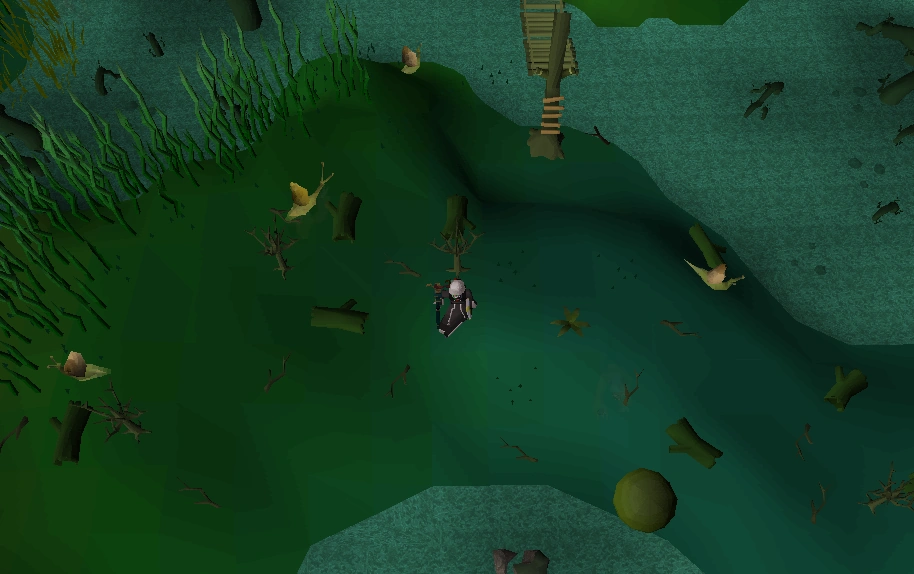 |
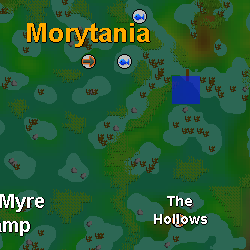 |
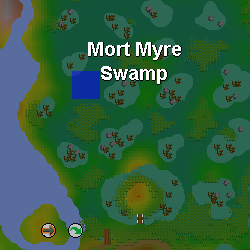
| Inside the Mort Myre Swamp, north-west of the Nature Grotto. | 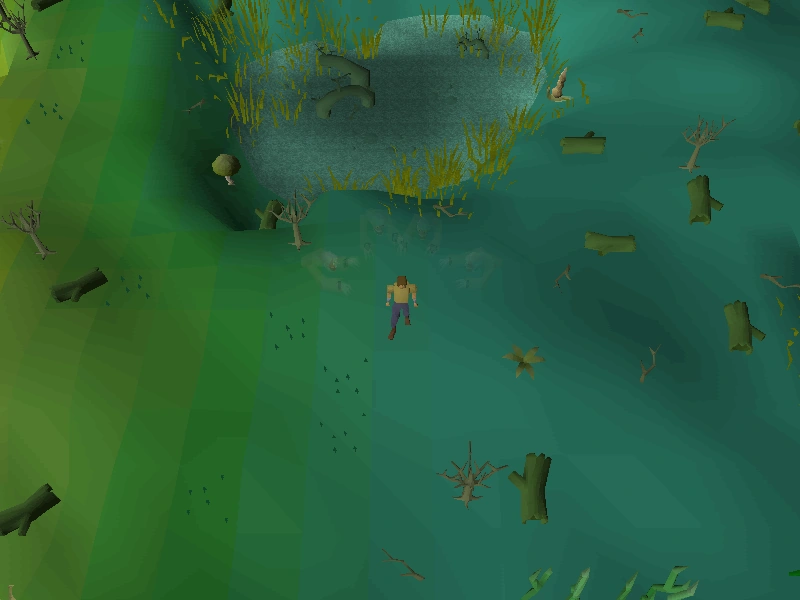 |
 |
| At Haunted Mine quest start. | 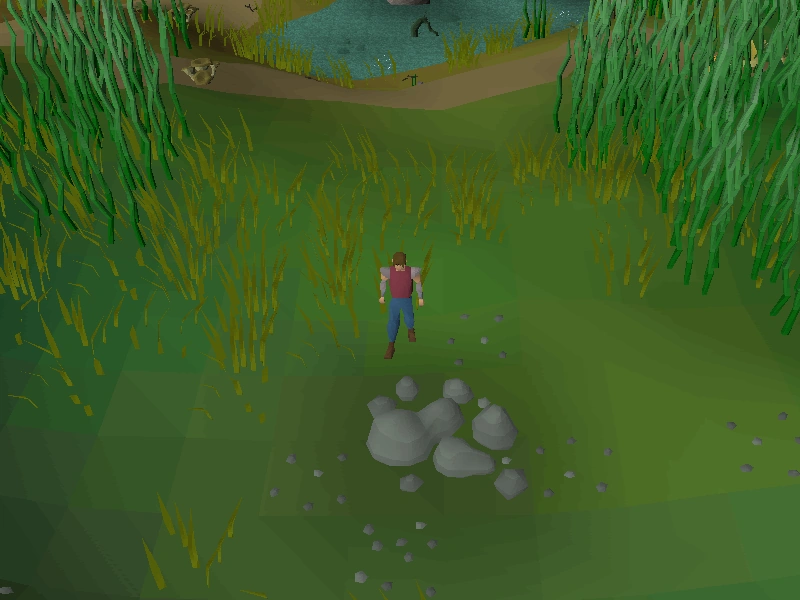 |
 |
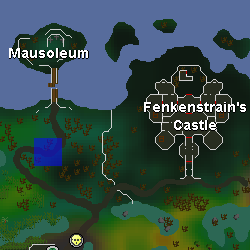
| South of the Mausoleum. |  |
 |
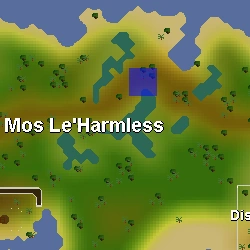
| Northern area of Mos Le'Harmless, between the lakes. | 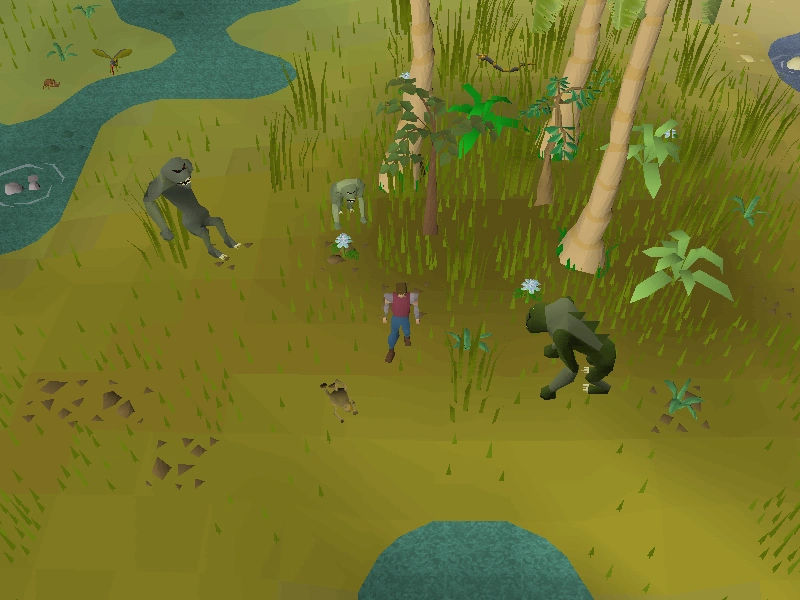 |
 |
| Near Mos Le'Harmless southern bar. | 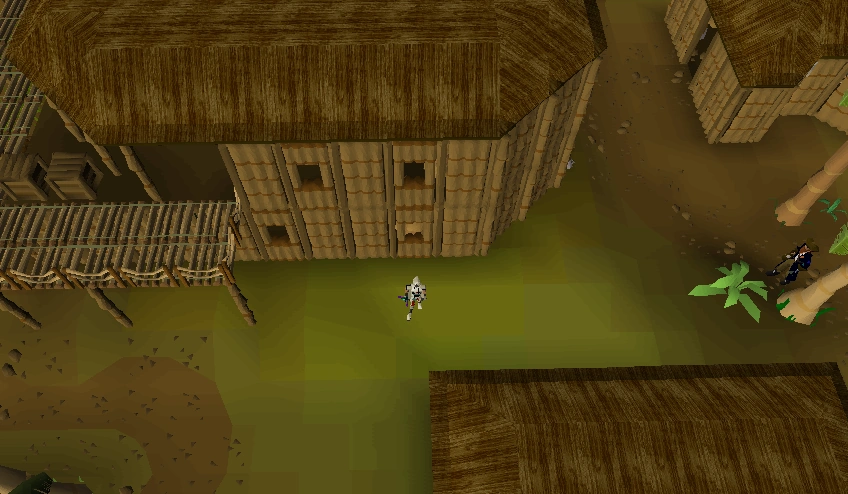 |
 |
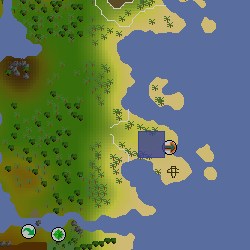
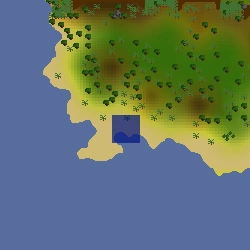
| Northern part of Dragontooth Island. |  |
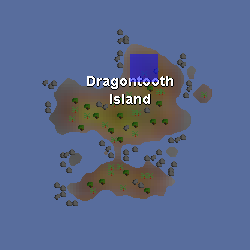 |
| Southern part of Dragontooth Island. | 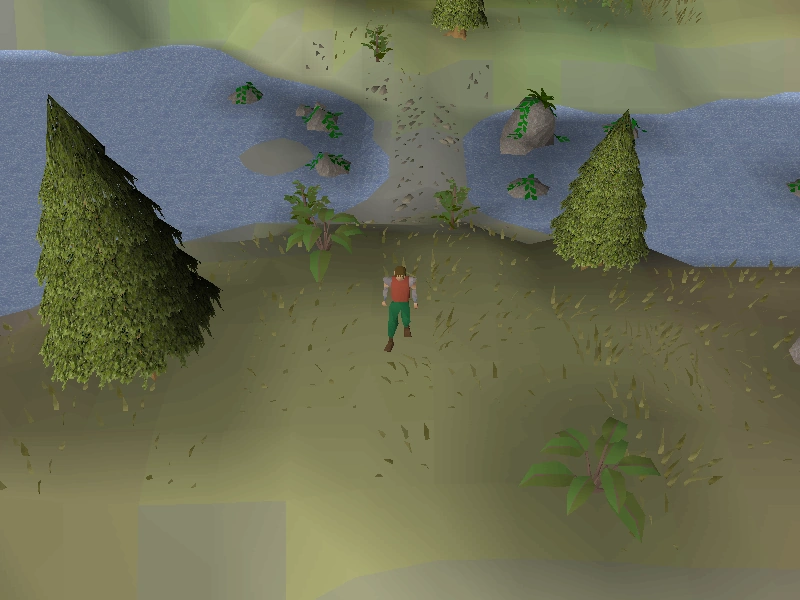 |
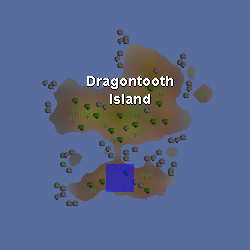 |
Western Provinces
| Location | Image | Map |
|---|---|---|
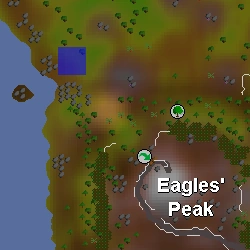
| North-west of Eagles' Peak. | 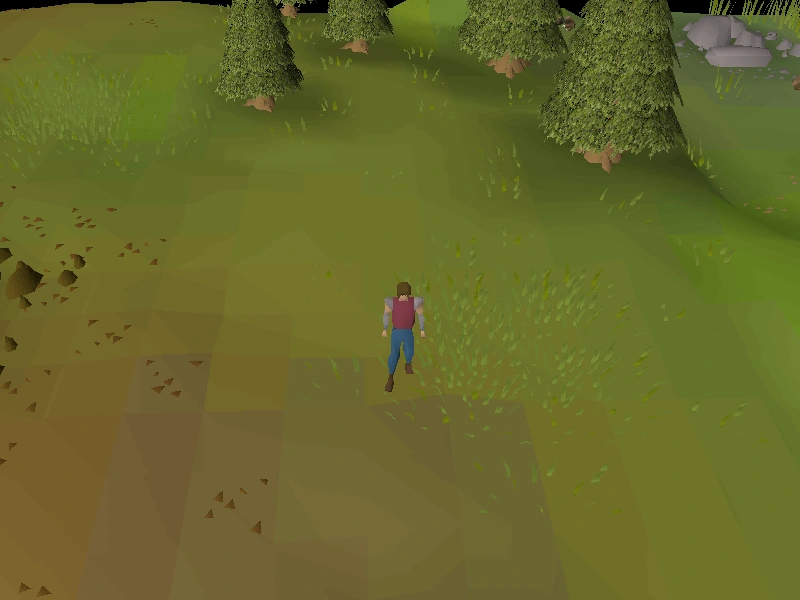 |
 |
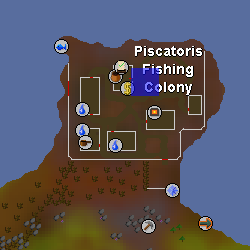
| Piscatoris Fishing Colony | 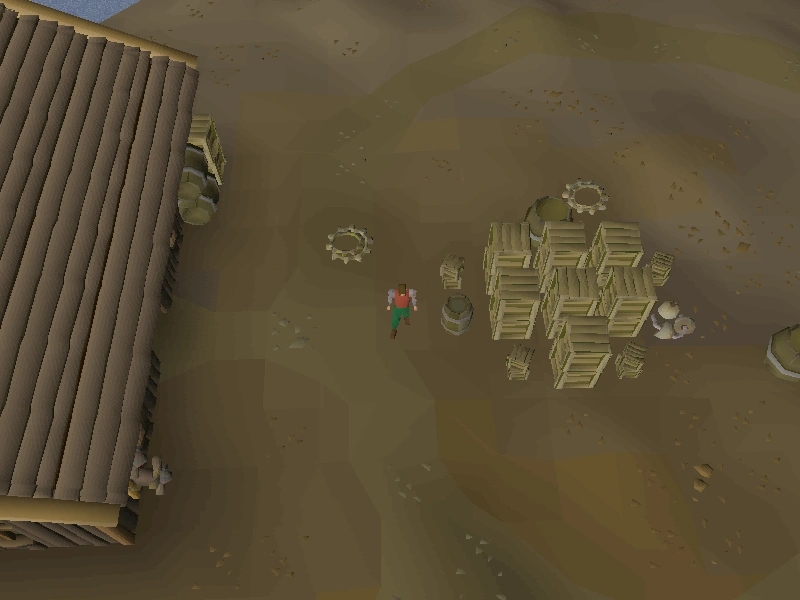 |
 |
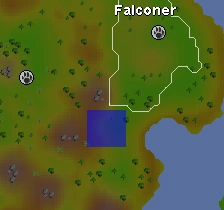
| Eastern part of Piscatoris Hunter area, south-west of the Falconry. | 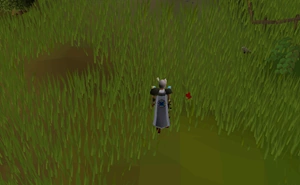 |
 |
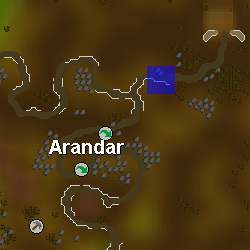
| South-west of the crystal gate to Arandar. | 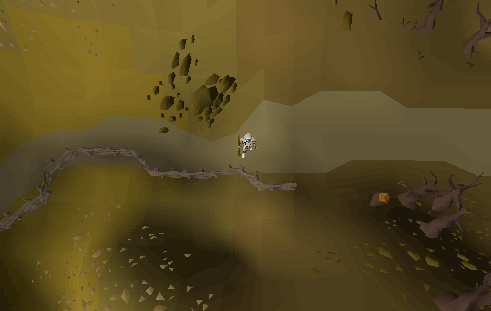 |
 |
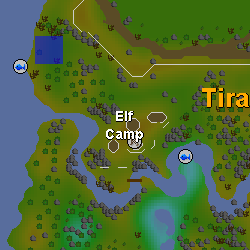
| East of Elf Camp. | 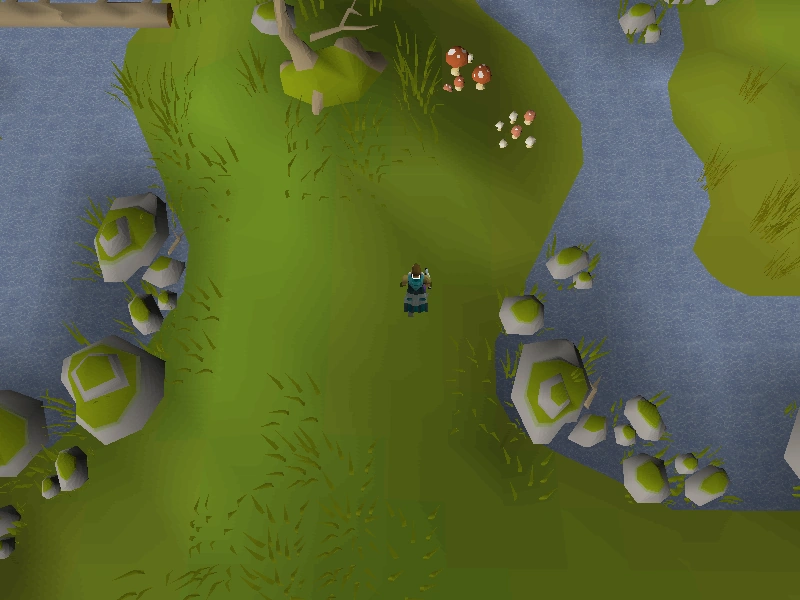 |
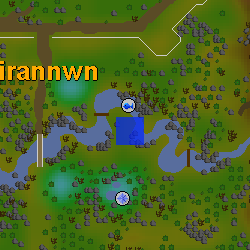 |
| North-west of Elf Camp. | 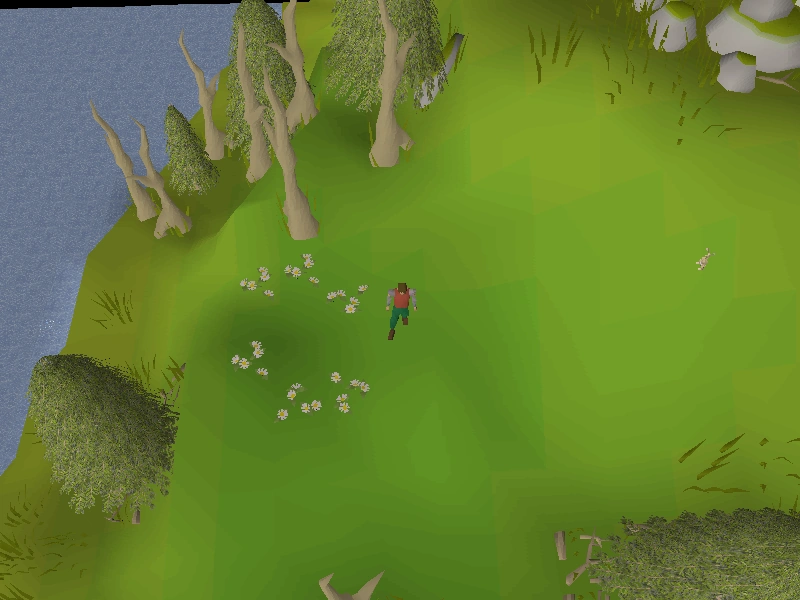 |
 |
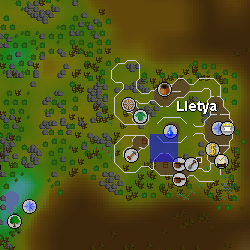
| In Lletya. | 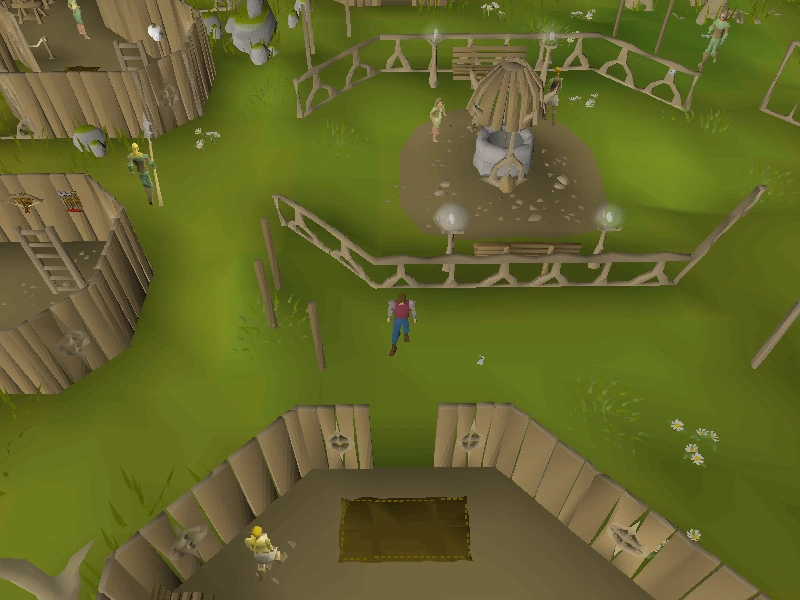 |
 |
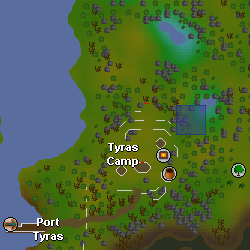
| Near Tyras Camp. | 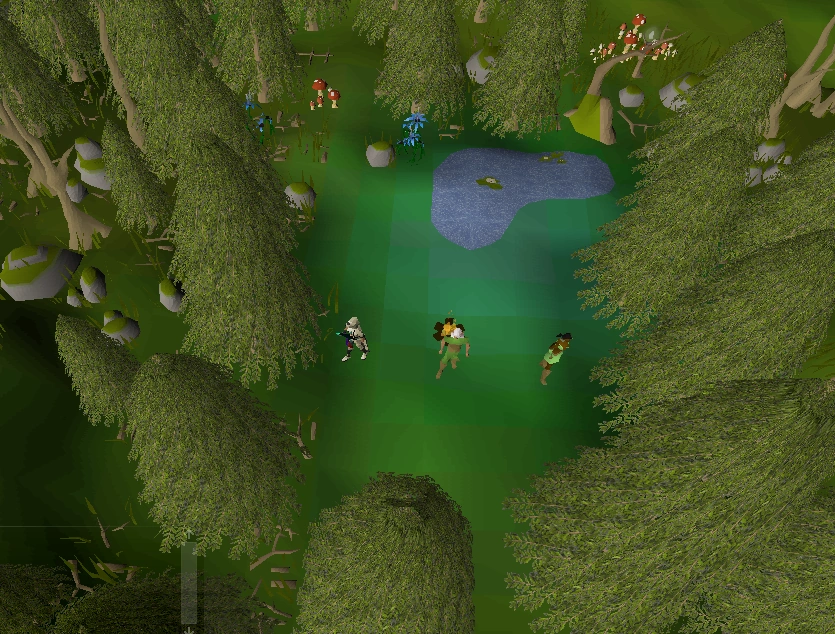 |
 |
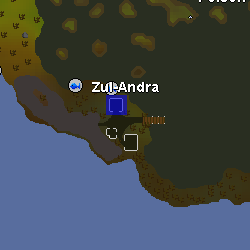
| The northern house at Zul-Andra. | 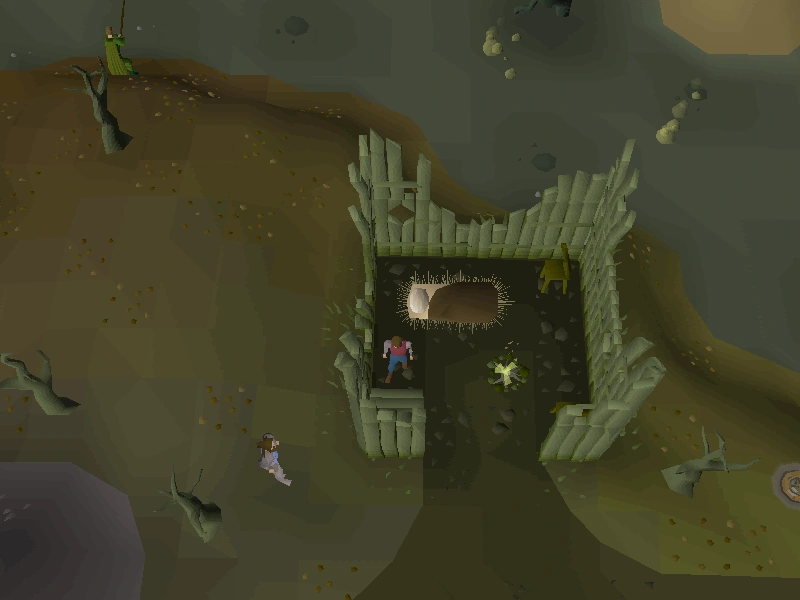 |
 |
Wilderness
| Location | Image | Map |
|---|---|---|
| North of the Grand Exchange, level 5 Wilderness. | 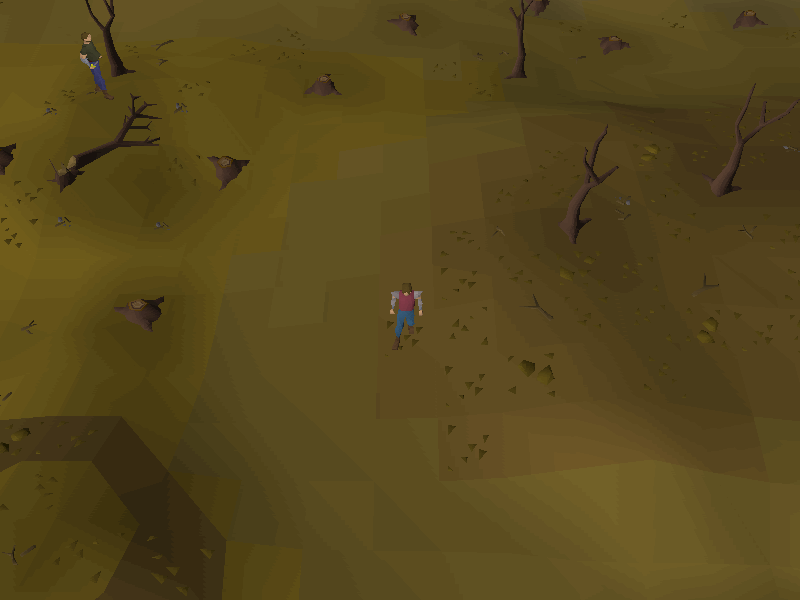 |
 |
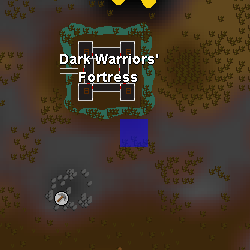
| South-east of the Dark Warriors' Fortress, level 12 Wilderness. |  |
 |
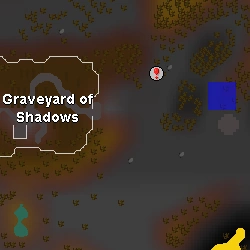
| East of the Corporeal Beast's lair, level 20 Wilderness. | 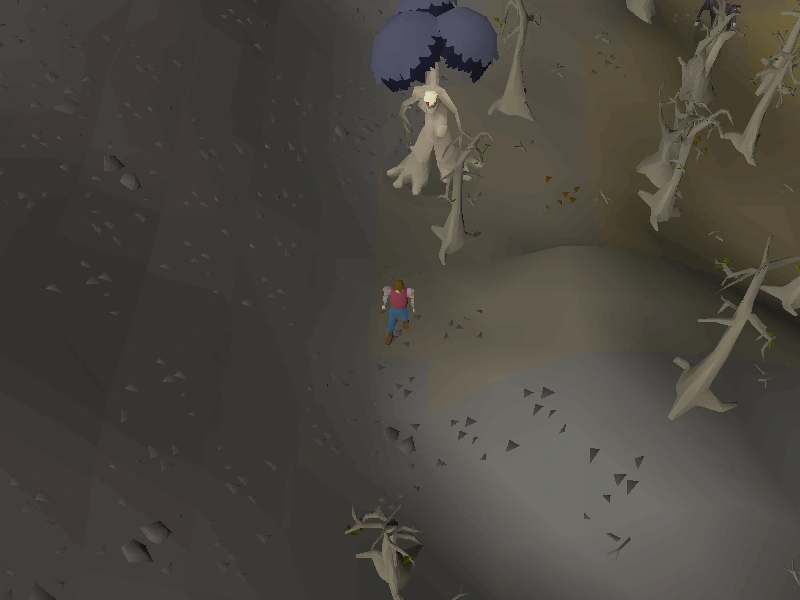 |
 |
| East of Venenatis' nest, level 28 Wilderness. | 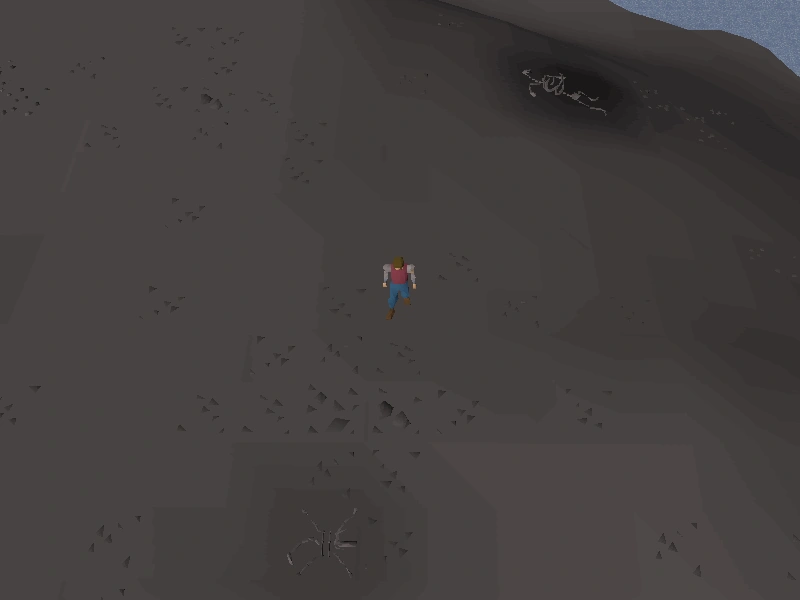 |
 |
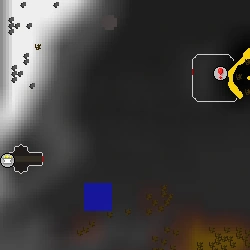
| East of the Wilderness canoe exit, level 35 Wilderness.
NOTE: This area is on the single/multi-combat border. It is recommended to dig in the single combat area, so you get the Brassican Mage instead of the Ancient Wizards. |
 |
 |
| South-east of the Chaos Temple, level 37 Wilderness. |  |
 |
| South of Callisto, level 38 Wilderness. | 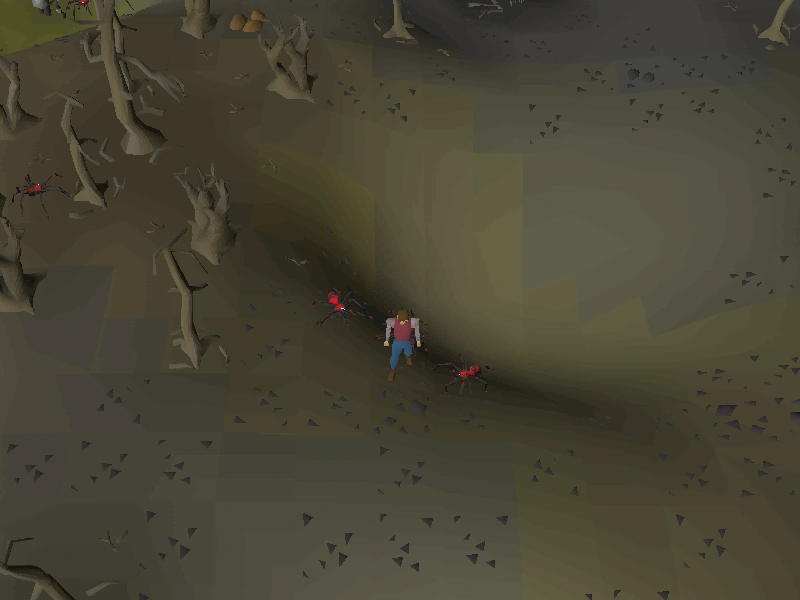 |
 |
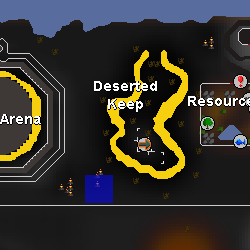
| South-west of the Deserted Keep, level 49 Wilderness. | 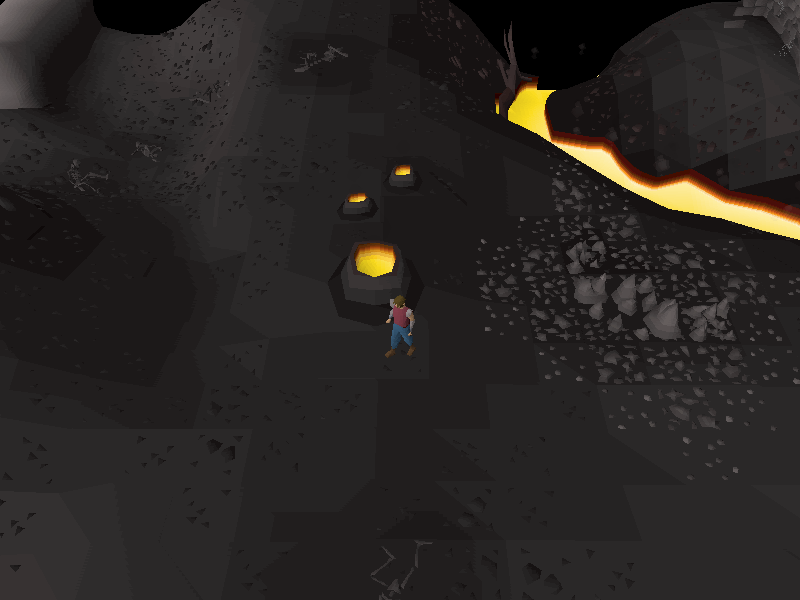 |
 |
| West of the Wilderness Agility Course, level 54 Wilderness. | 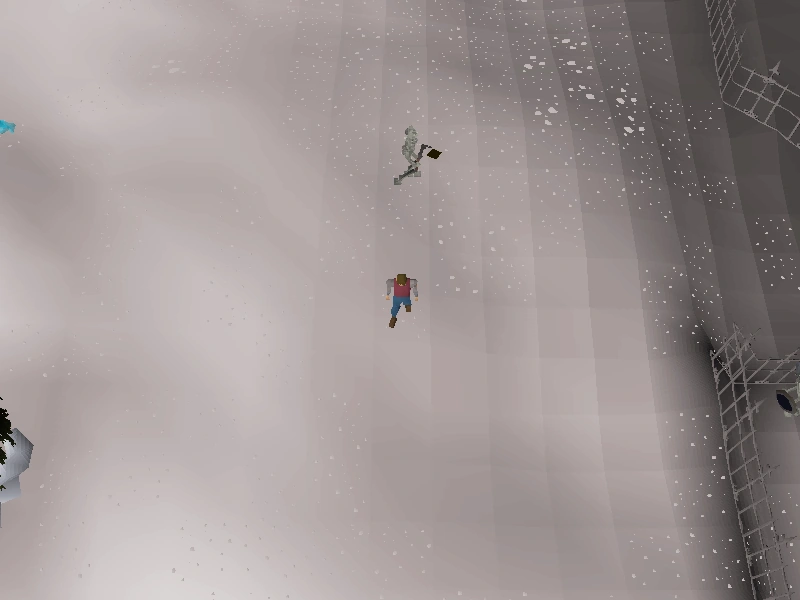 |
 |
Zeah
| Location | Image | Map |
|---|---|---|
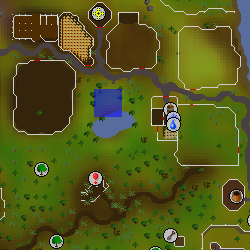
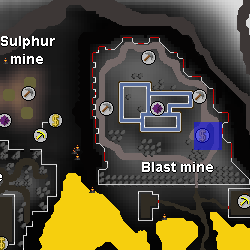
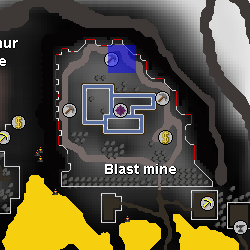
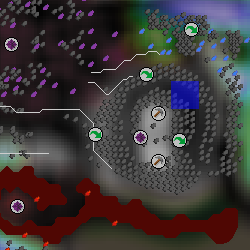
| Next to the bank in the Lovakengj House blast mine. | 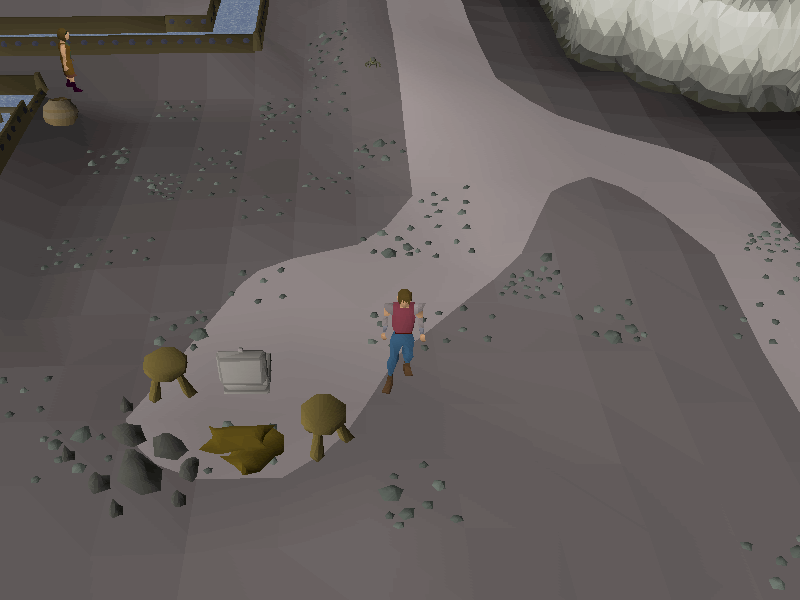 |
 |
| Northern part of the Lovakengj House blast mine. | 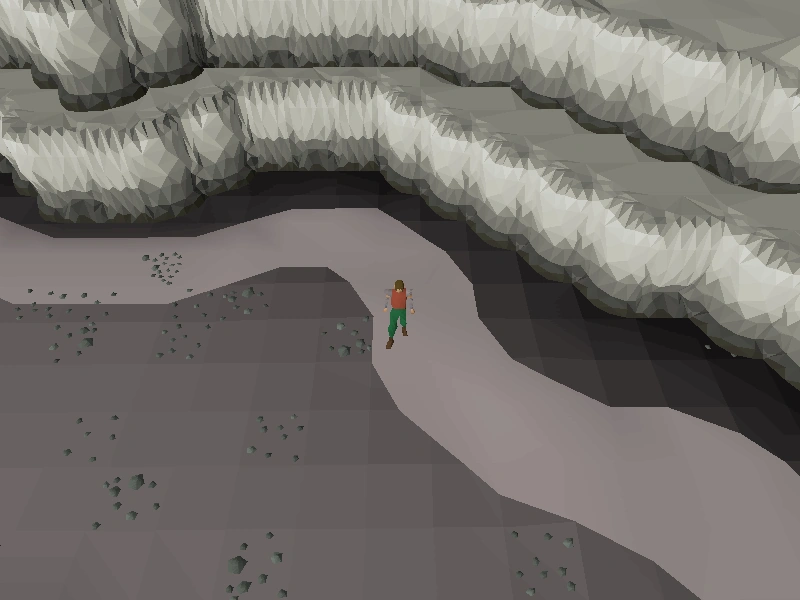 |
 |
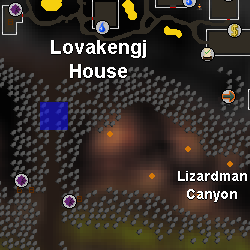
| Next to the lovakite furnace in the Lovakengj House. | 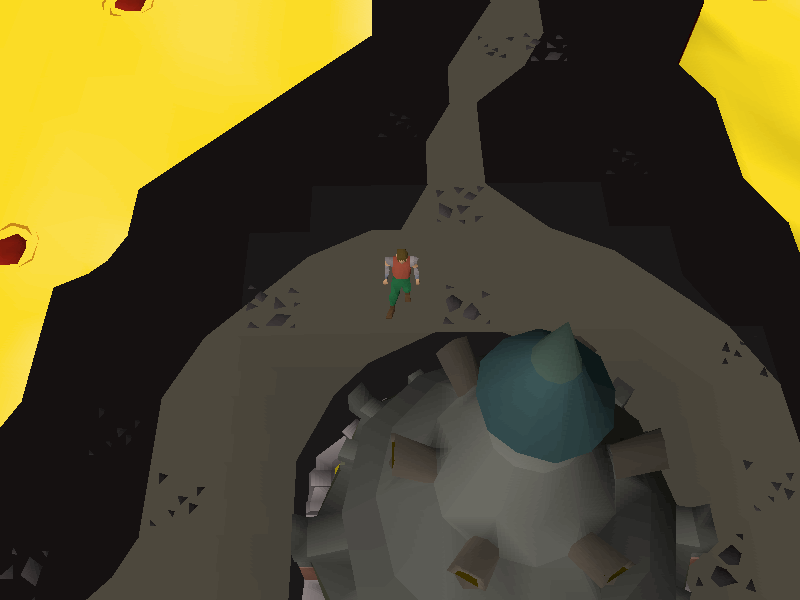 |
 |
| Next to mithril rock in the Lovakengj mine. | 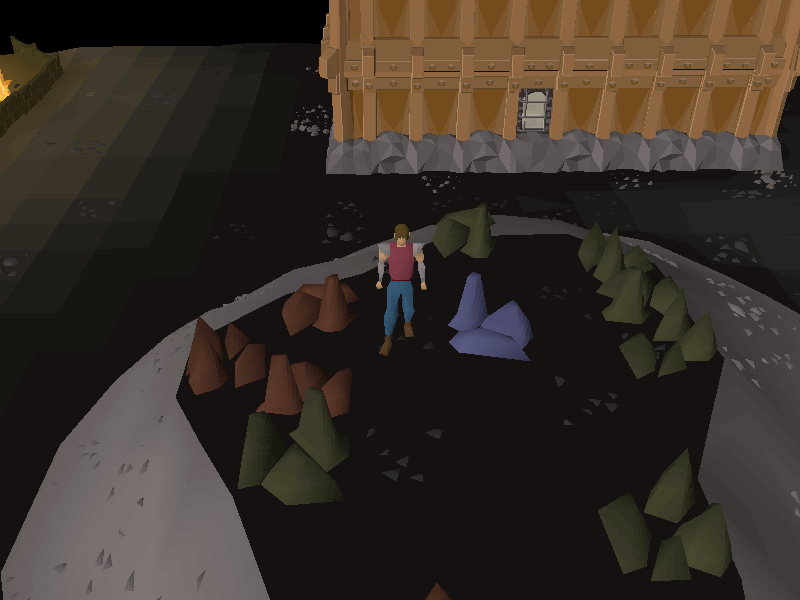 |
 |
| Western entrance in the Lovakengj House's sulphur mine. | 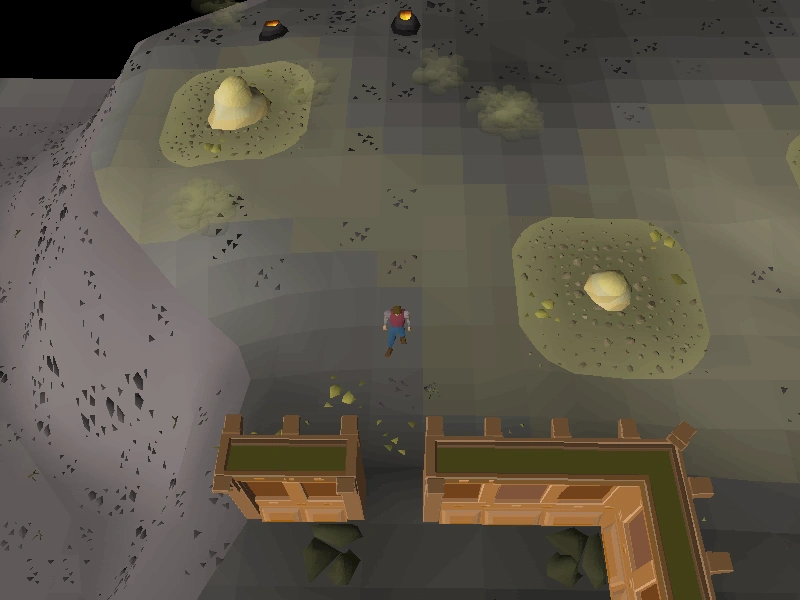 |
 |
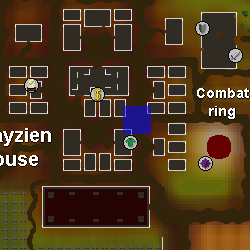
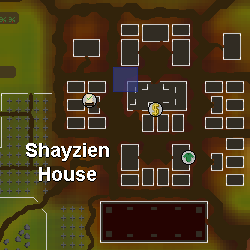
| South-east of the bank in the Shayzien House. | 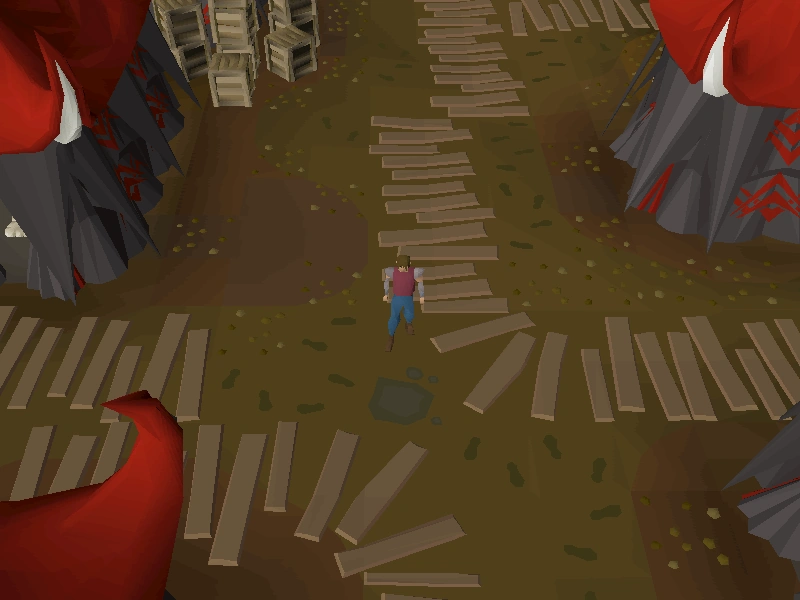 |
 |
| Overpass between the Lovakengj and Shayzien House. | 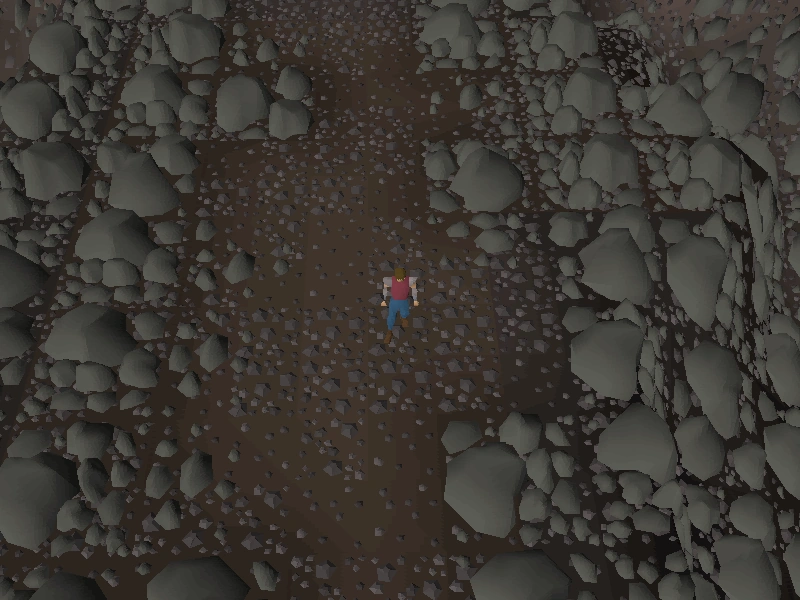 |
 |
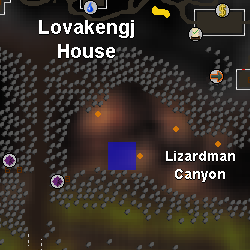
| Within Lizardman Canyon, east of the ladder. Requires 5% favour with the Shayzien House. | 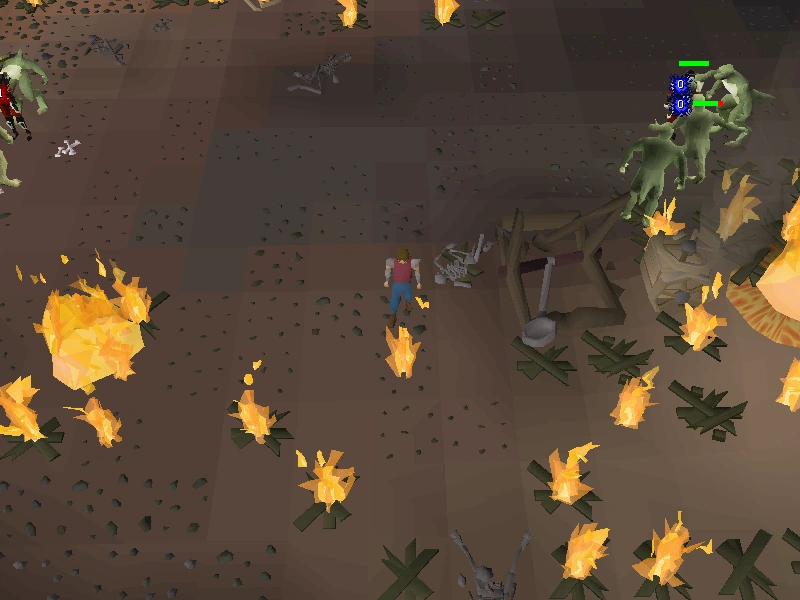 |
 |
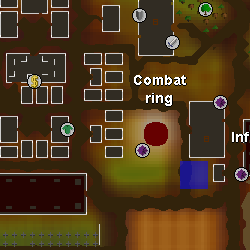
| Shayzien, south-east of the Combat Ring. | 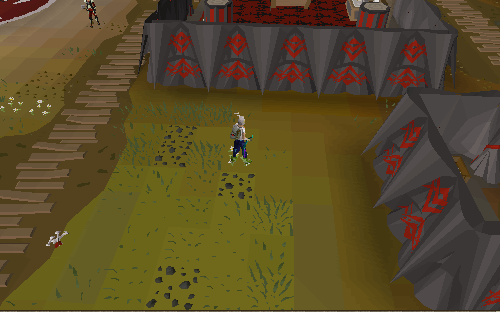 |
 |
| North-west of the bank in the Shayzien House. |  |
 |
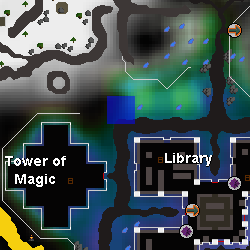
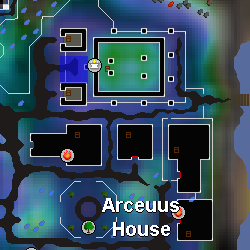
| North-west of the Arceuus House Library. | 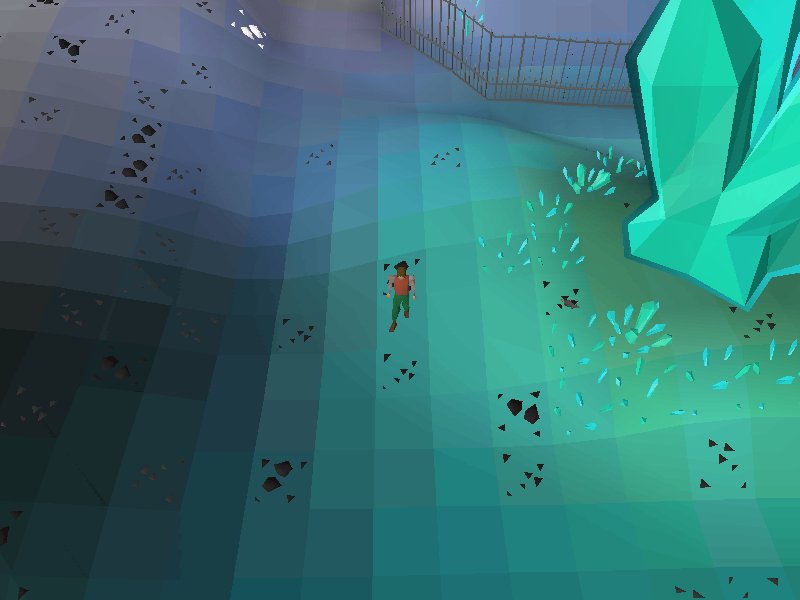 |
 |
| By the entrance to the Arceuus House church. | 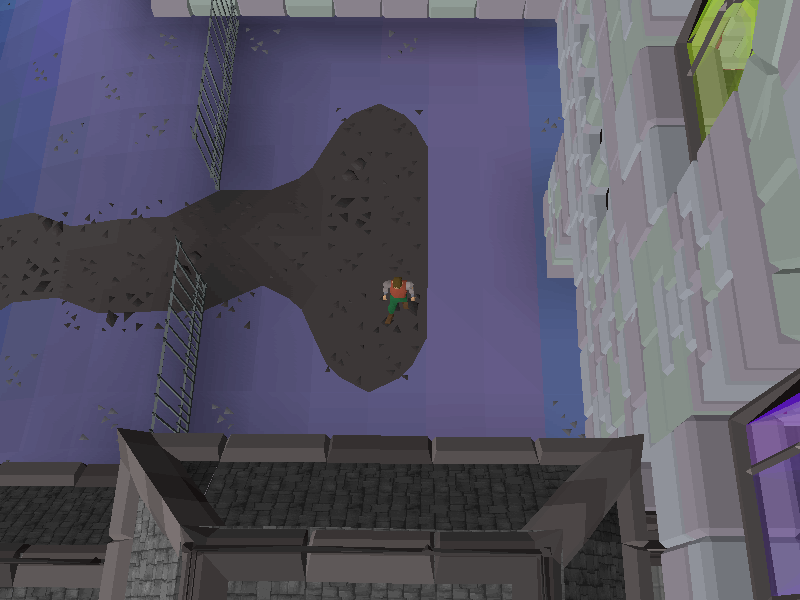 |
 |
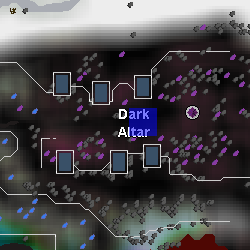
| West of the Dark Altar. | 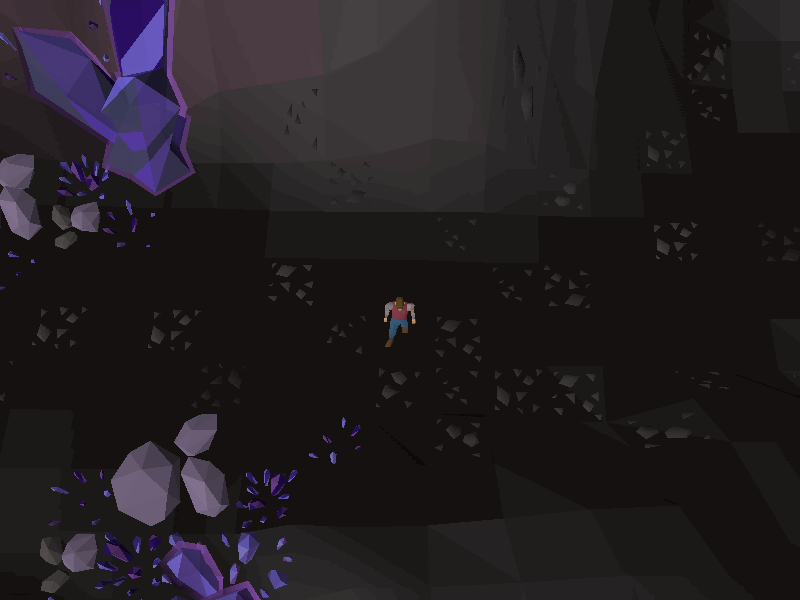 |
 |
| By the southern entrance to the Arceuus House. |  |
 |
| By the Arceuus essence mine. | 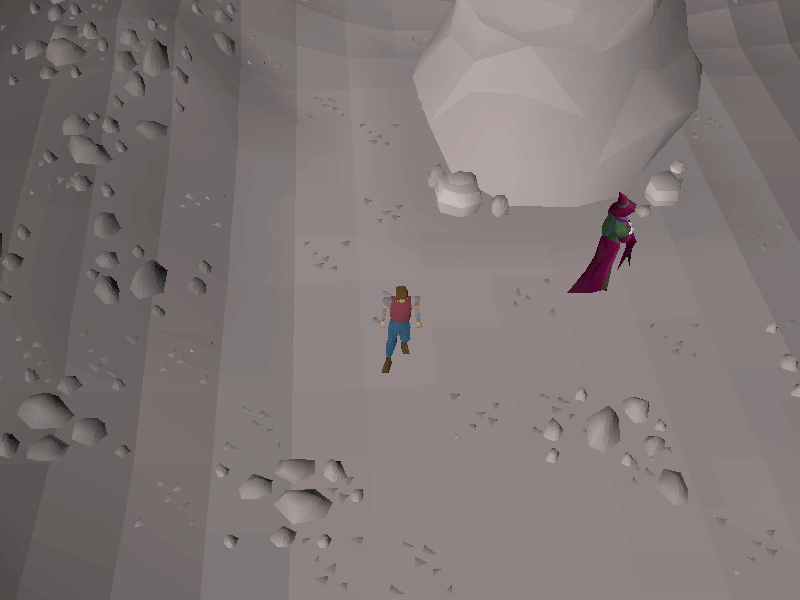 |
 |
| North-east of the Arceuus essence mine. | 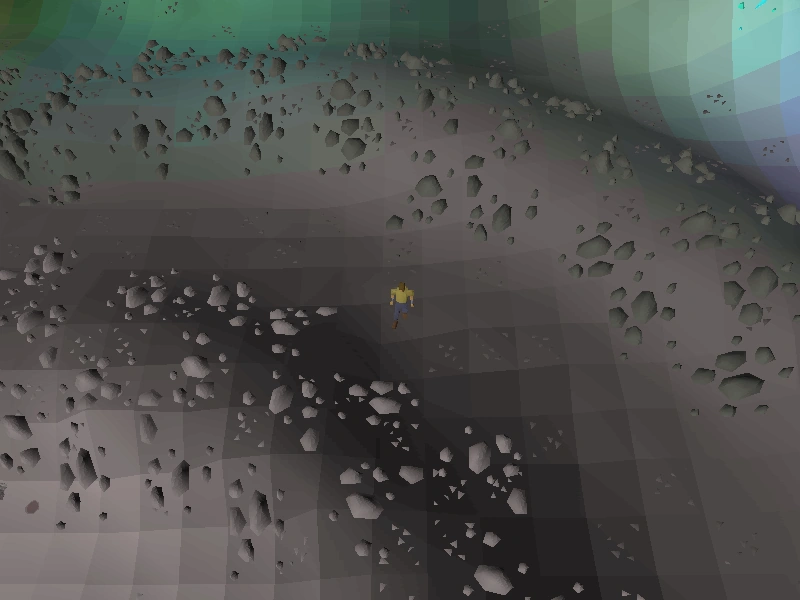 |
 |
| South of the Piscarilius mine. | 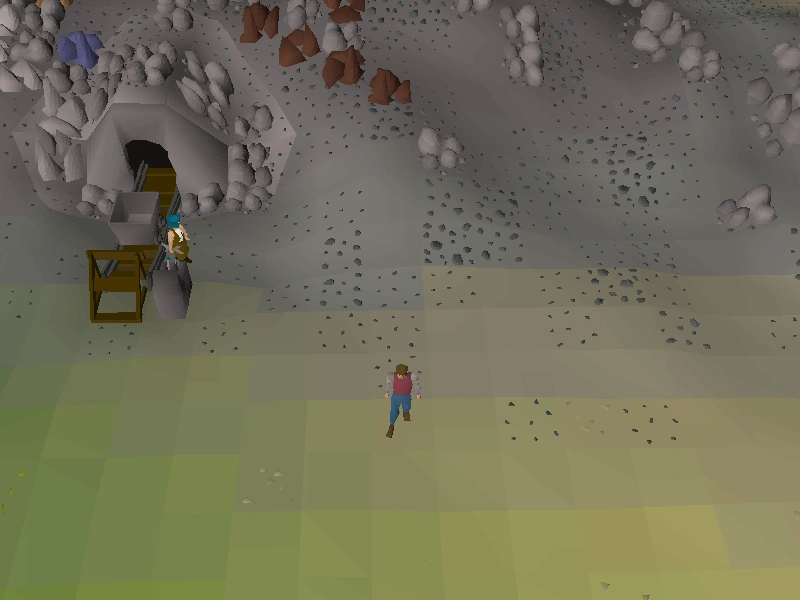 |
 |
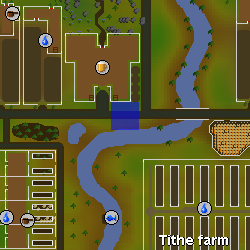
| South of The Golden Field tavern in the northern area of Great Kourend's Hosidius House. |  |
 |
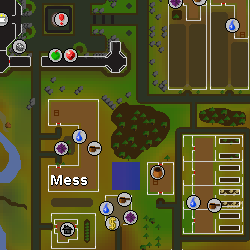
| East of Mess hall. | 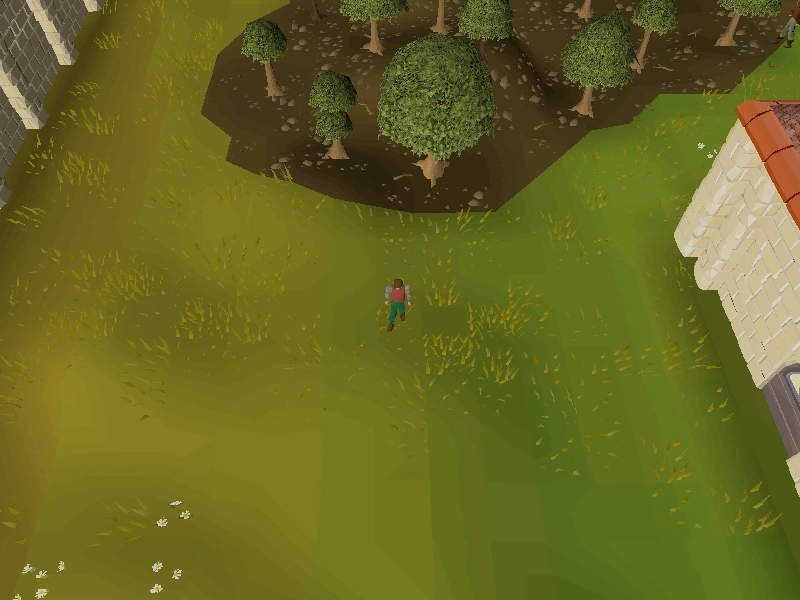 |
 |
| East of Watson's house. | 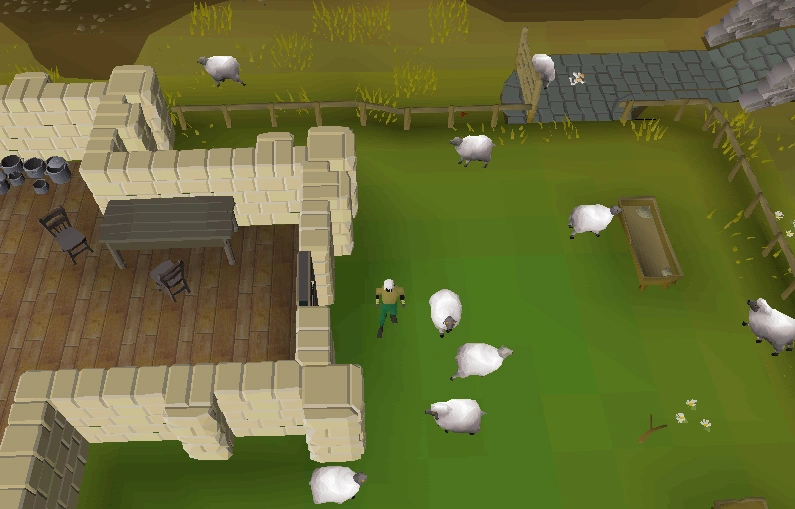 |
 |
| North of Vannah's Farm Store, between the chicken coop and willow trees. | 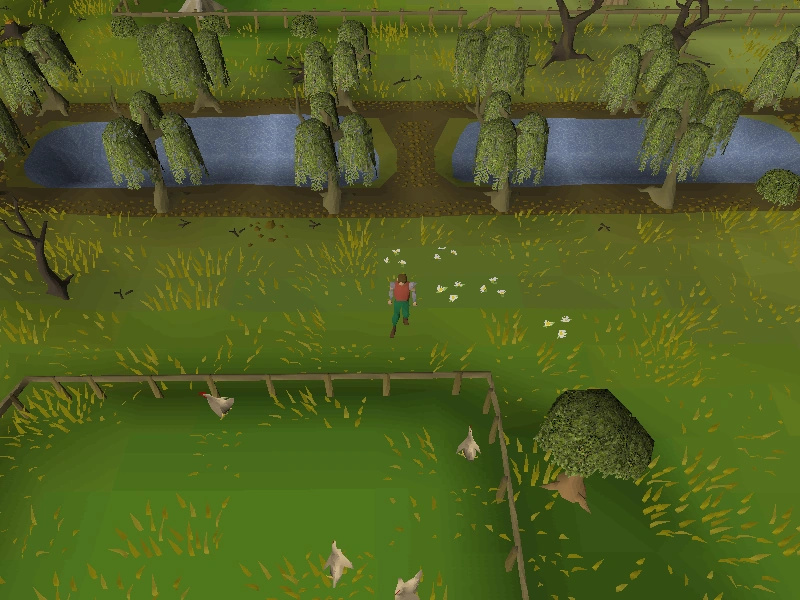 |
 |
| Items | |||||
| Guides |
| ||||
| NPCs |
Uri • Sherlock • Falo the Bard • Double agent • Ancient Wizard • Armadylian guard • Bandosian guard • Brassican Mage • Saradomin wizard • Zamorak wizard | ||||
| Other |
Clue droppers (Easy • Medium • Hard • Elite) • Emote items • Rewards • STASH • World map | ||||