TheBroadside (talk | contribs) (Undid revision 7424921 by Flarker8000 (talk)) |
m (cleanup) |
||
| (24 intermediate revisions by 19 users not shown) | |||
| Line 1: | Line 1: | ||
{{External|rs}} |
{{External|rs}} |
||
| − | {{Has quick guide}} |
+ | {{Has quick guide}}{{Quest |
| − | {{Infobox Quest |
||
|name = Wanted! |
|name = Wanted! |
||
|image = [[File:Wanted!.png|300px]] |
|image = [[File:Wanted!.png|300px]] |
||
| Line 37: | Line 36: | ||
*[[Falador teleport]]s |
*[[Falador teleport]]s |
||
*[[Varrock teleport]]s |
*[[Varrock teleport]]s |
||
| − | *A transportation method to Canifis ([[Dramen staff]], [[Kharyrll teleport]]s or [[Ectophial]]) |
+ | *A transportation method to Canifis ([[Dramen staff]], [[Kharyrll teleport]]s, [[Salve graveyard teleport]]s, or [[Ectophial]]) |
|kills = *[[Black Knight]] ''(level 33)'' |
|kills = *[[Black Knight]] ''(level 33)'' |
||
*[[Solus Dellagar]] |
*[[Solus Dellagar]] |
||
| Line 45: | Line 44: | ||
===Getting started=== |
===Getting started=== |
||
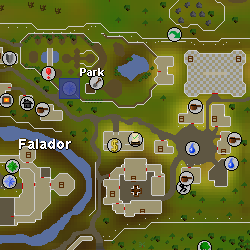
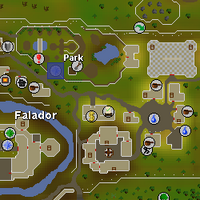
[[File:Sir Tiffy Cashien location.png|thumb|200px|The start point at [[Falador Park]].]] |
[[File:Sir Tiffy Cashien location.png|thumb|200px|The start point at [[Falador Park]].]] |
||
| − | To begin, speak with |
+ | To begin, speak with {{Link|Sir Tiffy Cashien|type=chat}} in {{Link|Falador Park}}. Ask if he has any jobs for you, and he lets you know that a clerk has made an error and that you're not actually permitted to be a {{Link|Temple Knights|Temple Knight}}. It turns out you have to work as a squire for five years. This is too long, so Sir Tiffy offers an alternative by exploiting a loophole. He'll then ask you to go see {{Link|Sir Amik Varze|type=chat}} in the {{Link|White Knights' Castle}}. |
===Sir Amik Varze=== |
===Sir Amik Varze=== |
||
| − | :'''Note:''' If wearing |
+ | :'''Note:''' If wearing {{Link|Initiate armour}} during the chat with {{Link|Sir Amik Varze|type=chat}}, the dialogue will be different, but you may still go through the quest without it. |
[[File:Sir Amik Varze chathead.png|left]] |
[[File:Sir Amik Varze chathead.png|left]] |
||
| − | Sir Amik Varze is on the {{FloorNumber|3}} on the west side in the |
+ | Sir Amik Varze is on the {{FloorNumber|3}} on the west side in the {{Link|White Knights' Castle}} in {{Link|Falador}}. ''He will ask you to become a squire after a small conversation. '''Decline his offer''', and the conversation will continue.'' If you do not decline his offer to become a squire, he will ask for {{Link|Asgarnian ale|type=item}} in an endless loop. Speak to {{Link|Sir Tiffy Cashien|type=chat}} to undo this. It turns out that there needs to be a crisis for you to become a deputy, but there is no current crisis. Report back to Sir Tiffy in {{Link|Falador Park}}. For some players, Sir Tiffy will not say anything about a crisis until you have spoken to him a few times. Eventually, Sir Tiffy will inform you of a crisis that has arisen. Head back to talk to Sir Amik again. |
| − | Amik will tell you the news that a criminal named |
+ | Amik will tell you the news that a criminal named {{Link|Solus Dellagar|type=chat}}, the "infamous murder-mage," is back. Follow the very unclear conversation through to the end, and accept his mission. |
===The Communication Orb=== |
===The Communication Orb=== |
||
''Items Needed: 10000 coins '''or '''1 law rune, 1 molten glass, and 1 enchanted gem'' |
''Items Needed: 10000 coins '''or '''1 law rune, 1 molten glass, and 1 enchanted gem'' |
||
[[File:Savant chathead.png|left]] |
[[File:Savant chathead.png|left]] |
||
| − | Once again, go back to |
+ | Once again, go back to {{Link|Sir Tiffy Cashien|type=chat}}. It turns out you're just the "agent" that needs to locate {{Link|Solus Dellagar|type=chat}}. As an agent, you need to be in constant communication. Sir Tiffy offers you a communication device for 10,000 {{Link|coins|img=Coins 1.png}}, or he can make one if you bring the supplies. Give Sir Tiffy the money or the supplies (a {{Link|law rune|type=item}}, an {{Link|enchanted gem|type=item}} and {{Link|molten glass|type=item}}). Either way, you'll receive a {{Link|Commorb|type=item}} from him. It is needed for the whole quest. |
| − | Use the "contact" feature on the orb to talk to |
+ | Use the "contact" feature on the orb to talk to {{Link|Savant|type=chat}}. It turns out that you should investigate the {{Link|Black Knights' Base|Black Knight Hideout}} in {{Link|Taverley Dungeon}}, and investigate the {{Link|Mage of Zamorak|type=chat}} in {{Link|Varrock}} that is interested in {{Link|Runecrafting}} (this is where you will need your 20 pure essence). |
| − | If you lose your |
+ | If you lose your {{Link|Commorb|orb|type=item}} after you make one, {{Link|Sir Tiffy Cashien|type=chat}} will lend you his. |
===Taverley Dungeon=== |
===Taverley Dungeon=== |
||
''Items needed: Combat [[equipment]] to kill [[Black Knight]]s'' |
''Items needed: Combat [[equipment]] to kill [[Black Knight]]s'' |
||
| − | |||
{{Main|Taverley Dungeon}} |
{{Main|Taverley Dungeon}} |
||
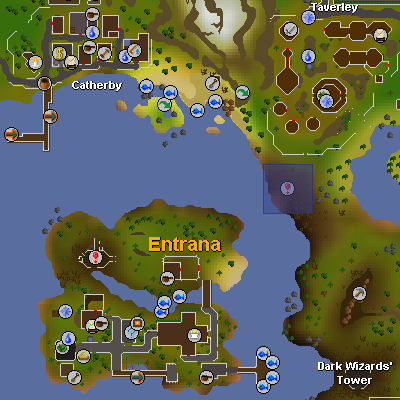
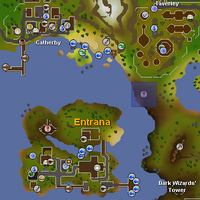
[[File:Taverley Dungeon location.png|thumb|left|200px|The [[Taverley Dungeon|dungeon]] location, south of [[Taverley]].]] |
[[File:Taverley Dungeon location.png|thumb|left|200px|The [[Taverley Dungeon|dungeon]] location, south of [[Taverley]].]] |
||
| − | Next, head over to the |
+ | Next, head over to the {{Link|Taverley Dungeon}}. From the west {{Link|bank}} in {{Link|Falador}}, you can use the {{Link|Agility|type=skill}} {{Link|Shortcuts|shortcut}} (level 5 Agility required), and keep heading northwest towards {{Link|Taverley}} until you see a ladder. Use the ladder and follow the dungeon north, then east, then south past the {{Link|magic axe|img=Magic axe.png}}s, {{Link|Poison Scorpion}}s, {{Link|Chaos dwarf|chaos dwarves|img=Chaos dwarf.png}} (do not cross the bridge), and finally past the {{Link|Hill Giant|img=Hill giant.png}}s, and into the {{Link|Black Knight|img=Black Knight.png}}s' rooms. |
[[File:Wanted! - Solus meets with Lord Daquarius.png|thumb|220px|Solus meets with [[Lord Daquarius]].]] |
[[File:Wanted! - Solus meets with Lord Daquarius.png|thumb|220px|Solus meets with [[Lord Daquarius]].]] |
||
| − | Continue through the double doors, and talk to |
+ | Continue through the double doors, and talk to {{Link|Lord Daquarius|type=chat}} in the southwesternmost room. He tells you nothing. {{Link|Savant|type=chat}} will call you. (Use the '''contact''' option on the {{Link|Commorb|type=item}} if she doesn't call automatically.) She advises you to try to bluff him into giving you something. Go kill a level 33 {{Link|Black Knight|img=Black Knight.png}} to make Lord Daquarius give in and beg you not to kill any more of his men. He tells you that {{Link|Solus Dellagar|type=chat}} is in a place with a lot of {{Link|fur|type=item}}, but that the fur is not from a {{Link|bear}}. |
:'''Note:''' The Black Knight kill won't count if you kill it before talking to Lord Daquarius, if you leave the room after the kill, or if you get interrupted during the ensuing conversation. |
:'''Note:''' The Black Knight kill won't count if you kill it before talking to Lord Daquarius, if you leave the room after the kill, or if you get interrupted during the ensuing conversation. |
||
===Zamorak Mage=== |
===Zamorak Mage=== |
||
''Items needed: 20 unnoted [[Rune essence|rune]]/[[pure essence]], Commorb''[[File:Varrock Chaos Altar Location.png|thumb|left|200px|Location of Chaos Altar in Varrock]] |
''Items needed: 20 unnoted [[Rune essence|rune]]/[[pure essence]], Commorb''[[File:Varrock Chaos Altar Location.png|thumb|left|200px|Location of Chaos Altar in Varrock]] |
||
| − | '''NOTE:''' Do not equip any Saradomin or Guthix items (such as |
+ | '''NOTE:''' Do not equip any Saradomin or Guthix items (such as {{Link|Void Knight equipment}}) or the Zamorak Mage will refuse to speak with you. In addition, if you have talked to the Zamorak Mage within the wilderness prior you can go straight to the {{Link|Chaos altar|Chaos Altar}} in Varrock. |
| − | Head to |
+ | Head to {{Link|Edgeville}} (or directly to the Chaos Altar if you have already done the Abyss miniquest) and grab 20 unnoted {{Link|Rune essence|rune|type=item}}/{{Link|pure essence|type=item}} from the bank. Follow the river into the {{Link|Wilderness}} where the {{Link|Mage of Zamorak|type=chat}} will be at the end of the river, and he will then tell you to meet him "somewhere" in {{Link|Varrock}}, which is the Chaos Altar in the temple in South East Varrock. |
[[File:Wanted! - Solus confronts Mage of Zamorak.png|thumb|220px|Solus meets with the Zamorakian [[Mage of Zamorak|mage]].]] |
[[File:Wanted! - Solus confronts Mage of Zamorak.png|thumb|220px|Solus meets with the Zamorakian [[Mage of Zamorak|mage]].]] |
||
| − | Talk to him about |
+ | Talk to him about {{Link|Solus Dellagar|type=chat}}, and make sure you do not wear anything of {{Link|Guthix}} or {{Link|Saradomin}} (including Void). The Zamorak Mage wants your {{Link|Commorb|orb|type=item}} in return for information, but {{Link|Savant|type=chat}} explains that it would be useless to him. He offers to trade his information for 20 rune essence instead. Talk to him again with the unnoted essence. The mage gives your character the tip that Solus went east. Your character connects "east" with the previous tip, "fur," and realises that Solus must be in {{Link|Canifis}} with the {{Link|Werewolf|werewolves|img=Boris.png}}. |
===Canifis=== |
===Canifis=== |
||
| − | Either run to |
+ | Either run to {{Link|Canifis}} or, if you have completed {{Link|Ghosts Ahoy}}, grab your {{Link|Ectophial|type=item}} from the bank to teleport there. Alternatively, you can teleport to the {{Link|Slayer Tower}} using a {{Link|Slayer ring|type=item}} and run South, teleport to the Salve Graveyard and run Northeast, or use the {{Link|Fairy rings|fairy ring}} code {{Fairycode|cks}} to get nearby. |
[[File:Wanted! - encountering Solus.png|thumb|220px|The player encounters Solus for the first time.]] |
[[File:Wanted! - encountering Solus.png|thumb|220px|The player encounters Solus for the first time.]] |
||
| − | Once in Canifis, |
+ | Once in Canifis, {{Link|Savant|type=chat}} will call you and tell you in a lengthy conversation that Solus is probably using a unique "slow teleport", which makes him invisible. If you accidentally keep running and skip the conversation with Savant, step outside the town back to the fairy ring and the conversation will trigger again. Now, use the "scan" option on your {{Link|Commorb|type=item}} as you walk around the town until you uncover {{Link|Solus Dellagar|type=chat}}. Solus briefly appears, speaks with you, and disappears. |
=== Chasing Solus === |
=== Chasing Solus === |
||
Savant then calls and finds that she is able to pull items off of Solus as he escapes. These items give you a clue as to Solus' next whereabouts. From this point on, you'll be chasing Solus throughout ''[[RuneScape]]'', and each time you find him, you'll receive an item. That item is a hint for where to go next. These items are always random, so here's a list of items that you may receive, along with where you should go: |
Savant then calls and finds that she is able to pull items off of Solus as he escapes. These items give you a clue as to Solus' next whereabouts. From this point on, you'll be chasing Solus throughout ''[[RuneScape]]'', and each time you find him, you'll receive an item. That item is a hint for where to go next. These items are always random, so here's a list of items that you may receive, along with where you should go: |
||
[[File:Wanted! - Solus disguised.png|thumb|220px|Solus disguises himself as a woman to distract the player.]] |
[[File:Wanted! - Solus disguised.png|thumb|220px|Solus disguises himself as a woman to distract the player.]] |
||
| − | * |
+ | *{{Link|Banana|type=item}} - {{Link|Musa Point}} {{Link|banana plantation}} |
| − | * |
+ | *{{Link|Bear fur|type=item}} - {{Link|Ardougne Market}} |
| − | * |
+ | *{{Link|Beer|type=item}} - {{Link|Dragon Inn}} in {{Link|Yanille}} ({{Link|Fairy rings|fairy ring}} - {{Fairycode|ciq}}) |
| − | * |
+ | *{{Link|Blue wizard hat|type=item}} - {{Link|Wizards' Tower}} south of {{Link|Draynor Village}}, ground floor library. (Fairy ring {{Fairycode|dis}}) |
| − | * |
+ | *{{Link|Blue cape|type=item}} - Inside {{Link|Champions' Guild}} |
| − | * |
+ | *{{Link|Bone spear|type=item}} - {{Link|Dorgesh-Kaan mine}} - Bring a {{Link|Light sources|light source}}, and follow {{Link|Kazgar|the goblin|type=chat}} to the back of the cave in order to scan for Solus. You'll find a {{Link|woman|type=chat}} who is a "poor maiden kidnapped by the evil Solus," but it turns out to be Solus, who will sucker punch you and leave. |
[[File:Wanted! - Solus attacks.png|thumb|220px|[[Solus Dellagar]] strikes the player with the [[Flames of Zamorak]].]] |
[[File:Wanted! - Solus attacks.png|thumb|220px|[[Solus Dellagar]] strikes the player with the [[Flames of Zamorak]].]] |
||
| − | * |
+ | *{{Link|Castle wars ticket|type=item}} - {{Link|Castle Wars}} |
| − | * |
+ | *{{Link|Cream hat|type=item}} - The {{Link|Grand Tree}}, in the base of the trunk just through the double doors (not by the clothing store that sells the hat). |
| − | * |
+ | *{{Link|Earmuffs|type=item}} - {{Link|Canifis}} {{Link|Slayer Tower}} (fairy ring - {{Fairycode|cks}}) |
| − | * |
+ | *{{Link|Right eye patch|type=item}} - {{Link|Brimhaven}} pub |
| − | * |
+ | *{{Link|Fake beard|type=item}} - {{Link|Ali Morrisane|type=chat}}'s stall in {{Link|Al Kharid}} |
| − | * |
+ | *{{Link|Fremennik cloak}} - {{Link|Rellekka}} |
| − | * |
+ | *{{Link|Fur|type=item}} - {{Link|Ardougne}} Market |
| − | * |
+ | *{{Link|Giant frog legs|type=item}} - {{Link|Lumbridge Swamp Caves}} - Bring a light source, a {{Link|spiny helmet|type=item}}, and if it is your first time entering, a {{Link|rope|type=item}}. Head to the level 99 {{Link|Giant frog|frogs|img=Giant frog.png}}, near the entry down to {{Link|Chasm of Tears}}, to scan for him. |
| − | * |
+ | *{{Link|Goblin mail|type=item}} - {{Link|Goblin Village}} |
| − | * |
+ | *{{Link|Greenman's ale|type=item}} - {{Link|Yanille}} pub |
| − | * |
+ | *{{Link|Red vine worm|type=item}} - {{Link|McGrubor's Wood}} (fairy ring {{Fairycode|als}}) |
| − | * |
+ | *{{Link|Rune essence|Rune|type=item}}/{{Link|pure essence|type=item}} (20 noted) - {{Link|Rune essence mine}}s |
| − | * |
+ | *{{Link|Toy horsey}} - {{Link|Draynor Village}}, near {{Link|Diango|type=chat}}. |
| − | * |
+ | *{{Link|Unholy symbol|type=item}} - Grave of Scorpius, south of {{Link|Grave of Scorpius|Shrine of Scorpius}}, north of the {{Link|Observatory}} with all the {{Link|ghost|type=chat}}s |
| − | At some point, |
+ | At some point, {{Link|Solus Dellagar|type=chat}} will appear at a location and hit you with a particularly strong cast of {{Link|Flames of Zamorak}}. Depending on your {{Link|Hitpoints|type=skill}} level, it will do up to 96 damage. It won't kill you, and {{Link|Savant|type=chat}} will teleport you back to {{Link|Falador}}, in the {{Link|White Knights' Castle}} without losing anything. |
| − | After a few locations, make sure to have a |
+ | After a few locations, make sure to have a {{Link|Weapons|weapon}} and {{Link|armour}}. At the second-to-last location (the one before the {{Link|Rune essence mine}}), Solus will summon a level 32 {{Link|Black Knight|img=Black Knight.png}} to take you out. Kill it. |
[[File:Wanted! - Solus decimates rangers.png|thumb|220px|[[Solus Dellagar]]'s powerful [[Ice Barrage]] attack.]] |
[[File:Wanted! - Solus decimates rangers.png|thumb|220px|[[Solus Dellagar]]'s powerful [[Ice Barrage]] attack.]] |
||
| − | Your last clue will be 20 noted |
+ | Your last clue will be 20 noted {{Link|Pure essence|pure|type=item}}/{{Link|rune essence|type=item}}. Bank and equip a weapon and armour for the final fight. Use any rune essence teleport spot you want, and {{Link|Savant|type=chat}} will close off possible teleports in order to trap him. After a small cutscene, Savant will summon 15 rangers to assist you, but Solus kills them all with {{Link|Ice Barrage}}. |
[[File:Wanted! - Fighting Solus.png|thumb|220px|The final battle.]] |
[[File:Wanted! - Fighting Solus.png|thumb|220px|The final battle.]] |
||
| − | Go attack Solus yourself and kill him, and you'll get his |
+ | Go attack Solus yourself and kill him, and you'll get his {{Link|Solus's hat|hat|type=item}}. He's fairly easy as he has been weakened after using such a powerful attack on the Temple Knight rangers.. He has no specific {{Link|Combat level}}, has 40 {{Link|Hitpoints|type=skill}} and only uses melee. After the fight, Savant congratulates you. You are returned to the rune essence teleport location. If you lose Solus's hat, contact Savant for another one. |
===Finishing=== |
===Finishing=== |
||
| − | Return to |
+ | Return to {{Link|Falador}}. Talk to {{Link|Sir Amik Varze|type=chat}} in the {{Link|White Knights' Castle}}, and hand over the hat. |
'''Congratulations! Quest complete!''' |
'''Congratulations! Quest complete!''' |
||
| − | <nowiki> </nowiki>He'll explain to you about the |
+ | <nowiki> </nowiki>He'll explain to you about the {{Link|White equipment|new armour}} system and killing {{Link|Black Knight|img=Black Knight.png}}s (and {{Link|White Knight|type=chat}}s). |
==Rewards== |
==Rewards== |
||
| Line 137: | Line 135: | ||
==Required for completing== |
==Required for completing== |
||
Completion of Wanted! is required for the following: |
Completion of Wanted! is required for the following: |
||
| − | * |
+ | * {{Link|The Slug Menace}} |
| − | * |
+ | * {{Link|Devious Minds|img=Monk (Devious Minds) chathead.png}} |
==Trivia== |
==Trivia== |
||
| − | *If you are wearing |
+ | *If you are wearing {{Link|Initiate armour}} when you talk to {{Link|Sir Amik Varze|type=chat}} about quitting the {{Link|Temple Knights}}, he will point it out and your character will boast about getting to keep "the cool armour". |
*The quote "Dead or Alive, You're coming with me" that your character says before being blasted by Solus' spell, is likely a reference to the film 'RoboCop' |
*The quote "Dead or Alive, You're coming with me" that your character says before being blasted by Solus' spell, is likely a reference to the film 'RoboCop' |
||
*<nowiki>Before spawning a Black Knight to fight you, Solus quotes: ''Say hello to my little friend!'', a reference to the film 'Scarface'</nowiki> |
*<nowiki>Before spawning a Black Knight to fight you, Solus quotes: ''Say hello to my little friend!'', a reference to the film 'Scarface'</nowiki> |
||
| Line 148: | Line 146: | ||
==Knight Rankings== |
==Knight Rankings== |
||
| − | In order to increase your ranking, you must kill a certain number of |
+ | In order to increase your ranking, you must kill a certain number of {{Link|Black Knight|img=Black Knight.png}}s. You start off as a Novice at 0 kills, and as you kill more knights, you'll grow in your rank. Killing Black Knights on a {{Link|free-to-play}} server '''will''' raise your knight ranking. |
*'''Novice''' - 100 Black Knights |
*'''Novice''' - 100 Black Knights |
||
*'''Peon''' - 200 Black Knights |
*'''Peon''' - 200 Black Knights |
||
| Line 157: | Line 155: | ||
===The White Knight Armoury=== |
===The White Knight Armoury=== |
||
| − | With the completion of this quest, you'll have access to an entirely new type of armour: |
+ | With the completion of this quest, you'll have access to an entirely new type of armour: {{Link|White equipment#Armour|White armour}}! |
{| class="wikitable" style="text-align:center;" |
{| class="wikitable" style="text-align:center;" |
||
|+'''White Knight Armour & Weapons''' |
|+'''White Knight Armour & Weapons''' |
||
| Line 163: | Line 161: | ||
!Picture!!Weapon or Armour!!Rank!!Attack Bonuses!!Defence Bonuses!!Other Bonuses |
!Picture!!Weapon or Armour!!Rank!!Attack Bonuses!!Defence Bonuses!!Other Bonuses |
||
|- |
|- |
||
| − | |[[File:White chainbody.png]]||[[White chainbody|Chainbody]]||Novice||Magic -15||Stab +22<br |
+ | |[[File:White chainbody.png]]||[[White chainbody|Chainbody]]||Novice||Magic -15||Stab +22<br>Slash +32<br>Crush +39<br>Magic -3<br>Range +24||Prayer +1 |
|- |
|- |
||
| − | |[[File:White platelegs.png]]||[[White platelegs|Platelegs]]||Novice||Magic -21<br |
+ | |[[File:White platelegs.png]]||[[White platelegs|Platelegs]]||Novice||Magic -21<br>Range -7||Stab +21<br>Slash +20<br>Crush +19<br>Magic -4<br>Range +20||Prayer +1 |
|- |
|- |
||
| − | |[[File:White dagger.png]]||[[White dagger|Dagger]]||Peon||Stab +10<br |
+ | |[[File:White dagger.png]]||[[White dagger|Dagger]]||Peon||Stab +10<br>Slash +5<br>Crush -4<br>Magic +1||Magic +1||Strength +7<br>Prayer +1 |
|- |
|- |
||
| − | |[[File:White sword.png]]||[[White sword|Sword]]||Peon||Stab +14<br |
+ | |[[File:White sword.png]]||[[White sword|Sword]]||Peon||Stab +14<br>Slash +10<br>Crush -2||Slash +2<br>Crush +1||Strength +12<br>Prayer +1 |
|- |
|- |
||
| − | |[[File:White plateskirt.png]]||[[White plateskirt|Plateskirt]]||Page||Magic -21<br |
+ | |[[File:White plateskirt.png]]||[[White plateskirt|Plateskirt]]||Page||Magic -21<br>Range -7||Stab +21<br>Slash +20<br>Crush +19<br>Magic -4<br>Range +20||Prayer +1 |
|- |
|- |
||
| − | |[[File:White med helm.png]]||[[White med helm|Medium Helm]]||Page||Magic -3<br |
+ | |[[File:White med helm.png]]||[[White med helm|Medium Helm]]||Page||Magic -3<br>Range -1||Stab +9<br>Slash +10<br>Crush +8<br>Magic -1<br>Range +9||Prayer +1 |
|- |
|- |
||
| − | |[[File:White sq shield.png]]||[[White sq shield|Square Shield]]||Page||Magic -6<br |
+ | |[[File:White sq shield.png]]||[[White sq shield|Square Shield]]||Page||Magic -6<br>Range -2||Stab +15<br>Slash +16<br>Crush +14<br>Range +15||Prayer +1 |
|- |
|- |
||
| − | |[[File:White mace.png]]||[[White mace|Mace]]||Noble||Stab +8<br |
+ | |[[File:White mace.png]]||[[White mace|Mace]]||Noble||Stab +8<br>Slash -2<br>Crush +16||||Strength +13 |
Prayer +3 |
Prayer +3 |
||
|- |
|- |
||
| − | |[[File:White magic staff.png]]||[[White magic staff|Magic Staff]]||Noble||Stab +2<br |
+ | |[[File:White magic staff.png]]||[[White magic staff|Magic Staff]]||Noble||Stab +2<br>Slash -1<br>Crush +10<br>Magic +10||Stab +2<br>Slash +3<br>Crush +1<br>Magic +10||Strength +7 |
Prayer +1 |
Prayer +1 |
||
|- |
|- |
||
| − | |[[File:White longsword.png]]||[[White longsword|Longsword]]||Noble||Stab +13<br |
+ | |[[File:White longsword.png]]||[[White longsword|Longsword]]||Noble||Stab +13<br>Slash +18<br>Crush -2||Slash +3<br>Crush +2||Strength +16<br>Prayer +1 |
|- |
|- |
||
| − | |[[File:White full helm.png]]||[[White full helm|Full Helm]]||Adept||Magic -6<br |
+ | |[[File:White full helm.png]]||[[White full helm|Full Helm]]||Adept||Magic -6<br>Range -2||Stab +12<br>Slash +13<br>Crush +10<br>Magic -1<br>Range +12||Prayer +1 |
|- |
|- |
||
| − | |[[File:White kiteshield.png]]||[[White kiteshield|Kiteshield]]||Adept||Magic -8<br |
+ | |[[File:White kiteshield.png]]||[[White kiteshield|Kiteshield]]||Adept||Magic -8<br>Range -2||Stab +17<br>Slash +19<br>Crush +18<br>Magic -1<br>Range +18||Prayer +1 |
|- |
|- |
||
| − | |[[File:White platebody.png]]||[[White platebody|Platebody]]||Adept||Magic -30<br |
+ | |[[File:White platebody.png]]||[[White platebody|Platebody]]||Adept||Magic -30<br>Range -10||Stab +41<br>Slash +40<br>Crush +30<br>Magic -6<br>Range + 40||Prayer +1 |
|- |
|- |
||
| − | |[[File:White boots.png]]||[[White boots|Boots]]||Adept||Magic -3<br |
+ | |[[File:White boots.png]]||[[White boots|Boots]]||Adept||Magic -3<br>Range -1||Stab +7<br>Slash +8<br>Crush +9||Prayer +1 |
|- |
|- |
||
| − | |[[File:White gloves.png]]||[[White gloves|Gloves]]||Adept||||Slash +1<br |
+ | |[[File:White gloves.png]]||[[White gloves|Gloves]]||Adept||||Slash +1<br>Crush +2||Prayer +1 |
|- |
|- |
||
| − | |[[File:White warhammer.png]]||[[White warhammer|Warhammer]]||Master||Stab -4<br |
+ | |[[File:White warhammer.png]]||[[White warhammer|Warhammer]]||Master||Stab -4<br>Slash -4<br>Crush +22<br>Magic -4||||Strength +19<br>Prayer +3 |
|- |
|- |
||
| − | |[[File:White battleaxe.png]]||[[White battleaxe|Battleaxe]]||Master||Stab -2<br |
+ | |[[File:White battleaxe.png]]||[[White battleaxe|Battleaxe]]||Master||Stab -2<br>Slash +20<br>Crush +15||Range -1||Strength +26<br>Prayer +1 |
|- |
|- |
||
| − | |[[File:White scimitar.png]]||[[White scimitar|Scimitar]]||Master||Stab +4<br |
+ | |[[File:White scimitar.png]]||[[White scimitar|Scimitar]]||Master||Stab +4<br>Slash +19<br>Crush -2||Slash +1||Strength +14<br>Prayer +3 |
|- |
|- |
||
| − | |[[File:White claws.png]]||[[White claws|Claws]]||Master||Stab +10<br |
+ | |[[File:White claws.png]]||[[White claws|Claws]]||Master||Stab +10<br>Slash +14<br>Crush -4||Stab +4<br>Slash +7<br>Crush +2||Strength +14<br>Prayer +1 |
|- |
|- |
||
| − | |[[File:White 2h sword.png]]||[[White 2h sword|Two-handed sword]]||Master||Stab -4<br |
+ | |[[File:White 2h sword.png]]||[[White 2h sword|Two-handed sword]]||Master||Stab -4<br>Slash +27<br>Crush + 21<br>Magic -4||Range -1||Strength +22<br>Prayer +1 |
|- |
|- |
||
| − | |[[File:White halberd.png]]||[[White halberd|Halberd]]||Master||Stab +19<br |
+ | |[[File:White halberd.png]]||[[White halberd|Halberd]]||Master||Stab +19<br>Slash +25<br>Crush +0<br>Magic -4||Stab -1<br>Slash + 2<br>Crush +3||Strength +20<br>Prayer +1 |
|} |
|} |
||
Latest revision as of 10:19, 8 June 2019
Details
| Start point | |
| Official difficulty | Intermediate |
| Description | A wanted man is on the loose. Can you track him down? |
| Length | Long |
| Requirements |
|
| Items required |
Recommended
|
| Enemies to defeat |
|
Walkthrough
Getting started
The start point at Falador Park.
To begin, speak with ![]() Sir Tiffy Cashien in
Sir Tiffy Cashien in ![]() Falador Park. Ask if he has any jobs for you, and he lets you know that a clerk has made an error and that you're not actually permitted to be a
Falador Park. Ask if he has any jobs for you, and he lets you know that a clerk has made an error and that you're not actually permitted to be a ![]() Temple Knight. It turns out you have to work as a squire for five years. This is too long, so Sir Tiffy offers an alternative by exploiting a loophole. He'll then ask you to go see
Temple Knight. It turns out you have to work as a squire for five years. This is too long, so Sir Tiffy offers an alternative by exploiting a loophole. He'll then ask you to go see ![]() Sir Amik Varze in the
Sir Amik Varze in the ![]() White Knights' Castle.
White Knights' Castle.
Sir Amik Varze
- Note: If wearing
 Initiate armour during the chat with Sir Amik Varze, the dialogue will be different, but you may still go through the quest without it.

Sir Amik Varze is on the 2nd floor[?] on the west side in the ![]() White Knights' Castle in
White Knights' Castle in ![]() Falador. He will ask you to become a squire after a small conversation. Decline his offer, and the conversation will continue. If you do not decline his offer to become a squire, he will ask for
Falador. He will ask you to become a squire after a small conversation. Decline his offer, and the conversation will continue. If you do not decline his offer to become a squire, he will ask for ![]() Asgarnian ale in an endless loop. Speak to
Asgarnian ale in an endless loop. Speak to ![]() Sir Tiffy Cashien to undo this. It turns out that there needs to be a crisis for you to become a deputy, but there is no current crisis. Report back to Sir Tiffy in
Sir Tiffy Cashien to undo this. It turns out that there needs to be a crisis for you to become a deputy, but there is no current crisis. Report back to Sir Tiffy in ![]() Falador Park. For some players, Sir Tiffy will not say anything about a crisis until you have spoken to him a few times. Eventually, Sir Tiffy will inform you of a crisis that has arisen. Head back to talk to Sir Amik again.
Falador Park. For some players, Sir Tiffy will not say anything about a crisis until you have spoken to him a few times. Eventually, Sir Tiffy will inform you of a crisis that has arisen. Head back to talk to Sir Amik again.
Amik will tell you the news that a criminal named ![]() Solus Dellagar, the "infamous murder-mage," is back. Follow the very unclear conversation through to the end, and accept his mission.
Solus Dellagar, the "infamous murder-mage," is back. Follow the very unclear conversation through to the end, and accept his mission.
The Communication Orb
Items Needed: 10000 coins or 1 law rune, 1 molten glass, and 1 enchanted gem

Once again, go back to ![]() Sir Tiffy Cashien. It turns out you're just the "agent" that needs to locate
Sir Tiffy Cashien. It turns out you're just the "agent" that needs to locate ![]() Solus Dellagar. As an agent, you need to be in constant communication. Sir Tiffy offers you a communication device for 10,000
Solus Dellagar. As an agent, you need to be in constant communication. Sir Tiffy offers you a communication device for 10,000 ![]() coins, or he can make one if you bring the supplies. Give Sir Tiffy the money or the supplies (a
coins, or he can make one if you bring the supplies. Give Sir Tiffy the money or the supplies (a ![]() law rune, an
law rune, an ![]() enchanted gem and
enchanted gem and ![]() molten glass). Either way, you'll receive a
molten glass). Either way, you'll receive a ![]() Commorb from him. It is needed for the whole quest.
Commorb from him. It is needed for the whole quest.
Use the "contact" feature on the orb to talk to ![]() Savant. It turns out that you should investigate the
Savant. It turns out that you should investigate the ![]() Black Knight Hideout in
Black Knight Hideout in ![]() Taverley Dungeon, and investigate the
Taverley Dungeon, and investigate the ![]() Mage of Zamorak in
Mage of Zamorak in ![]() Varrock that is interested in
Varrock that is interested in ![]() Runecrafting (this is where you will need your 20 pure essence).
Runecrafting (this is where you will need your 20 pure essence).
If you lose your ![]() orb after you make one,
orb after you make one, ![]() Sir Tiffy Cashien will lend you his.
Sir Tiffy Cashien will lend you his.
Taverley Dungeon
Items needed: Combat equipment to kill Black Knights
Next, head over to the ![]() Taverley Dungeon. From the west
Taverley Dungeon. From the west ![]() bank in
bank in ![]() Falador, you can use the
Falador, you can use the ![]() Agility
Agility ![]() shortcut (level 5 Agility required), and keep heading northwest towards
shortcut (level 5 Agility required), and keep heading northwest towards ![]() Taverley until you see a ladder. Use the ladder and follow the dungeon north, then east, then south past the
Taverley until you see a ladder. Use the ladder and follow the dungeon north, then east, then south past the ![]() magic axes,
magic axes, ![]() Poison Scorpions,
Poison Scorpions, ![]() chaos dwarves (do not cross the bridge), and finally past the
chaos dwarves (do not cross the bridge), and finally past the ![]() Hill Giants, and into the
Hill Giants, and into the ![]() Black Knights' rooms.
Black Knights' rooms.

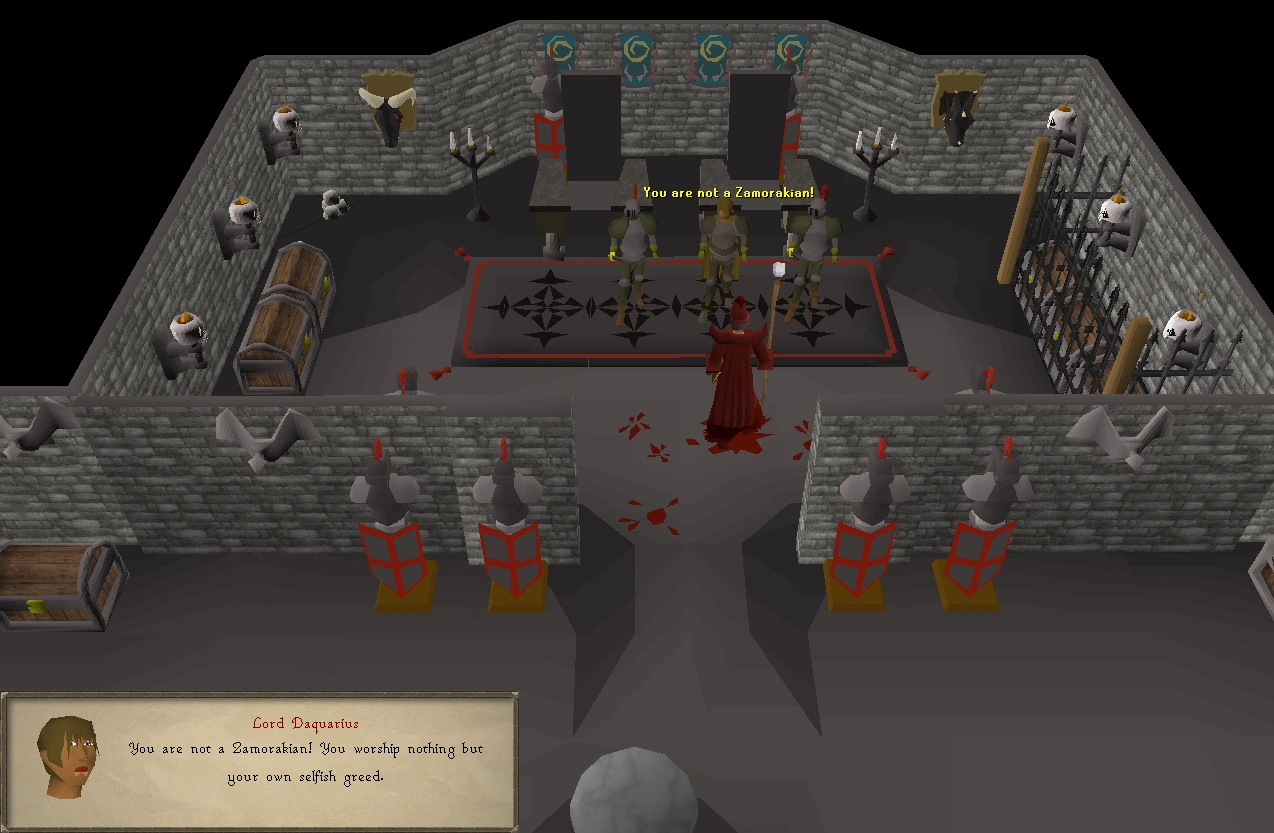
Solus meets with Lord Daquarius.
Continue through the double doors, and talk to ![]() Lord Daquarius in the southwesternmost room. He tells you nothing.
Lord Daquarius in the southwesternmost room. He tells you nothing. ![]() Savant will call you. (Use the contact option on the
Savant will call you. (Use the contact option on the ![]() Commorb if she doesn't call automatically.) She advises you to try to bluff him into giving you something. Go kill a level 33
Commorb if she doesn't call automatically.) She advises you to try to bluff him into giving you something. Go kill a level 33 ![]() Black Knight to make Lord Daquarius give in and beg you not to kill any more of his men. He tells you that
Black Knight to make Lord Daquarius give in and beg you not to kill any more of his men. He tells you that ![]() Solus Dellagar is in a place with a lot of
Solus Dellagar is in a place with a lot of ![]() fur, but that the fur is not from a
fur, but that the fur is not from a ![]() bear.
bear.
- Note: The Black Knight kill won't count if you kill it before talking to Lord Daquarius, if you leave the room after the kill, or if you get interrupted during the ensuing conversation.
Zamorak Mage
Items needed: 20 unnoted rune/pure essence, Commorb

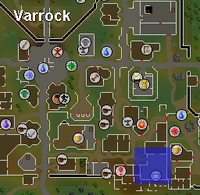
Location of Chaos Altar in Varrock
NOTE: Do not equip any Saradomin or Guthix items (such as ![]() Void Knight equipment) or the Zamorak Mage will refuse to speak with you. In addition, if you have talked to the Zamorak Mage within the wilderness prior you can go straight to the
Void Knight equipment) or the Zamorak Mage will refuse to speak with you. In addition, if you have talked to the Zamorak Mage within the wilderness prior you can go straight to the ![]() Chaos Altar in Varrock.
Chaos Altar in Varrock.
Head to ![]() Edgeville (or directly to the Chaos Altar if you have already done the Abyss miniquest) and grab 20 unnoted
Edgeville (or directly to the Chaos Altar if you have already done the Abyss miniquest) and grab 20 unnoted ![]() rune/
rune/![]() pure essence from the bank. Follow the river into the
pure essence from the bank. Follow the river into the ![]() Wilderness where the
Wilderness where the ![]() Mage of Zamorak will be at the end of the river, and he will then tell you to meet him "somewhere" in
Mage of Zamorak will be at the end of the river, and he will then tell you to meet him "somewhere" in ![]() Varrock, which is the Chaos Altar in the temple in South East Varrock.
Varrock, which is the Chaos Altar in the temple in South East Varrock.

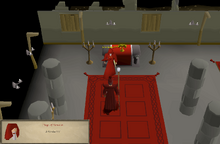
Solus meets with the Zamorakian mage.
Talk to him about ![]() Solus Dellagar, and make sure you do not wear anything of
Solus Dellagar, and make sure you do not wear anything of ![]() Guthix or
Guthix or ![]() Saradomin (including Void). The Zamorak Mage wants your
Saradomin (including Void). The Zamorak Mage wants your ![]() orb in return for information, but
orb in return for information, but ![]() Savant explains that it would be useless to him. He offers to trade his information for 20 rune essence instead. Talk to him again with the unnoted essence. The mage gives your character the tip that Solus went east. Your character connects "east" with the previous tip, "fur," and realises that Solus must be in
Savant explains that it would be useless to him. He offers to trade his information for 20 rune essence instead. Talk to him again with the unnoted essence. The mage gives your character the tip that Solus went east. Your character connects "east" with the previous tip, "fur," and realises that Solus must be in ![]() Canifis with the
Canifis with the ![]() werewolves.
werewolves.
Canifis
Either run to ![]() Canifis or, if you have completed
Canifis or, if you have completed ![]() Ghosts Ahoy, grab your
Ghosts Ahoy, grab your ![]() Ectophial from the bank to teleport there. Alternatively, you can teleport to the
Ectophial from the bank to teleport there. Alternatively, you can teleport to the ![]() Slayer Tower using a
Slayer Tower using a ![]() Slayer ring and run South, teleport to the Salve Graveyard and run Northeast, or use the
Slayer ring and run South, teleport to the Salve Graveyard and run Northeast, or use the ![]() fairy ring code cks to get nearby.
fairy ring code cks to get nearby.
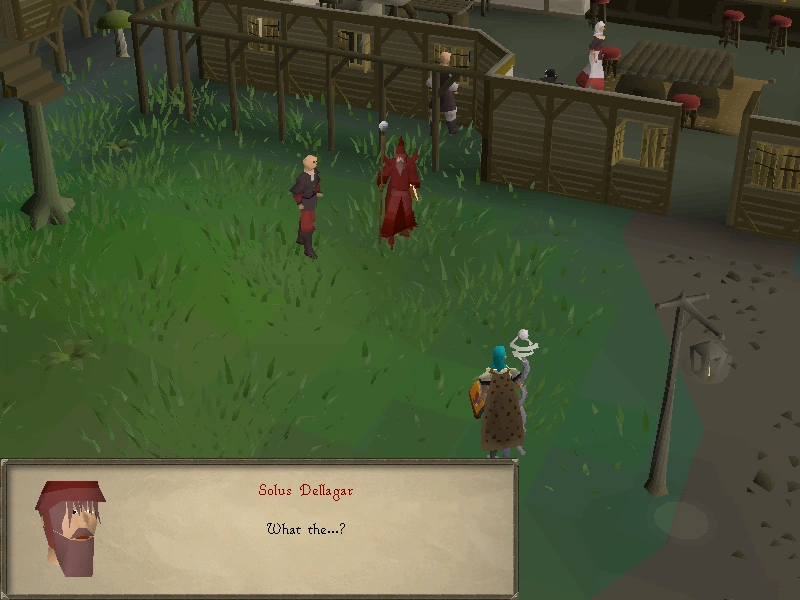
The player encounters Solus for the first time.
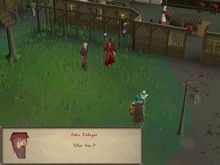
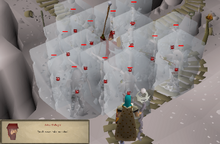
Once in Canifis, ![]() Savant will call you and tell you in a lengthy conversation that Solus is probably using a unique "slow teleport", which makes him invisible. If you accidentally keep running and skip the conversation with Savant, step outside the town back to the fairy ring and the conversation will trigger again. Now, use the "scan" option on your
Savant will call you and tell you in a lengthy conversation that Solus is probably using a unique "slow teleport", which makes him invisible. If you accidentally keep running and skip the conversation with Savant, step outside the town back to the fairy ring and the conversation will trigger again. Now, use the "scan" option on your ![]() Commorb as you walk around the town until you uncover
Commorb as you walk around the town until you uncover ![]() Solus Dellagar. Solus briefly appears, speaks with you, and disappears.
Solus Dellagar. Solus briefly appears, speaks with you, and disappears.
Chasing Solus
Savant then calls and finds that she is able to pull items off of Solus as he escapes. These items give you a clue as to Solus' next whereabouts. From this point on, you'll be chasing Solus throughout RuneScape, and each time you find him, you'll receive an item. That item is a hint for where to go next. These items are always random, so here's a list of items that you may receive, along with where you should go:
Solus disguises himself as a woman to distract the player.
- Banana - Musa Point banana plantation
- Bear fur - Ardougne Market
- Beer - Dragon Inn in Yanille ( fairy ring - ciq)
- Blue wizard hat - Wizards' Tower south of Draynor Village, ground floor library. (Fairy ring dis)
- Blue cape - Inside Champions' Guild
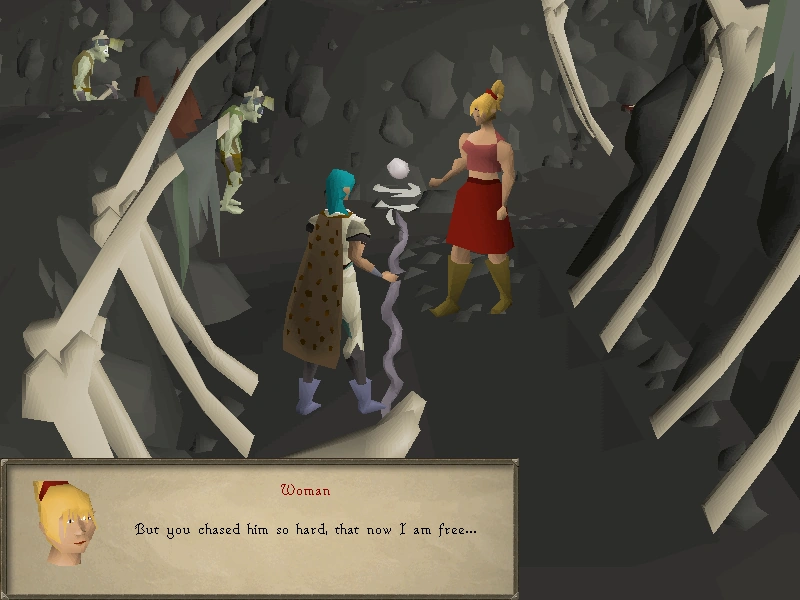
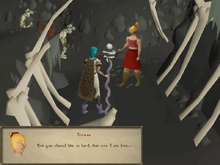
- Bone spear - Dorgesh-Kaan mine - Bring a light source, and follow the goblin to the back of the cave in order to scan for Solus. You'll find a woman who is a "poor maiden kidnapped by the evil Solus," but it turns out to be Solus, who will sucker punch you and leave.

Solus Dellagar strikes the player with the Flames of Zamorak.
- Castle wars ticket - Castle Wars
- Cream hat - The Grand Tree, in the base of the trunk just through the double doors (not by the clothing store that sells the hat).
- Earmuffs - Canifis Slayer Tower (fairy ring - cks)
- Right eye patch - Brimhaven pub
- Fake beard - Ali Morrisane's stall in Al Kharid
- Fremennik cloak - Rellekka
- Fur - Ardougne Market
- Giant frog legs - Lumbridge Swamp Caves - Bring a light source, a spiny helmet, and if it is your first time entering, a rope. Head to the level 99 frogs, near the entry down to Chasm of Tears, to scan for him.
- Goblin mail - Goblin Village
- Greenman's ale - Yanille pub
- Red vine worm - McGrubor's Wood (fairy ring als)
- Rune/ pure essence (20 noted) - Rune essence mines
- Toy horsey - Draynor Village, near Diango.
- Unholy symbol - Grave of Scorpius, south of Shrine of Scorpius, north of the Observatory with all the ghosts
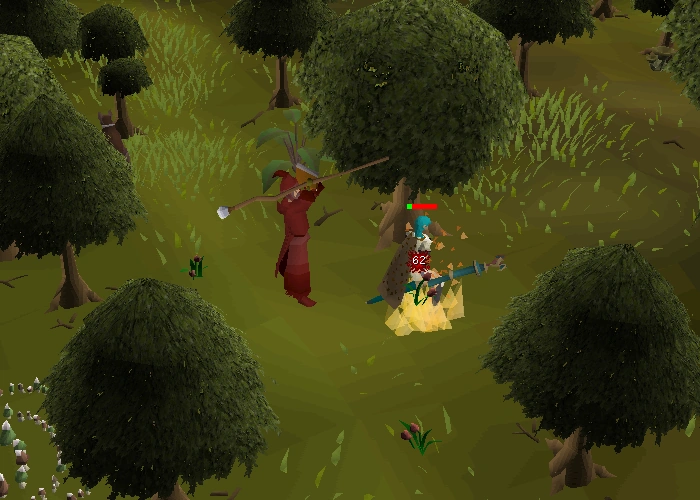
At some point, ![]() Solus Dellagar will appear at a location and hit you with a particularly strong cast of
Solus Dellagar will appear at a location and hit you with a particularly strong cast of ![]() Flames of Zamorak. Depending on your
Flames of Zamorak. Depending on your ![]() Hitpoints level, it will do up to 96 damage. It won't kill you, and
Hitpoints level, it will do up to 96 damage. It won't kill you, and ![]() Savant will teleport you back to
Savant will teleport you back to ![]() Falador, in the
Falador, in the ![]() White Knights' Castle without losing anything.
White Knights' Castle without losing anything.
After a few locations, make sure to have a ![]() weapon and
weapon and ![]() armour. At the second-to-last location (the one before the
armour. At the second-to-last location (the one before the ![]() Rune essence mine), Solus will summon a level 32
Rune essence mine), Solus will summon a level 32 ![]() Black Knight to take you out. Kill it.
Black Knight to take you out. Kill it.

Solus Dellagar's powerful Ice Barrage attack.
Your last clue will be 20 noted ![]() pure/
pure/![]() rune essence. Bank and equip a weapon and armour for the final fight. Use any rune essence teleport spot you want, and
rune essence. Bank and equip a weapon and armour for the final fight. Use any rune essence teleport spot you want, and ![]() Savant will close off possible teleports in order to trap him. After a small cutscene, Savant will summon 15 rangers to assist you, but Solus kills them all with
Savant will close off possible teleports in order to trap him. After a small cutscene, Savant will summon 15 rangers to assist you, but Solus kills them all with ![]() Ice Barrage.
Ice Barrage.

The final battle.
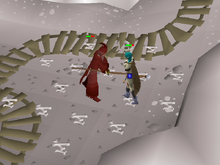
Go attack Solus yourself and kill him, and you'll get his ![]() hat. He's fairly easy as he has been weakened after using such a powerful attack on the Temple Knight rangers.. He has no specific
hat. He's fairly easy as he has been weakened after using such a powerful attack on the Temple Knight rangers.. He has no specific ![]() Combat level, has 40
Combat level, has 40 ![]() Hitpoints and only uses melee. After the fight, Savant congratulates you. You are returned to the rune essence teleport location. If you lose Solus's hat, contact Savant for another one.
Hitpoints and only uses melee. After the fight, Savant congratulates you. You are returned to the rune essence teleport location. If you lose Solus's hat, contact Savant for another one.
Finishing
Return to ![]() Falador. Talk to
Falador. Talk to ![]() Sir Amik Varze in the
Sir Amik Varze in the ![]() White Knights' Castle, and hand over the hat.
White Knights' Castle, and hand over the hat.
Congratulations! Quest complete!
He'll explain to you about the ![]() new armour system and killing
new armour system and killing ![]() Black Knights (and
Black Knights (and ![]() White Knights).
White Knights).
Rewards
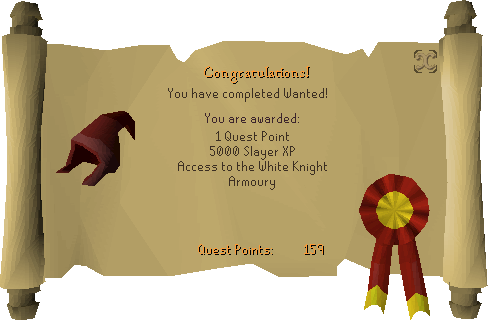
- 1 Quest point
- 5,000 Slayer experience
- Access to the armoury of the White Knights (White equipment)
Required for completing
Completion of Wanted! is required for the following:
Trivia
- If you are wearing Initiate armour when you talk to Sir Amik Varze about quitting the Temple Knights, he will point it out and your character will boast about getting to keep "the cool armour".
- The quote "Dead or Alive, You're coming with me" that your character says before being blasted by Solus' spell, is likely a reference to the film 'RoboCop'
- Before spawning a Black Knight to fight you, Solus quotes: ''Say hello to my little friend!'', a reference to the film 'Scarface'
- When you get the bone spear as one of your teleport items, Savant used to say "I have never heard of them" when you mention the Dorgeshuun goblins. This references the quest "The Lost Tribe" because the goblins had been in hiding since the God Wars. After the September 2017 update, Savant will instead ask the player if they have ever heard of "a group of goblins that have been around since Fossil Island was abandoned".
- When you get the bone spear the player will speak as if they know of the Dorgeshuun goblins even if you have not started "The Lost Tribe" quest.
Knight Rankings
In order to increase your ranking, you must kill a certain number of ![]() Black Knights. You start off as a Novice at 0 kills, and as you kill more knights, you'll grow in your rank. Killing Black Knights on a
Black Knights. You start off as a Novice at 0 kills, and as you kill more knights, you'll grow in your rank. Killing Black Knights on a ![]() free-to-play server will raise your knight ranking.
free-to-play server will raise your knight ranking.
- Novice - 100 Black Knights
- Peon - 200 Black Knights
- Page - 300 Black Knights
- Noble - 500 Black Knights
- Adept - 800 Black Knights
- Master - 1,300 Black Knights
The White Knight Armoury
With the completion of this quest, you'll have access to an entirely new type of armour: ![]() White armour!
White armour!
| Picture | Weapon or Armour | Rank | Attack Bonuses | Defence Bonuses | Other Bonuses |
|---|---|---|---|---|---|
| Chainbody | Novice | Magic -15 | Stab +22 Slash +32 Crush +39 Magic -3 Range +24 |
Prayer +1 | |
| Platelegs | Novice | Magic -21 Range -7 |
Stab +21 Slash +20 Crush +19 Magic -4 Range +20 |
Prayer +1 | |
| Dagger | Peon | Stab +10 Slash +5 Crush -4 Magic +1 |
Magic +1 | Strength +7 Prayer +1 | |
| Sword | Peon | Stab +14 Slash +10 Crush -2 |
Slash +2 Crush +1 |
Strength +12 Prayer +1 | |
| Plateskirt | Page | Magic -21 Range -7 |
Stab +21 Slash +20 Crush +19 Magic -4 Range +20 |
Prayer +1 | |
| Medium Helm | Page | Magic -3 Range -1 |
Stab +9 Slash +10 Crush +8 Magic -1 Range +9 |
Prayer +1 | |
| Square Shield | Page | Magic -6 Range -2 |
Stab +15 Slash +16 Crush +14 Range +15 |
Prayer +1 | |
| Mace | Noble | Stab +8 Slash -2 Crush +16 |
Strength +13
Prayer +3 | ||
| Magic Staff | Noble | Stab +2 Slash -1 Crush +10 Magic +10 |
Stab +2 Slash +3 Crush +1 Magic +10 |
Strength +7
Prayer +1 | |
| Longsword | Noble | Stab +13 Slash +18 Crush -2 |
Slash +3 Crush +2 |
Strength +16 Prayer +1 | |
| Full Helm | Adept | Magic -6 Range -2 |
Stab +12 Slash +13 Crush +10 Magic -1 Range +12 |
Prayer +1 | |
| Kiteshield | Adept | Magic -8 Range -2 |
Stab +17 Slash +19 Crush +18 Magic -1 Range +18 |
Prayer +1 | |
| Platebody | Adept | Magic -30 Range -10 |
Stab +41 Slash +40 Crush +30 Magic -6 Range + 40 |
Prayer +1 | |
| Boots | Adept | Magic -3 Range -1 |
Stab +7 Slash +8 Crush +9 |
Prayer +1 | |
| Gloves | Adept | Slash +1 Crush +2 |
Prayer +1 | ||
| Warhammer | Master | Stab -4 Slash -4 Crush +22 Magic -4 |
Strength +19 Prayer +3 | ||
| Battleaxe | Master | Stab -2 Slash +20 Crush +15 |
Range -1 | Strength +26 Prayer +1 | |
| Scimitar | Master | Stab +4 Slash +19 Crush -2 |
Slash +1 | Strength +14 Prayer +3 | |
| Claws | Master | Stab +10 Slash +14 Crush -4 |
Stab +4 Slash +7 Crush +2 |
Strength +14 Prayer +1 | |
| Two-handed sword | Master | Stab -4 Slash +27 Crush + 21 Magic -4 |
Range -1 | Strength +22 Prayer +1 | |
| Halberd | Master | Stab +19 Slash +25 Crush +0 Magic -4 |
Stab -1 Slash + 2 Crush +3 |
Strength +20 Prayer +1 |
Wanted! | |||||
|---|---|---|---|---|---|
| NPCs |
| ||||
| Items | |||||
| Related | |||||